It was a bee-dup, not a brinnnngggg, yeah thats right bee-dup. Hold on, it wasn’t a bee-dup either it was definitely a deedle-deee, yes that’s it, a deedle-dee. Marc send me an email not a phone call or text, requesting a cake for his mom’s 80th birthday party. He wanted one cake shaped like an eight and the other like a zero. After some serious investigative questioning of the client I discoverer his mom likes  hazelnut and black and white. So the plan was set. One chocolate cake shaped like an eight with hazelnut butter-cream frosting, and one round white cake for the zero with white hazelnut cake and butter-cream frosting. Through various devious and nefarious means I also discovered the cake would need to feed about 45-50 ravenous 80 year-olds.
Now that the cake(s) were designed, the logistics needed to be planned. I decided one two layer 12″ cake for the zero and two 8″ two (I love numbers) layer cakes with the bottoms of each cut off and the flat sides set together to make the eight.

The 12″ cakes should take about 90 minutes to make and bake, then another 30-45 min to cool. (Wrapped in the heavy duty plastic wrap I use it will stay fresh for at least a week.) The chocolate cake is pretty easy, but as I only have three 8″ cake pans I knew I would have to make 2 batches. If I had one set of cakes made and cooled, I could frost/decorate it while the other cakes cooled. Make one cake Thursday, one Friday and frost/decorate Saturday, no problem.
I made the hazelnut cake Thursday night after work in one single LARGE batch. Friday night I made two of the four chocolate cakes before dinner and the final two after. Saturday morning I leveled the first of the two 12″ and would you believe it the *#&%#@ of the 12″ cake wasn’t cooked at all. *#&%#@ !!. It’s Saturday morning and now I have to make two more *#&%#@ 12″ cakes, cool them, frost and decorate before 5:30 when its time for our traditional New Year’s pizza and a movie. I decided to make the hazelnut cakes one at a time, it takes longer but is safer and I didn’t have time for any more *#&%#@ errors. *#&%#@. While the first cake was baking I made a double recipe of butter cream frosting, crumb coated and cut the chocolate cakes, putting them in the fridge to set. I baked the second set of hazelnut cakes at a lower temperature for a longer time, covering the cakes with aluminum foil to keep them from over-browning. (While the first cake was cooling and the second was baking, Fran and I went and upgraded our iPhone 3’s to iPhone 4s’s, a good move at a great price. The new phones are much faster and we probably wont complain about the speed for a month or two.)
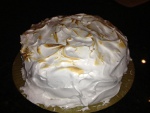
After lunch (note Wendy’s cup in one picture) I frosted the two now cooled  hazelnut cakes which were baked perfectly. The white cakes did not need a crumb coat (thankfully) so I could frost and decorate them fairly quickly. My piping is definitely improving, but as I can barely read my own handwriting I do not hold out much hope for my lettering. The ribbons and flowers really set the cake off nicely.

Now, for the mechanics: White Hazelnut Cake
Ingredients (for one 12″ round cake)
- 3 cups white sugar
- 1-1/2 cups butter
- 6 eggs
- 2 tablespoons vanilla extract
- 4 cups all-purpose flour
- 1/2 cup of hazelnuts. (I used a blender on “food processor”) level and beat the *#&%#@ out of them, then sifted the lees through a strainer leaving essentially hazelnut flour)
- 1 tablespoon and 2-1/4 teaspoons baking powder
- 1-1/2 cups milk
Directions
- Preheat oven to 325 degrees F. Grease and flour a 12 inch round cake pan. Fran bought these exceptionally cool silicone liners which i cut to fit the bottom of the cake pan, parchment paper will also work and both make the cake release from the pan very easily.
- In a medium bowl, cream together the sugar and butter. (Be sure they are well creamed, 7-8 min at level 2 on my KitchenAid mixer. Beat in the eggs, one at a time, then stir in the vanilla. Combine flour and baking powder, alternately add these dry ingredient and milk to the creamed mixture starting and ending with the dry ingredients. Pour or spoon batter into the prepared pan.
Bake for 60 minutes, covered with aluminum foil, in the preheated oven. To keep the bottom from over browning try setting the cake pan in an inch of water as it bakes. I did not try this, but will next time.
Chocolate Cake and Butter Cream Frosting
Both are described elsewhere in abatteredoldsuitcase so I won’t re-iterate here. I did substitute 3 oz of Frangelica for the vanilla to give the frosting the hazelnut flavor.


 Freeze the cake overnight. To sculpt the cake place tooth picks in the center of each side, about one inch from the edge and cut a smooth curve from each corner, through the toothpick to the next corner. When completed, shave some of the cake away from the edges to make the rounded pillow look. Use some buttercream frosting to crumb coat the cake then put it back in the fridge to set. After a few hours I like to smooth it off with my gloved hands so the cake will have a very satiny finish.


