Raspberry Swirl Pound Cake

Sometime around my birthday our Florida BFF send me a packet of recipes she culled from a selection of magazines. This Raspberry Swirl Pound Cake caught my eye, however, the first attempt hit the bin after QC rated it thumbs down. (Mfg agreed.)

I modified the original recipe from FoodNetwork by swapping out the AP flour for cake flour. This reduced the gluten to make a softer, lighter cake. Pound cake is not expected to be light and airy, but let’s be honest, dense, wet, stodgy cake is not terribly pleasant. I also substituted caster sugar for the cane sugar, reduced the oven temperature from 350F to 325F, increased the number of egg yolks by 2 and eliminated the almond extract. (QC and I do not like almond extract.) The final result was deemed presentable!

Raspberry-Swirl Pound Cake

INGREDIENTS
Cake
• 226g (2 sticks) salted butter, at room temperature, plus more for the pan
• 198 (1 ¾ cups) cake flour, plus more for the pan
• 6-oz fresh raspberries
• 2 tablespoons seedless raspberry jam
• 248g (1 cup plus 2 tablespoons) caster sugar, divided
• 3 large eggs, plus 3 egg yolk, at room temperature
• ¼ cup heavy cream
• 1 1/8 teaspoons pure vanilla extract
• 4 drops red gel food coloring (or enough to make an intense pink color)
Glaze
• ½ cup confectioners’ sugar
• 2 tablespoons heavy cream for topping (more to thin if necessary)
• 1/8 teaspoon vanilla
• Crushed freeze-dried raspberries, for topping

METHOD

Make the pound cake:

  1. Preheat the oven to 325˚. Spray the bottom and sides of a 9-by-5-inch loaf pan with Baker’s Joy, then line with parchment paper in two overlapping strips, leaving an overhang. Butter the parchment and lightly dust with flour, tapping out the excess.
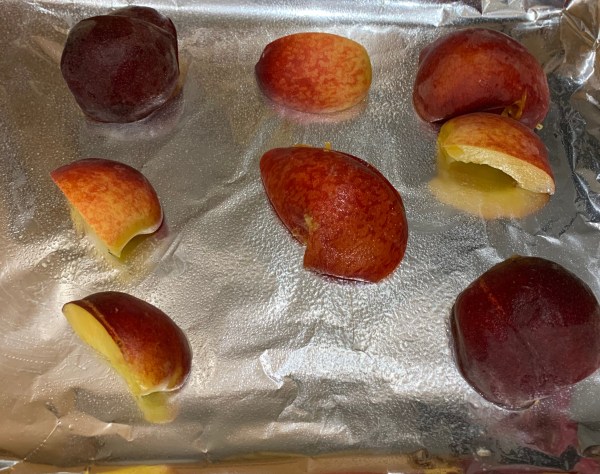
  2. Combine the fresh raspberries, jam, 2 tablespoons cane sugar and 1/4 cup water in a medium saucepan over medium heat. Cook, stirring and smashing the berries with a wooden spoon, until
    thickened, 10 to 15 minutes. Remove from the heat and strain through a fine-mesh sieve into a medium bowl, pressing with a rubber spatula. Let cool.
  3. Whisk the eggs, egg yolks, 1/4 cup heavy cream and 1 teaspoon vanilla extract in a medium bowl until slightly foamy; set aside.
  4. Beat the butter and remaining 1 cup caster sugar in a large bowl with a mixer on medium speed until well combined, 1 to 2 minutes. Scrape down the bowl and increase the mixer speed to
    medium high. Beat until pale and fluffy, 6 to 7 more minutes.
  5. Reduce the mixer speed to low and beat in the flour until just combined.
  6. Gradually add the egg mixture and beat until combined. Scrape down the bowl, increase the speed to medium and beat until smooth and fluffy, 15 to 30 seconds.
  7. Scoop 3/4 cup batter into the bowl with the raspberry sauce and stir in the red food coloring. Transfer half of the remaining plain batter to the prepared pan and top with half of the raspberry batter; swirl together with a knife. Repeat and swirl the batters together again.
  8. Bake until the top springs back when gently pressed and a toothpick inserted into the center comes out clean, 1 hour 10 minutes to 1 hour 20 minutes. (205 F internal temperature)
  9. Transfer to a rack and let cool 15 minutes in the pan. Lift the cake from the pan and remove the parchment; return to the rack to cool completely.

Make the Glaze

  1. Combine the confectioners’ sugar, 2 tablespoons heavy cream and the remaining 1/8 teaspoon each vanilla and almond extracts in a medium bowl and whisk until smooth; thin with the remaining 1 tablespoon heavy cream, if needed.
  2. Spoon the glaze over the cooled cake and sprinkle with freeze-dried raspberries. Let set at least 20 minutes.

Donuts! Getcha Hot Donuts Here!

My QC department stumbled across a new recipe for cake donuts. “Maybe you would like to try it sometime.” Now if that isn’t throwing the gauntlet down, I don’t know what is.

This recipe makes about a dozen so topped a third of them with vanilla glaze and coated a third with cinnamon/sugar. They were excellent. The plain have always been my fav’s.

Be sure to keep the temperature as close to 350 deg F as you can. Adjust the temperature if need be between batches. I could fit 4 donuts at a time into my large skillet. My temperature was a little hot for the first few donut holes so they turned dark before the centers were fully cooked. Temperature is very important!

Old Fashioned Cake Donut Recipe

https://www.mashed.com/433134/old-fashioned-cake-donut-recipe/

INGREDIENTS
• 1 ½ cup sugar, divided
• 1 teaspoon salt
• ½ teaspoon nutmeg
• 1 tablespoon baking powder
• 2 eggs
• ¼ cup unsalted butter, melted
• 1 cup whole milk
• 4 cups flour
• Oil (for frying)
• 2 tablespoons cinnamon
Glaze (to glaze 5 or 6 donuts)
• 1 Cup confectioners sugar
• 3 Tbl Whole cream
• ½ tsp vanilla

METHOD

  1. In a large bowl, combine one cup of sugar, salt, nutmeg, and baking powder.
  2. Add the eggs, melted butter, and milk to the bowl, then mix.
  3. Add the flour to the dough, beating well until everything is combined. Cover the dough with plastic wrap and refrigerate for one hour.
  4. Remove the dough from the fridge. In a large frying pan or Dutch oven, heat about one inch of oil to 360 degrees Fahrenheit.
  5. While the oil heats, roll out the dough to about ½ inch thickness on a well-floured surface. Use a donut cutter to cut out circles in the dough. If you don’t have a donut cutter, you could use a biscuit cutter or glass, then a bottle cap for the donut hole. Continue rolling out the dough and cutting out donuts until there’s no dough remaining.
  6. Gently drop the donuts into the hot oil in batches, making sure not to overcrowd the pan. Cook each side for approximately two minutes, until golden brown, then flip over. Remove the cooked donuts from the oil and place them on a paper towel-lined plate.
  7. In a small bowl, combine ½ cup of sugar and cinnamon. Dip the donuts in the cinnamon-sugar mixture before serving.

    Glaze
  8. Warm cream (or milk) until steam rises from the surface
  9. Add vanilla
  10. Whisk in sugar until incorporated
  11. Dip donuts into glaze and set aside to cool and harden about 30 minutes.

https://www.mashed.com/433134/old-fashioned-cake-donut-recipe/?utm_campaign=clip

Raspberry Drop Scones and Blackberry Hand Pies

As mentioned elsewhere days without golf can be dangerous. Along with a new Pumpernickel/Rye Bread and High Hydration Honey White Bread I tried a new puff pastry to make blackberry hand pies and raspberry drop scones to freeze and thaw for breakfast.

The more important thing is I was able to try out my new hexagonal cookie cutter. I never liked the square, or triangular (folded squares) hand pies. Circular were good, but the space between the circles wasted a lot of puff pastry. The hexagonal cutter was nearly as efficient as cutting squares, but look more like round pies.

My new hexagonal cookie cutters

I used a larger cutter for the top to assure good coverage of the smaller bottom. I docked the bottom piece with a fork to manage the puff of the pastry.

The edges of the covered pies were pinched with the fork, and egg wash painted on, a steam vent cut on the top and sparkling sugar sprinkled on each pie before baking.

Puits d’Amour – ‘Wells of Love’

We saw this pastry on GBBO. I hadn’t made any complex pastries in a while so thought this would be fun to try. I made a few changes to Prue Leith’s recipe. I used my own recipe for the creme patisserie and choux. The recipe and method below are as I made it.

I also found a new puff pastry I wanted to try. You may know my preferences in puff. Trader Joe’s is good but doesn’t puff as much as Pepperidge Farms. This new one is Wewalka European Bakery Style which seem to have a puff ratio about in the middle. It has good flake an layers. The only problem is they do not recommend freezing it before using.

Puits d’Amour – ‘wells of love’

INGREDIENTS
Puff pastry
Compote:
• 250g strawberries, hulled and chopped
• 25g caster sugar
• 1 tbsp lemon juice
• 50g raspberries
Crème Pâtissière:
• ½ c sugar
• ¼ c corn starch
• Pinch salt
• 2 c whole milk
• 4 egg yolks
• 2 Tbl butter
4 ½ tsp demerara sugar, to brûlée
Choux Pastry:
• ½ c (65 grams) AP flour
• ½ tsp granulated white sugar
• ¼ tsp salt
• 4 tbsp (55 grams) unsalted butter, cut into pieces
• ½ c (120 ml) water
• 2 large eggs, lightly beaten
Sparkling sugar

METHOD
Compote

  1. Add the strawberries to a pan with the sugar and lemon juice and cook over a medium heat for 10 minutes. Add the raspberries and cook for a further 5–10 minutes, until reduced to a thick compote (but not a jam). Remove from the heat, cool, then chill.
    Crème Pâtissière
  2. Whisk eggs and milk together and add to all other ingredients (except vanilla) to a medium saucepan.
  3. Bring to boil whisking constantly
  4. Cook until thickened (it will look lumpy, its ok)
  5. Sieve lumpy mixture into a bowl and add 1 tsp vanilla, mix thoroughly
  6. When incorporated, cover with plastic directly on the cream and cool.
  7. Remove from the heat and pass through a sieve into a clean bowl. Add the butter and stir until melted. Leave to cool, cover with cling film and chill until cold.

Cut Pastry Disks

  1. Heat the oven to 220°C/200°C fan/425°F/Gas 7. Lightly dust your worktop and roll out the rough puff to a 35cm square. Using the 10cm cutter, cut out 9 discs. Place on the baking sheets and prick each disc all over with a fork. Chill for 30 minutes.
    Choux
  2. In a bowl whisk the flour with the sugar and salt.
  3. Place the butter and water in a saucepan over medium high heat and bring to a boil.
  4. Remove from heat and, with a wooden spoon, add the flour mixture, all at once, and stir until combined. It will look like mashed potatoes. Return saucepan to the heat and stir constantly until the dough comes away from the sides of the pan and forms a thick smooth ball (about 1-2 minutes). The dough will film the bottom and sides of the saucepan and make cleaning a pain.
  5. Transfer the dough to an electric mixer and beat on low speed to release the steam from the dough (about 1 minute).
  6. Once the dough is lukewarm start adding the lightly beaten eggs (dough will separate and then come together) and continue to mix until you have a smooth thick paste (dough will fall from a spoon in a thick ribbon).
  7. Pipe the choux in a circle ½cm in from the edge of each disc. Brush each choux ring with beaten egg and sprinkle with sparkling sugar. Bake for 20–25 minutes, until puffed, crisp and golden. Remove from the oven and transfer to a wire rack to cool completely.
  8. To assemble, spoon the crème pâtissière into a piping bag fitted with a 1.5cm plain nozzle. Spoon the strawberry compote into the pastry shells and pipe the crème pâtissière over the top. Sprinkle half a teaspoon of demerara sugar on top and, using a blowtorch, brûlée the sugar. Serve immediately.

Say Cheese, Please!

Actually, say mozzarella! No baking this past weekend, but I did make home-made mozzarella cheese. I read it is the easiest cheese to make and as I needed to run to the store for some for a pan pizza, I thought I would learn how to make it. For emergencies you understand.

It was reasonably easy, but I think I made a few minor errors this first time. I don’t think the curd set completely. On advice from cheese makers blogs I let it set much longer than the recipe specified, but it was still pretty liquid. I may need more rennet and/or let it set at a warmer temperature.

Once I finished cooking the curd and started to knead and stretch it, I began to see the ‘cottage cheese’ texture, but it never came together to form a glossy mass.

I packed two small balls of cheese in airtight containers with a little left over whey to let it set and continue curing overnight.

Much to my surprise, the final cheese had a good texture and excellent taste. In summary, it is very easy to make, just a little harder than driving the two miles to the market and buying it.

Mozzarella Cheese
https://www.thekitchn.com/how-to-make-homemade-mozzarella-cooking-lessons-from-the-kitchn-174355
Makes about 1 pound of mozzarella
INGREDIENTS
• 1 ¼ cup water
• 1 ½ teaspoon citric acid
• ¼ rennet tablet or ¼ teaspoon liquid rennet (Not Junket rennet, see note below)
• 1 gallon milk, whole or 2%, not ultra-pasteurized*
• 1 teaspoon kosher salt
METHOD

  1. Measure out 1 cup of water. Stir in the citric acid until dissolved. Measure out ¼ cup of water in
    a separate bowl. Stir in the rennet until dissolved.
  2. Pour the milk into the pot. Stir in the citric acid solution. Set the pot over medium-high heat and
    warm to 90°F, stirring gently.
  3. Remove the pot from heat and gently stir in the rennet solution. Count to 30. Stop stirring, cover
    the pot, and let it sit undisturbed for 5 minutes.
  4. After five minutes, the milk should have set, and it should look and feel like soft silken tofu. If it
    is still liquidy, re-cover the pot and let it sit for another five minutes. Once the milk has set, cut it
    into uniform curds: make several parallel cuts vertically through the curds and then several
    parallel cuts horizontally, creating a grid-like pattern. Make sure your knife reaches all the way
    to the bottom of the pan.
  5. Place the pot back on the stove over medium heat and warm the curds to 105°F. Stir slowly as
    the curds warm, but try not to break them up too much. The curds will eventually clump
    together and separate more completely from the yellow whey.
  6. Remove the pan from the heat and continue stirring gently for another 5 minutes.
  7. Ladle the curds into a microwave-safe bowl with the slotted spoon.
  8. Microwave the curds for one minute. Drain off the whey. Put on your rubber gloves and fold the
    curds over on themselves a few times. At this point, the curds will still be very loose and
    cottage-cheese-like.
  9. Microwave the curds for another 30 seconds and check their internal temperature. If the
    temperature has reached 135°F, continue with stretching the curds. If not, continue
    microwaving in 30-second bursts until they reach temperature. The curds need to reach this
    temperature in order to stretch properly.
  10. Sprinkle the salt over the cheese and squish it with your fingers to incorporate. Using both
    hands, stretch and fold the curds repeatedly. It will start to tighten, become firm, and take on a
    glossy sheen. When this happens, you are ready to shape the mozzarella. Make one large ball,
    two smaller balls, or several bite-sized bocconcini. Try not to over-work the mozzarella.
  11. Using and Storing Your Mozzarella:
  12. The mozzarella can be used immediately or kept refrigerated for a week. To refrigerate, place
    the mozzarella in a small container. Mix a teaspoon of salt with a cup of cool whey and pour this
    over the mozzarella. Cover and refrigerate.
    RECIPE NOTES
  13. Adapted from New England Cheesemaking Supply Company

Hand Pies and Pan Au Chocolat

So, I had some puff pastry left over from the torsades last week, AND I had a half pint of fresh raspberries left over from my breakfast cereal. What am I to do?

I know! I can use some of my 11#s of chocolate for Pan Au Chocolat and puff pastry and raspberries for some hand pies. I posted both recipes and methods elsewhere in this blog so won’t bore you with repetition.

Check Out My Buns!

How many great discoveries were the result of a simple mistake? Sometimes you just step in it. Lucky for me, after I tested the vitality of my yeast in the Tangzhong bread post, I realized I had the perfect starter for another yeast bread. Again, as luck would have it, the other half of our QA department mentioned she would love some cinnamon rolls. Oh lucky day!!

And, it’s good to learn from your (my) mistakes. While the recipe called for a 9×13” pan I suggest you use a pan large enough to provide an inch of room around each bun to allow room for further rise and oven spring. While not visible in the lousy the rolls over grew their space in the pan and “erupted” ending up very messy

Next time I will use an 11×5” pan and the final product will be more attractive. Nonetheless, they tasted phenomenal! After our QA samples we refrigerated a couple more and froze the rest to thaw, warm and test later.

Cinnamon Rolls

INGREDIENTS

Cinnamon Roll Dough:
• 1 cup milk warm (105 degrees F)
• ½ cup + 1 TBS granulated sugar divided
• 1 TBS Active dry yeast
• 2 large eggs room temperature
• 6 TBS butter melted
• 1 tsp pure vanilla extract
• 4 to 4 ½ cups all-purpose flour
• 1 tsp sea salt
• 1 tsp ground cinnamon

Cinnamon Sugar Filling:
• 1 cup brown sugar packed
• 2 ½ TBS ground cinnamon
• 6 TBS butter softened

Cream Cheese Frosting:
• 1 8 oz package cream cheese, softened
• ¼ cup butter softened
• 2 cups powdered sugar
• ½ tsp pure vanilla extract
• 1/8 tsp salt

METHOD
Cinnamon Roll Dough:

  1. Warm milk in the microwave milk for 45-60 seconds. It should be warm but not hot to the touch (about 105 degrees F).
  2. Place milk into the bowl of your standing mixer, then add 1 TBS sugar and 1 TBS yeast to the warm milk. Stir and let it sit (proof) for five minutes or until it becomes foamy.
  3. Add the ½ cup sugar, butter, eggs, and vanilla to the mixture in the bowl of your standing mixer. Use a dough hook to stir until combined
  4. Add 4 cups flour, salt and cinnamon and stir the dough hook, starting on low and increasing to high.
  5. Knead dough in the standing mixer until a large ball is formed. The dough should be smooth and only slightly tacky to the touch. If the dough seems too sticky and is not forming a ball, add more flour 1 TBS at a time until a smooth ball is formed.
  6. Transfer dough to a floured surface and knead with your hands until it is smooth and elastic (about 3-5 minutes). Form it into a ball.
  7. Grease a large bowl and place the dough inside.
  8. Cover the bowl with a warm, damp towel and put the bowl in a warm place to rise.
  9. Let the dough rise in a warm place about 1 hour or until dough has doubled in size.
    Filling:
  10. While the dough is rising, make the filing. In a small bowl, combine butter, brown sugar and cinnamon until mixture is homogenous (uniform throughout). Set aside.
  11. Alternately, you can combine the cinnamon and sugar. Then melt the butter and brush it on the rolled dough, then sprinkle the cinnamon sugar on the butter-brushed dough. (I think this way is easier)!
  12. Assemble Cinnamon Rolls
  13. Sprinkle a large work surface with flour.
  14. Gently press the gas out of the dough and form it into a rectangle.
  15. Roll the dough into a 24×12” rectangle, about 1/4 inch thick.
  16. Spread the filling all over the dough using greased hands or a greased spatula. This process can seem difficult but it gets easier as you spread it. (Alternately: if you only combined the cinnamon and sugar, then melt the butter and use a pastry brush to spread the melted butter all over the dough. Then sprinkle the dough with cinnamon sugar and pat it down gently to insure it sticks).
  17. Roll up dough cut into 12 equal sized rolls (feel free to measure and cut each roll to be 2” long).
  18. Line a 11×15 inch glass baking dish with parchment paper and lightly grease. Then place rolls in 4 rows of three, evenly spaced.There should be some room between each roll to allow for oven spring.
  19. Cover and let rise until nearly doubled, about 30 minutes and preheat the oven to 350 degrees F
  20. Bake Cinnamon Rolls
  21. Once rolls are doubled in size, bake them in the preheated oven until golden brown, about 18-20 minutes. They will rise more in the oven. (NOTE: Check the center cinnamon rolls and make sure they are baked through. If your oven bakes cool or unevenly you may need to increase the baking time up to 10 minutes longer. If the top starts to brown before the center is baked, tent the baking pan with foil to prevent further browning).
    Cream Cheese Frosting
  22. While rolls are baking, beat together cream cheese, butter, powdered sugar, vanilla extract and salt. Do NOT chill the frosting. Keep it at room temperature until the cinnamon rolls are baked.
  23. Once the cinnamon rolls have bene removed from the oven, spread the cream cheese frosting on them while they are still warm.
  24. Cool & Serve!
  25. Let cool and serve warm.

Notes

  1. To make ahead:
    a. After the cinnamon rolls have been assembled in a baking dish, wrap tightly with plastic wrap and cover with a tea towel or aluminum foil and place them in the refrigerator.
    b. In the morning, remove the baking dish from the refrigerator and let them come to room temperature and finish rising (this takes about 30-40 minutes).
    c. Then bake according to recipe instructions.
  2. To Freeze:
    a. Assemble the cinnamon rolls in the baking pan.
    b. tightly cover with plastic wrap and then with aluminum foil or a lid.
    c. freeze for up to 1 month.
    d. To bake, remove cinnamon rolls from the freezer the night before you’d like to bake them.
    e. Let them come to room temperature and rise overnight, then bake according to the recipe instructions.
    f. If filling “oozes out”
    g. If you find some of the cinnamon/sugar filling at the bottom of your baking pan when you pull them out of the oven, immediately place a lid or a baking sheet over the top of the cinnamon rolls and flip them upside down (invert them). This will cause the filling to reincorporate into the rolls!

Little Jack Horner said, “Let Them Eat Cake!”

I have a recipe for fig cake, but currently have an over abundance of sliced plums in the freezer and this year’s crop is on the tree. Substituting the plums for figs was a good choice. The tartness of the plums paired nicely with the sweetness of the cake. Now, what to do with the bags of frozen figs?

First Birthday

Well, I was all set for Vivian’s first birthday party on August 10, but due to typical one year old circumstances, it was postponed until today, August 25. This offered no problems, rather a whole new opportunity to perfect (maybe too strong a word) a mermaid themed birthday cake for Vivian.

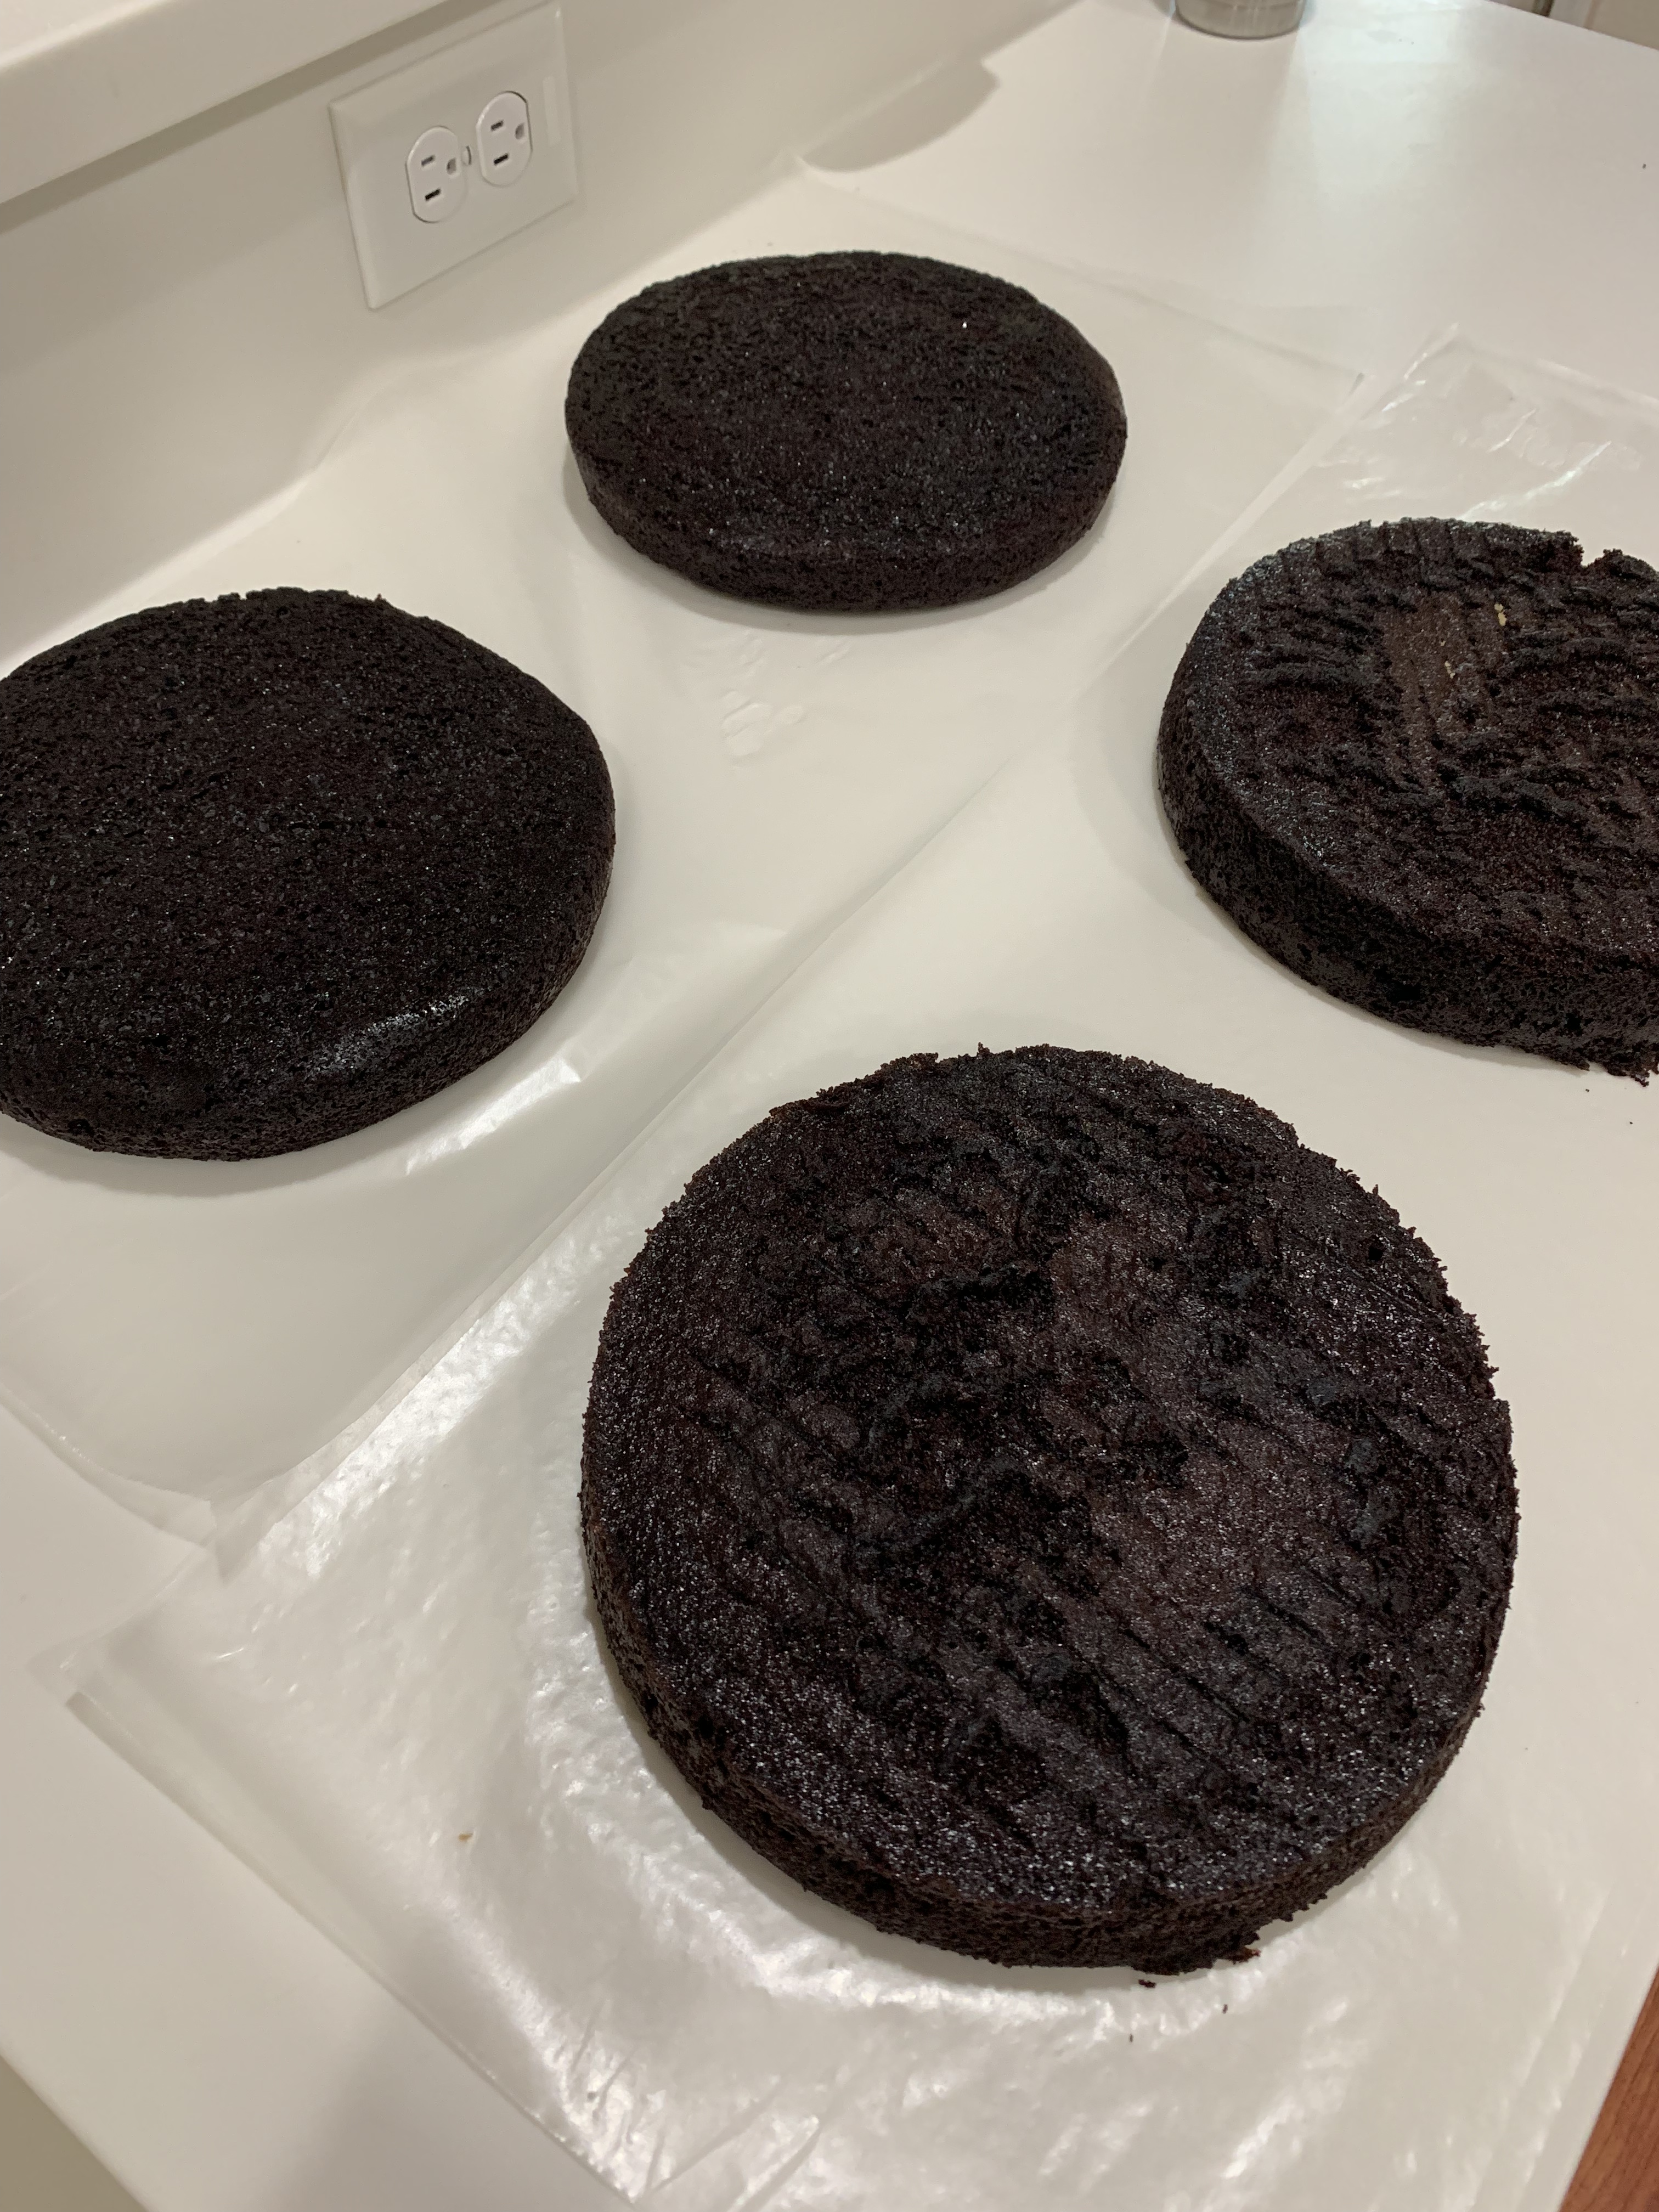
The cake was comprised of two 12″ round merengue white cake layers and three 9″ chocolate layers. Each were crumb coated and refrigerated. Meanwhile, I made marshmallow fondant and colored portions a shades of “ocean green” colors. The entire 3 layer chocolate and 2 layer vanilla cakes were covered with fondant.Then used some of it to punch out circular “scales.”

A variety of sea “creatures” were molded from both chocolate, white chocolate (tinted pink) and gum paste. The purple “sea weed” was made from gum paste and stored at room temperature in an airtight container. These were actually made over a month ago and were fine to use today. The chocolate sea creatures were made three weeks ago and stored in the fridge.

The cakes were stacked this morning and the “sea creatures” and mermaid tails were attached using Dab-And-Hold edible adhesive.

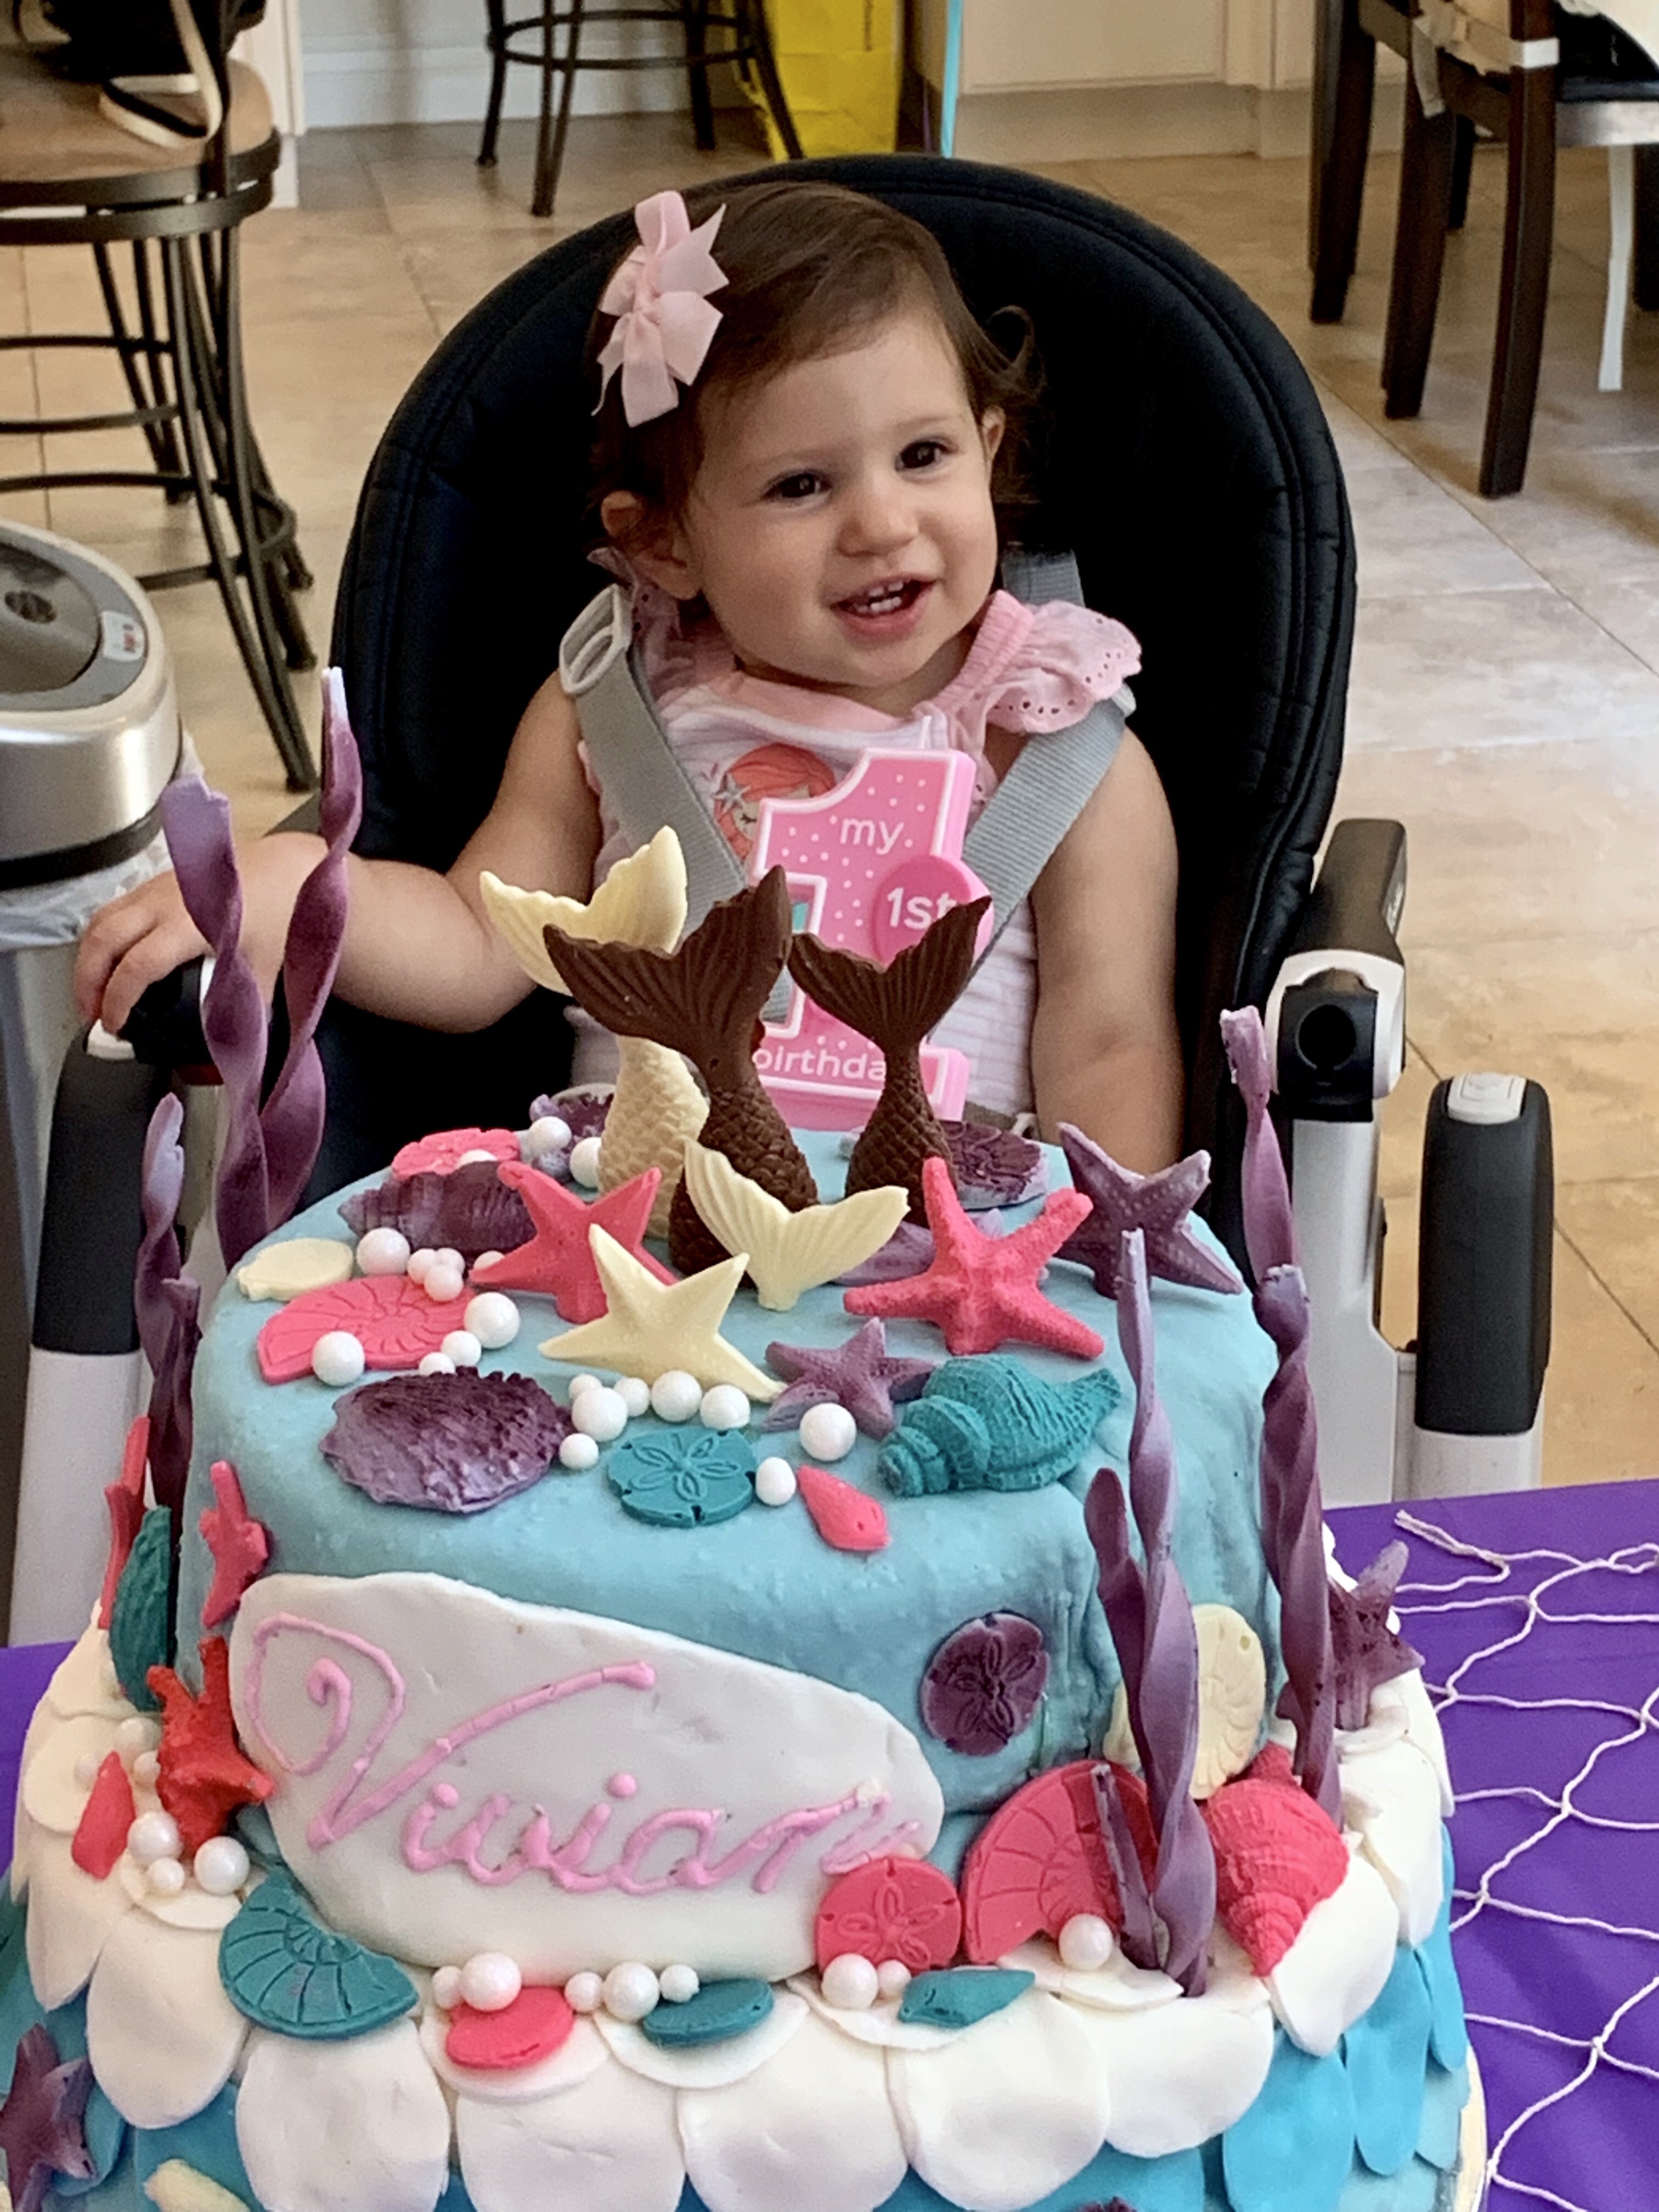
My critique: the design and execution was good. The chocolate cake was outstanding, the meringue white cake tasted good, but was a bit dry. I am still looking for an acceptable recipe. Marshmallow fondant is too sweet, but the little figurines need to be a fixed to a smooth surface. I may give rolled buttercream next. I also found a recipe where I can substitute the cocoa ingredients to create a vanilla cake with similar crumb and moisture to my chocolate cake recipe. More experimentation!!

Extreme Chocolate Cake

INGREDIENTS

  • 2 cups white sugar
  • 1 3/4 cups all-purpose flour
  • 3/4 cup dark unsweetened cocoa powder
  • 1 1/2 teaspoons baking soda
  • 1 1/2 teaspoons baking powder
  • 1 teaspoon salt
  • 2 eggs
  • 1 cup milk
  • 1/2 cup vegetable oil
  • 2 teaspoons vanilla extract
  • 1 cup boiling water

METHOD

  1. Preheat oven to 350 degrees F (175 degrees C).
  2. Grease and flour the two Wilton 3D Egg cake pans. 
  3. Use the first set of ingredients to make the cake.
  4. In a medium bowl, stir together the sugar, flour, cocoa, baking soda, baking powder and salt.
  5. Add the eggs, milk, oil and vanilla, mix for 3 minutes with an electric mixer.
  6. Stir in the boiling water by hand.

Meringue White Cake

INGREDIENTS

• 1 cup butter (softened)
• 1 1/2 cups granulated sugar
• 3 cups cake flour* (345 grams spooned & measured carefully)
• 1/2 teaspoon salt
• 2 teaspoons baking powder
• 1 cup milk (2% milkfat)
• 1 teaspoon vanilla extract
• 3/4 cup egg whites plus 3 tablespoons (160 g)

METHOD

  1. Using a stand mixer, beat the egg whites with the whisk attachment until they are stiff and form peaks. This may take a minute or two. Pour the egg whites into another bowl and place them in the refrigerator until you’re ready to add them to the batter.
  2. Using the same bowl that you used to beat the egg whites, place the softened butter in and cream the butter for about 2 minutes (using the beater blade attachmenuntil it is white in appearance.
  3. Add the sugar to the butter and beat until fluffy (about another 1-2 minutes).
  4. In a small bowl, combine the flour (measured carefully*), salt and baking powder. Set aside.
  5. In another bowl, combine the milk and vanilla extract.
  6. Add the flour mixture to the butter/sugar mixture alternately with the milk.
  7. Add the stiffly beaten eggs to the cake batter. Fold the egg whites in gently. Do not overmix at this point. If you do, your cake will become more dense.
  8. Grease and flour 2 9″ round cake pans. Pour the cake batter equally into the prepared cake pans.
  9. Bake the cakes at 350 degrees for 25-27 minutes or until the top bounces back when you touch it.
  10. Allow the cakes to cool for 10 minutes, then loosen the edges and remove them from the pans to a wire rack, allowing them to cool completely.

Marshmallow Fondant

INGREDIENTS

  • 500 g marshmallows
  • 1000 g confectioners sugar
  • 1 tsp white vanilla
  • 2-3 Tbl water

METHOD

  1. Grease (well with Crisco or equivalent) a heat proof microwavable bowl
  2. Place marshmallow in the bowl and sprinkle 2-3 Tbl water over the marshmallows
  3. Heat in a microwave in 30 second increments until the marshmallow is melted and smooth. Don’t overcook and burn.
  4. Grease (well) dough hook and stand mixer bowl and add melted marshmallow.
  5. Add confectioners sugar a cup at a time and stir on medium until incorporated.
  6. Add the vanilla during one of the sugar additions.
  7. Reserve about a cup of sugar to use during hand kneading
  8. Grease (well) your workspace and hands and turn the fondant out.
  9. Cover with sugar and begin kneading, adding more sugar as necessary until the fondant is smooth and not sticky.
  10. Use a greased rolling pin and roll the fondant out to required size. For this cake I rolled it out to about 24″ x 24″. Once kneaded and no longer sticky I folded it into quarters to make it easy to pick up and drape over the cake. Be careful. If not adequately kneaded, it will tear.


Time Was On My Side

Last year, after fresh peach season was over, I saw a recipe for Roasted Peach and Strawberry Jam. I saved that link for a half a year, until this week, when the farmer’s market was selling BOTH fresh peaches and strawberries. It was worth the wait.

img_0171

This jam isn’t cooked, but will last a couple of week if refrigerated. As if!

It is an easy and (hands on) quick recipe.

img_0176img_0177

INGREDIENTS

  • 3 cups (350 g) hulled and cut up strawberries
  • 3 cups (415 g) halved peaches
  • 1/3 cup sugar
  • 2 Tbl lemon juice

METHOD

  1. Halve peaches and remove the stone
  2. Bake peach halves at 250 F for 15 minutes, then turn over, skin side up and bake for and additional 15 min
  3. Slice strawberries – they don’t have to be too small, but should at least be sliced in half
  4. Remove peach halves from oven, remove the skin and dice them, toss with the strawberries, sugar and lemon juice.
  5. Spread fruit on a lightly olive oil sprayed, aluminum foil lined baking sheet (with edges) for 45-60 minutes or until the fruit is very soft, but not so long as the juice solidifies.
  6. Remove the fruit from the over and let cool 5-10 minute.
  7. Pour fruit and juices into a food processor and puree until the desired consistency is obtained.
  8. Can and place in the refrigerator.