Artisan Raisin Bread

With few exceptions I followed thebusybaker.com’s recipe for this raisin bread. I did use the “quick rise’ option of more yeast and only a 2 hour proof. I needed to add 5-6 extra tablespoons of AP flour while mixing to be able to form the dough into a ball.

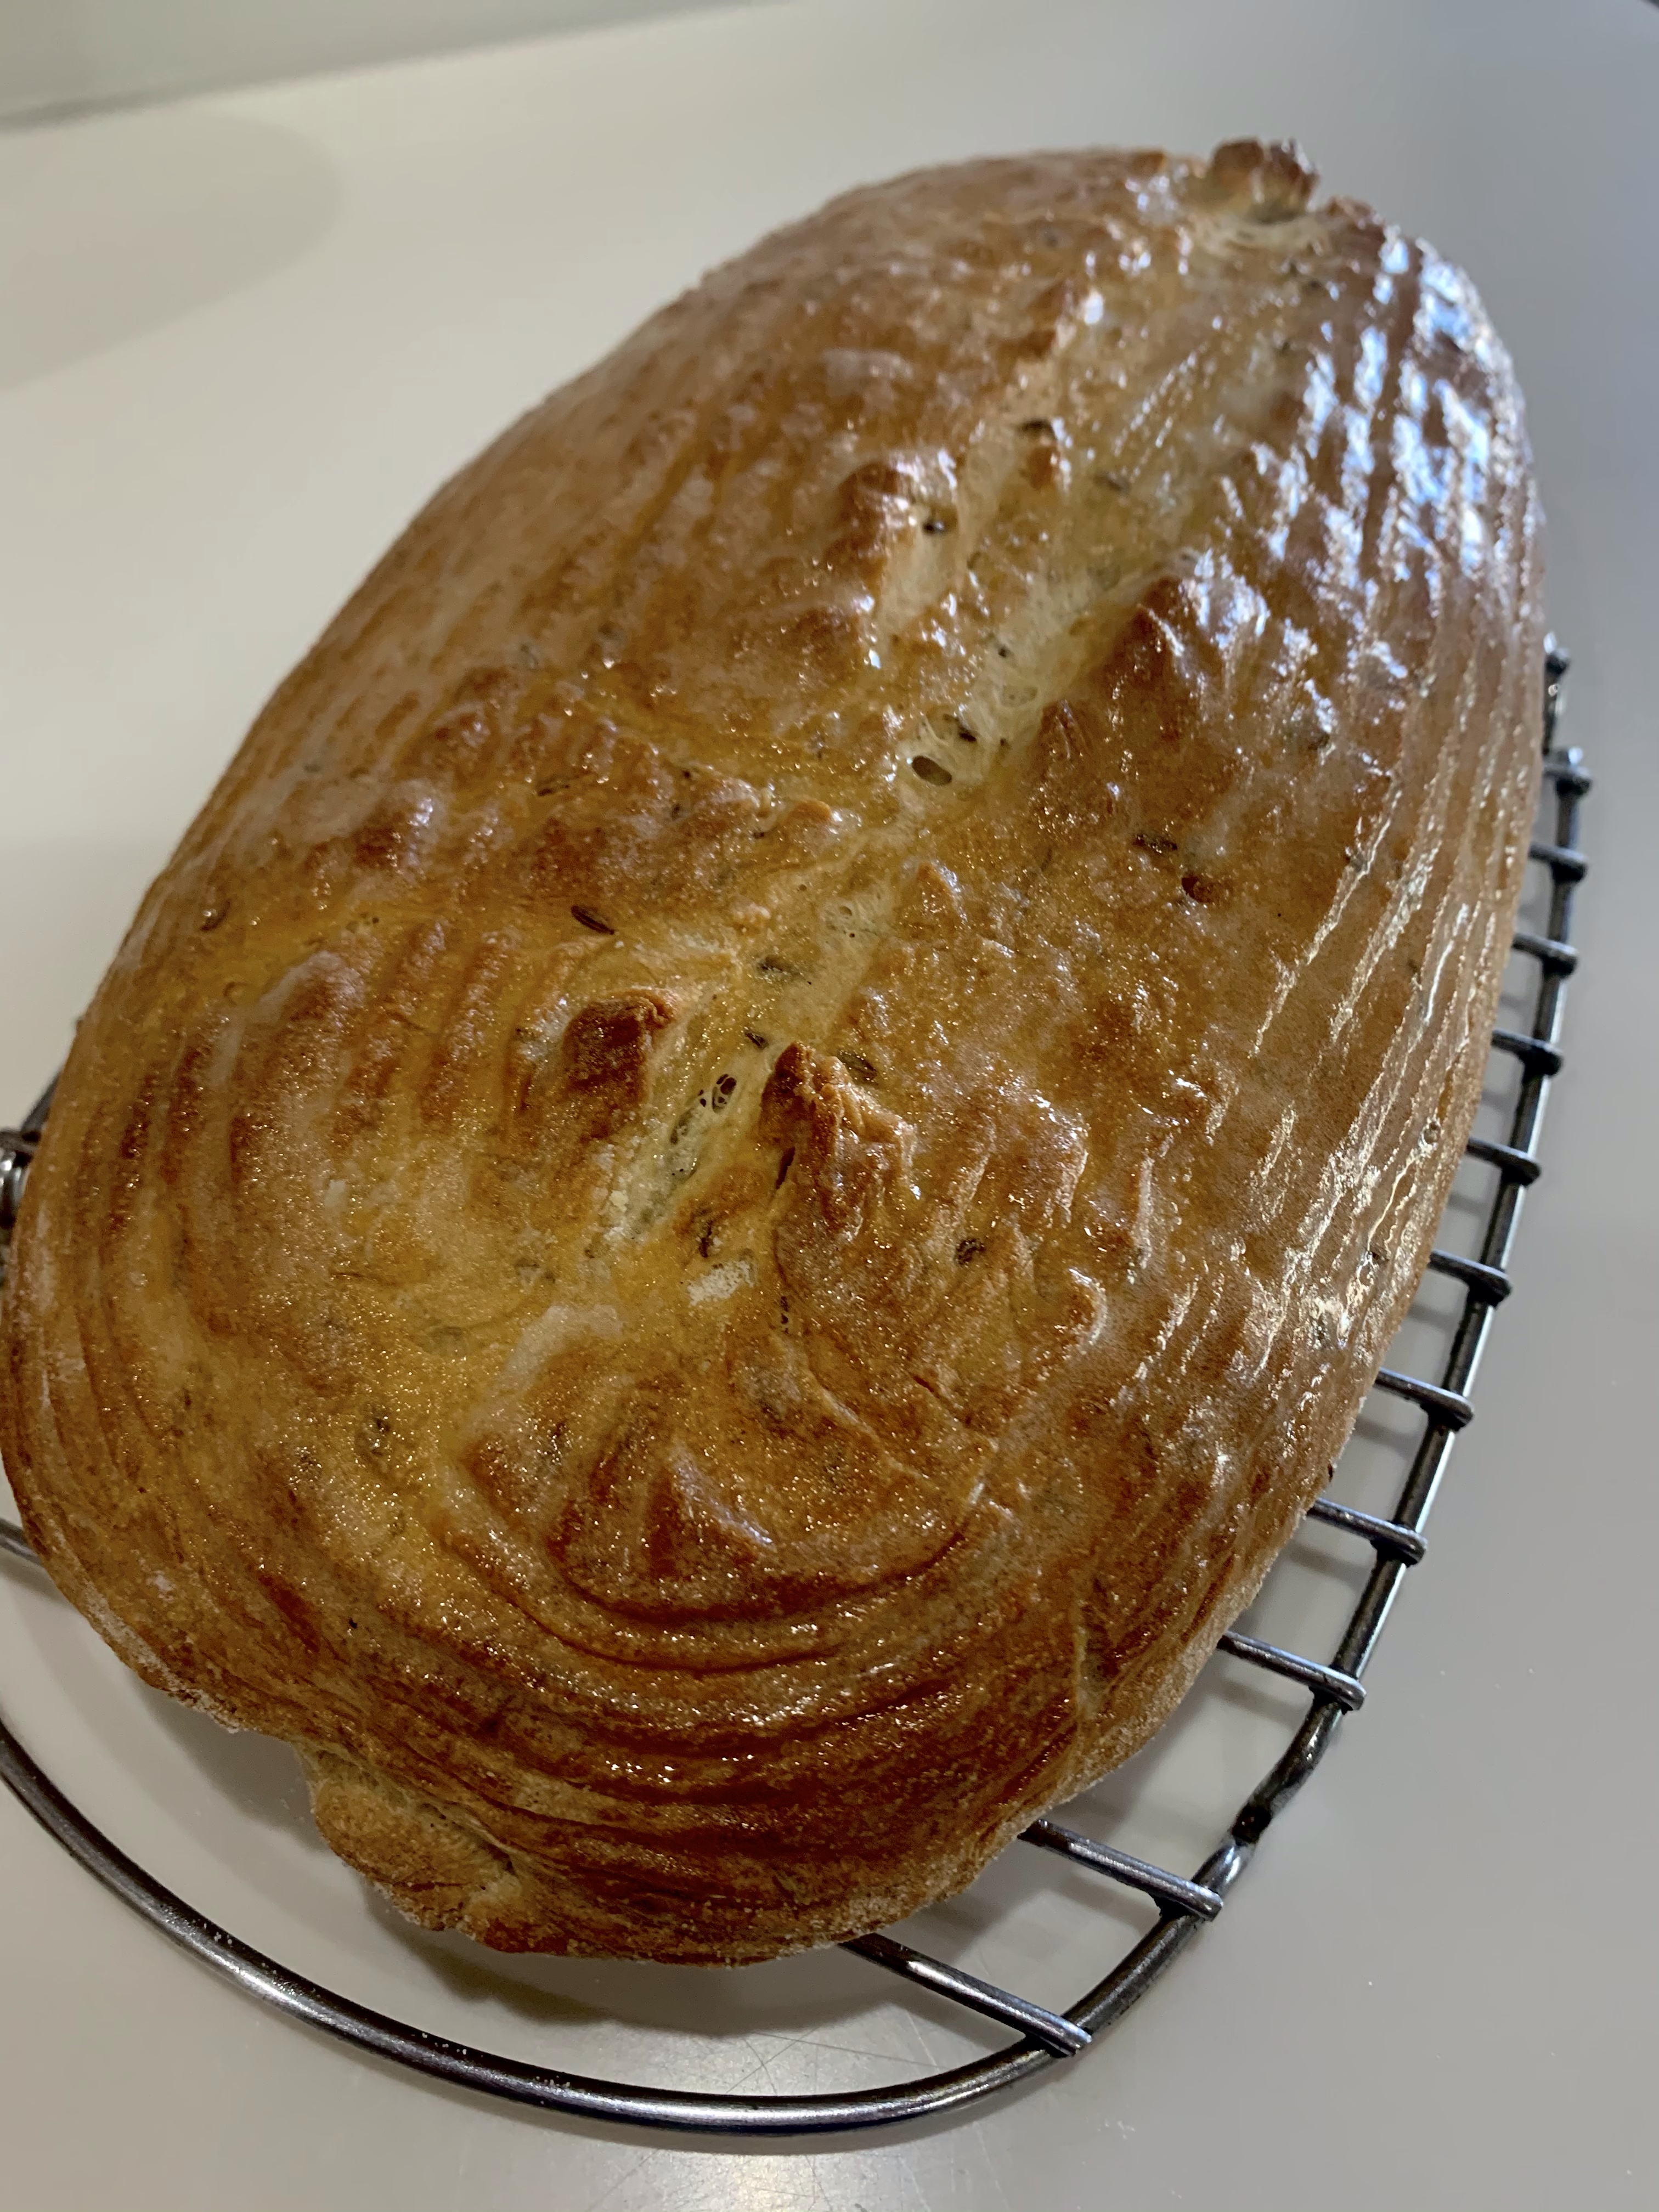
Often baking using a Dutch Oven at 450 deg F will burn or at least excessively darken the bottom of the loaf. Putting a piece of silicone mat on the bottom coupled with a doubled sheet of parchment paper seemed to help. I will try removing the bread from the Dutch Oven after 30 minutes (when you should remove the cover) and let it rest on the oven rack for the last 15 – 20 minutes.

https://thebusybaker.ca/easy-no-knead-cinnamon-raisin-artisan-bread/

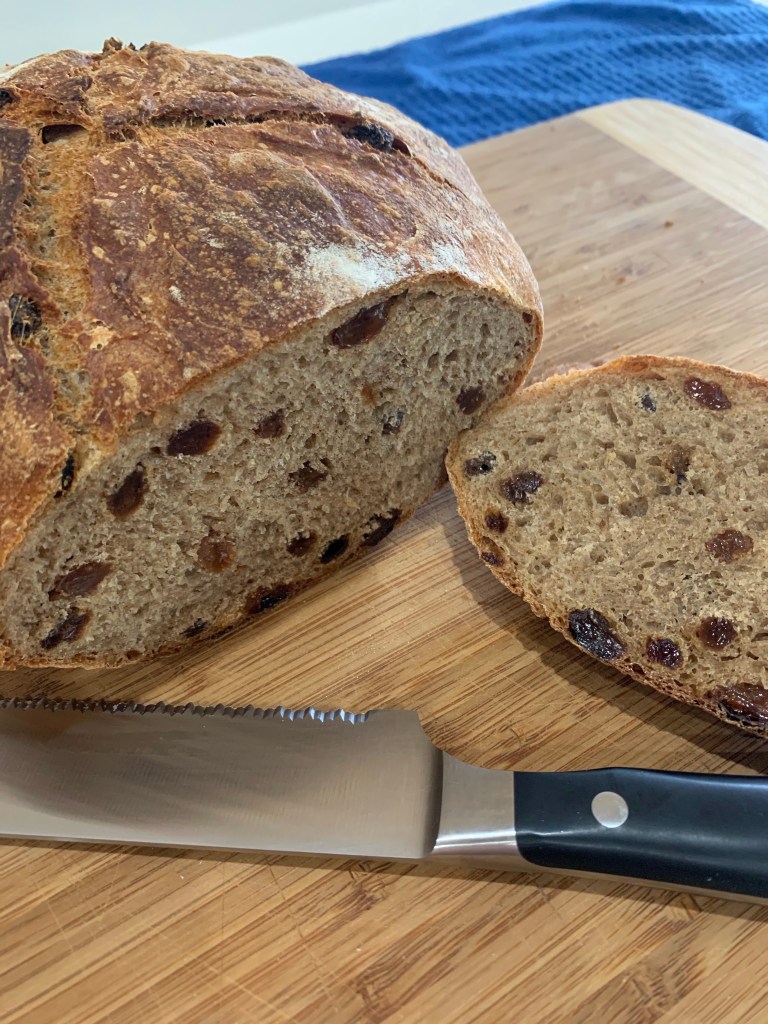
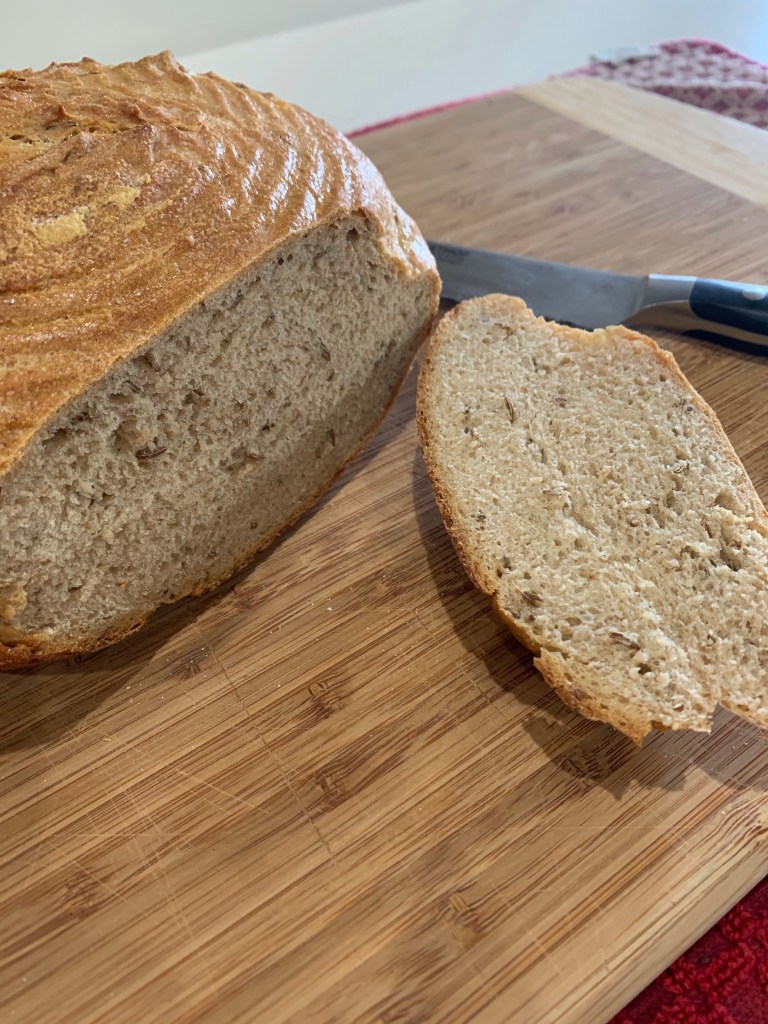
Raisin Bread – No Knead


INGREDIENTS

• 250g (2 cups) all purpose flour (plus 1-2 tablespoons if necessary)
• 120g (1 cup) whole wheat flour
• 110g (3/4 cup) raisins
• 2½ teaspoon active dry yeast
• 1½ teaspoons sea salt
• 2 teaspoons ground cinnamon
• 3 tablespoons brown sugar
• 355g) (1½ cup room temperature water (plus 1-2 tablespoons if necessary)
• a few tablespoons extra flour for shaping the loaf

METHOD

  1. Add the flours, raisins, yeast, salt, cinnamon, and brown sugar to a large bowl. Be sure to add the yeast and the salt to separate sides of the bowl.
  2. Stir the dry ingredients together well.
  3. Add the water and stir until a thick, rough dough forms. Add 1-2 more tablespoons of water or flour if needed.
  4. Flour your hands and shape the dough into a ball, placing it into the bottom of the bowl and covering the bowl with plastic wrap.
  5. Place in a warm spot (my proofing oven) in your kitchen and let rise for 2 hours.
  6. After the rising time, preheat your oven to 450 degrees Fahrenheit.
  7. Place an oven-safe Dutch Oven pot in the cold oven and let it preheat with the oven. I like to add a small sheet of silicone to insulate the bottom of the bread from the excessive heat of the Dutch Oven. It seems to help.
  8. Flour your hands well and shape the dough into a round ball and set it on a piece of parchment paper on the counter dusted with flour.
  9. Dust the top of the dough ball with flour and cover with a clean kitchen towel, letting it rise for 25 minutes.
  10. After the dough has risen remove the Dutch Oven pot from the oven and using the parchment paper, pick up the dough and place it carefully in the bottom of the Dutch Oven. Make two very shallow slices in the top of the risen loaf in the shape of an X.
  11. Replace the lid of the Dutch Oven, place it back into the hot oven, and bake for 30 minutes.
  12. After 30 minutes of baking time, remove the lid from the Dutch Oven and continue baking for an additional 10 minutes uncovered.
  13. After the baking time, remove the pot from the oven and transfer the loaf to a cooling rack using the parchment paper.
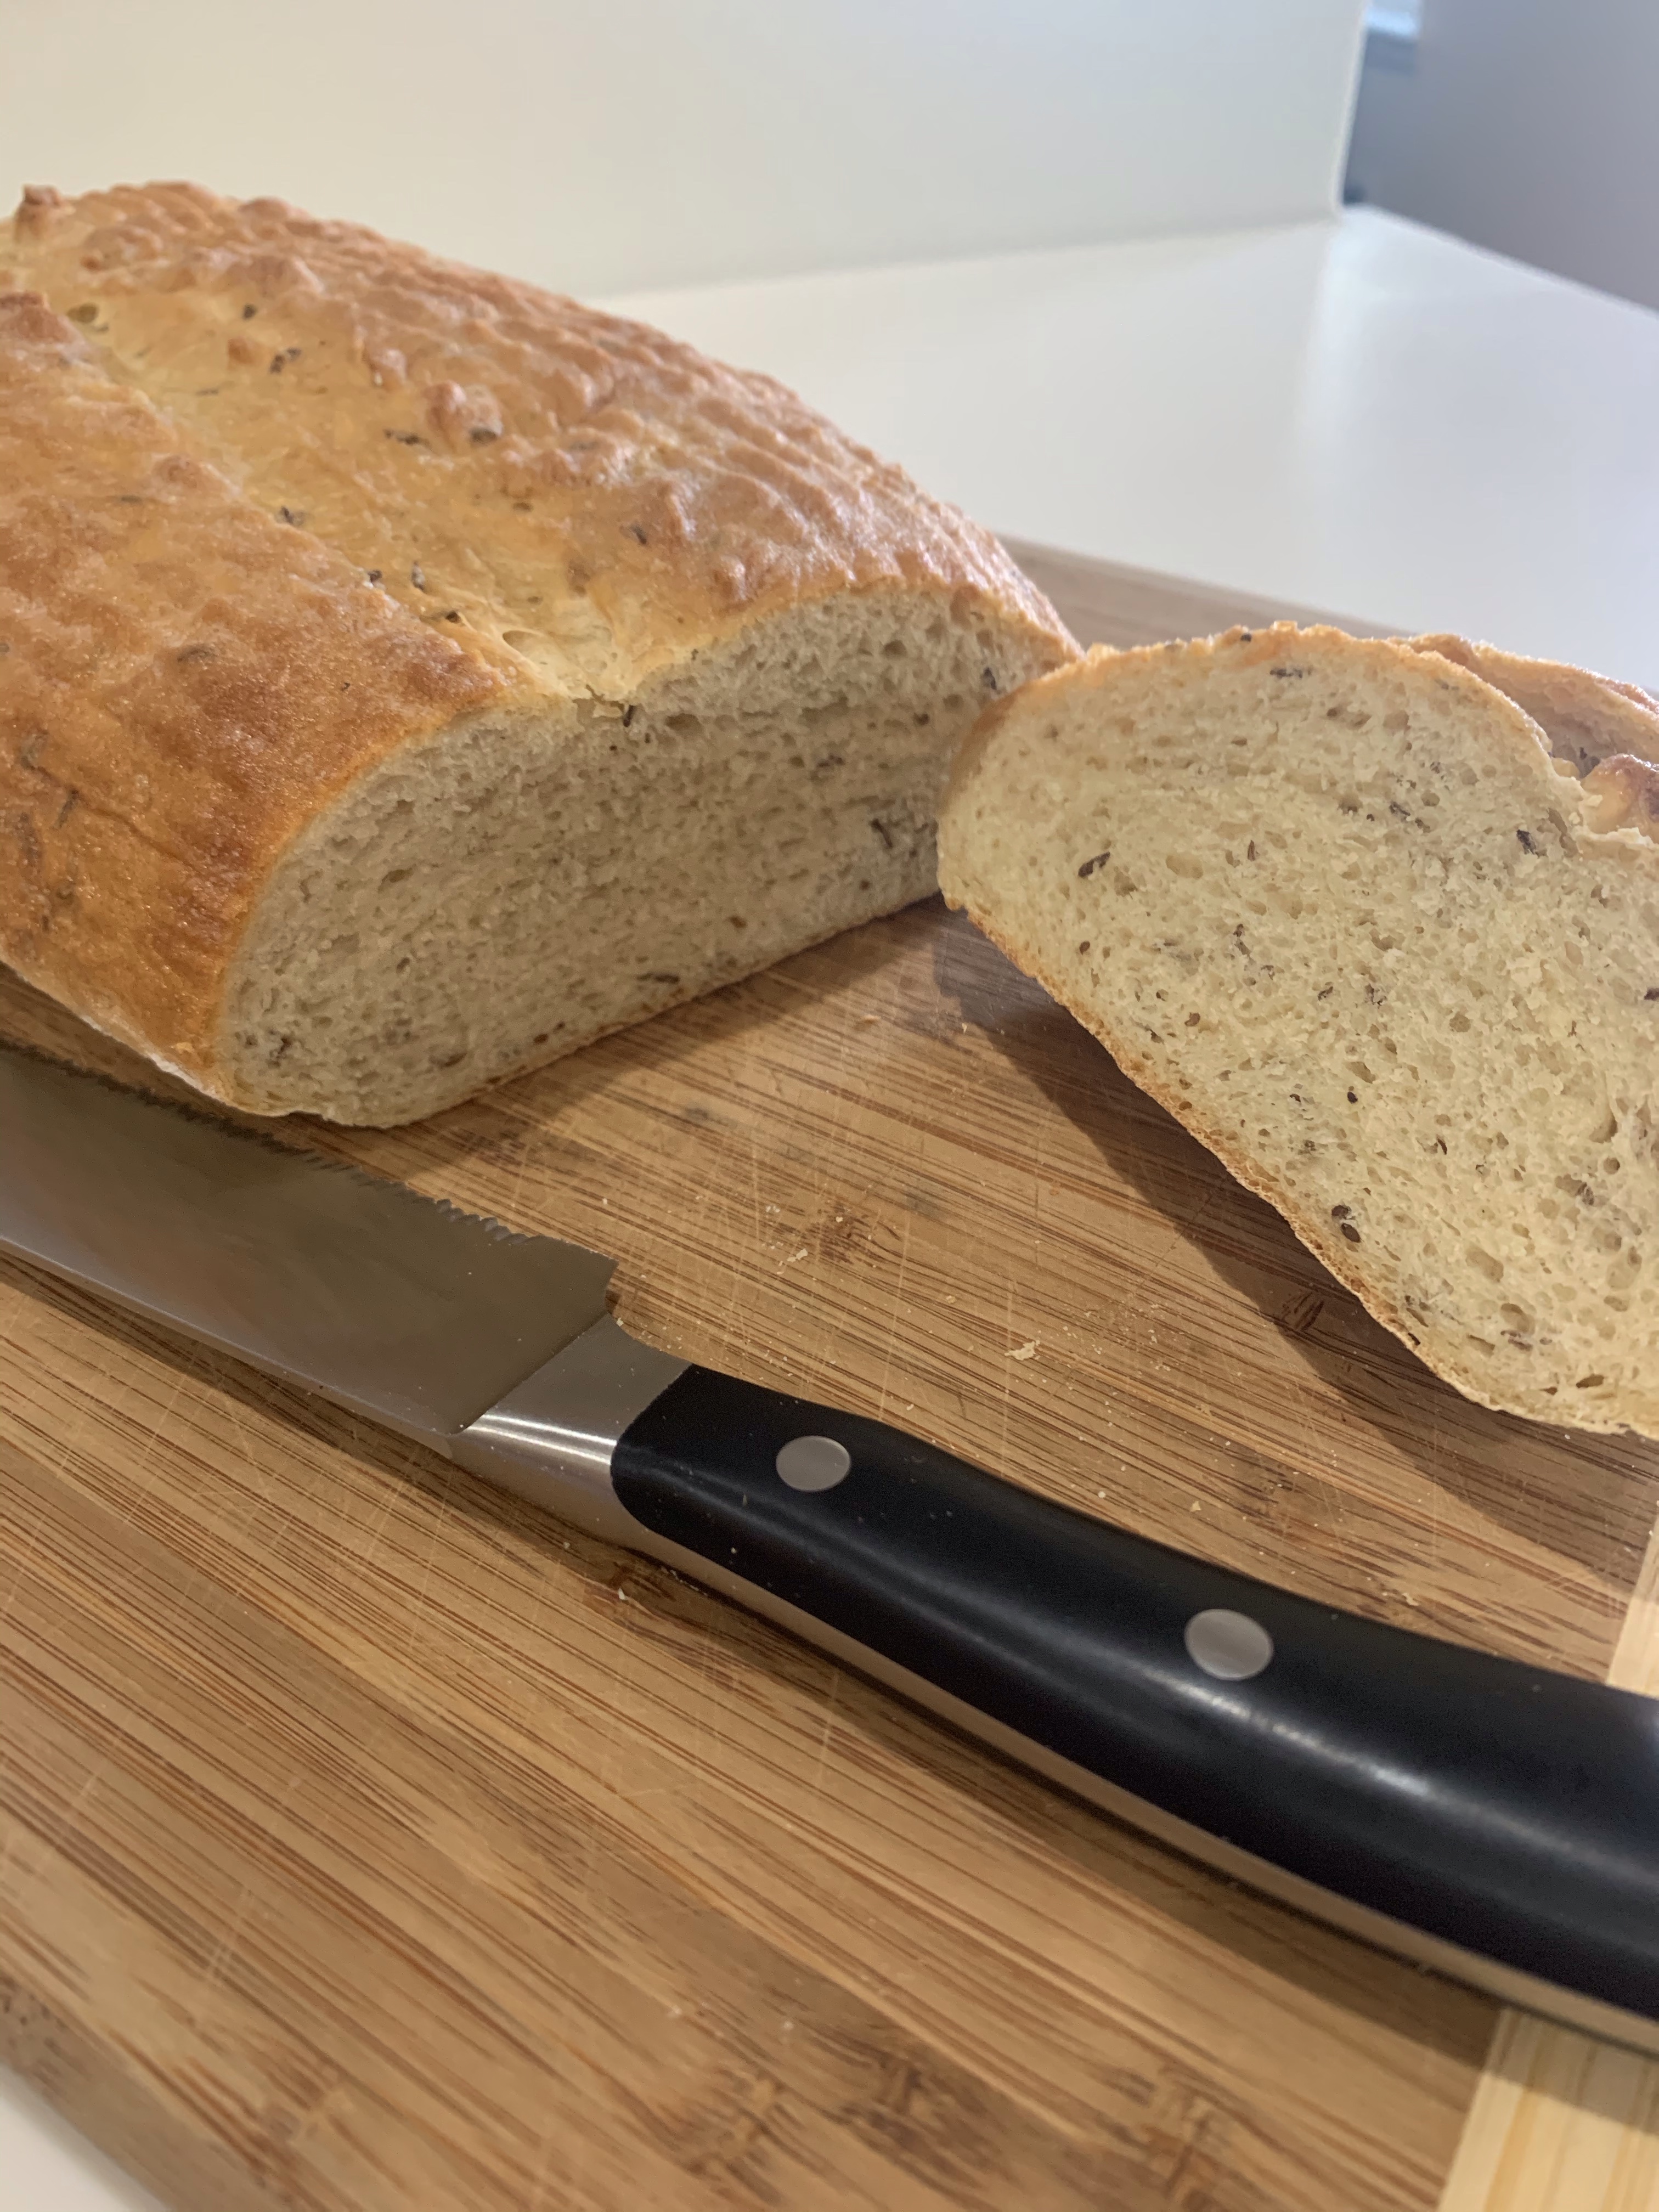
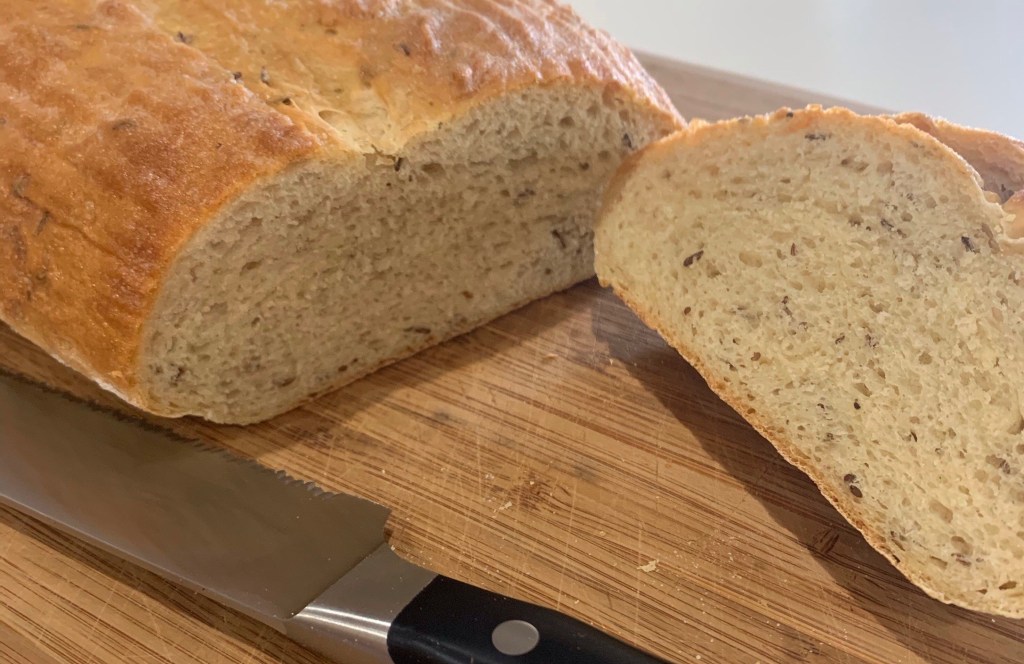
  14. Cool completely before slicing.

The Rye Experiment – Part 3 – The Final

Back to the experiment and on to Part – 3 the Final. This Part was supposed to be completed last week, but due to an unfortunate brain freeze I used the wrong flour. This time I used the First Clear Flour instead of the AP flour used by mistake in Part 2a. (Ahhh, to be 65 again!)

However, this time I also used a Dutch Oven instead of baking uncovered. The rationale is I want the best combination of crumb, crust and flavor. The Dutch Oven provided the traditional chewy ‘Deli Rye’ crust. This recipe and method is a winner!!

So the recipe remains the same as Part 2, except I used a Dutch Oven. I used First Clear and Pumpernickel flours. I used an egg wash when there were about 15 minutes left in the bake. In my case I added it when the internal bread temperature was 195 deg. F.

Caraway Rye Bread KAB – Final

https://www.kingarthurbaking.com/recipes/caraway-rye-bread-recipe

INGREDIENTS

• 1 cup (227g) lukewarm water
• 1 cup (106g) white rye, medium rye, or pumpernickel flour
• 4 teaspoons (14g) sugar
• 2 1/4 teaspoons instant yeast
• 1/2 cup (113g) sour cream (low-fat is fine; please don’t use nonfat)
• 1 to 2 tablespoons (10g) caraway seeds, to taste
• 1 1/2 teaspoons salt
• 2 1/3 cups (280g) First Clear Flour
• 3 tablespoons (25g) vital wheat gluten

METHOD

  1. In a medium-sized mixing bowl or the bowl of your stand mixer, combine the water, sugar, rye flour and yeast, mixing to form a soft batter. Let the mixture rest for 20 minutes; this allows the rye flour to absorb some of the liquid, making the dough easier to knead.
  2. Add the remaining ingredients, and mix and knead the dough together — by hand, mixer or bread machine — until it’s fairly smooth. The nature of rye dough is to be sticky, so don’t be tempted to add too much flour.
  3. Place the dough in an oiled bowl or large (8-cup) measure, cover, and let it rise until noticeably puffy, 60 to 90 minutes.
  4. Gently deflate the dough, knead it briefly, and shape it into two smooth oval or round loaves; or one long oval loaf. Place them on a lightly greased or parchment-lined baking sheet.
  5. Cover the loaves, and let them rise until they’re noticeably puffy, about 90 minutes. Towards the end of the rise, preheat the oven to 350°F.
  6. Just before they go into the oven, spritz the loaves with water, and slash them about 1/2″ deep. The oval loaves look good with one long, vertical slash; the rounds, with two or three shorter slashes across the top.
  7. Bake the loaves for 35 to 40 minutes, or until an instant-read thermometer inserted into the center reads 205°F to 210°F. The single, larger loaf will bake for 45 to 50 minutes. If the bread appears to be browning too quickly, tent it lightly with foil after 25 minutes of baking.
  8. Remove the loaves from the oven, and transfer them to a rack. While still warm, brush them with melted butter, if desired; this will keep their crust soft.

Killing Time Making Rolls

So, what do you do as you are waiting for your dinner rolls to proof? Well, If you have an 11 pound bag of chocolate, 60 pieces of 1”x1” caramel, making salted chocolate covered caramels is a good way to pass the time.

I cut the caramels a day ago, tempered the chocolate, dipped and drained the coated caramel and sprinkled some Maldon flaked sea salt on each.

The chocolates were setting as the first proof of the rolls completed. The proofed dough weighed 1,553 grams, so to make 24 rolls, each had to weigh about 63 g. I weighed each, formed them into a small ball and rolled them on the counter to tension the surface of the roll.

I arranged them 4×6 in a glass baking tray and baked at 375 deg until the internal temperature was 180 deg. (about 20 min.) Once out of the oven, a light brush with melted butter and boom. Excellent dinner rolls! The recipient and methods for both the dinner rolls and chocolates are found elsewhere in this blog.

Sandwich Rye – New Recipe

I was going to continue the experiment with Part 3, but wanted to try this new recipe I found at ayearinbread.blogspot.com. It’s interesting as it uses bread flour, molasses and citric acid. It had a good flavor, crumb and a great crust. Oh, I also needed to make a few (3) loaves of white sandwich bread for PB&J lunches. The oddest thing happened with the white bread. Two of the loaf rose nice and round, but one fell. No idea.

Sandwich Rye
http://ayearinbread.blogspot.com/2007/09/kevin-sandwich-rye.html

• INGREDIENTS
• rye flour 1 c 146 g
• bread flour 2 1/4 c 330g
• instant yeast 1 tsp
• wheat gluten 1 1/2 tbsp
• citric acid (sour salt) 1/4 tsp
• caraway seeds 2 tbsp 20g
• molasses 1 1/2 tbsp
• butter melted 1 tbsp
• table salt 3/4 tsp
• water 1 c + 2 tbsp 256 g

Egg Wash
• egg 1
• water 1 tbsp

METHOD

  1. In the bowl of a stand mixer using the paddle attachment, mix together the yeast, gluten, citric acid, caraway seeds, rye flour, and 2 cups (280g) of bread flour. Add salt and mix in. (Note, the salt is added after mixing the original ingredients to minimize it’s direct contact with the yeast, which it can kill).
  2. In a measuring cup, mix together water, molasses, and butter using a small whisk. With the motor running at low speed, pour liquid into dry ingredients. Once moistened, switch to the dough hook and finish blending. The dough should be moist and sticky, add just enough additional flour, a tablespoon at a time, to have dough clear the sides of the bowl. Increase speed to medium and knead for eight minutes. (Note, dough will clear sides but stick to bottom, scrape it up with a rubber spatula every couple of minutes.)
  3. Scoop dough onto a lightly floured surface and knead lightly a few times then form into a ball. Place the dough in a bowl sprayed with cooking oil, spritz top with oil, and cover tightly with plastic wrap. Allow to rise until doubled in bulk — about 1 1/2 hours.
  4. Gently deflate dough, scoop onto a lightly floured surface, fold a few times, and allow to relax for about five minutes. Shape dough into a loaf and place on a piece of parchment on your peel or on a baking sheet. Lightly spritz tops with oil and cover with plastic. Allow to rise until doubled in size, about 1 hour. In the meantime, heat oven to 400F (200C) and place rack in center position. (Note: it’s important to give the oven a long preheat before baking, particularly if you’re using a baking stone.)
  5. Whisk together egg and 1 tablespoon of water in a small bowl. Brush loaf with egg wash and bake for 15 minutes. Rotate rack front to back and continue baking 15 to 20 minutes until golden brown. The interior should read 190F on an instant read thermometer.

The Rye Experiment- Part 2a

Oops! I used the pumpernickel flour but forgot to use First Clear instead of AP flour. The plan was to use the best combination of ingredients to make the best loaf of rye bread.

I made two small free form boules. They held their shape really well.

Maybe tomorrow I will read my own instructions all the way through before baking. The results were pretty darn good today, though!

The Rye Experiment, Part 2

As I said in Part 1, this variation will simply substitute First Clear Flour for the White Rye in Part 1. I added an egg/water wash to this loaf to increase the color of the bread. I did not coat the finished warm bread with butter, which darkened the Part 1 loaf. I also baked it in the bottom of a Dutch Oven to help keep its shape. (No real difference.) I won’t publish the recipe again, just go to Part 1 and make the change noted above.

Manufacturing reports the crumb may be a little better. The holes are slightly larger and more evenly distributed. The crust is a little chewier and darkened just about right. The rise was higher. QC has yet to report.

Part 3 will substitute Rye Bread Improver for the Vital Wheat Gluten. I am thinking Part 4 will be the winner of Parts 1-3 and substituting pumpernickel flour for the other rye flour. Stay tuned.

The Rye Experiment, Part 1

Fran and I are self quarantining so we can join Daniel and Frances’s “pod” for Christmas and New Years. To pass the days I decided to experiment with variations of rye bread recipes. KAB has a good, basic caraway seed rye bread recipe, which I used as a starting place. (Recipe below.)

Following the recipe as written resulted in a well risen, soft rye bread with a good crumb. Today’s roast beef sandwich with lettuce, jalapeños and lettuce was excellent.

The first variation is to replace the white rye flour with first clear flour. In case you were wondering first clear flour is what remains after milling patent flour. It compensates for the low gluten content of rye flour. It is the traditional flour used in Jewish bakeries and adds loftier rise and better chew. This variation will be in the next post, The Rye Experiment, Part 2.

No, I didn’t have to buy anything for this experiment. Here is a picture of my specialty flour cupboard. Standard flours (AP, bread, whole wheat, pumpernickel,) are kept in a separate storage unit.

Caraway Rye Bread KAB

https://www.kingarthurbaking.com/recipes/caraway-rye-bread-recipe
INGREDIENTS
• 1 cup (227g) lukewarm water
• 1 cup (106g) white rye, medium rye, or pumpernickel flour
• 4 teaspoons (14g) sugar
• 2 1/4 teaspoons instant yeast
• 1/2 cup (113g) sour cream (low-fat is fine; please don’t use nonfat)
• 1 to 2 tablespoons (7g to 14g) caraway seeds, to taste
• 1 1/2 teaspoons salt
• 2 1/3 cups (280g) King Arthur Unbleached All-Purpose Flour or First Clear Flour
• 3 tablespoons (25g) vital wheat gluten or rye bread improver, optional, for best rise

METHOD

  1. In a medium-sized mixing bowl or the bowl of your stand mixer, combine the water, sugar, rye flour and yeast, mixing to form a soft batter. Let the mixture rest for 20 minutes; this allows the rye flour to absorb some of the liquid, making the dough easier to knead.
  2. Add the remaining ingredients, and mix and knead the dough together — by hand, mixer or bread machine — until it’s fairly smooth. The nature of rye dough is to be sticky, so don’t be tempted to add too much flour.
  3. Place the dough in an oiled bowl or large (8-cup) measure, cover, and let it rise until noticeably puffy, 60 to 90 minutes.
  4. Gently deflate the dough, knead it briefly, and shape it into two smooth oval or round loaves; or one long oval loaf. Place them on a lightly greased or parchment-lined baking sheet.
  5. Cover the loaves, and let them rise until they’re noticeably puffy, about 90 minutes. Towards the end of the rise, preheat the oven to 350°F.
  6. Just before they go into the oven, spritz the loaves with water, and slash them about 1/2″ deep. The oval loaves look good with one long, vertical slash; the rounds, with two or three shorter slashes across the top.
  7. Bake the loaves for 35 to 40 minutes, or until an instant-read thermometer inserted into the center reads 205°F to 210°F. The single, larger loaf will bake for 45 to 50 minutes. If the bread appears to be browning too quickly, tent it lightly with foil after 25 minutes of baking.
  8. Remove the loaves from the oven, and transfer them to a rack. While still warm, brush them with melted butter, if desired; this will keep their crust soft.

A Short Stay at The Parker House

I am sure most of you are experts at making and baking Parker House Rolls, but I saw a recipe from KAB a week before Thanksgiving and thought I would give them a try.

Making the enriched dough is pretty standard, although this recipe calls for 50g of potato flour. Substituted in any yeast bread potato flour increases the moisture content. Along with the egg and milk this results in a smoother enriched dough than you would expect from 55% hydration bread. (100* weight liquid/weight flour.)

Forming the rolls is what makes the Parker House Rolls distinctive. The dough is rolled out, folded and cut into 3” portions. (See METHOD below for exact steps.) Butter painted onto the inside of the rolled dough, plus the additional butter coating the finished product after baking makes these moist, tender and very buttery. Easy to do and delicious.

Parker House Rolls

INGREDIENTS
• 3 cups (361g) King Arthur Unbleached All-Purpose Flour
• 2 ½ teaspoons instant yeast
• 3 tablespoons (39g) sugar
• 1 ¼ teaspoons salt
• ¼ cup (50g) potato flour or 3/4 cup (50g) dried potato flakes
• 3 tablespoons (43g) butter
• 1 cup (227g) milk
• 1 large egg
• 3 ½ to 4 tablespoons (50g to 57g) butter, melted; for brushing on rolls

METHOD

  1. In a large mixing bowl, or in the bowl of an electric mixer, combine all of the ingredients (except the 3 ½ to 4 tablespoons (50 to 57g) melted butter at the end), mixing to form a shaggy dough. Note: to speed the rising process, whisk together the milk and egg, and heat gently just enough to remove the refrigerator chill; then add to the remaining ingredients.
  2. Knead the dough, by hand (10 minutes) or by machine (7 to 8 minutes) until it’s smooth.
  3. Place the dough in a lightly greased bowl or 8-cup measure (so you can track its rising progress). Allow it to rise for 90 minutes; it’ll become quite puffy, though it probably won’t double in bulk. Note that the dough takes quite awhile to get going; after 1 hour, it may seem like it’s barely expanded at all. But during the last half hour, it rises more quickly.
  4. Transfer the dough to a lightly greased work surface. Divide it in half. Working with one half at a time, roll or pat the dough into an 8″ x 12″ rectangle.
  5. Brush the dough all over with a light coating of the melted butter. You’ll have butter left over; you’ll need it for the other half of the dough, as well as for brushing on top of the baked rolls.
  6. Cut the dough in half lengthwise, to make two 4″ x 12″ rectangles. Working with one rectangle at a time, fold it lengthwise to about ½” of the other edge, so the bottom edge sticks out about ½” beyond the top edge. You’ll now have a rectangle that’s about 2 ¼ ” x 12″. Repeat with the other piece of dough.
  7. Cut each of the rectangles crosswise into four 3″ pieces, making a total of 8 folded rolls, each about 2 ¼” x 3″. Flip the rolls over (so that their smooth non-folded side is facing up), and place them in a lightly greased 9″ x 13″ pan. Repeat with the remaining piece of dough, making 16 rolls in all. You’ll arrange 4 rows of 4 in the pan, with the longer side of the rolls going down the longer side of the pan. Gently flatten the rolls to pretty much cover the bottom of the pan.
  8. Cover the pan, and let the rolls rise for about 45 minutes to 1 hour, until they’re puffy but definitely not doubled. Towards the end of the rising time, preheat the oven to 350°F.
  9. Bake the rolls for 20 to 25 minutes, until they’re golden brown and feel set.
  10. Remove them from the oven, and brush with the remaining melted butter. Pull them apart to serve.

Hint ‘O Banana Soft Bread

I saw a video for this bread on Cookist. I found a recipe and a comment at the bottom said it was not very bananaee (my word) and they were correct. Hence, Hint ‘O Banana. It is a very nice soft loaf and easy to make. I am wondering if I upped the amount of banana in the dough if it would increase the bananaee flavor. It really is a good bread just the way it is, but if you were expecting overwhelming banana flavor, like in a traditional banana bread, you will be disappointed. Definitely NOT your, your Mama’s or your Grammies’ banana bread!

The bread has a very mild banana flavor. I wish I weighed the banana before mashing it into the dough. It was a small one. Next time I will try two small ones or one large one and adjust other liquids. I think I will modify the method to incorporate a tangzhong. Stay tuned.

Banana Bread Loaf

INGREDIENTS
• 350 g Bread Flour
• 30 g Caster Sugar
• 1 tsp salt
• 2 Tbl Milk Powder
• 1 very ripe banana
• 1 egg
• 70 ml milk
• ½ tsp yeast
• 40 g unsalted butter, cubed.

METHOD

  1. Sift flour into mixing bowl of stand mixer and add dry ingredients and mix
  2. Mash banana and add to mixing bowl
  3. Whisk egg and milk together then add to bowl
  4. Add yeast
  5. Mix on medium with dough hook until stiff dough is formed. Add additional milk if necessary
  6. Add cubed butter, a piece at a time, continue on mixing speed 2 for 20 min
  7. Knead by hand, form into a ball, tension surface
  8. Let rise, covered for 60 min
  9. Knock down dough, flatten into an oval and divide in half
  10. Flatten, do envelope fold, turn 90 deg and repeat envelope fold
  11. Form into a ball, tension surface
  12. Cover and let rest 15 minutes
  13. Butter bread trays
  14. Roll each ball out about 6-8” long, roll up into a batard, pinch seams and ends closed
  15. Roll under curved fingers slightly to tension. Don’t apply pressure.
  16. Cut into 1” wide pieces, but not all the way through, keeping loaf together Should be about 10 pieces
  17. Pick up carefully and place into bread pan
  18. Cover and let rise 60 minutes
  19. Bake at 350 for 17-20 minutes until internal temp is 195-200F
  20. Coated with melted butter
  21. Loosen bread to release from pan
  22. Tip out and pull apart to enjoy.

Long Chocolate Buns

I saw a picture of an elongated bread roll, like a hot dog roll, but slashed with a lame and the slashes were filled with lemon curd before baking. Well, I couldn’t find the recipe so decided to create my own. This is the first time I have stepped out of my chemist-trained-recipe-following comfort zone.

I also decided, since I don’t really care for lemon curd, I would instead roll chocolate ala pain au chocolat but using an enriched bread dough instead of puff pastry. This was also an excuse to use some of the 11# of chocolate I bought a couple of weeks ago.

The QC department suggested a less bitter chocolate (64% cacao) and sparkling sugar topping (good suggestion.) QC will have to live with 64% as I do have 11 pounds. Manufacturing suggested no chop the chocolate so small. Something the size of chocolate chips should melt fine and be easier to handle.

Chocolate Filled Bread Buns

INGREDIENTS
• 2 teaspoons active dry yeast
• 1 cup barely warm milk
• 3 cups all-purpose flour
• 2 tablespoons butter, melted
• 3 tablespoons sugar
• 1 teaspoons salt
• 2 eggs, one for dough, one for egg wash
• 1 tablespoon orange zest
• 165g, about 1 cup (4-6 ounces) bittersweet chocolate chopped fine (pulse in a food processor)

METHOD

  1. In a large mixing bowl, sprinkle the yeast over the warm milk and let sit for 5 minutes.
  2. Add 2 tablespoons melted butter, sugar, salt, egg, and orange zest. Stir until blended and fragrant.
  3. Add 3 cups of flour and mix until the dough comes together. It will be sticky! On a lightly floured surface knead the dough until soft and elastic (about 8 minutes), adding more flour to keep the dough from sticking if necessary. Do not add too much flour! The dough will become more workable the longer you knead. Or, if you have a standing mixer, knead the dough with the dough attachment for 5-7 minutes, or until elastic.
  4. Transfer the kneaded dough to a lightly oiled bowl. Cover with plastic wrap and a clean kitchen towel. Let the dough rise in a warm area until it doubles in size, about 2 hours.
  5. Punch dough down, divide into 12 equal portions, and shape each portion into a round ball. Flatten into an oval then roll to ¼ “ thick rectangle.
  6. Place a stripe of chocolate ½ “ from long end of rectangle. Roll to cover chocolate and place a second stripe of chocolate. Roll up and seal edges and all seams.
  7. Place rolls a on baking sheet coated lightly with cooking spray. Cover with a kitchen towel and let it rise for another 20 minutes.
  8. Preheat oven to 400 degrees F.
  9. Slash diagonally 4x with lame.
  10. Brush 1 egg wash over the rolls. Sprinkle with coarse sparkling sugar.
  11. Bake for 8-12 minutes or until lightly browned. Serve warm or at room temperature.