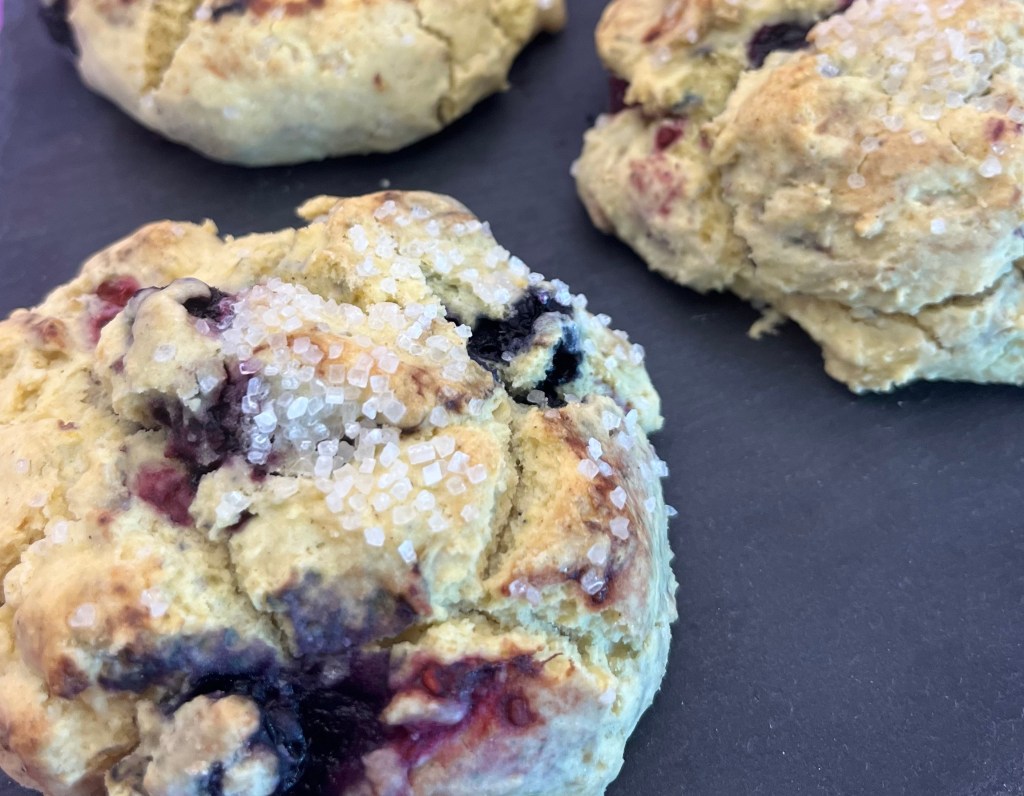
I needed to make some snacks for someone with dietary restrictions. The challenge was to make gluten and dairy free pastries, without sacrificing taste and texture. Severe modifications to my drop berry scones filled the bill.
Replacing regular AP flour with Bob’s Red Mill Gluten Free AP flour, substituting cold cubed Crisco for cold butter and using almond milk instead of whole whipping cream paid the bill in full.
They were delicious, every bit as good as the standard “gluten-y” scones, with comparable texture. While I prefer blueberries for these scones, I have a large bag of Costco frozen mixed fruit (blueberries, raspberries and blackberries) I am trying to use up.
Gluten Free Berry Drop Scones
INGREDIENTS • 2 1/2 cups Bob’s Red Mill Gluten Free AP flour • 1 tablespoon baking powder • 3/4 teaspoon kosher salt • 1/3 cup sugar • Zest of 1 small lemon (I froze the zest of several lemons and take a pinch when needed) • 1/2 cup Crisco chilled and cut into cubes • 150-175g fresh raspberries (about a cup) • 1 cup almond milk • Coarse or turbinado sugar for topping
METHOD
Preheat oven to 400. Line a baking sheet with parchment paper.
In the bowl of a food processor, add the flour, baking powder, salt, sugar and zest. Pulse a few times to incorporate.
Add the cubed Crisco and pulse to incorporate. The mixture should resemble very coarse sand.
Empty the flour mixture into a mixing bowl. Add the almond milk and stir until just barely incorporated.
Gently fold in the berries. It’s fine if the raspberries break up a little – it adds a nice pink stain to the dough. The dough should just be moist, not wet, but also not crumbly or powdery looking. If it looks too dry, add a tablespoon of cold water.
Spoon the dough into 9-12 equally-sized pieces on the parchment lined baking sheet. Sprinkle some coarse or turbinado sugar over the top, if desired.
Bake for 16-19 minutes, rotating the pan halfway through. The scones should be lightly golden and cooked through.
Cool in the pan for 5-10 minutes then carefully remove to a cooling rack.
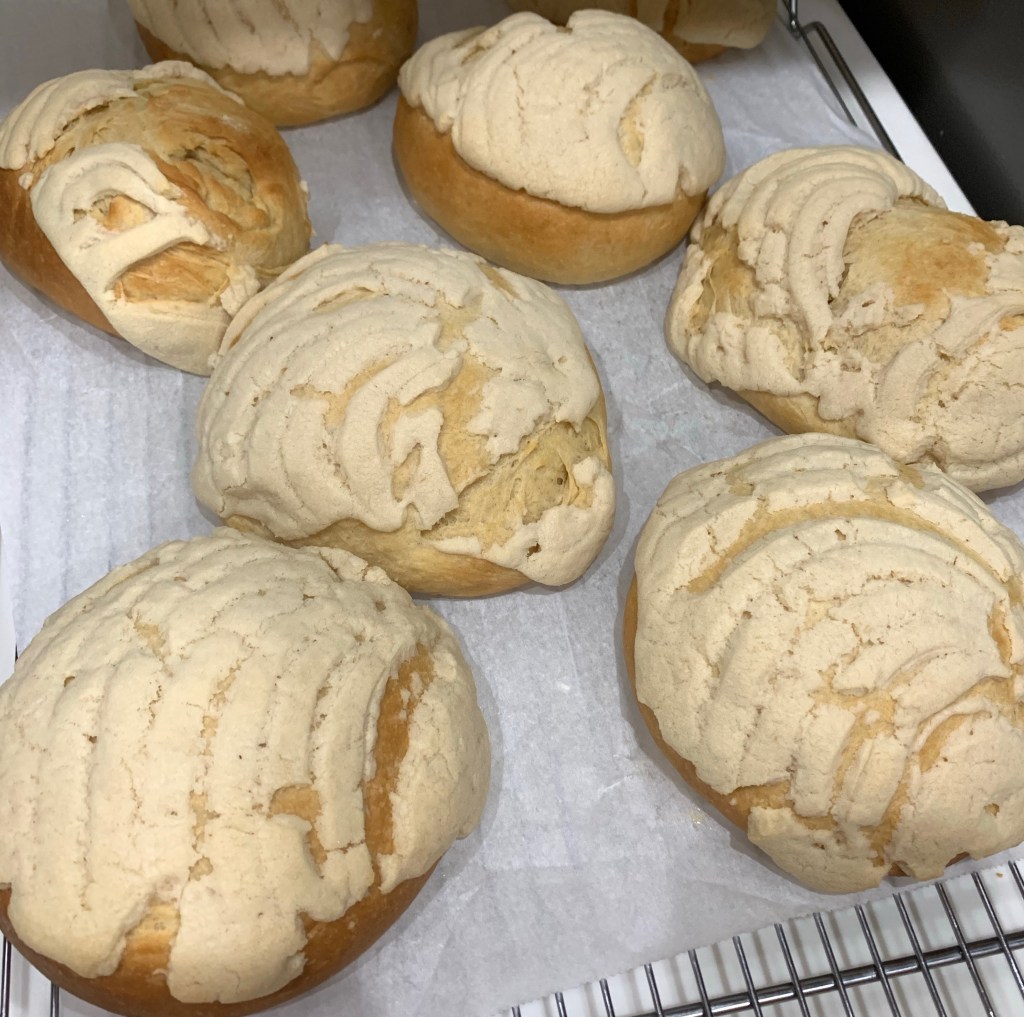
One of my sons asked if I could make conchas as a surprise treat for his wife for Mother’s Day. Of course, I said yes, then searched the internet to see what the hell conchas are. I found three or four recipes that seemed sensible, watched two YouTube videos on technique, then tried two “practice” batches.
The first batch was ok, but the texture was wrong. They were tight crumbed and tough, although the flavor was acceptable. Bear in mind, I had never eaten (or heard of) a concha before this week, but I do know what good bread texture and flavor is. QC reminded me I couldn’t even pronounce “concha” until a friend corrected me. My pronunciation was so off, she didn’t know what I was talking about until I showed her one and she said “Oh! Concha. I love them.” The sugar topping used vegetable shortening rather than butter. The author thought the resultant topping would be less grainy. I liked the ones with butter better.
Do not press the embossing concha press through the topping or it will slide off, even if the tops of the conchas were well buttered.
The second batch was better. I used butter based topping and bread flour rather than AP. The crumb still wasn’t acceptable but the flavor remained good. QC thought they needed a little more cinnamon so in the final batch I doubled the cinnamon from one-half to a full teaspoon.
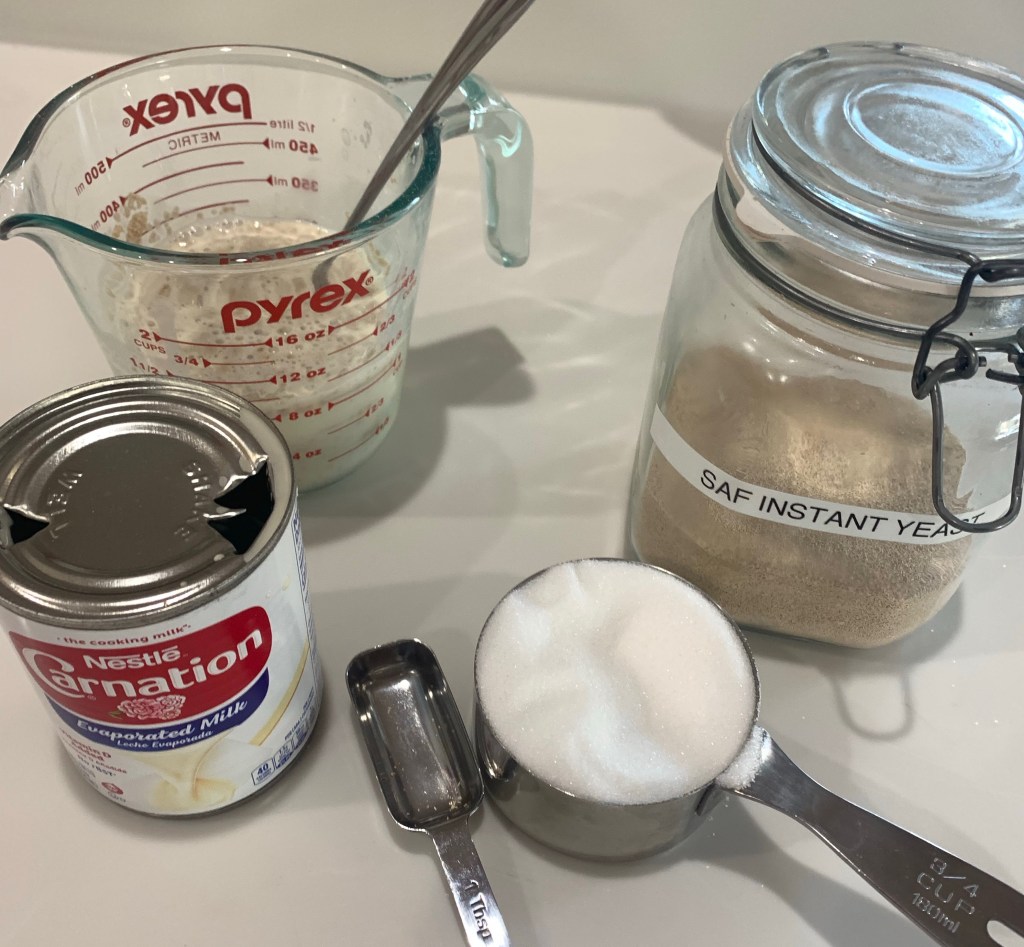
Ingredients for yeast conditioner
If you make conchas do not over knead the dough. It will be, and should be, very slack,. Proof in a warm, dry, draft free environment. I did as one of the authors recommended, when I started, I turned one of my ovens to “Proof” then just before putting in the dough, turned it off. If you don’t have a proofing oven, just put the light on and leave it on. Proof this way for exactly two hours.
I changed how the topping was formed. After rolling, pressing and buttering the dough balls I rolled the topping out between two sheets of parchment paper, then chose a round cookie cutter the same size as the flattened dough balls. This worked much better than using my hands to flatten the topping into disks to put on the buttered dough balls. Trust me on this.
Conchas Mexicanas Pan Dulce
INGREDIENTS: (Makes about 8-12 conchas it all depends on how large you want them. 10 conchas will be about five inches diameter each.)
TOPPING: • 1 cup AP flour • 1 cup powder sugar • 8 tbsp unsalted butter at room temp • 1 tbsp vanilla • (Optional To add chocolate flavor add 1 -2 tsp Hershey’s cocoa)
METHOD
DOUGH
If you have a “proof” setting on your oven turn it on now. If not, turn on the oven light to create a warm environment
Heat evaporated milk for 30 sec in microwave
Add 1 Tbl of the ¾ c sugar and 1 Tbl yeast to the warm milk, mix thoroughly and let sit for 5-10 min
Sift flour, sugar, and cinnamon into the bowl of a stand mixer and mix until well combined
Add room temperature (soft) butter, vanilla, and yeast/sugar/evaporated milk mixture to the dry ingredients
Add eggs on at a time start timer for 10 minutes
After 5 minutes add salt and continue kneading
Coat bowl with a light coating of cooking spray, form dough into a ball and cover.
If you turned ON the proof setting turn the oven OFF now
Place covered bowl into your OFF oven with the oven light on and set timer for 2 hours
TOPPING – (Make the topping after the dough had proofed for 1 ¾ hours to keep it fresher and more pliable)
Sift powdered sugar and flour into a medium sized bowl
Add room temperature butter and vanilla and mix into a smooth paste. (I found it easiest to “knead” with my hands.)
If you are flavoring the topping add the cocoa now and mix thoroughly. You can divide the topping and only flavor half)
Wrap tightly in plastic.
ASSEMBLY
Line baking sheet with parchment paper.
Pour dough onto a very lightly floured surface and form into a log
Divide the dough into the number of conchas desired. (8 conchas will be about 5-6” diameter.)
Roll each portion by cupping your hand over the portion and rolling on the table until the little dimple on the bottom disappears. (You may need to pinch the dimple together)
Place the portions on the parchment lined baking sheet.
Rub butter on each roll covering the entire surface
Divide the topping into the same number of conchas
Place each topping portion into a ball then roll between parchment paper sheets to about 1/8” thickness
Cut flattened topping with a round cookie cutter just larger than the diameter of the dough ball
Place a disk of topping on each dough ball and press down firmly. (some people recommend pinching the edge of the topping and dough together .)
Use a concha cutter (or knife) to emboss the traditional “shell” pattern being sure not to cut all the way through the topping.
Preheat oven to 325 F.
Cover concha’s and let rest 30-45 minutes
Bake 15-20 minutes, until bottom is light brown. Don’t be surprised if it requires 28-30 minutes for the bottoms to brown.
While I was waiting for other items to mix/chill/rise/etc I made a few other items this morning.
We were nearly out of bread (amazing.) I made a loaf of my honey high-hydration no-knead bread. This may be the prettiest loaf I have made. The slashes on top were well defined and kept the bread from blowing out anywhere else.
Oh, by the way, there are three-berry scones in the background. I like to freeze them, then on golf days take them from the freezer and snack on them on the course. They don’t seem to help my game, but do make it more enjoyable.
This time, I made the scones bigger than usual. I used some frozen berries we had (ever frugal) and had trouble incorporating them into the dough. They ended up being delicious!
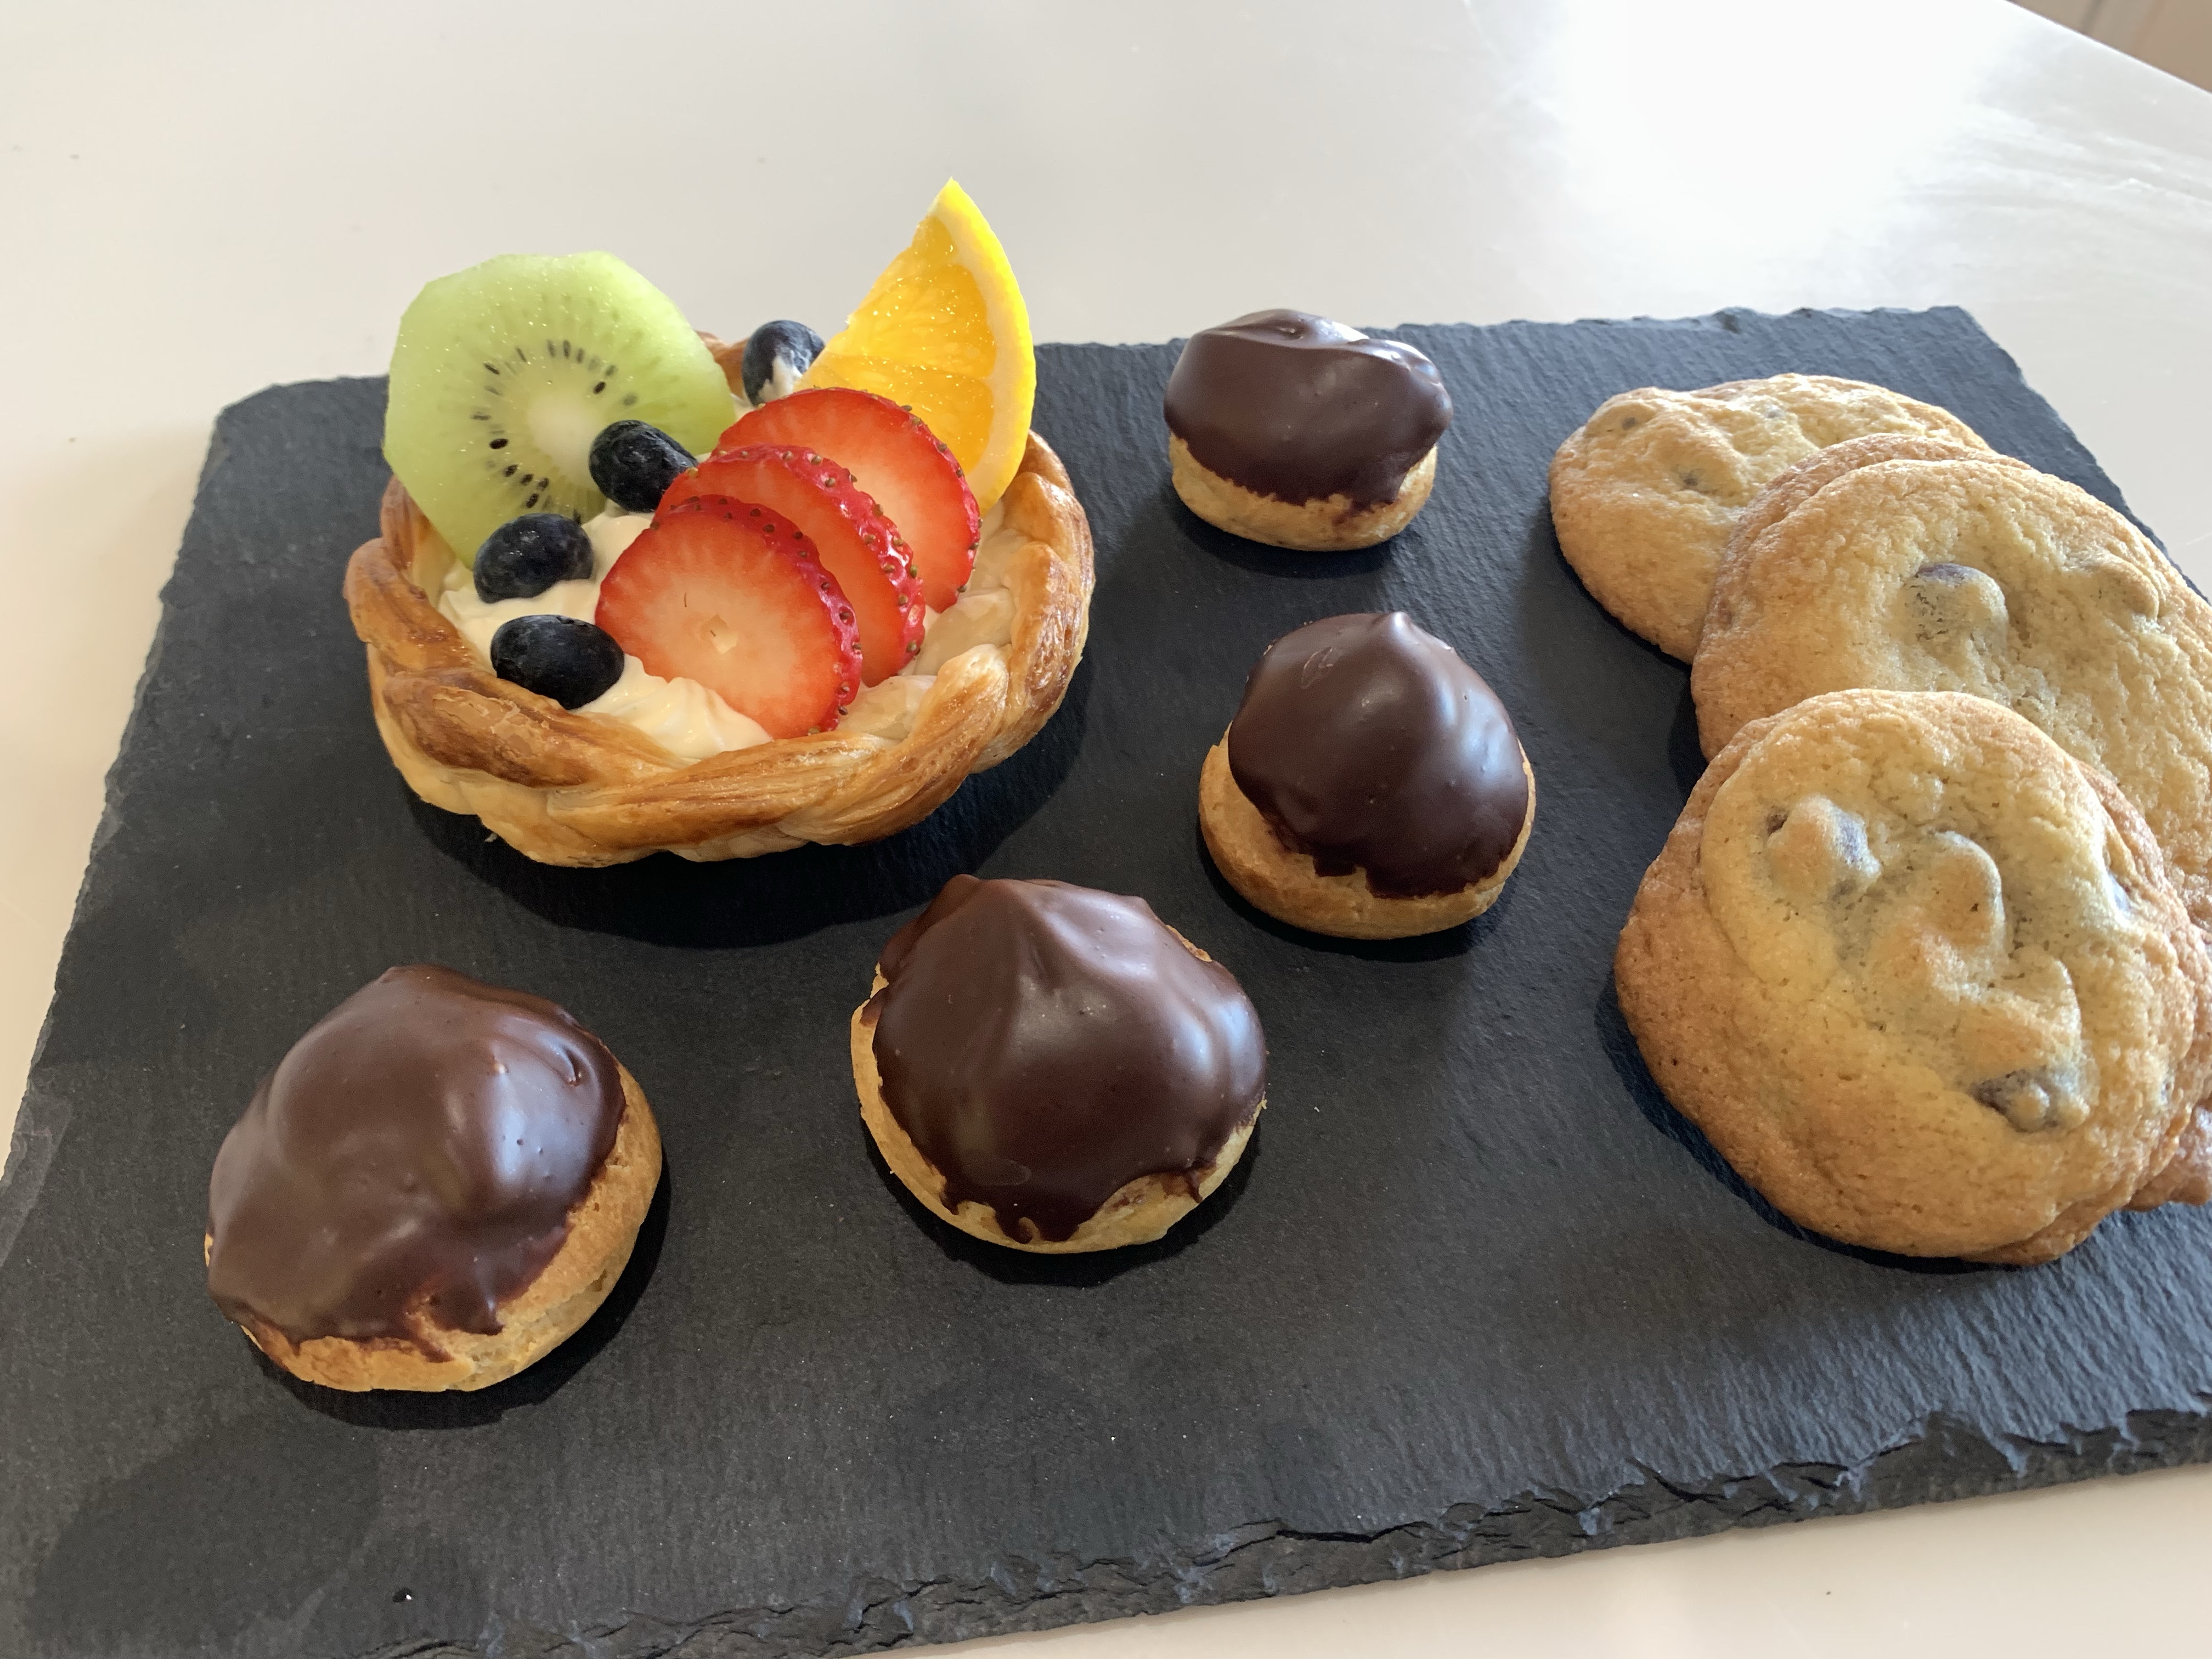
Ok, so I made fruit tarts in braided tart shells. Should the title be Braided Tarts with Fruit, or Fruit Braided Tarts, or Braided Fruit Tarts? Reminds me of Eats, Shoots and Leaves.
Did I fail to mention I had some frozen choux pastry, and as creme diplomat is made with creme patisserie which when piped inside choux and coated with chocolate makes profiteroles and as long as the oven was hot, decided to add some frozen chocolate chip cookies to conserve energy?
QC had the day off and was out with some friends, leaving me home alone, heh, heh, heh. What to do, oh what to do?
There were braided tart shells in the freezer and I recently bought a kiwi and picked an orange from my neighbor’s tree. I promised a couple of friends I would make them some fruit tarts when everything came together and yesterday all the stars aligned.
First freshen the frozen tart shells (notice the braided sides) in the over at 400F for 5-8 minutes, then an additional 5 minutes at 320F.
Peel and cut the kiwi into thin slices and slice the orange and strawberries.
Make the Crème Diplomat and pipe into the cool shells, add the fruit in your best imitation of a pretty pattern. Sprinkle a few blueberries around the other fruit for color.
Serve as soon as possible as the Crème Diplomat will deflate fairly quickly.
A good, quiet “me” day.
Crème Diplomat
INGREDIENTS • ½c sugar • ¼c corn starch • Pinch salt • 2 c whole milk • 4 egg yolks • 2 Tbl butter • 2 cups heavy cream, cold
METHOD
Whisk eggs and milk together and add to all other ingredients (except vanilla) to a medium saucepan.
Bring to boil whisking constantly
Cook until thickened (it will look lumpy, its ok)
Sieve lumpy mixture into a bowl and add 1 tsp vanilla, mix thoroughly
When incorporated, cover with plastic directly on the cream and cool about an hour.
Whip the cold heavy cream to medium peaks.
Fold a few spoonfuls of the custard into the cream. Gradually add the rest of the custard, being careful to not knock the air out.
Notes
You can make the custard or creme patisserie ahead of time, it will keep for a few days in an airtight container in the fridge. However, I would not add the whipped cream until you were ready to serve it. It is best served immediately.
Mix crème patisserie 1::1 with whipped cream if making crème patisserie in advance,
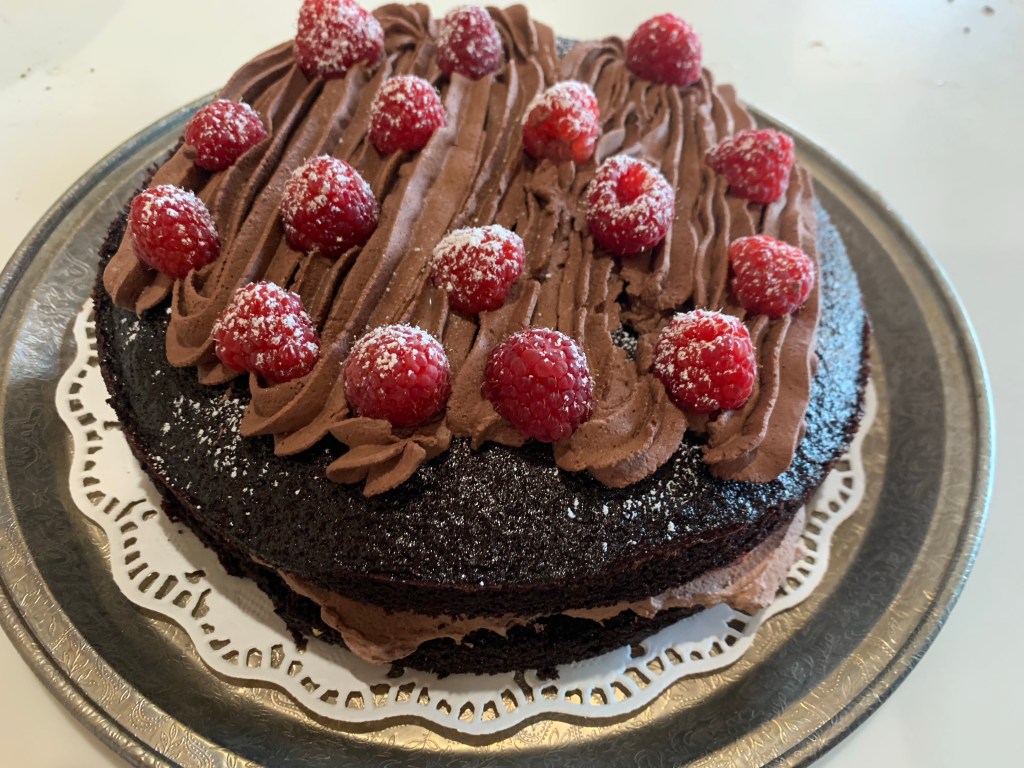
I saw a picture of a chocolate – raspberry torte on King Arthur Baking’s website. With no hesitation I thought, “I am so making that.” However, my extreme chocolate cake cannot be beat and basic chocolate whipped cream is a piece of cake. (Well, sometimes cake, but this time torte.)
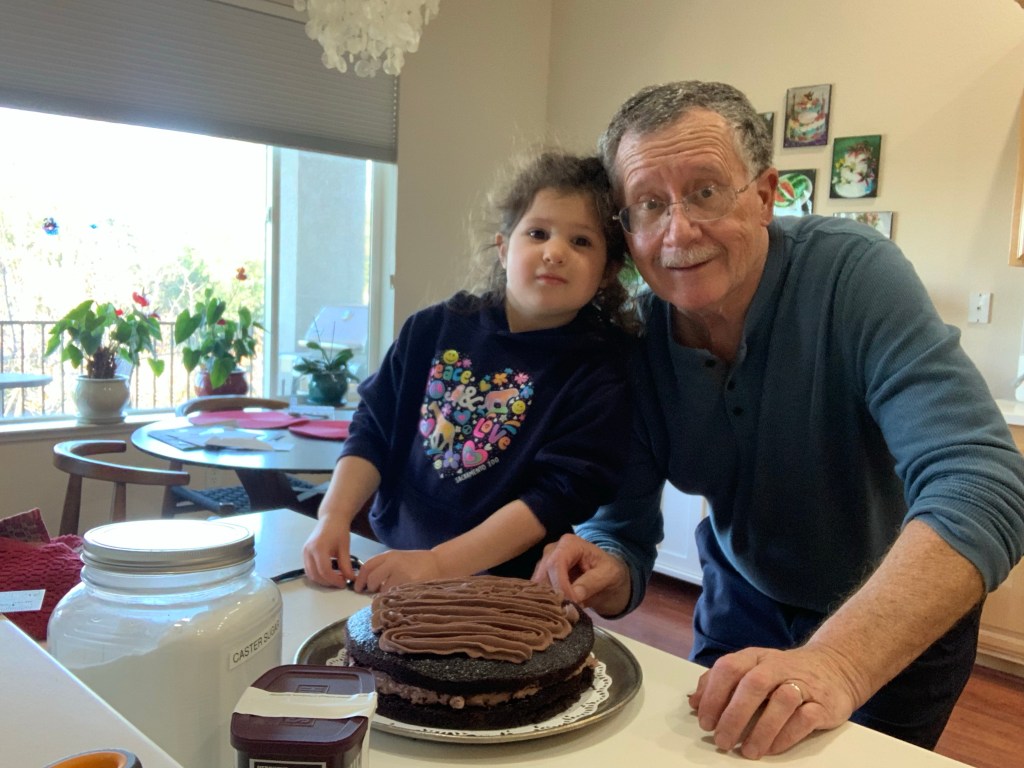
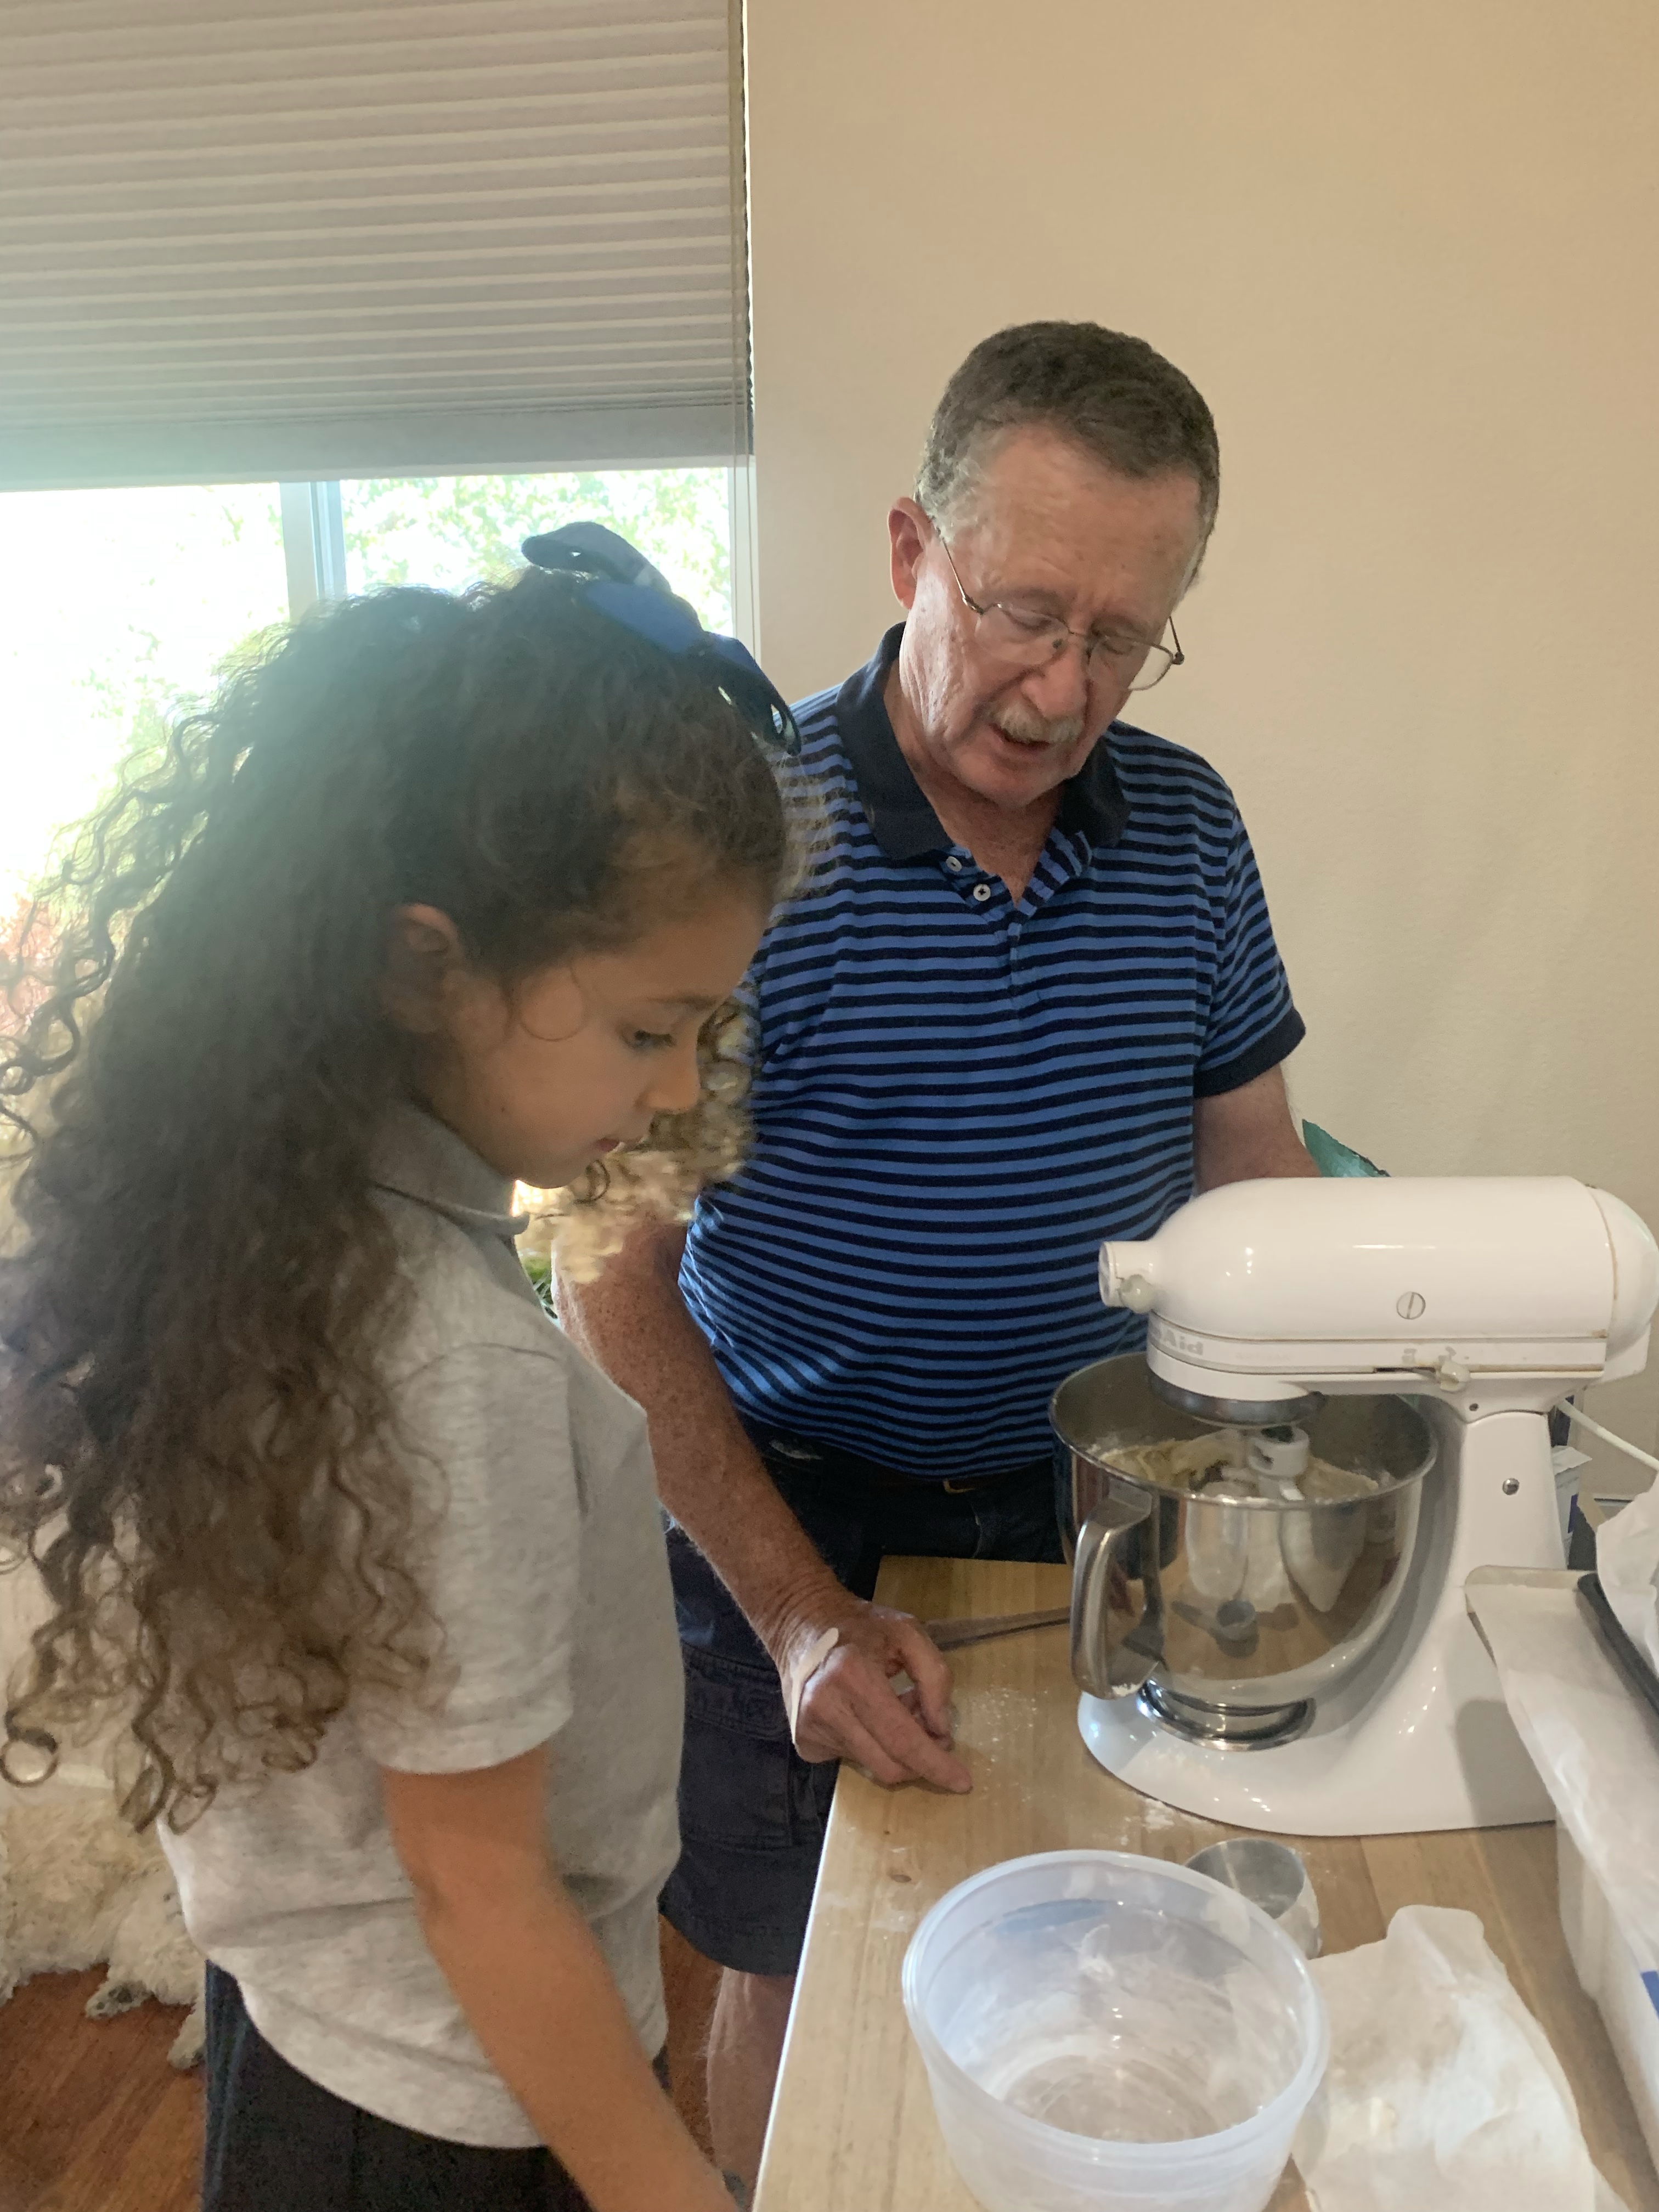
I made the cake and placed both 9” layers in the freezer, one to chill, the other to freeze until needed sometime in the future. Once chilled I sliced one layer in half. I used the toothpick and floss method, something I showed my 3 year old granddaughter today. She had never seen that before (no big surprise, after all she is only 3) but I am sure she will not forget it. That girl forgets nothing!
She and I then whipped up some chocolate whip cream, spread half over the top of the lower layer and spread about 4 oz of raspberries randomly around the cake. Be sure the whipped cream is thick enough so you can bury the raspberries.
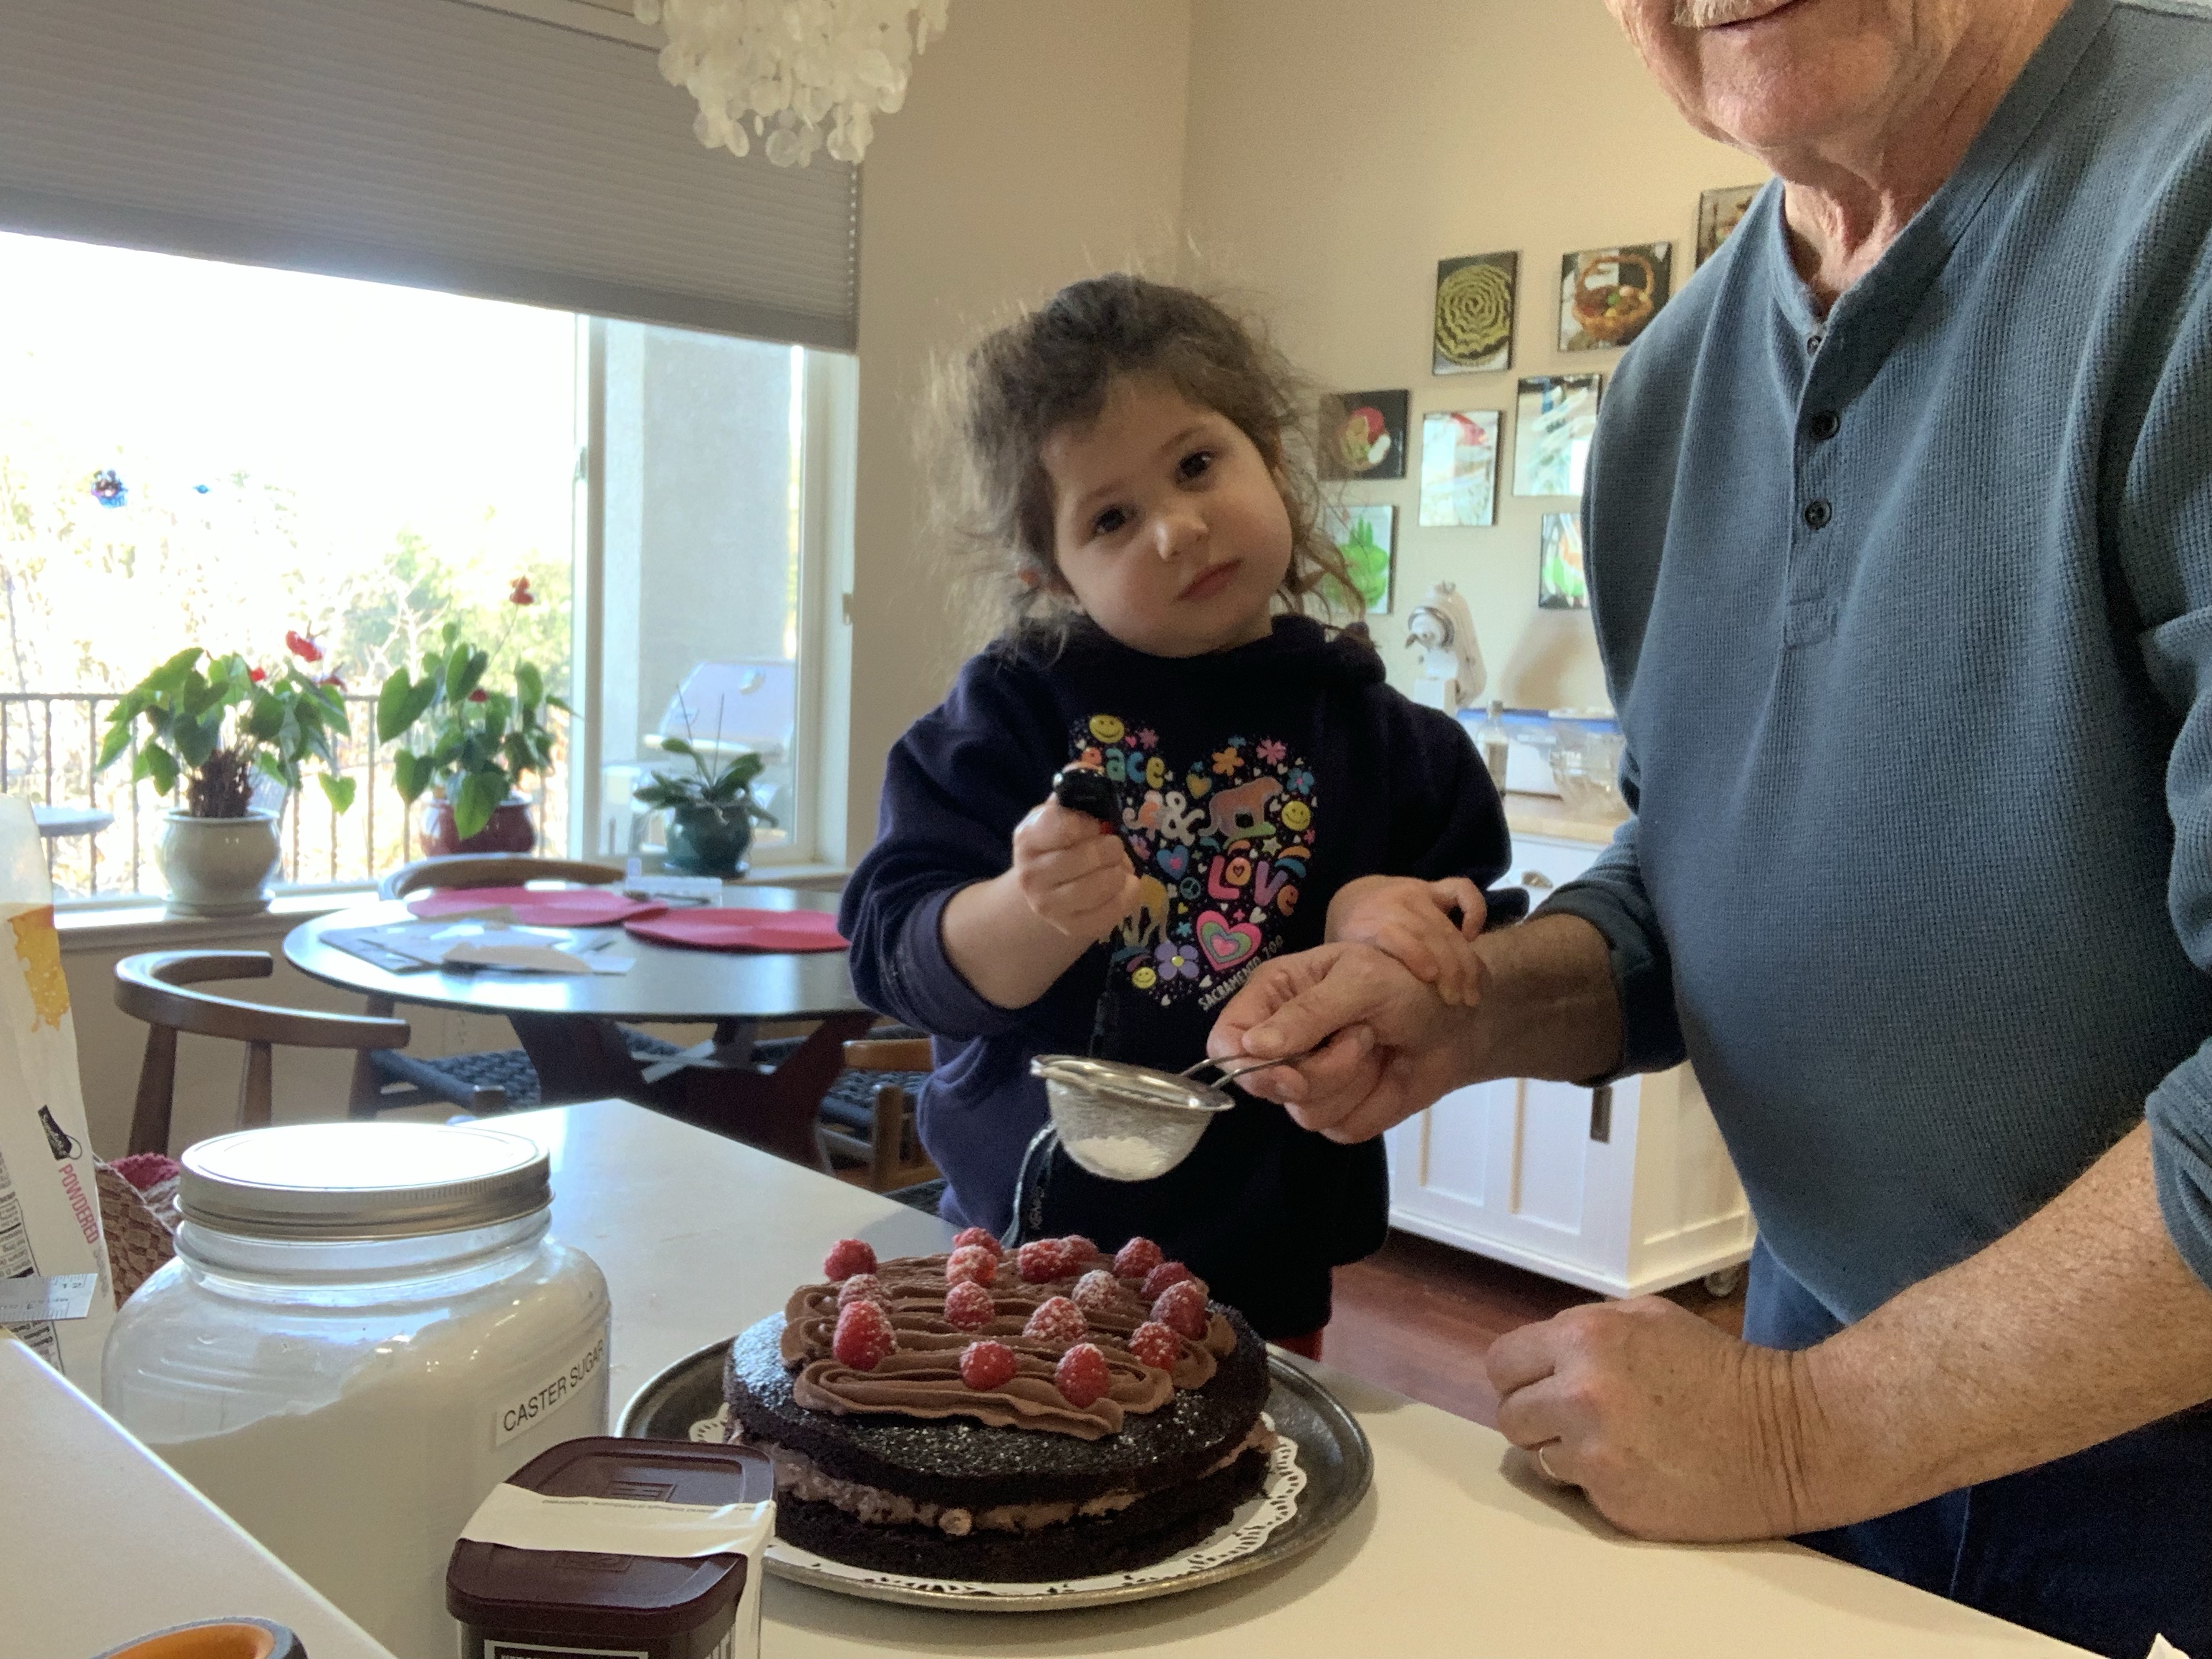
Place the second layer of cake over the first and (we piped, KAF spread,) whipped cream over the top, adding the rest of the raspberries. KAF suggested dusting with cocoa, we decided to use powered sugar. I used 6 oz raspberries total.
Chocolate Whipped Cream
INGREDIENTS
454 g (2 Cups) Milk
56 g (4 Tbl) Caster Sugar
20 g (4 Tbl) Special Dark Cocoa
1 Tsp Vanilla
METHOD
Chill mixing bowl and whisk in the freezer for 30 minutes.
Add milk to mixing bowl and whip to soft peaks
Slowly add caster sugar until firm peaks
Add cocoa, but start the mixer slowly to keep the cocoa from flying all over.
Increase the mixer speed to form stiff peaks and assure the cocoa is fully incorporated.
I wanted to try a new recipe for blueberry muffins that purported to yield soft, moist, not dense muffins. I also had some new ‘tulip’ muffin papers to try. These were advertised to not need a muffin pan (read that as one less pan to wash.) In use, the papers were too thin, therefore too flimsy to not need the support of a muffin pan.
The papers would have been good had I squeezed them into a pan small enough to help them maintain a round shape. They weren’t bad, but not perfect. Perhaps a heavier paper, or using 2 or 3 of them to make the papers stiffer? On the positive side they did not leak resulting in a clean pan which require no washing.
The recipe was very good. The muffins were not stodgy, rather were moist, soft and just a bit crumbly. Nearly perfect, or at least very good.
While the oven was hot I also made a batch of apple/raisin ‘scones’. Scones are in quotes as they are un-traditional. I made them in an ring mold pan to force them to rise up the sides rather than spread horizontally. (They did.) The same brown sugar and cinnamon crumble was used on both the scones and muffins. It was a good experiment, but I prefer my standard, traditional drop berry scones topped with sparkling sugar.
I was bored as the scones baked so using Dan’s modified waffle recipe I made a batch of waffles to freeze and nuke for a quick breakfast before an early tee time.
I just cancelled golf for tomorrow due to a forecast 100% chance of 55 degree rain. Now… what to do with another day off? Hmmmm….
Blueberry Muffins
INGREDIENTS Streusel Topping • ½ cup (100g) packed light or dark brown sugar • 1 teaspoon ground cinnamon Muffins • 1¾ cups (220g) all-purpose flour • 1 teaspoon baking soda • 1 teaspoon baking powder • ½ teaspoon salt • ½ cup (115g) room temperature unsalted butter • ½ cup (100g) granulated sugar • ¼ cup (50g) packed light or dark brown sugar • 2 large room temperature eggs • ½ cup (120g) room temperature sour cream or plain/vanilla yogurt • 2 teaspoons pure vanilla extract • ¼ cup (60ml) room temperature milk • 1½ cups (250g) fresh or frozen blueberries METHOD
Preheat oven to 425°F (218°C). Spray a 12-count muffin pan with nonstick spray or use cupcake liners. Grease/line a second pan with 2 liners because this recipe yields about 14 muffins. Set aside.
Mix all of the streusel ingredients together. Set aside.
Whisk the flour, baking soda, baking powder, and salt together in a large bowl. Set aside.
Using a handheld or stand mixer fitted with a paddle or whisk attachment, beat the butter, granulated sugar, and brown sugar together on high speed until smooth and creamy, about 2 minutes. On medium speed, add the eggs one at a time, beating well after each addition. Beat in the sour cream and vanilla extract on medium speed until combined. By hand, add the dry ingredients and milk into the wet ingredients and stir gently, no more than 4 stirs. Gently, fold in the blueberries.
Spoon the batter into liners, filling them all the way to the top. Top each with streusel, gently pressing it down into the surface so it sticks. Bake for 5 minutes at 425 then, keeping the muffins in the oven, reduce the oven temperature to 350°F (177°C). Bake for an additional 18-20 minutes or until the internal temperature reaches 205-210 °F or a toothpick inserted in the center comes out clean. The total time these muffins take in the oven is about 23-25 minutes, give or take. Allow the muffins to cool for 5 minutes in the muffin pan, then transfer to a wire rack to continue cooling.
Muffins stay fresh covered at room temperature for a few days or in the refrigerator for up to 1 week.
Apple/Raisin Ring Scones
INGREDIENTS • 2 1/2 cups all purpose flour • 1 tablespoon baking powder • 3/4 teaspoon kosher salt • 1/3 cup sugar • Zest of 1 small lemon (I used a small mandarin orange) • 1/2 cup unsalted butter, chilled and cut into cubes • 1 cup diced apple • 1/2 cup raisins • 1 cup heavy cream • Brown sugar/cinnamon streusel (see above)
METHOD
Preheat oven to 400. Line a baking sheet with parchment paper.
In the bowl of a food processor, add the flour, baking powder, salt, sugar and zest. Pulse a few times to incorporate.
Add the cubed butter and pulse to incorporate. The mixture should resemble very coarse sand.
Empty the flour mixture into a mixing bowl. Add the cream and stir until just barely incorporated.
Dice the apples leaving the skin. Use the outside of the apple removing a majority of the inside without skin. The skin will add some color to the scone. The dough should just be moist, not wet, but also not crumbly or powdery looking. If it looks too dry, add a tablespoon of cold water.
Add and mix in the diced apple and raisins
Spoon the dough into 6 ring molds sprinkle some streusel over the top, if desired.
Bake for 16-19 minutes, rotating the pan halfway through. The scones should be lightly golden and cooked through.
Cool in the pan for 5-10 minutes then carefully remove to a cooling rack.
This afternoon’s ‘to do’ list contained nothing pressing. Tuesday I hard boiled eggs to include in our dinner salad and to make egg salad Wednesday. Today I baked a loaf of sandwich bread because I love egg salad on fresh baked bread. And as long as I was making bread I decided to replace the hamburger rolls I froze a few weeks ago. (I wasn’t happy with the rise of those whole wheat buns.) Today I mixed a double recipe of bread dough and shaped half into a loaf to bake at 425 deg and the rest into hamburger rolls to be baked at 375 deg.
To make a softer crust I coated the top of the loaf with melted butter before baking (hence the darker crust) and once again after it was baked, but still hot.
I also had a cup of heavy cream to use before it expired, and as long as the oven was on, I dropped the temperature and made some multi berry scones, baked at 400 deg.
Remember the hamburger rolls that baked at 375 deg? Well, as long as the oven was going to be dropped to 375 deg and as long as I had some frozen chocolate chip cookie dough that also bakes at 375 deg, I figured, what the heck.?
I have to find more chores to add to the ‘to do’ list. Today was exhausting.
The best part of the day was participating in the Grandparents Drive-Thru Car Parade at Grace’s school! (Unicorn car. You can’t see the fuzzy pink tail.)
Speaking of Grace, here we are making the aforesaid chocolate chip cookies.
We love shortbread cookies, and we love chocolate. Combining the two is a step from ecstasy. Also, this gave me the excuse… I mean opportunity… to use the hexagonal cookie cutters Fran (aka QC) bought me.
Using hexagonal cutters reduces dough waste as there are no gaps between each cut.
Hexagonal Cookie Cutters with the one used on the lower right.
L: Rolled out, cut dough. R: Cut cookies on baking tray.Shortbread Cookies surrounded by Raspberry Hand Pies.
Shortbread Cookies
INGREDIENTS • 3/4 pound unsalted butter, at room temperature • 1 cup sugar, plus extra for sprinkling • 1 teaspoon pure vanilla extract • 3 ½ cups all-purpose flour • ¼ teaspoon salt • 6 to 7 ounces very good semisweet chocolate, finely chopped
METHOD
Preheat the oven to 350 degrees F.
In the bowl of an electric mixer fitted with a paddle attachment, mix together the butter and 1 cup of sugar until they are just combined. Add the vanilla.
In a medium bowl, sift together the flour and salt, then add them to the butter-and-sugar mixture. Mix on low speed until the dough starts to come together. Dump onto a surface dusted with flour and shape into a flat disk. Wrap in plastic and chill for 30 minutes.
Roll the dough 1/2-inch thick and cut with a 3 by 1-inch finger-shaped cutter. Place the cookies on an ungreased baking sheet and sprinkle with sugar. Bake for 20 to 25 minutes, until the edges begin to brown. Allow to cool to room temperature.
When the cookies are cool, place them on a baking sheet lined with parchment paper. Put 3 ounces of the chocolate in a glass bowl place over a pan of boiling water. Turn the burner down to simmer and heat with stirring until the chocolate is nearly all melted. Stir vigorously until the chocolate is smooth and slightly cooled; stirring makes it glossier.
Drizzle 1/2 of each cookie with just enough chocolate to coat it.
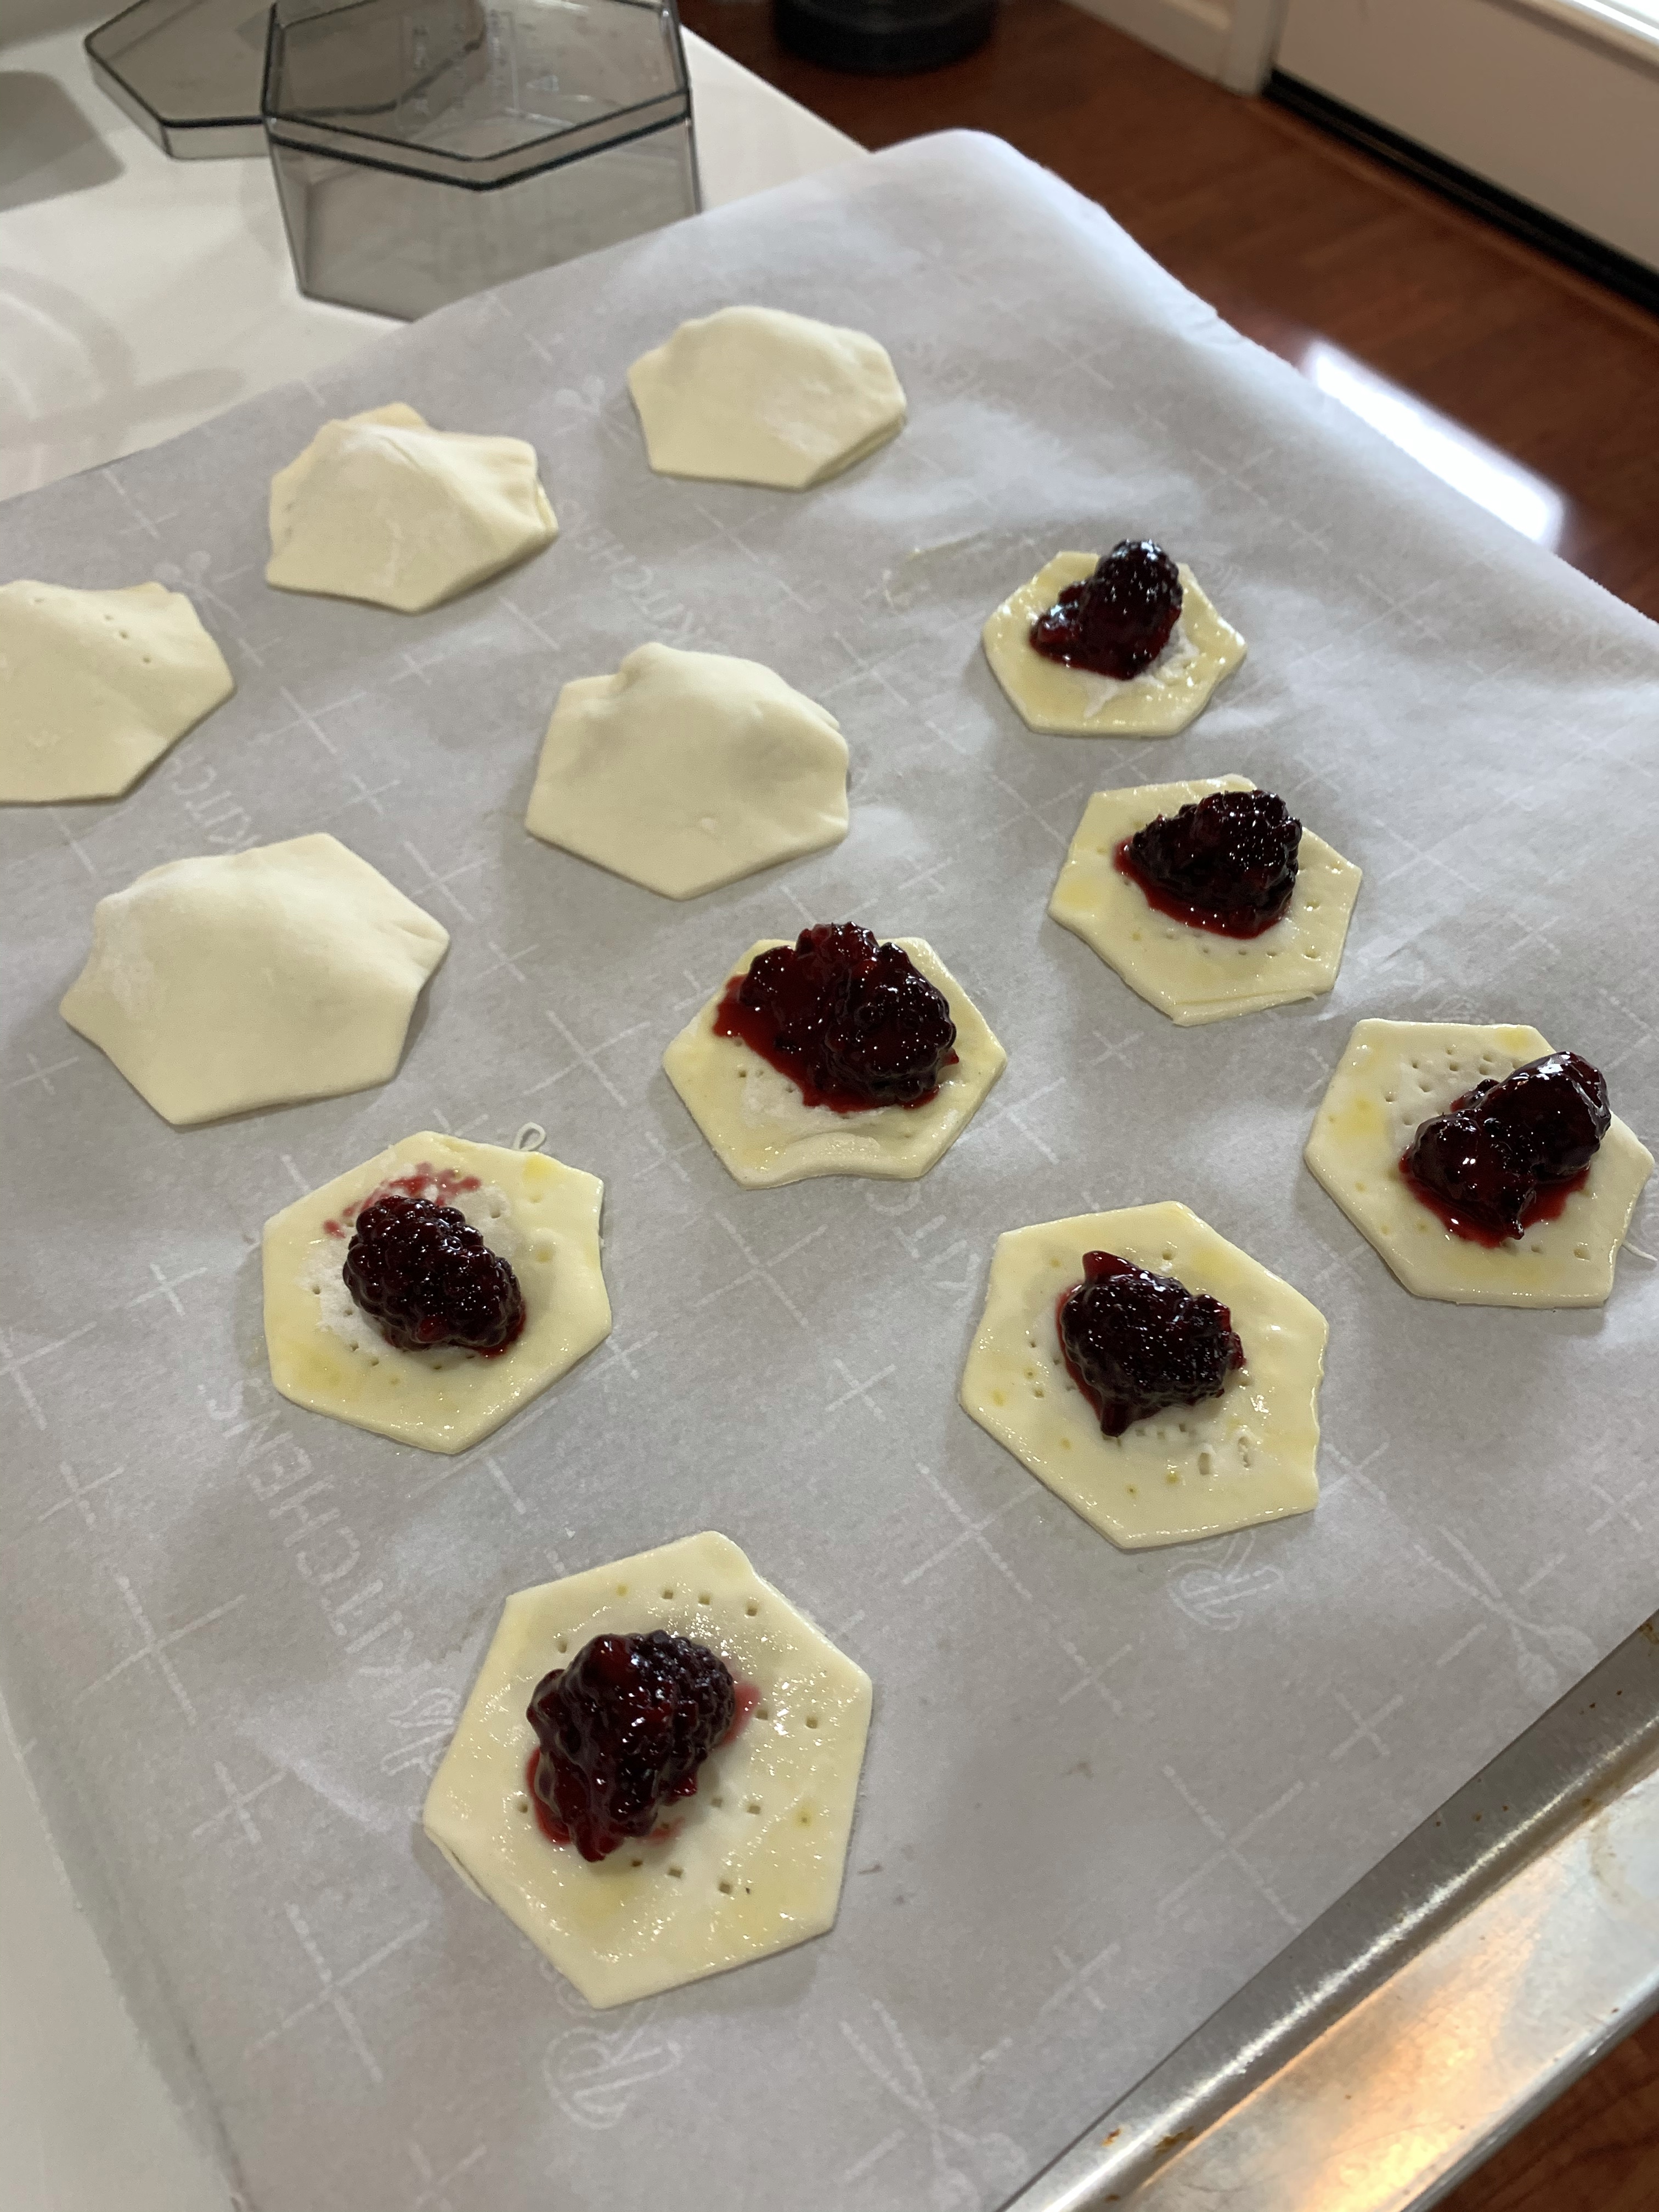
The more important thing is I was able to try out my new hexagonal cookie cutter. I never liked the square, or triangular (folded squares) hand pies. Circular were good, but the space between the circles wasted a lot of puff pastry. The hexagonal cutter was nearly as efficient as cutting squares, but look more like round pies.
My new hexagonal cookie cutters
I used a larger cutter for the top to assure good coverage of the smaller bottom. I docked the bottom piece with a fork to manage the puff of the pastry.
The edges of the covered pies were pinched with the fork, and egg wash painted on, a steam vent cut on the top and sparkling sugar sprinkled on each pie before baking.
We saw this pastry on GBBO. I hadn’t made any complex pastries in a while so thought this would be fun to try. I made a few changes to Prue Leith’s recipe. I used my own recipe for the creme patisserie and choux. The recipe and method below are as I made it.
I also found a new puff pastry I wanted to try. You may know my preferences in puff. Trader Joe’s is good but doesn’t puff as much as Pepperidge Farms. This new one is Wewalka European Bakery Style which seem to have a puff ratio about in the middle. It has good flake an layers. The only problem is they do not recommend freezing it before using.
Choux Dough. Left is to dry while the right has the “V” drip from the beater.
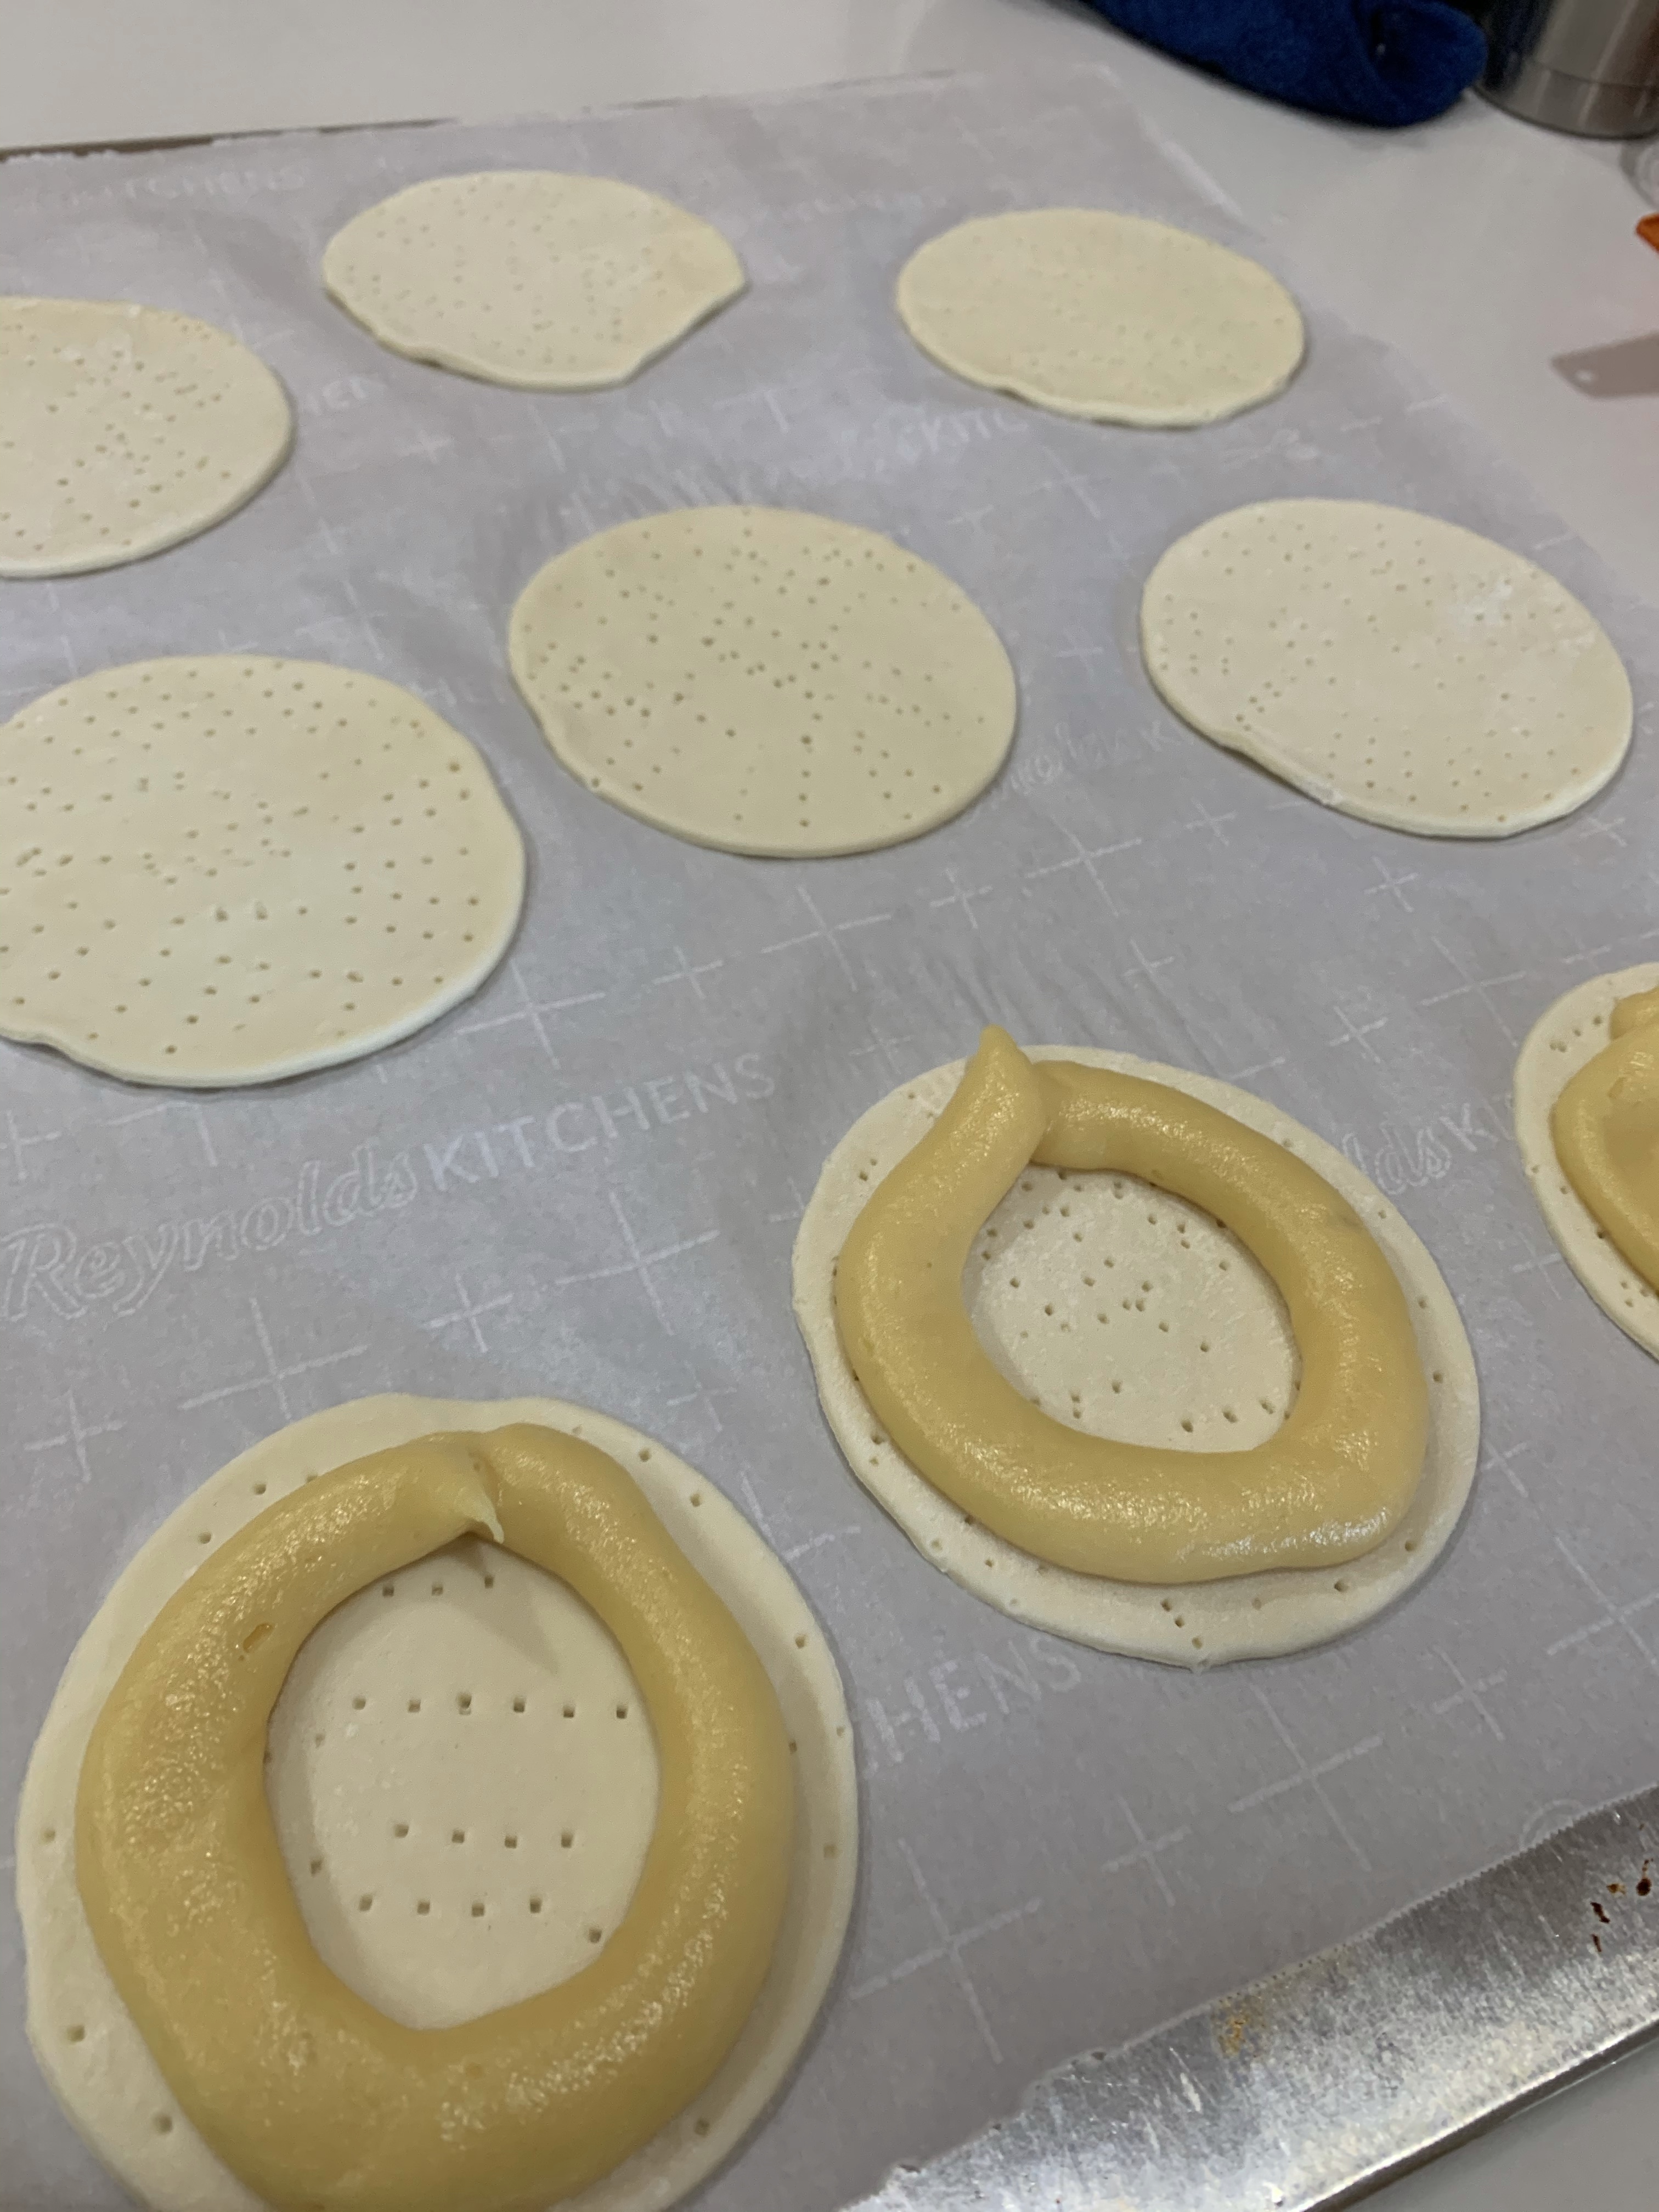
Assembled pastry. Chilled puff pastry disk and piped choux on Left. All piped on Right.
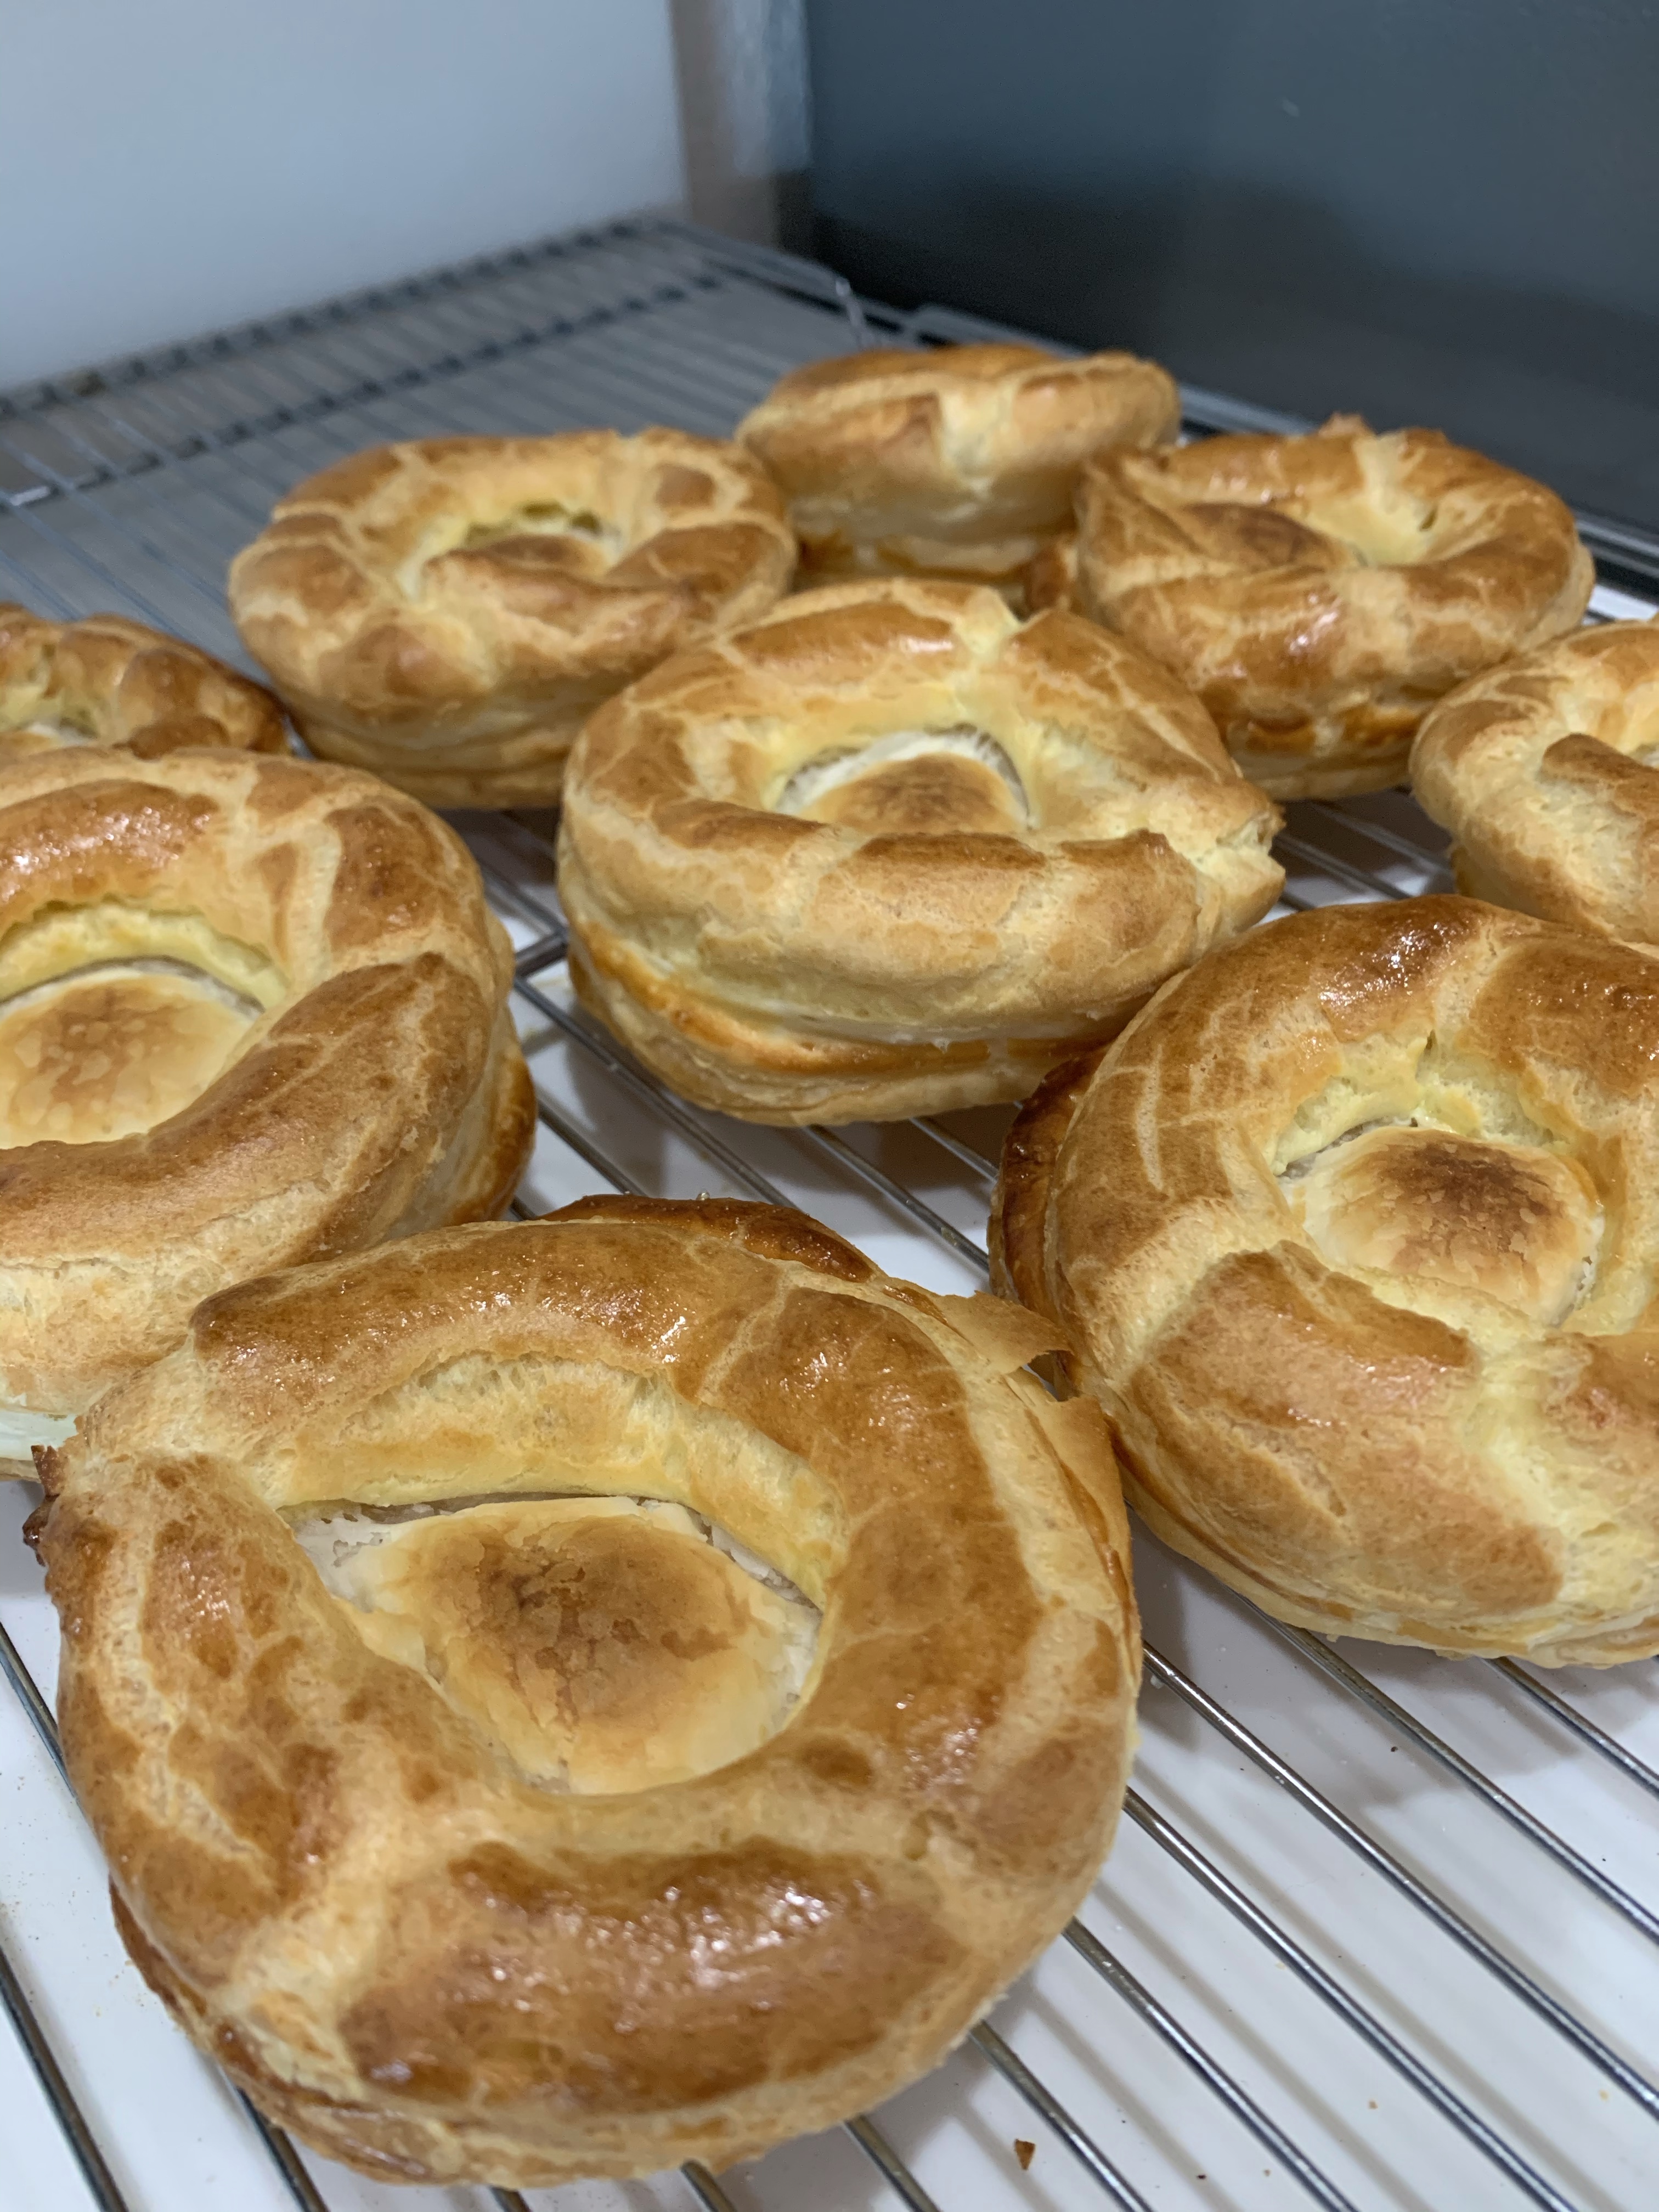
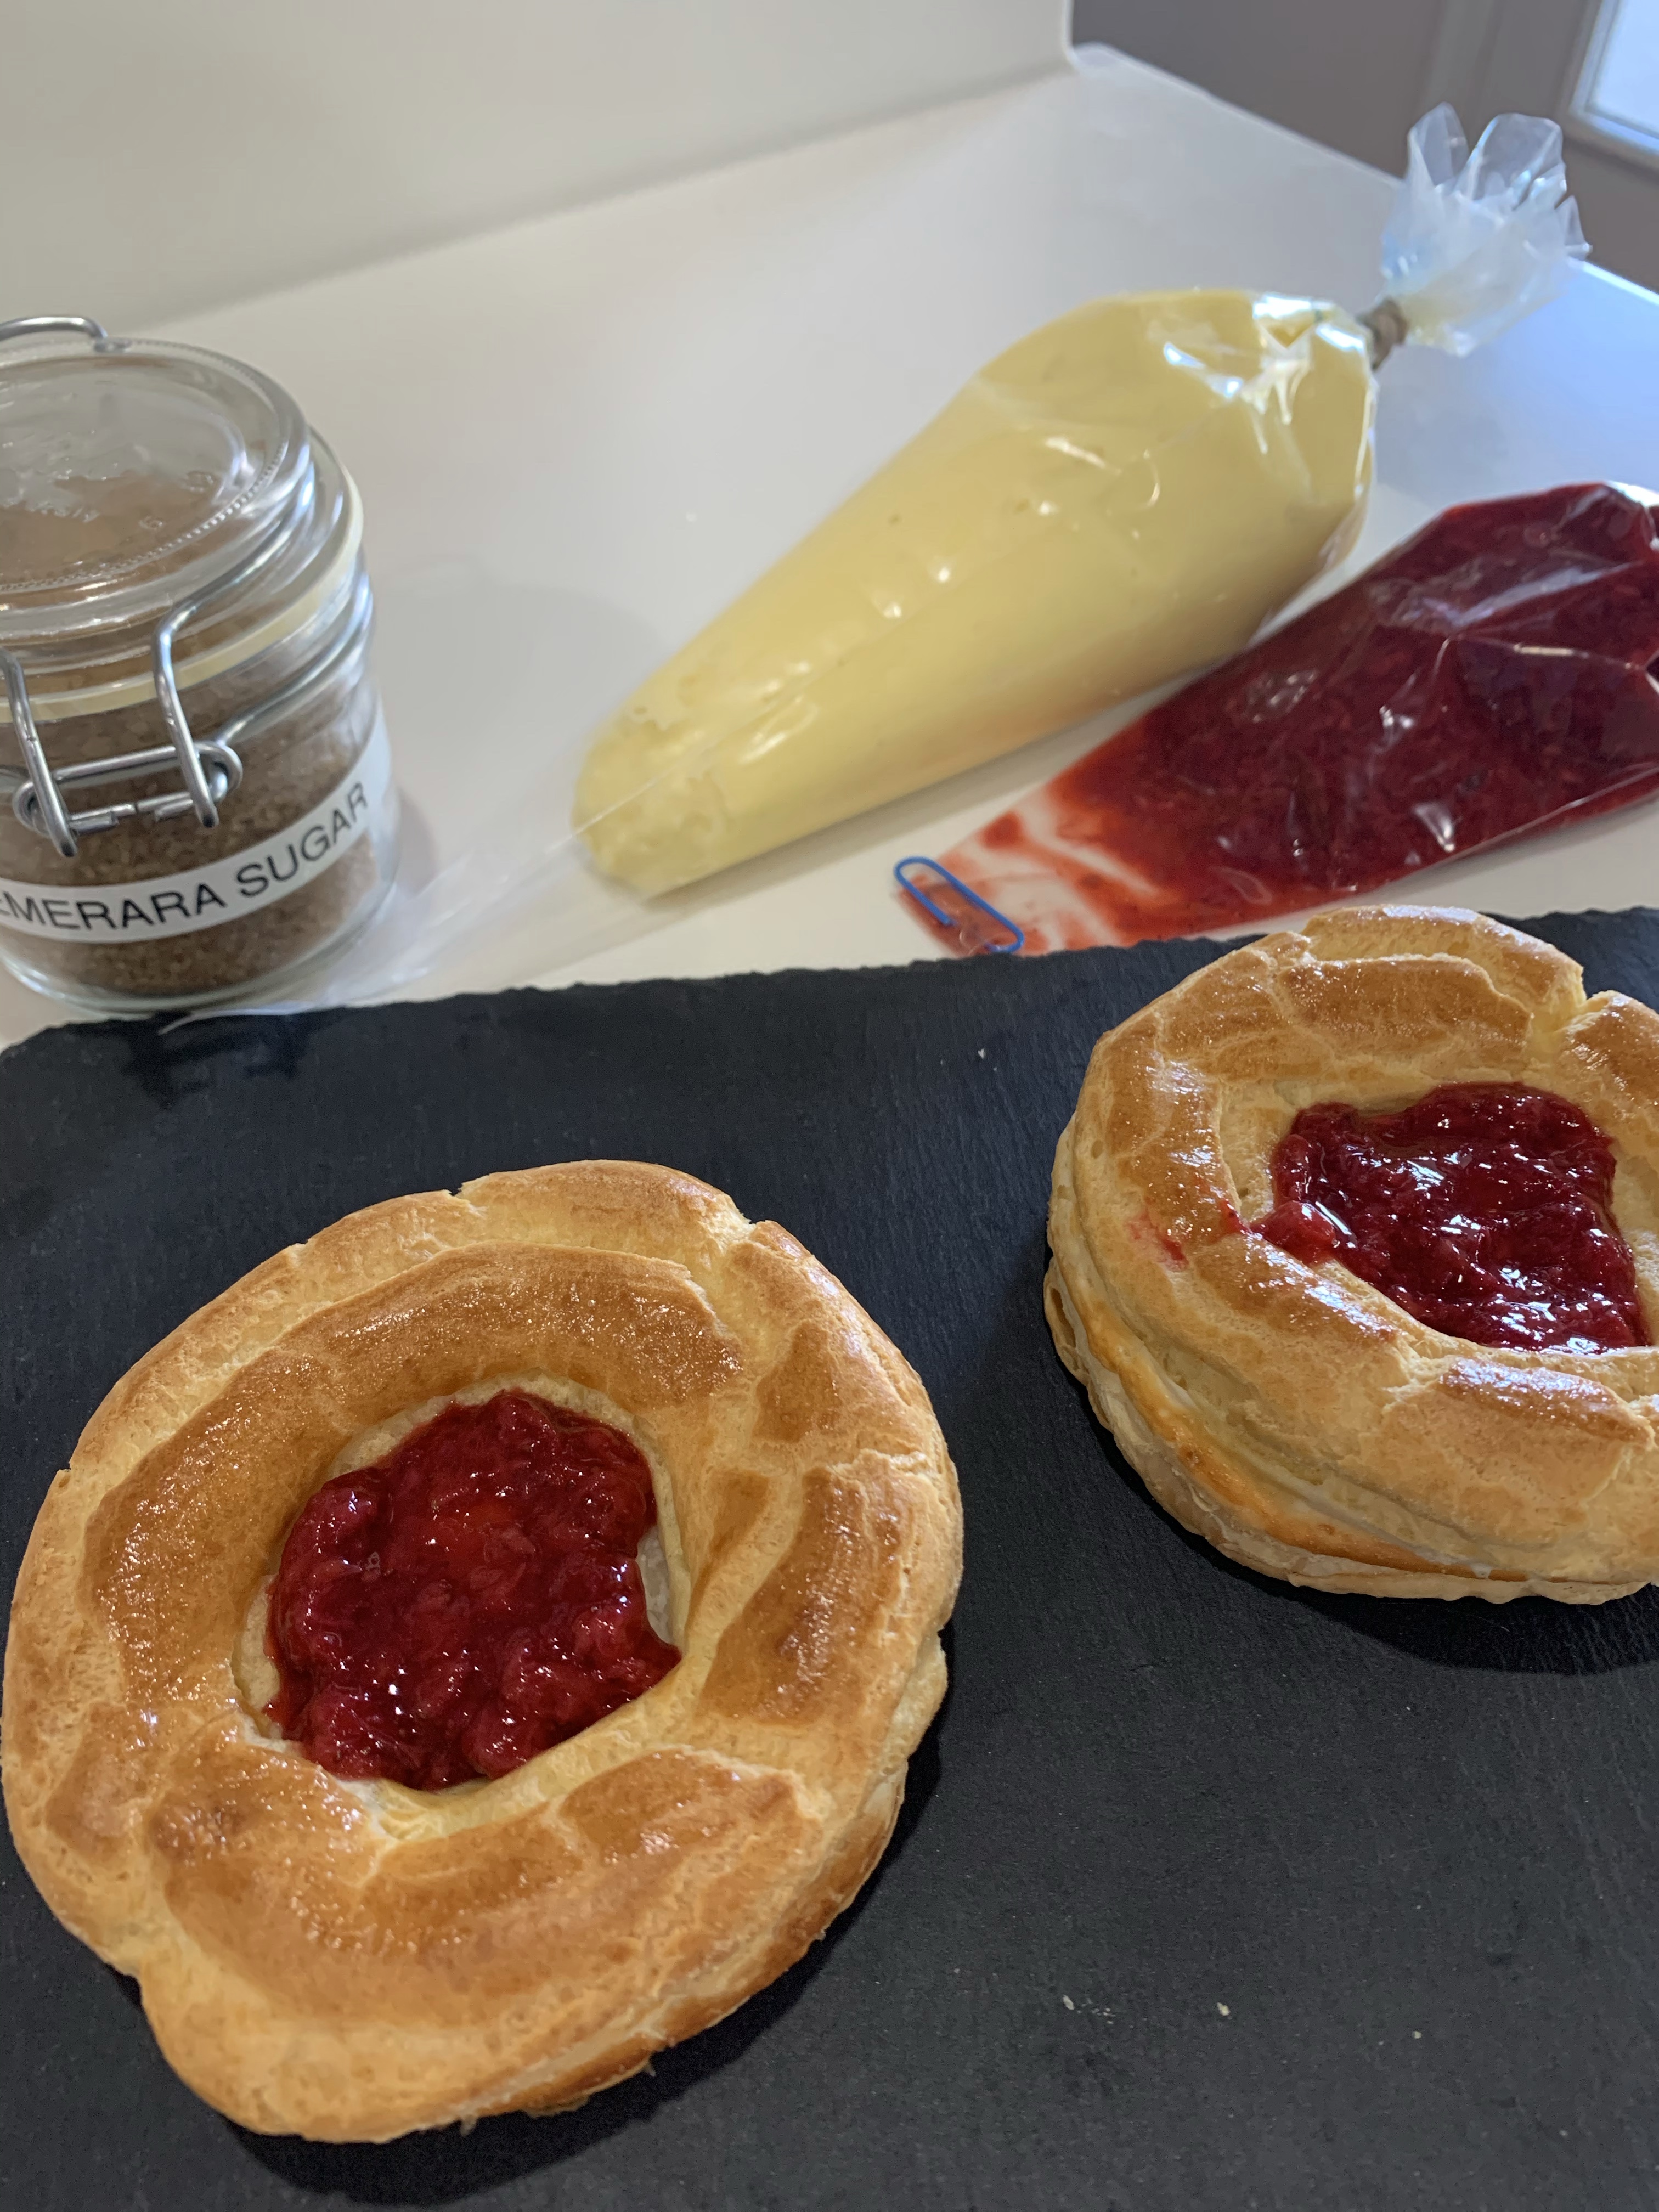
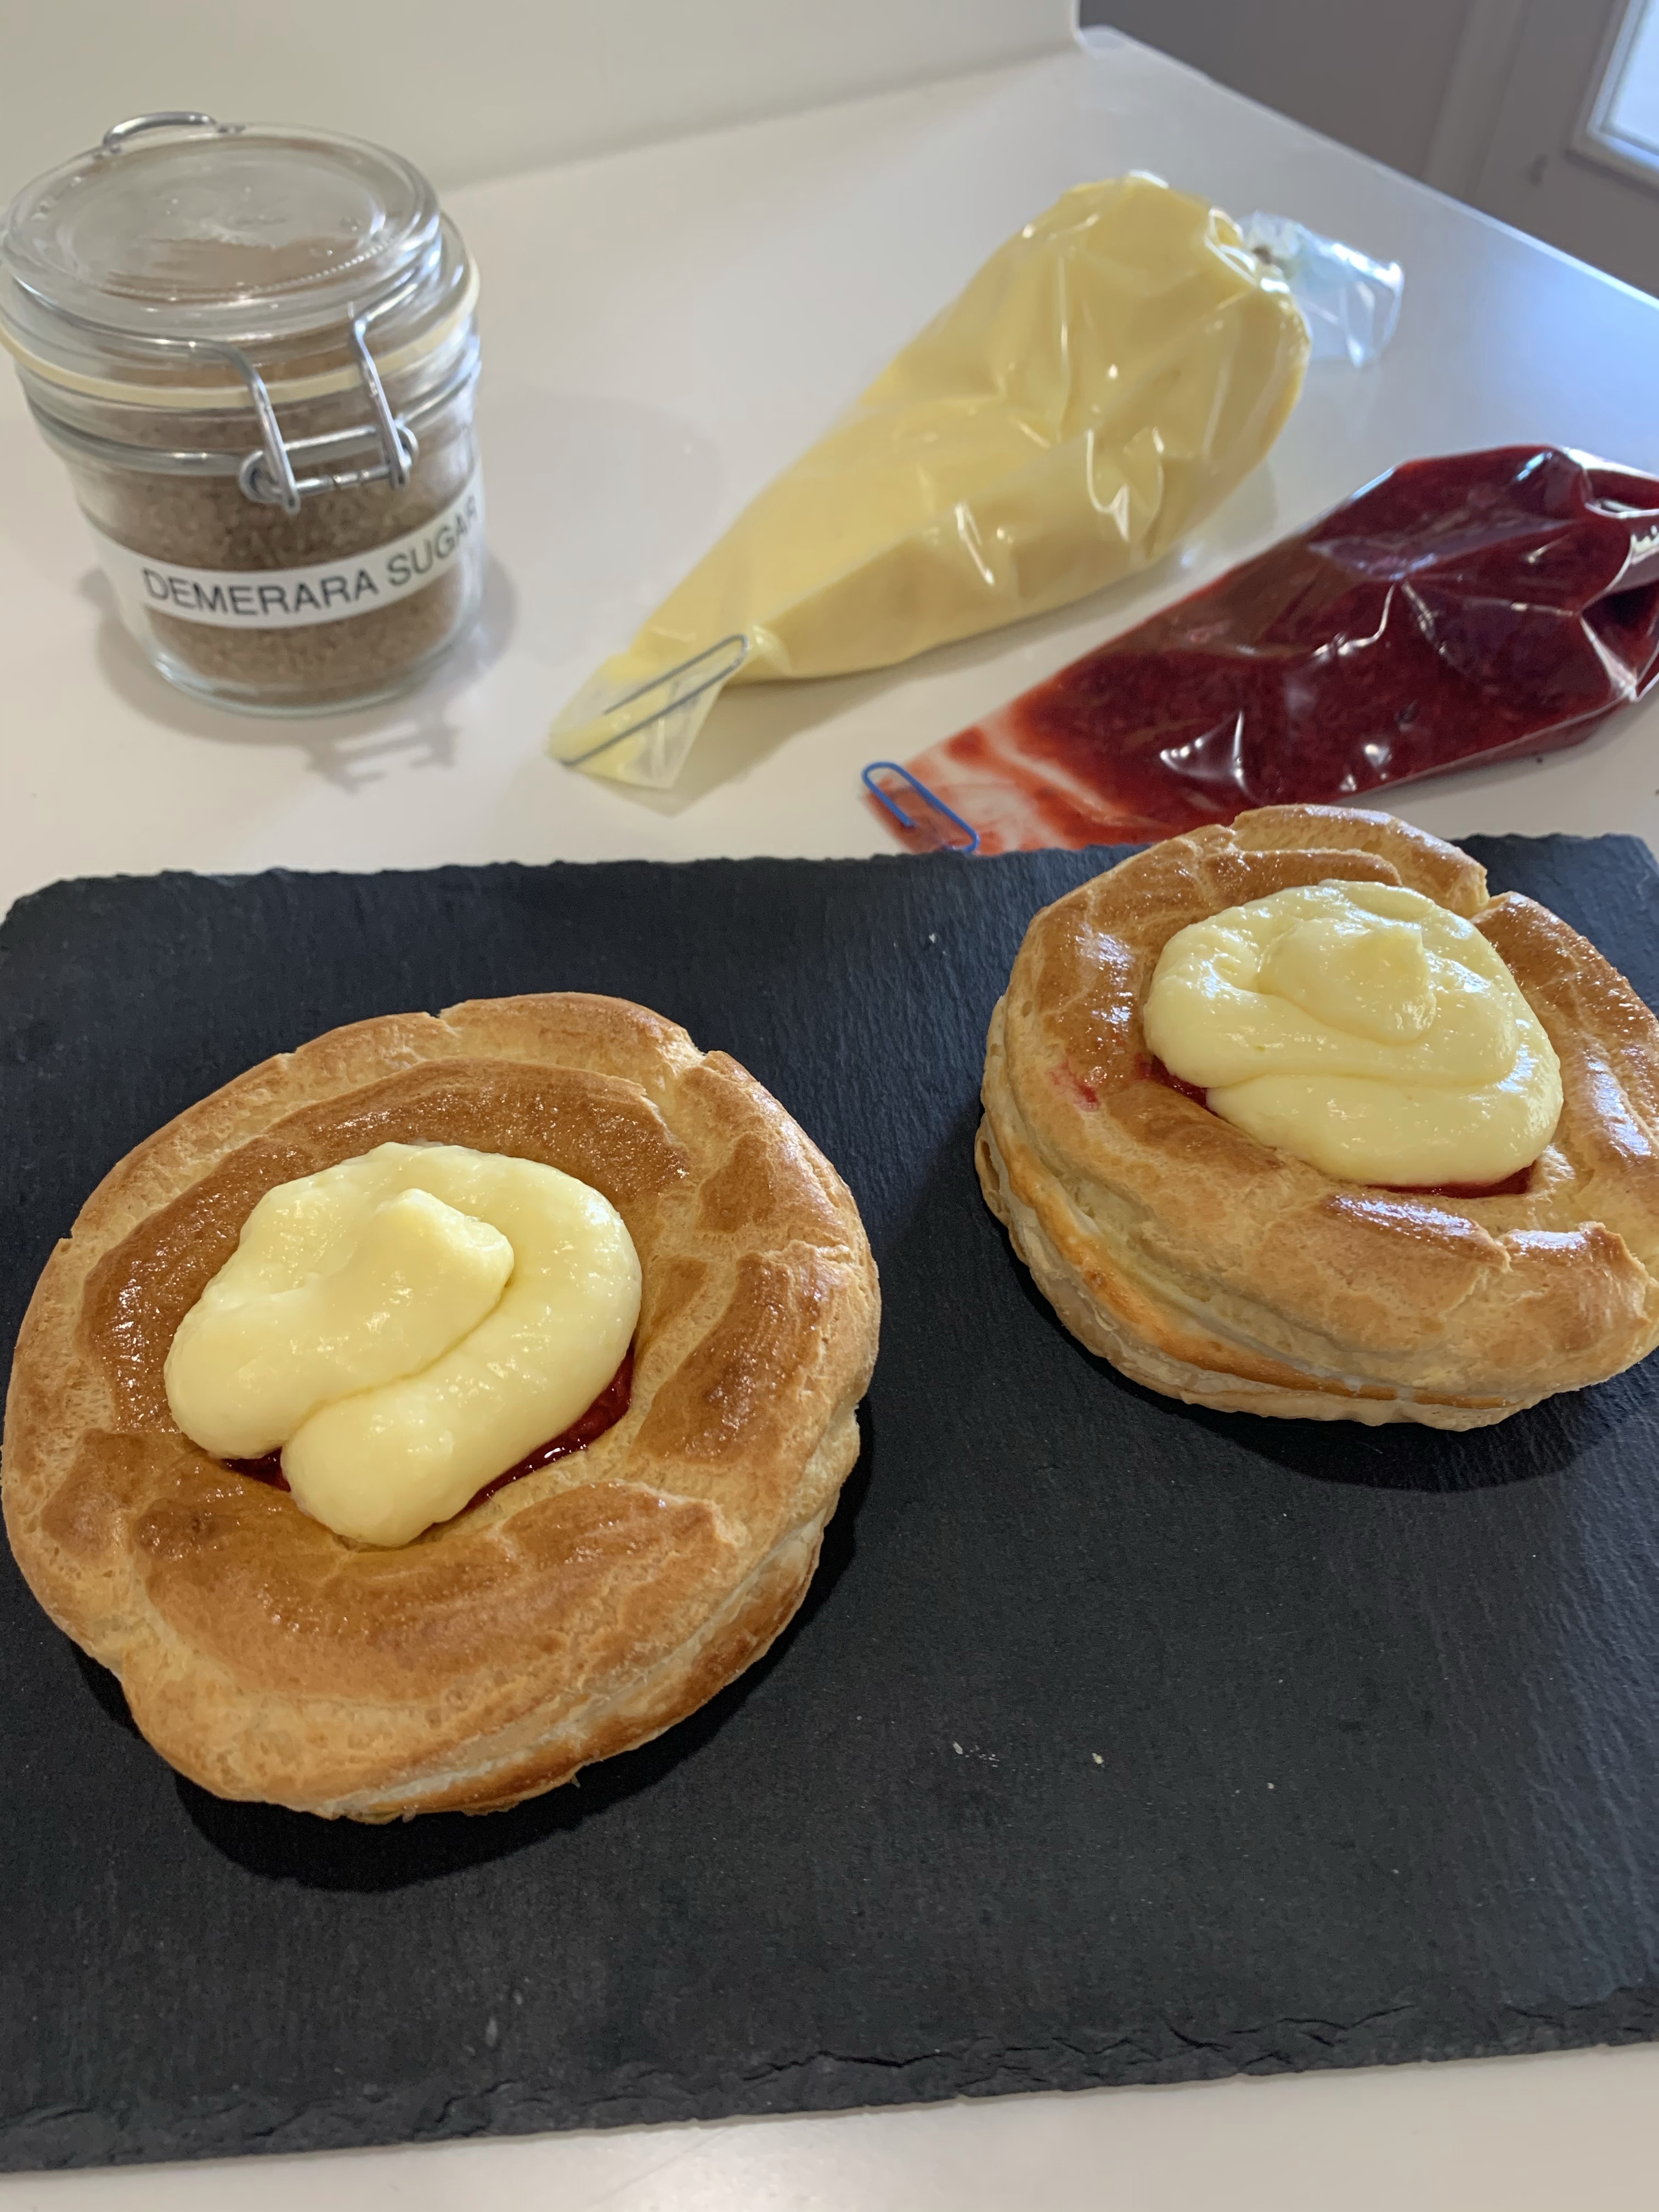
Upper left: Finished pastry shell. Top center: ready to fill. Upper right” Berry compote added. Bottom creme patisserie piped on pastry.
Left: Torching Demerara sugar. Center brûléed. Right: Completed pastry cut in half to show layering.
Puits d’Amour – ‘wells of love’
INGREDIENTS Puff pastry Compote: • 250g strawberries, hulled and chopped • 25g caster sugar • 1 tbsp lemon juice • 50g raspberries Crème Pâtissière: • ½ c sugar • ¼ c corn starch • Pinch salt • 2 c whole milk • 4 egg yolks • 2 Tbl butter 4 ½ tsp demerara sugar, to brûlée Choux Pastry: • ½ c (65 grams) AP flour • ½ tsp granulated white sugar • ¼ tsp salt • 4 tbsp (55 grams) unsalted butter, cut into pieces • ½ c (120 ml) water • 2 large eggs, lightly beaten Sparkling sugar
METHOD Compote
Add the strawberries to a pan with the sugar and lemon juice and cook over a medium heat for 10 minutes. Add the raspberries and cook for a further 5–10 minutes, until reduced to a thick compote (but not a jam). Remove from the heat, cool, then chill. Crème Pâtissière
Whisk eggs and milk together and add to all other ingredients (except vanilla) to a medium saucepan.
Bring to boil whisking constantly
Cook until thickened (it will look lumpy, its ok)
Sieve lumpy mixture into a bowl and add 1 tsp vanilla, mix thoroughly
When incorporated, cover with plastic directly on the cream and cool.
Remove from the heat and pass through a sieve into a clean bowl. Add the butter and stir until melted. Leave to cool, cover with cling film and chill until cold.
Cut Pastry Disks
Heat the oven to 220°C/200°C fan/425°F/Gas 7. Lightly dust your worktop and roll out the rough puff to a 35cm square. Using the 10cm cutter, cut out 9 discs. Place on the baking sheets and prick each disc all over with a fork. Chill for 30 minutes. Choux
In a bowl whisk the flour with the sugar and salt.
Place the butter and water in a saucepan over medium high heat and bring to a boil.
Remove from heat and, with a wooden spoon, add the flour mixture, all at once, and stir until combined. It will look like mashed potatoes. Return saucepan to the heat and stir constantly until the dough comes away from the sides of the pan and forms a thick smooth ball (about 1-2 minutes). The dough will film the bottom and sides of the saucepan and make cleaning a pain.
Transfer the dough to an electric mixer and beat on low speed to release the steam from the dough (about 1 minute).
Once the dough is lukewarm start adding the lightly beaten eggs (dough will separate and then come together) and continue to mix until you have a smooth thick paste (dough will fall from a spoon in a thick ribbon).
Pipe the choux in a circle ½cm in from the edge of each disc. Brush each choux ring with beaten egg and sprinkle with sparkling sugar. Bake for 20–25 minutes, until puffed, crisp and golden. Remove from the oven and transfer to a wire rack to cool completely.
To assemble, spoon the crème pâtissière into a piping bag fitted with a 1.5cm plain nozzle. Spoon the strawberry compote into the pastry shells and pipe the crème pâtissière over the top. Sprinkle half a teaspoon of demerara sugar on top and, using a blowtorch, brûlée the sugar. Serve immediately.