San Juan Hill Pastry Hand Pies   

Making puff pastry at home is a tedious process requiring several hours to incorporate the butter into the flour. For years I have relied on the kindness of Trader Joe’s and Pillsbury as my source of puff pastry. Both are delicious and easy to use. TJ’s has less rise and is good for a variety of pastries while Pill’s has skyscraper (get it?, “high rise?”) puff. This spring I found out that TJ’s puff pastry is seasonal. Who knew? Also, trying to insert a very little humor and perhaps some click bait with “San Juan Hill” – Teddy Roosevelt and the “Rough” Riders? Oh well, maybe not.

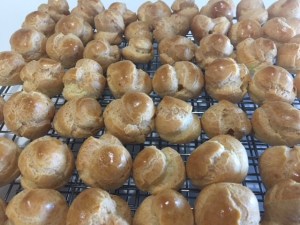
Anyway, I decided it was time to try, at least rough puff pastry. I tried two different recipes, one from King Arthur Flour and the other from Gordon Ramsey via BBC. The primary difference between the two is KAF adds sour cream while Gordon uses cool water as the liquid and KAF adds some baking powder to assist the rise.

To create the characteristic layers in the puff pastry it needs to be book folded and rolled. Both recipes called for repeating this twice, but many of the comments said to repeat up to four times, which I will do next time. The final pastry was very good, but lacked the layers and puff of either TJ’s or Pill’s.

I have trouble making the pastry and remembering to take photos as the work progresses. What I need is a camera that will take pics every 15 seconds, the just use the appropriate ones. I missed the filling of the pies. I used a heaping teaspoon for the blueberry mix and made a few using 3 fresh raspberries. Another suggestion: cut the tops of the pies about and inch bigger than the bottoms. Once the dough tries to stretch over the filled bottom the edges do not line up. I used about 2.5″ for the bottom and 3:5 inches for the tops. Also, round hand pies are much better looking but wastes a lot of dough. Square pies are rather plain, but more efficient.  What I need are two hexagonal cookie cutters, one 2.5″ and the other 3.5″. Then I could have the “roundish” look but a closest pack design, minimizing waste.

Gordon’s pastry was a bit easier to work with than KAF’s. The original recipe called for too much water which made a very, very wet dough. Luckily, I started with about 50 ml (one third of what the recipe said you may need and half of what it said to add initially.) They both tasted excellent and the texture was good, not great, but that may improve with additional rolling, folding and chilling. Once I made Gordon’s pastry I used the bottom of KAF’s to fill and finish the hand pies.

Rough Puff Pastry – Gordon Ramsey

INGREDIENTS

  • 250g strong plain flour
  • 1 tsp fine sea salt
  • 250g butter, at room temperature, but not soft
  • about 150ml cold water

METHOD

  1. Sift the flour and salt into a large bowl. Roughly break the butter in small chunks, add them to the bowl and rub them in loosely. You need to see bits of butter.
  2. Make a well in the bowl and pour in about one-third of the cold water, mixing until you have a firm rough dough adding extra water if needed. Wrap dough with cling film and leave to rest for 20 mins in the fridge.
  3. Turn out onto a lightly floured board, knead gently and form into a smooth rectangle. Roll the dough in one direction only, until 3 times the width, about 20 x 50cm (~ 8”x20”). Keep edges straight and even. Don’t overwork the butter streaks; you should have a marbled effect.
  4. Fold the top third down to the center, then the bottom third up and over that. Give the dough a quarter turn (to the left or right) and roll out again to three times the length. Fold as before, cover with cling film and chill for at least 20 mins before rolling to use.

Blueberry Hand Pies with Rough Puff Pastry – KAF

INGREDIENTS

Pastry

  • 2 cups King Arthur Unbleached All-Purpose Flour
  • ¾ teaspoon salt
  • ½ teaspoon baking powder
  • 1 cup (16 tablespoons) cold unsalted butter
  • ½ cup cold sour cream

Filling

  • 2 cups blueberries, fresh or frozen
  • 2 tablespoons cornstarch
  • ⅓ cup sugar
  • ⅛ teaspoon salt (a large pinch)
  • 1 tablespoon lemon juice
  • *For frozen berries, use 2½ tablespoons cornstarch.

Topping

  • 1 large egg, beaten
  • 2 tablespoons white sparkling sugar, for garnish

METHOD

  1. To make the pastry: Whisk together the flour, salt, and baking powder. Add the butter, working it in to make a coarse/crumbly mixture. Leave most of the butter in large, pea-sized pieces.
  2. Add the sour cream, and stir until the mixture starts to come together in chunks. Turn it out onto a floured work surface, and bring it together with a few quick kneads.
  3. Pat the dough into a rough log, and roll it into an 8″ x 10″ rectangle. Dust both sides of the dough with flour, and starting with a shorter end, fold it in three like a business letter.
  4. Flip the dough over, give it a 90° turn on your work surface, and roll it again into an 8″ x 10″ rectangle. Fold it in three again.
  5. Wrap the dough, and chill for at least 30 minutes before using.
  6. To make the filling: If you’re using fresh berries, rinse and drain well. Place fresh or frozen berries in a saucepan. Whisk the cornstarch with the sugar, and pour over the berries. Add the salt and lemon juice, stirring to combine.
  7. Place the saucepan on a burner set to medium-high heat and cook, stirring, until the small amount of liquid in the bottom of the pan comes to a simmer. Reduce the heat to medium and continue to cook, stirring frequently, until the mixture starts to thicken, about 5 minutes. Transfer the cooked berries to a bowl and let cool to room temperature. It’s fine to make the filling ahead of time, and refrigerate until you’re ready to use it.
  8. Preheat the oven to 425°F; place a rack on the middle shelf. Line a baking sheet with parchment paper.
  9. To assemble the pies: Roll the dough into a 14″ x 14″ square. With a straight edge and pastry wheel, or a 3½” square cutter, cut out sixteen 3½” squares.
  10. Divide the filling among eight of the squares, using about a heaping tablespoon for each; a slightly heaped tablespoon cookie scoop works well here. Brush some of the beaten egg along the edges of each filled square.
  11. Use a knife to cut a vent into each of the remaining eight squares; or use a decorative cutter of your choice.
  12. Top each filled square with a vented square, and press along the edges with the tines of a fork to seal.
  13. Brush the top of each pie with the remaining beaten egg, and sprinkle with sparkling sugar. Transfer the pies to the prepared baking sheet. Note: If at any time during this process the pies become sticky and hard to work with, simply refrigerate them for about 20 minutes, until firm.
  14. Bake the pies for 18 to 20 minutes, until they’re a light golden brown. Remove them from the oven, and let cool for 20 minutes before serving.
  15. Store pies, lightly wrapped, at room temperature for a couple of days; freeze for longer storage.

Have a Very Independent Day

Happy Independence Day family and friends! Have a wonderful day, full of independence, liberty, personal freedom, free speech and remember our government is OUR government, NOT our elected representative’s government.

For Daniel and Frances’ 4th of July BBQ yesterday I made a U.S. flag tart with crème patisserie filling, raspberry and meringue stripes and blueberry and meringue stars. I also made red, white and blue macarons.  The only new recipe I incorporated into these two desserts (the other recipes can be found elsewhere in this blog) was the Italian meringue used to fill the macarons and make the stars for the flag.  I wish I had kept the 4 star, 3 star, 4 star pattern, but miscounted in the middle of piping. Yeah, I miscounted on the way to 4. Oh well, next time.


As you probably know, there are 3 common methods of making meringue. French meringue is the most common which is made by whisking sugar into beaten egg whites. While the easiest to make, it is the least stable meringue and is perfect for filling or toppings, or folded into batters for sponges, jocondes etc. Italian meringue is made by beating egg whites to stiff peaks then drizzling a simple sugar, heated to 2400 F, into the whipped egg whites. This is the most stable meringue and is great for frosting cakes, top filling pies and mousse. Swiss meringue is made by gently beating egg whites and sugar in a bain marie until the sugar is completely dissolved and the mixture reaches 1300 F. The mixture is then removed from the heat and whisked at high speed to create volume, then lower speed to cool the meringue and is very stiff. Swiss meringue is often used as a base for buttercream frosting.

ITALIAN MERINGUE

Makes about 360 ml (or 1½ cups), Author: The Tough Cookie

INGREDIENTS

  • 150g (or ¾ cup) granulated sugar
  • 60ml (or ¼ cup) water
  • 60g (or ¼ cup) egg whites (about 2 large egg whites)

METHOD

  1. In a medium-sized saucepan, combine the sugar and water. Heat over low heat, stirring until the sugar has dissolved. Once the sugar has dissolved, turn the heat to medium-high and allow the syrup to come to a boil.
  2. In the meantime, add the egg whites to a medium-sized, heatproof bowl and mix (with a mixer fitted with the whisk attachment) until foamy and the whites are almost able to hold soft peaks.
  3. Once the syrup is boiling, clip on a candy (or sugar) thermometer.
  4. Cook until the syrup reaches 240°F, then take the pan off the heat and slowly drizzle the hot syrup into the bowl with the foamy egg whites, mixing continuously to prevent the eggs from scrambling. Don’t pour the syrup onto the whisk, or the syrup may splatter against the sides of the bowl (or into your face!). Instead, aim for a spot close to the whisk.
  5. Once all the syrup has been added, keep mixing until the bottom of the bowl feels cool to the touch and the meringue has cooled down to body temperature.
  6. Use immediately or keep in the fridge (covered) until ready to use. It’s a very stable meringue, so it won’t start weeping, leaking or collapsing.

NOTES

Italian meringue can be made two days in advance and stored in the fridge until needed (covered with plastic wrap).


Challah, Challah Oxen Free!!

Actually challah bread is totally meat free, no oxen, nothing that walks or has a face, real vegetarian. I remember playing hide-and-go-seek with the neighborhood kids when growing up on “the hill.” I also remember its more violent, rambunctious cousin, kick-the-can. Good times.

I decided it was time to try to make (and braid) a challah. I found this recipe and technique at the Kitchn and it worked beautifully. I am annoyed I was so focused on making the braid, I forgot to photograph the process. Maybe next time. You can see their photo instructions at thekitchen.com.

Challah is an enriched dough bread and is the traditional bread used to welcome Shabbat with HaMotzi (blessing for bread) being recited prior to tearing or cutting the bread and distributing to all in attendance. I find it interesting that two loaves are placed on the table on Shabbat to, perhaps, commemorate the two portions of manna given to the Israelites in the desert during their 40-year wander. Also, the challah is covered with a cloth to,perhaps, represent the dew covering the manna keeping it fresh. There are many reasons why challah is braided. Google it to find the reason(s) you like. I like this rational for 6 braids. Each braid represents a “profane” day of the week (all 6 days except Shabbat) and braiding the, combines those days into a unity which is easier to place behind you to allow the peaceful contemplation and celebration of the sacredness of Shabbat. Or perhaps, two loaves, 12 braids represents the 12 tribes, or perhaps the braids are reminiscent of the structure of DNA, or perhaps it is just custom.

From thekitchn.com

INGREDIENTS

  • 2 teaspoons active dry or instant yeast
  • 1 cup (8 ounces) lukewarm water
  • 4 to 4 1/2 cups (20 to 22 ounces) all-purpose flour
  • 1/4 cup (1 3/4 ounces) white granulated sugar
  • 2 teaspoons salt
  • 2 large eggs
  • 1 large egg yolk (reserve the white for the egg wash)
  • 1/4 cup (2 ounces) neutral-flavored vegetable oil, or butter

METHOD

  1. Dissolve the yeast: Sprinkle the yeast over the water in a small bowl, and add a healthy pinch of sugar. Stir to dissolve the yeast and let stand until you see a thin frothy layer across the top.
  2. Mix the dry ingredients: Whisk together 4 cups of the flour, sugar, and salt in the bowl of a standing mixer.
  3. Add the eggs, yolk, and oil: Make a well in the center of the flour and add the eggs, egg yolk, and oil. Whisk these together to form a slurry, pulling in a little flour from the sides of the bowl.
  4. Mix to form a shaggy dough: Pour the yeast mixture over the egg slurry. Mix the yeast, eggs, and flour with the dough hook until you form a shaggy dough that is difficult to mix.
  5. Knead the dough for 6 to 8 minutes: With a dough hook attachment, knead the dough on low speed for 6 to 8 minutes. If the dough seems very sticky, add flour a teaspoon at a time until it feels tacky, but no longer like bubblegum. The dough has finished kneading when it is soft, smooth, and holds a ball-shape.
  6. Let the dough rise until doubled: Place the dough in an oiled bowl, cover with plastic wrap, and place somewhere warm. Let the dough rise until doubled in bulk, 1 1/2 to 2 hours.
  7. Separate the dough and roll into ropes: Separate the dough into three or six equal pieces, depending on the type of braid you’d like to do. Roll each piece of dough into a long rope roughly 1-inch thick and 16 inches long. If the ropes shrink as you try to roll them, let them rest for 5 minutes to relax the gluten and then try again.
  8. Braid the dough: Gather the ropes and squeeze them together at the very top. If making a 3-stranded challah, braid the ropes together like braiding hair or yarn and squeeze the ends together when complete. If making a 6-stranded challah, follow the directions at thekitchn.com.
  9. Let the challah rise: Line a baking sheet with parchment and lift the loaf on top. Sprinkle the loaf with a little flour and drape it with a clean dishcloth. Place the pan somewhere warm and away from drafts and let it rise until puffed and pillowy, about an hour.
  10. Brush the challah with egg white: About 20 minutes before baking, heat the oven to 350°F. When ready to bake, whisk the reserved egg white with a tablespoon of water and brush it all over the challah. Be sure to get in the cracks and down the sides of the loaf.
  11. Bake the challah: Slide the challah on its baking sheet into the oven and bake for 30 to 35 minutes, rotating the pan halfway through cooking. The challah is done when it is deeply browned and registers 190°F in the very middle with an instant-read thermometer.
  12. Cool the challah: Let the challah cool on a cooling rack until just barely warm. Slice and eat.
  13. For those bakers who are not visual: Making a 6-Stranded Challah Braid
    1. The name of the game here is “over two, under one, over two.” Carry the right-most rope over the two ropes beside it, slip it under the middle rope, and then carry it over the last two ropes. Lay the rope down parallel to the other ropes; it is now the furthest-left strand. Repeat this pattern until you reach the end of the loaf. Try to make your braid as tight as possible. Your braid will start listing to the left as you go; it’s ok to lift it up and recenter the loaf if you need to. Once you reach the end, squeeze the ends of the ropes together and tuck them under the loaf.
    2. At this point, your loaf is fairly long and skinny. If you’d like to make a celebration ring, stretch the loaf a little longer and pull the ends toward each other to create a circle. You can either squeeze the ends together, or if you’re feeling adventurous, braid them into a continuous circle.
  14. If you’re making a regular loaf (as pictured), you need to “plump” it a little to tighten the ropes into more of a loaf shape. Place your left palm at the end of the braid and your right palm at the top, and gently push the two ends toward each other, just like plumping a pillow in slow motion. Then slip your fingers under the dough along either side and gently lift the dough while cupping it downwards. (This isn’t a vital step, so don’t worry if you’re not sure you did it correctly.)

Mousse and Squirrel… “Squirrel!!”

I know, mixing cartoons is never a good idea, but I couldn’t resist. Boris Badenov was never successful at deceiving Rocky and Bullwinkle, despite trying every week and oddly, neither Moose nor Squirrel recognized them time after time. The second Squirrel in the title is and a wink to “UP” and a nod to how easy it is to be distracted from what is important.

Originally, I was thinking about making a key-lime mousse, but then saw this recipe for a margarita mouse and pounced like a dog on a chew toy. I saw the raspberry and chocolate moussessess, or meece on GBBO (not their recipes) and decided to add a variety of mousse to my file, and I love raspberries, and chocolate is the universal food so why not?

I wanted to use recipes that do not use gelatin to make the mousse. I try very hard not to use gelatin to keep as much as possible vegetarian. From what I found authentic french mousse does not use gelatin, and neither to I.

Margarita Mousse

INGREDIENTS

  • 2 tablespoons sugar
  • 1 tablespoon lime zest
  • 1⁄2 fresh lime, cut into wedges
  • 1 (14 ounce) can sweetened condensed milk
  • 2 tablespoons orange liqueur, such as Triple Sec
  • 3 tablespoons tequila
  • 1⁄3 cup fresh lime juice
  • 1 cup whipping cream

METHOD

  1. Combine sugar with 1 tsp lime zest. Rub the rims of 4-6 margarita glasses with lime wedges to moisten, crunch into granulated sugar mixture, and place in the freezer.
  2. In a separate bowl, combine remaining lime zest, condensed milk, Triple Sec, tequila, and 1/3 cup lime juice. Set aside.
  3. Whip cream until stiff peaks form. Fold whipped cream into tequila mixture, working carefully to keep the air in the whipped cream.
  4. Spoon into prepared frozen glasses, making sure not to disturb the sugared rims.
  5. Refrigerate for 4 hours or until firm.

Chocolate Mousse

INGREDIENTS

  • 200-250g 70%+ cacao chocolate (more is better for stability)
  • 400g heavy whipping cream
  • 1 egg yolk

METHOD

  1. melt chocolate in a baine-marie
  2. whip cream
  3. whip egg yolk in a baine-marie until fluffy *
  4. mix the chocolate into the egg yolk
  5. carefully fold the cream into the chocolate
  6. refrigerate 3-4 hours

This mousse will set after a few hours in the fridge.

Raspberry Mousse

INGREDIENTS

  • 400g fresh raspberries
  • 100g caster sugar
  • 3 medium egg whites
  • 300g heavy whipping cream
  • icing sugar to dust

METHOD

  1. Reserving some raspberries for decoration, place the remainder in a pan with 50g of the caster sugar and cook on a medium heat for 4-5 minutes, stirring until the fruit collapses.
  2. To make a coulis, place a fine sieve over a bowl and pass the fruit through to de-seed. Cool for 10 minutes, then keep in the fridge until needed.
  3. In a clean bowl, whisk the egg whites with the remaining sugar for 2-3 minutes or until stiff peaks form.
  4. Whisk the cream until it forms soft floppy peaks.
  5. Add 2-3 tbs of the coulis to the cream and stir very gently until nicely mixed. Once mixed add in the rest of the coulis until well incorporated.
  6. With a metal spoon gently fold one large spoon of egg white mixture into the coulis and cream mixture. Mix very gently until all incorporated. Repeat until all egg white is mixed in.
  7. Gently divide the mixture between 6 glasses or mugs. Chill for 4-5 hours. To serve, decorate with raspberries, dust with icing sugar.

Mah Jong Snacks Anyone?

Last week Fran’s mah jongg group met at our house. While they tend not to each very much before, during or after their games, but I was asked to make something for this week. I had not made pan au chocolat in quite a while and had just seen this recipe for Oreo macarons online. There were very few of anything left.


Macarons and Pain Au Chocolat


Pain au Chocolate

INGREDIENTS

  • Puff pastry
  • Chocolate
  • Confectioner’s sugar

METHOD

  1. Roll out puff pastry
  2. Dust with confectioner’s sugar
  3. Cut into 2” wide
  4. Lay chocolate at one end, roll one time, press down gently and roll again, press gently again
  5. Add second row of chocolate and roll one last time, press gently
  6. Chill overnight
  7. Brush with egg wash
  8. Bake 360 deg 20-25 min on parchment lined baking sheet

Oreo Macarons

INGREDIENTS

  • 3 eggs whites, room temperature
  • ¼ cup sugar
  • 1¼ cups powdered sugar
  • ¾ cup superfine almond flour
  • 2 tablespoons dark cocoa powder
  • ½ teaspoons black food coloring
  • 2 cups of powdered sugar
  • 1 cup of softened butter
  • 1 teaspoons of vanilla
  • 2 tablespoons of milk
  • ½ cup cookies and cream filling
    • 8 oz. cream cheese, at room temperature (takes about 2 hours to reach room temp)
    • 4 oz. salted butter, at room temperature (1 stick)
    • 1 teaspoon vanilla
    • 2 cups powdered sugar

METHOD

  1. Preheat oven to 285ºF/140ºC.
  2. In a medium bowl, beat the egg whites until frothy.
  3. Keep beating and slowly add sugar until stiff peaks form.
  4. Sift powdered sugar, cookie crumbs, almond flour, and cocoa powder over the egg whites.
  5. Fold the dry mixture into the egg whites completely, but make sure to not overmix or the macarons will not rise.
  6. Once the batter reaches a lava-like consistency, add the food coloring. Mix until just combined, without over mixing.
  7. Place the mixture into a piping bag or zip-top bag. Cut of the tip to pipe.
  8. Pipe 1½-inch dollops onto a baking sheet lined with parchment paper. Tip: take a little batter to “glue” down the edges of the parchment paper so it stays put.
  9. Let the cookies rest at room temperature for 30 minutes to an hour, until they are no longer wet to the touch and a skin forms on top.
  10. While resting, make the filling
    1. Cream together the cream cheese, butter, and vanilla until smooth.
    2. Mix in the powdered sugar until smooth.
  11. When the cookies are dry to the touch, bake for 15-18 minutes until they have risen.
  12. Let rest for 10 minutes before filling. To fill, pipe about about a tablespoon of the buttercream onto one macaron and place another on top.
  13. Macarons are best kept refrigerated until serving.

Tilt-a-whirl Down on the South Beach Drag

The other day, Fran watched Biscuit Week on the GBBO (I had fallen asleep on the couch) and decided Mary Berry’s Viennese Whirls might be a good next bake for me;  I made them this morning and will take them to Daniel and France’s house to day for our day-after Father’s Day dinner.

Baked Whirls

These resemble shortbread cookies/biscuits with raspberry jam and buttercream filling. The cookie should be firm enough to handle, but soft enough to melt in your mouth with each bite. The trick is to adjust the viscosity of the dough to allow it to be piped into 2″ diameter circles using a star tip. To accentuate the whirl shape and  texture, chill the piped biscuits in the refrigerator for 15 minutes before baking. (I didn’t do this and they lost some height and swirl detail.)


I was also making some raspberry jam, so I just sieved some to use for the cookies. I also added some meringue powder to help the buttercream harden a little to make the filling a little firmer without having to keep them refrigerated.


Completed Whirls

INGREDIENTS

For the jam

  • 200g (7oz) raspberries
  • 250g (9oz) jam sugar

For the biscuits

  • 250g (9oz) very soft unsalted butter
  • 50g (1¾oz) icing sugar
  • 225g (8oz) plain flour
  • 25g (1oz) cornstarch

For the filling

  • 100g (3½oz) unsalted butter, softened
  • 200g (7oz) icing sugar, plus extra for dusting
  • ½ tsp vanilla extract
  • 1 Tbl Meringue Powder

METHOD

For the jam,

  1. Put the washed raspberries in a small, deep-sided saucepan and crush them using a potato masher. Add the sugar and bring to boil over a low heat. When the sugar is melted, increase the heat and boil further for 4 minutes. Remove from the heat and carefully pour into a shallow container (pass it through a sieve if you’d rather not have seeds in your jam). Leave to cool and set.

For the biscuits,

  1. Preheat the oven to 375F. Line 3 baking sheets with non-stick baking parchment. Using a 2″ round cutter as a guide, draw circles on each sheet of paper, spaced well apart. Turn the paper over so the pencil marks are underneath.
  2. Measure the butter and icing sugar into a bowl and beat until pale and fluffy. Sift in the flour and cornstarch and beat well, until thoroughly mixed. Spoon the mixture into a piping bag fitted with a medium star nozzle. Pipe 24 swirled rounds (not rosettes), inside the circles on the baking sheets.
  3. Bake in the center of the oven for 13—15 minutes, until a pale golden-brown. Cool on the baking sheets for 5 minutes then carefully transfer to a wire rack to cool completely and harden.

For the filling,

  1. measure the butter into a bowl and sift the icing sugar on top.
  2. Add the vanilla extract and beat with a wooden spoon or an electric whisk until very light and smooth.
  3. Spoon into a piping bag fitted with a large star nozzle.

Spoon a little jam onto the flat side of 12 of the biscuits and place jam-side up on a cooling rack. Pipe the buttercream over the jam and sandwich with the remaining biscuits. Dust with icing sugar to finish.

Tips/Techniques

For this recipe you will need a piping bag, a medium star nozzle, a large star nozzle, 3 baking sheets. If your kitchen is warm and you have time you could try placing the whirls in the fridge for 15 minutes before baking. This will help them hold their shape while cooking.

Bree Orc(he) or Brioche Donuts

My title is a shout out to LOTR fans.

I saw Paul Hollywood make brioche donuts on the GBBO last week. They looked so good. Boom!

For those unfamiliar, brioche is a pastry of French origin that is similar to a highly enriched bread, and whose high egg and butter content give it a rich and tender crumb. (Wikipedia) Brioche dough is light, sweet and fluid.

Here is my very slight adaptation of Paul Hollywood’s recipe:
INGREDIENTS

  • For the dough:
    • 500g strong white bread flour, plus extra for dusting
    • 7g salt
    • 50g caster sugar
    • 10g instant yeast
    • 140ml warm whole milk
    • 5 medium eggs
    • 250g unsalted butter, softened, plus extra for greasing
  • For the filling:
    • 200g milk or semi-sweet chocolate, broken into squares
    • 1 large raspberry per donut
  • 3 quarts vegetable oil
  • Caster sugar for dredging

METHOD

  1. Put the flour and sugar into the bowl of the mixer, fitted with a dough hook, and add the salt to one side and the yeast to the other. Add the milk and the eggs and mix for about 8 minutes until smooth.
  2. Knead the dough on a slow speed for 5 minutes then gradually start to add the butter. Once all of the butter has been incorporated and the dough is smooth and sticky, increase the speed and knead for a further 6 minutes. Pour the dough into a large bowl (remember that the dough will almost double in size), cover with cling film and place in the fridge overnight.
  3. Lightly dust the work surface with flour, turn out the dough and roll into a large rectangle.
  4. Roll the dough into a long log, about 2” in diameter and 16” long
  5. Divide the dough into 20 balls (about 40g each). Flatten each one out a little and put 10g of chocolate in the middle – you may have to break the chocolate into smaller pieces so it sits snugly in the middle. Form the dough into a ball around the chocolate and roll to smooth.
  6. Place the balls on a lightly floured tray and cover with a clean plastic bag or cling film and leave to prove for an hour or until doubled in size.
  7. Heat the oil in the fryer to 350oF and gently place the doughnuts, 2 – 4 at a time, into the pan or the fryer. They will puff up and float so you will need to turn them over periodically so that they cook evenly on all sides. They brown quickly because of the sugar and butter in the dough, but you need to cook them for about 10-12 minutes so that they cook through and the chocolate melts.
  8. Remove from the fryer with a slotted spoon and drain on kitchen paper. Dredge with caster sugar and serve.

Delightful Day of Rest

Last night Fran and I co-hosted the Oneg Shabbat at our local temple. For those who are unfamiliar with an Oneg, it is a celebration of the beginning of Shabbat (#4 of the Ten Commandments) and is usually accompanied with food and socializing after Friday evening services.  Each family of the temple is urged to host or co-host one Oneg a year. We co-hosted with our friends Ellen and Mark, and in absentia, Annalee and Jerry.Eclairs and Dipped Strawberries

I offered to make pastries (surprise, surprise) and settled on eclairs and Kouign-Amanns (QUEEN-ah-mahns.) We called on Wednesday to check on the expected attendance (which is always a crap shoot which is perhaps the wrong metaphor.) It was a teen appreciation Shabbat. We also added some fruit bowls and a vegetable tray for the health-conscious Californians. Since I needed a chocolate glaze for the eclairs and I Kouing Amannfigured it would be easy enough to use that as a base to dip a few strawberries. Those plus a few blackberries would add some color and be a good garnish for the patters. Ellen and Mark added some cookies, ruggala and chocolate chip Mandelbrot (like a biscotti) and some cheese and crackers for Annalee and Jerry and another woman donated a large plate of chocolate chip cookies.

Well, the long and short of it is, we ended up with about one large platter for every two people in attendance.  Mark estimated there were about 40 people present. I was pleased there were no eclairs left to bring home, and the Kouign-Amanns would likewise have disappeared had I not snuck some out for Frances. We will bring them to her tomorrow when we go to the Founder’s Day Party to celebrate the opening of the newest Coconut’s Fish Cafe, 20010 Stevens Creek Blvd., Cupertino, CA.

For some unknown reason the veggie platter was left all but untouched. (We left it for the Torah study group that meets Saturday mornings.)

Olive Breadsticks, Revisited

I made a batch of these breadsticks a few months ago and yesterday I realized I was ready for a few more. These are great plain as snacks or with a nice marinara sauce for dipping or as a side with pasta. The slight tartness of the olives adds a nice balance to the sweetness of the bread. My problem is I eat too many.

These breadsticks are easy to make. The only tricky part is cutting, handling and shaping the slack dough. After rising, the dough is soft, sticky and wet. Use a LOT of flour Breadsticks2on your work table and generously dust the top of the dough before you gently form it into a rough rectangle about 16″ x 14″. Cut the rectangle in half (two 7″ smaller rectangles) then cut each of those into about 1″ strips, avoiding dissecting any olives. Use your bench knife and separate the first strip by flicking it onto the flour next to the dough rectangle. Pick it up with flour dusted fingers, place on the parchment-lined baking sheet and stretch it to about 10″ and try to straighten. I was not totally successful in straightening the breadsticks, but it doesn’t hurt the flavor.

Wascally Easter Wabbit

It’s always fun when Easter and Passover coincide. This doesn’t happen as often as you might imagine, and this non-coincidelitization is not by accident. In 325 CE the Council of Nicaea established that Easter would be held on the first Sunday after the first full moon occurring on or after first day of spring unless the full moon is on Sunday when Easter is delayed by 1 week. Passover commences on the 15th of the Hebrew month of Nisan and lasts for either seven or eight days depending on the Jewish tradition being observed. The Jewish month is lunar based and varies substantially from the Gregorian calendar. I know, TMI. Anyway, this decreases the chances of Easter falling on the same day as Passover, but doesn’t eliminate it, as in this year. Following the Jewish Passover dietary restrictions for the 8 days of Pesach (which I don’t; The first two days are enough for me) while preparing desserts for Easter is… interesting.

Several years ago I purchased a Wilton Egg Mold to make an M&M cake for Robin’s birthday and a football for another party, and now an Easter egg cake. This mold creates perfect egg shaped cakes, but has some challenges. The mold measures 9″x6″x6″ which means you need to time the bake for a 6″ deep cake, but the ends are thinner so don’t over bake and burn the ends. I found doubling the baking time is about right, i.e. 60 minutes for a recipe for a standard 2″ deep pan calling for 30 min.

Another problem is sealing the two halves during the bake. The chocolate cake recipe I prefer adds a cup of boiling water just prior to pouring. This makes a very low viscosity batter which is easy to spill, hence you don’t want to move the mold after it is filled. Mold with stringTying the two mold halves together without sloshing batter is a challenge. I place the string across the oval stand prior to placing the empty mold on it. The mold should be filled to the top rim with batter. Thus far, doing this assured the top half is filled with cake. I Egg Mold with Clipsthen place the top half on and tie the string around both. This time I also added 5 paper binder clips positioned around the edge of theEgg Mold two molds. (I would use 7-10 clips, if I had them.) Do place the mold on a cookie sheet to catch spills and choose one that does not warp in the heat.

If there is little leakage, and the bake is properly timed, and you coated the molds with release spray you should end up with a beautiful Peanut M&M – Football – Easter Egg – shaped cake. A couple of other hints with this mold: remove the top half 5 minutes after removing the cake from the oven, Chocolate Cakethen remove the cake from the bottom mold 5 minutes later. You may have to shake the pan slightly for the cake to release. Cool on a rack.

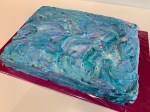
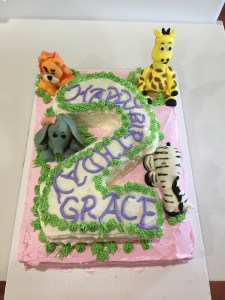
For Grace’s 1st birthday I am making a cake for  about 100 people. I want this to be a smooth surface (i.e. fondant) but dislike store bought fondant. This weekend I made a Fondant Covered Chocolate cakebatch of marshmallow frosting to try it on the Easter egg cake. It was easy to make, roll and drape. While intensely sweet (read: marshmallow and confectioners sugar) it tasted much better than store bought, plus it cuts easily to make decorations. This fondant may be flavored, but will be very sweet no matter what flavor. This fondant is smooth and soft, IMG_0025easy to drape and form. The pink band around the cake is a band of colored fondant, wetted and wrapped around the cake.

I wanted the second cake to be a chocolate covered egg with lots of colored royal icing decoration. I envisioned a chocolate egg, like the hollow chocolate eggs you buy in the market for Easter. Alas, my tempered chocolate set to quickly and would not pour over the crumb coated cake. I had to spread it as quickly as possible, but was not quick enough. It was too thick and lumpy.  If anyone has suggestions to remedy this I would appreciate your input. The Finished Tempured Chocolate Yellow Cakepiping is all buttercream, both white and colored. I was going to make buttercream roses for the toppers, but by the time I finished the rest, my hand was cramping and decided simple dropped flowers (Wilton #193 tip) would suffice. I added the jelly beans for some additional color, they probably weren’t needed but we like jelly beans.

At the end of the meal there was 1/3rd of the white frosted cake left, a 1/4 of the chocolate and almost none of the outstanding carrot cake Fran made. Both 9″ tarts (one creme patisserie/fruit and one chocolate/orange) were left. Not a bad effort for 20 adults.

INGREDIENTS

Chocolate Cake

  • 2 cups white sugar
  • 1 3/4 cups all-purpose flour
  • 3/4 cup unsweetened cocoa powder
  • 1 1/2 teaspoons baking soda
  • 1 1/2 teaspoons baking powder
  • 1 teaspoon salt
  • 2 eggs
  • 1 cup milk
  • 1/2 cup vegetable oil
  • 2 teaspoons vanilla extract
  • 1 cup boiling water

Yellow Cake

  • 4 1/2 cups (570g) all-purpose flour
  • 2 teaspoon baking soda
  • 1 teaspoon salt
  • 2 cup (460g) unsalted butter, softened
  • 3 3/4 cups (700g) granulated sugar
  • 4 large eggs, at room temperature
  • 4 teaspoons pure vanilla extract
  • 1 cup (240g) sour cream, at room temperature
  • 2 cup (480ml) whole milk, at room temperature

Buttercream

  • 4 cups of powdered sugar (or 1 box)
  • 1 Cup (2 sticks) of softened butter
  • 1/4 cup meringue powder to make a crusting frosting
  • 2-3 teaspoons of vanilla
  • 1-2 tablespoons of milk
  • Violet food coloring (a little of this will make the frosting white, not yellow from the butter coloring. Just a little on the end of a tooth pick is enough)

Marshmallow Fondant

  • 500 g marshmallows
  • 1000 g confectioners sugar
  • 1 tsp white vanilla
  • 2-3 Tbl water

Tempered Chocolate

  • Scharffen Berger Semi-Sweet Dark Chocolate (I like this brand but any would do)

METHOD

Chocolate Cake

  1. Preheat oven to 350 degrees F (175 degrees C). Spray both halves of the egg mold.
  2. Use the first set of ingredients to make the cake. In a medium bowl, stir together the sugar, flour, cocoa, baking soda, baking powder and salt. Add the eggs, milk, oil and vanilla, mix for 3 minutes with an electric mixer. Stir in the boiling water by hand. Pour to fill the bottom mold to the brim.
  3. Bake for 60 minutes in the preheated oven. (Bake time make take some experimentation)  Cool for 5 minutes before removing the top half and another 5 minutes before rolling the cake on a rack to cool completely.

Yellow Cake

  1. Preheat oven to 350°F (175°C). Spray both halves of the egg mold.
  2. Whisk the flour, baking soda, and salt together in a large bowl. Set aside. Using a handheld or stand mixer fitted with a paddle attachment, beat the butter on high speed until smooth and creamy – about 1 minute. Add the sugar and beat on high speed for 3 full minutes until creamed together. The mixture should be a light yellow color. Scrape down the sides and up the bottom of the bowl with a rubber spatula as needed. On medium-high speed, add 1 egg at a time, beating well after each addition until both are mixed in. On high speed, beat in the vanilla extract and sour cream. Scrape down the sides and up the bottom of the bowl with a rubber spatula as needed.
  3. With the mixer running on low speed, add the dry ingredients to the wet ingredients alternating with the milk. Start and end with the dry ingredients. Mix each addition just until incorporated. Do not overmix this batter. The batter will be smooth, velvety, and slightly thick.
  4. Pour the cake batter into the prepared pan. Smooth it out into an even layer.
  5. Bake for 60 minutes in the preheated oven. (Bake time make take some experimentation)  Cool for 5 minutes before removing the top half and another 5 minutes before rolling the cake on a rack to cool completely.

Buttercream

  1. Add powdered sugar and meringue powder to mixing bowl.
  2. Add softened sticks of butter
  3. Add vanilla. If you want white buttercream use clear imitation vanilla.
  4. Add 1 tbsp of milk.
  5. Beat on low until powdered sugar is incorporated. Then move mixer up to medium-high speed. Scrape sides and bottom of bowl often. When completely mixed the frosting may appear dry.
  6. Add more milk, a little bit at a time until frosting is the proper consistency.
  7. Again, for white frosting now add a little violet food coloring. I use the end of a toothpick and add just a little at a time. Mix thoroughly.

Marshmallow Fondant

  1. Grease (well with Crisco or equivalent) a heat proof microwavable bowl
  2. Place marshmallow in the bowl and sprinkle 2-3 Tbl water over the marshmallows
  3. Heat in a microwave in 30 second increments until the marshmallow is melted and smooth. Don’t overcook and burn.
  4. Grease (well) dough hook and stand mixer bowl and add melted marshmallow.
  5. Add confectioners sugar a cup at a time and stir on medium until incorporated.
  6. Add the vanilla during one of the sugar additions.
  7. Reserve about a cup of sugar to use during hand kneading
  8. Grease (well) your workspace and hands and turn the fondant out.
  9. Cover with sugar and begin kneading, adding more sugar as necessary until the fondant is smooth and not sticky.
  10. Use a greased rolling pin and roll the fondant out to required size. For this cake I rolled it out to about 18″ x 14″. It was easy to pick up and drape over the cake.

Tempered Chocolate

  1. Cut 1 lb of chocolate into small pieces (or pulse in a food processor)
  2. Place chocolate in a heat proof bowl over simmering water (the bowl should not touch the water.)
  3. Heat the chocolate while stirring until melted, continue heating to 120 deg
  4. Remove the bowl from the heat (dry the bottom of the bowl. Any water will cause the chocolate to seize.)
  5. When the chocolate cools to 82 deg, place back on the heat and heat to 90 deg.
  6. Pour the liquid chocolate over the cake. This will cool the chocolate and make it set into a thin crust. My problem was I let the chocolate cool too much before trying to pour. Next time I will leave the bowl on the hot water and remove both from the heat. Hopefully this will keep the chocolate thin enough to pour. If anyone has suggestions I would appreciate them.