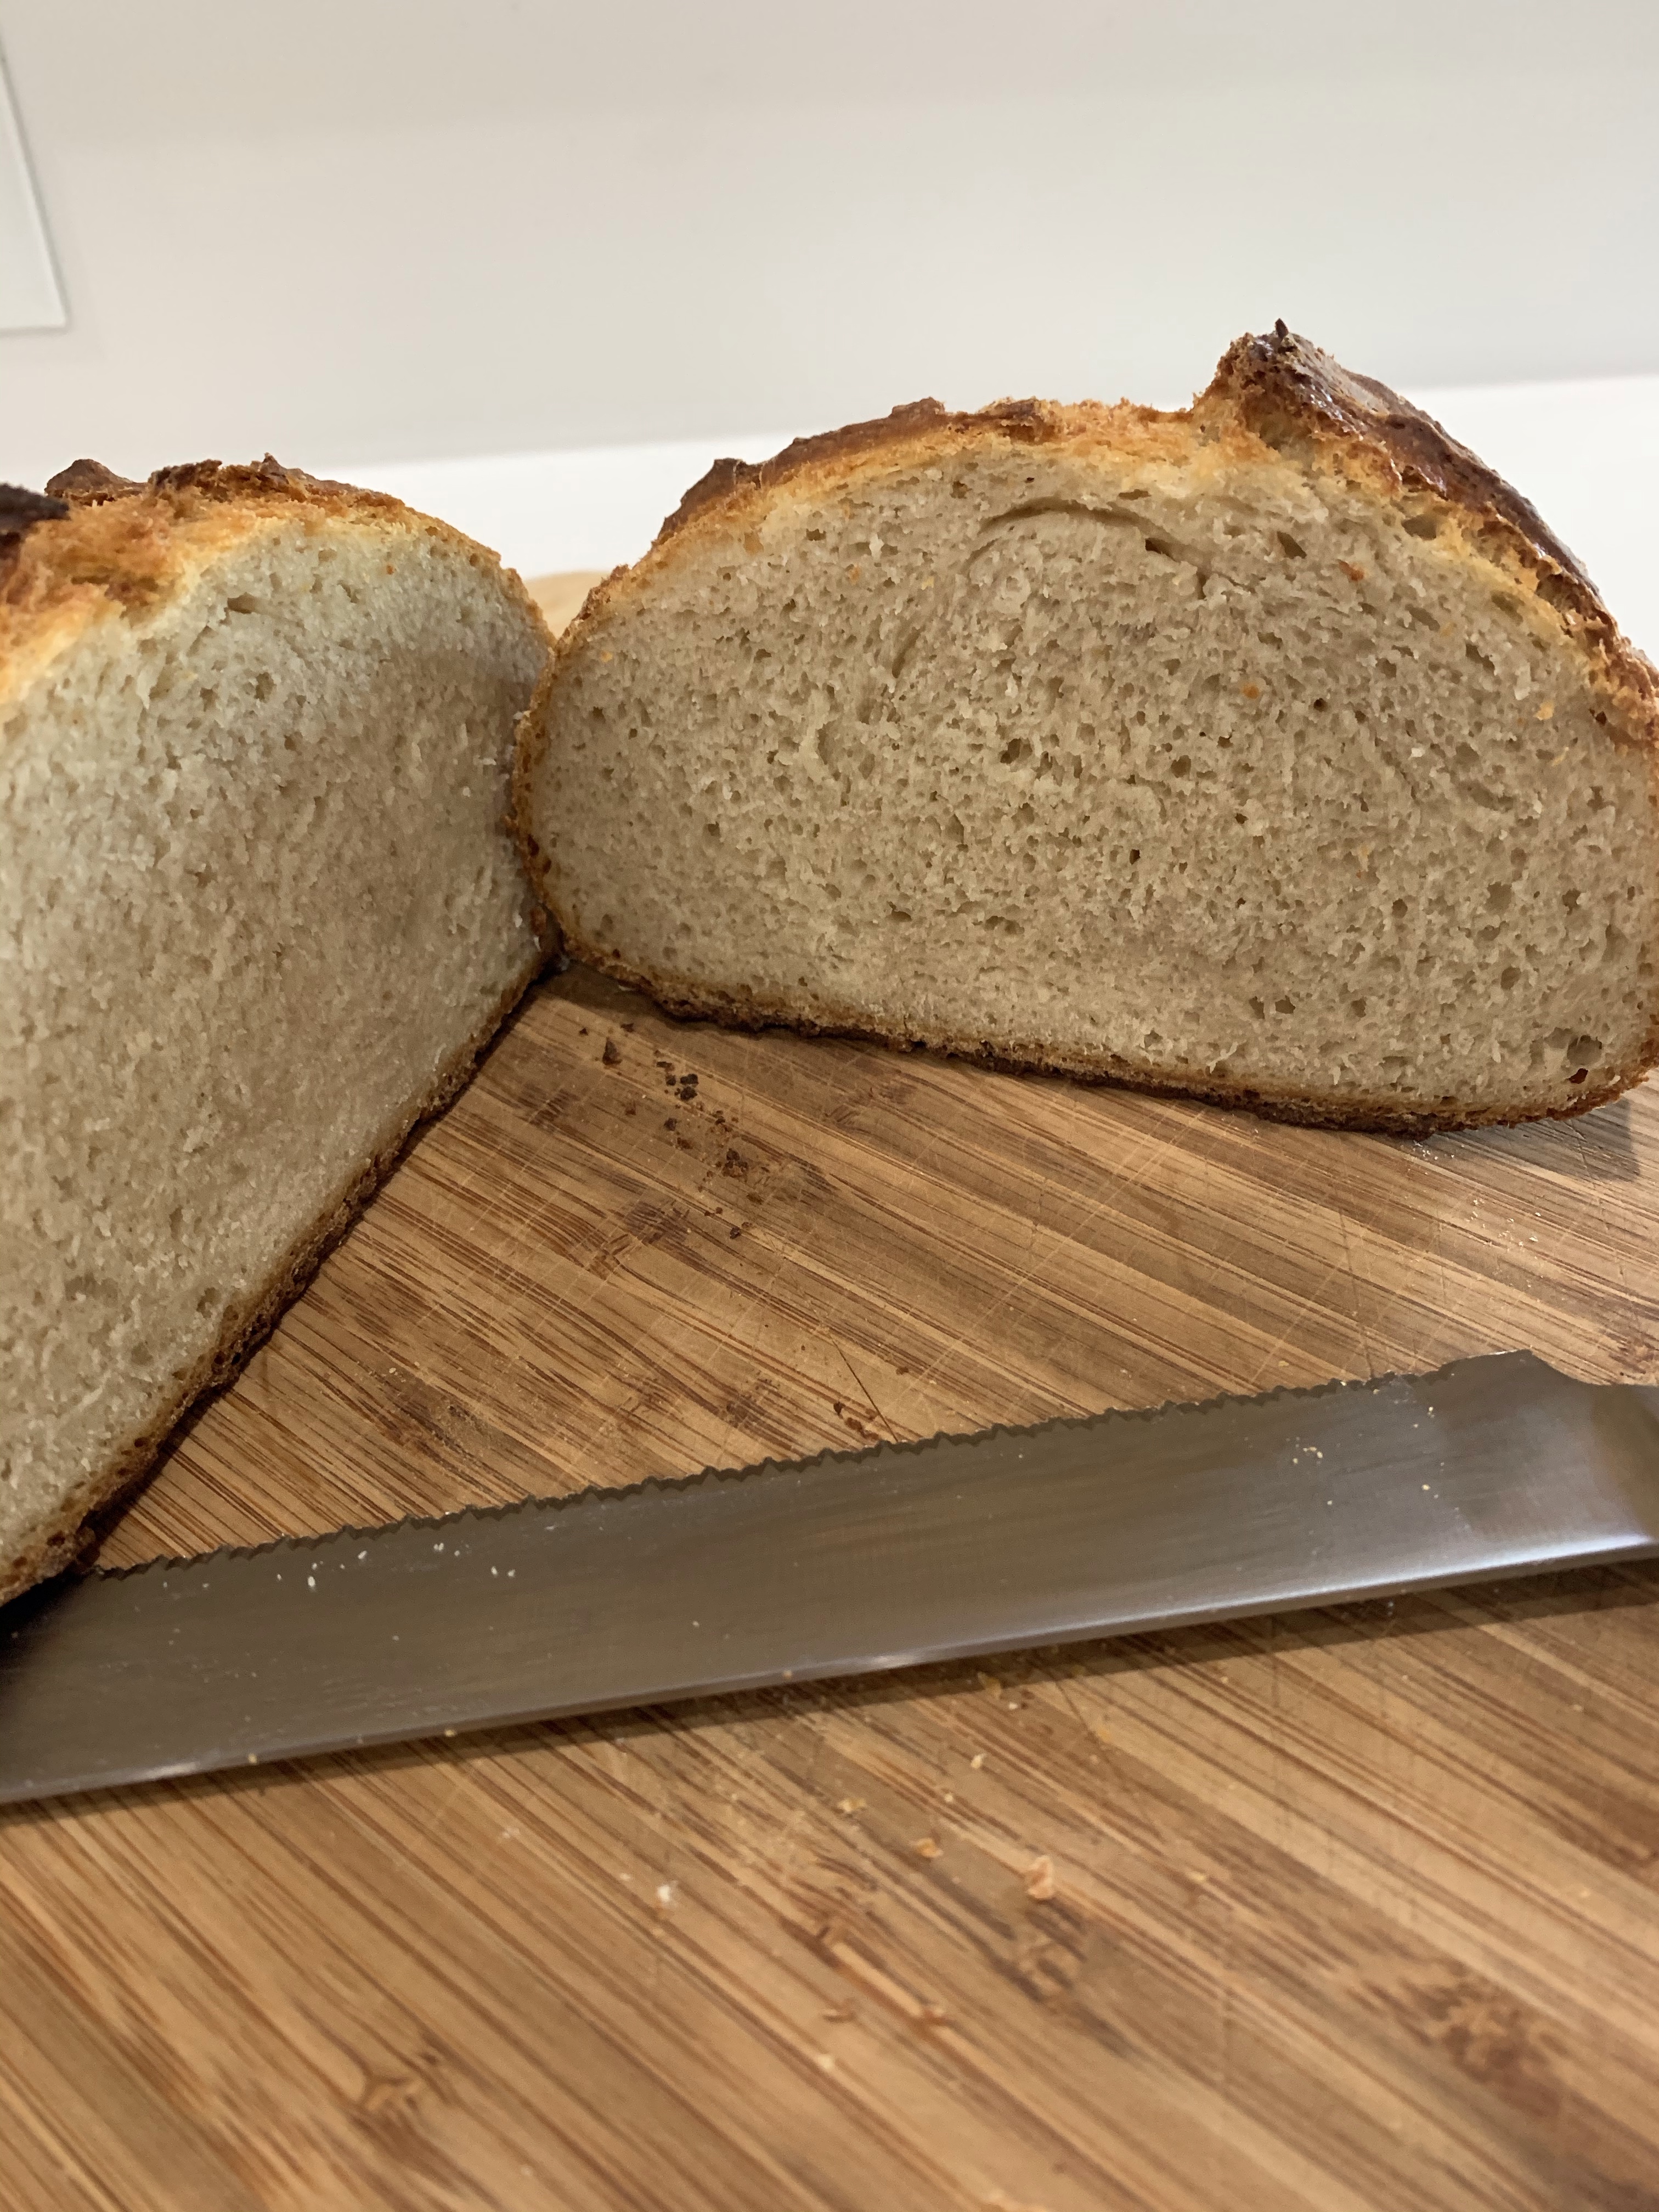
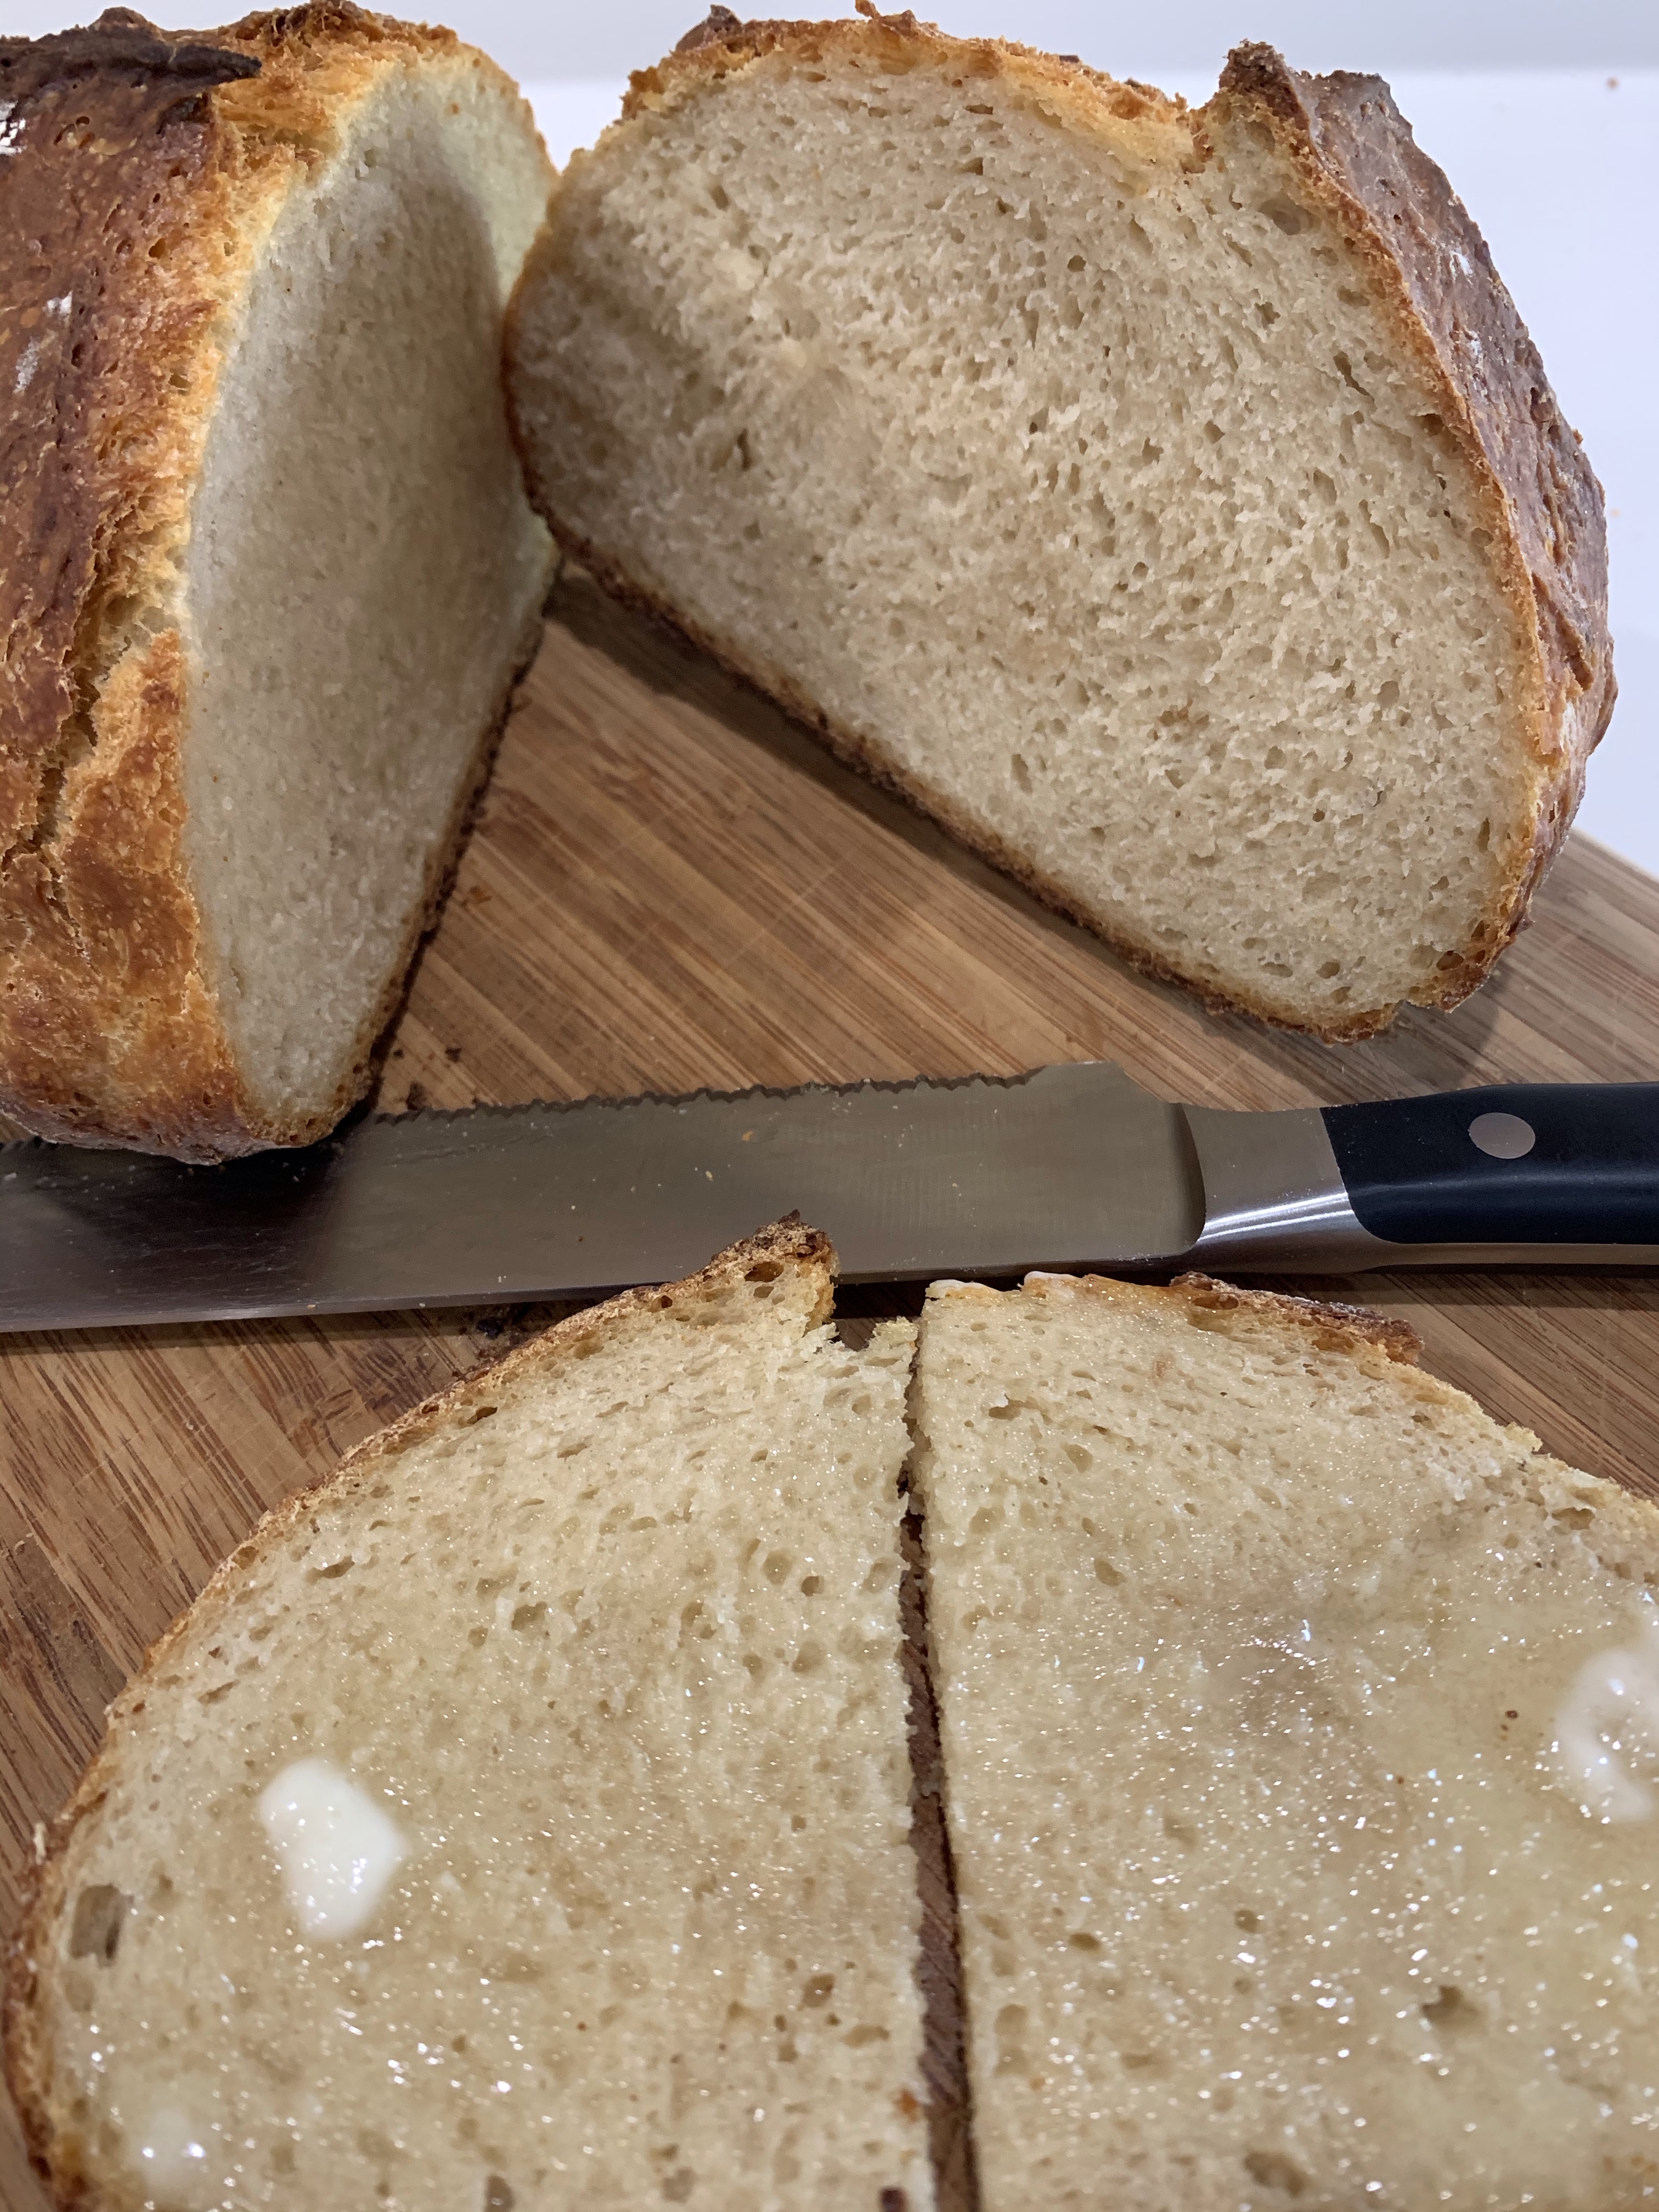
Is it “poolish” to make a high hydration bread without an overnight pre-ferment? It may have been a “biga” mistake but I made this high hydration no-knead bread with honey in a morning, in time for lunch.
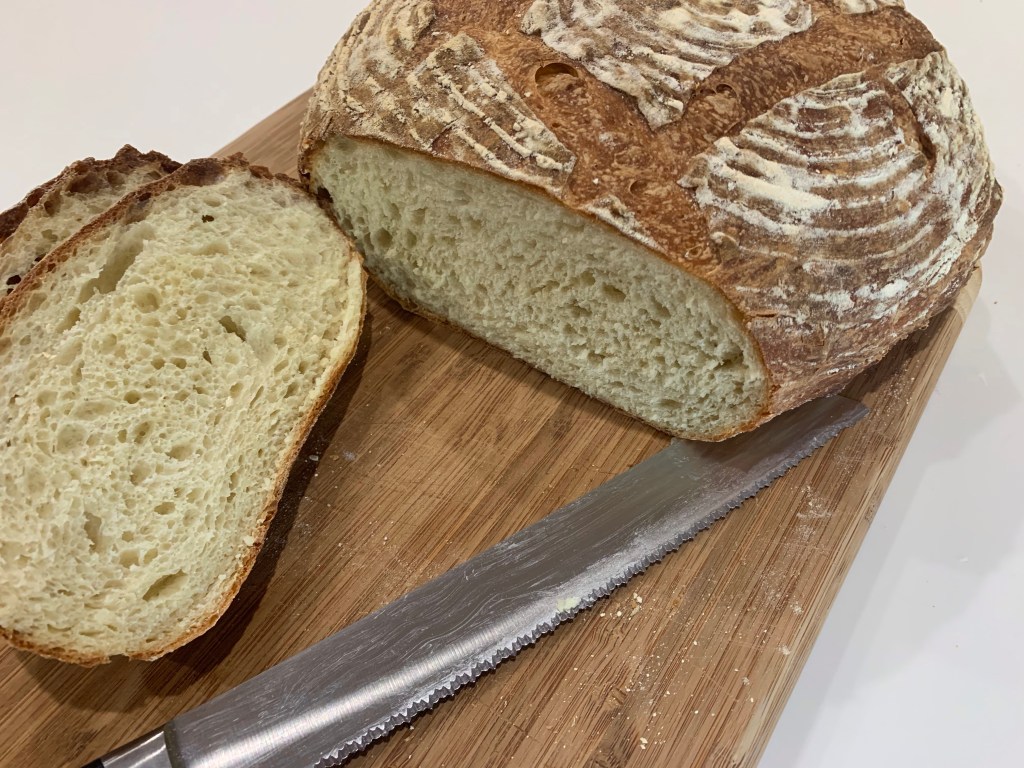
After recent great success with Italian Pugliese bread it was time to start experimenting with variations. Can the flavor, crumb, hole formation and amazing crust of the high hydration (84%) pugliese be reproduced without using the biga (overnight pre-fermentation?)
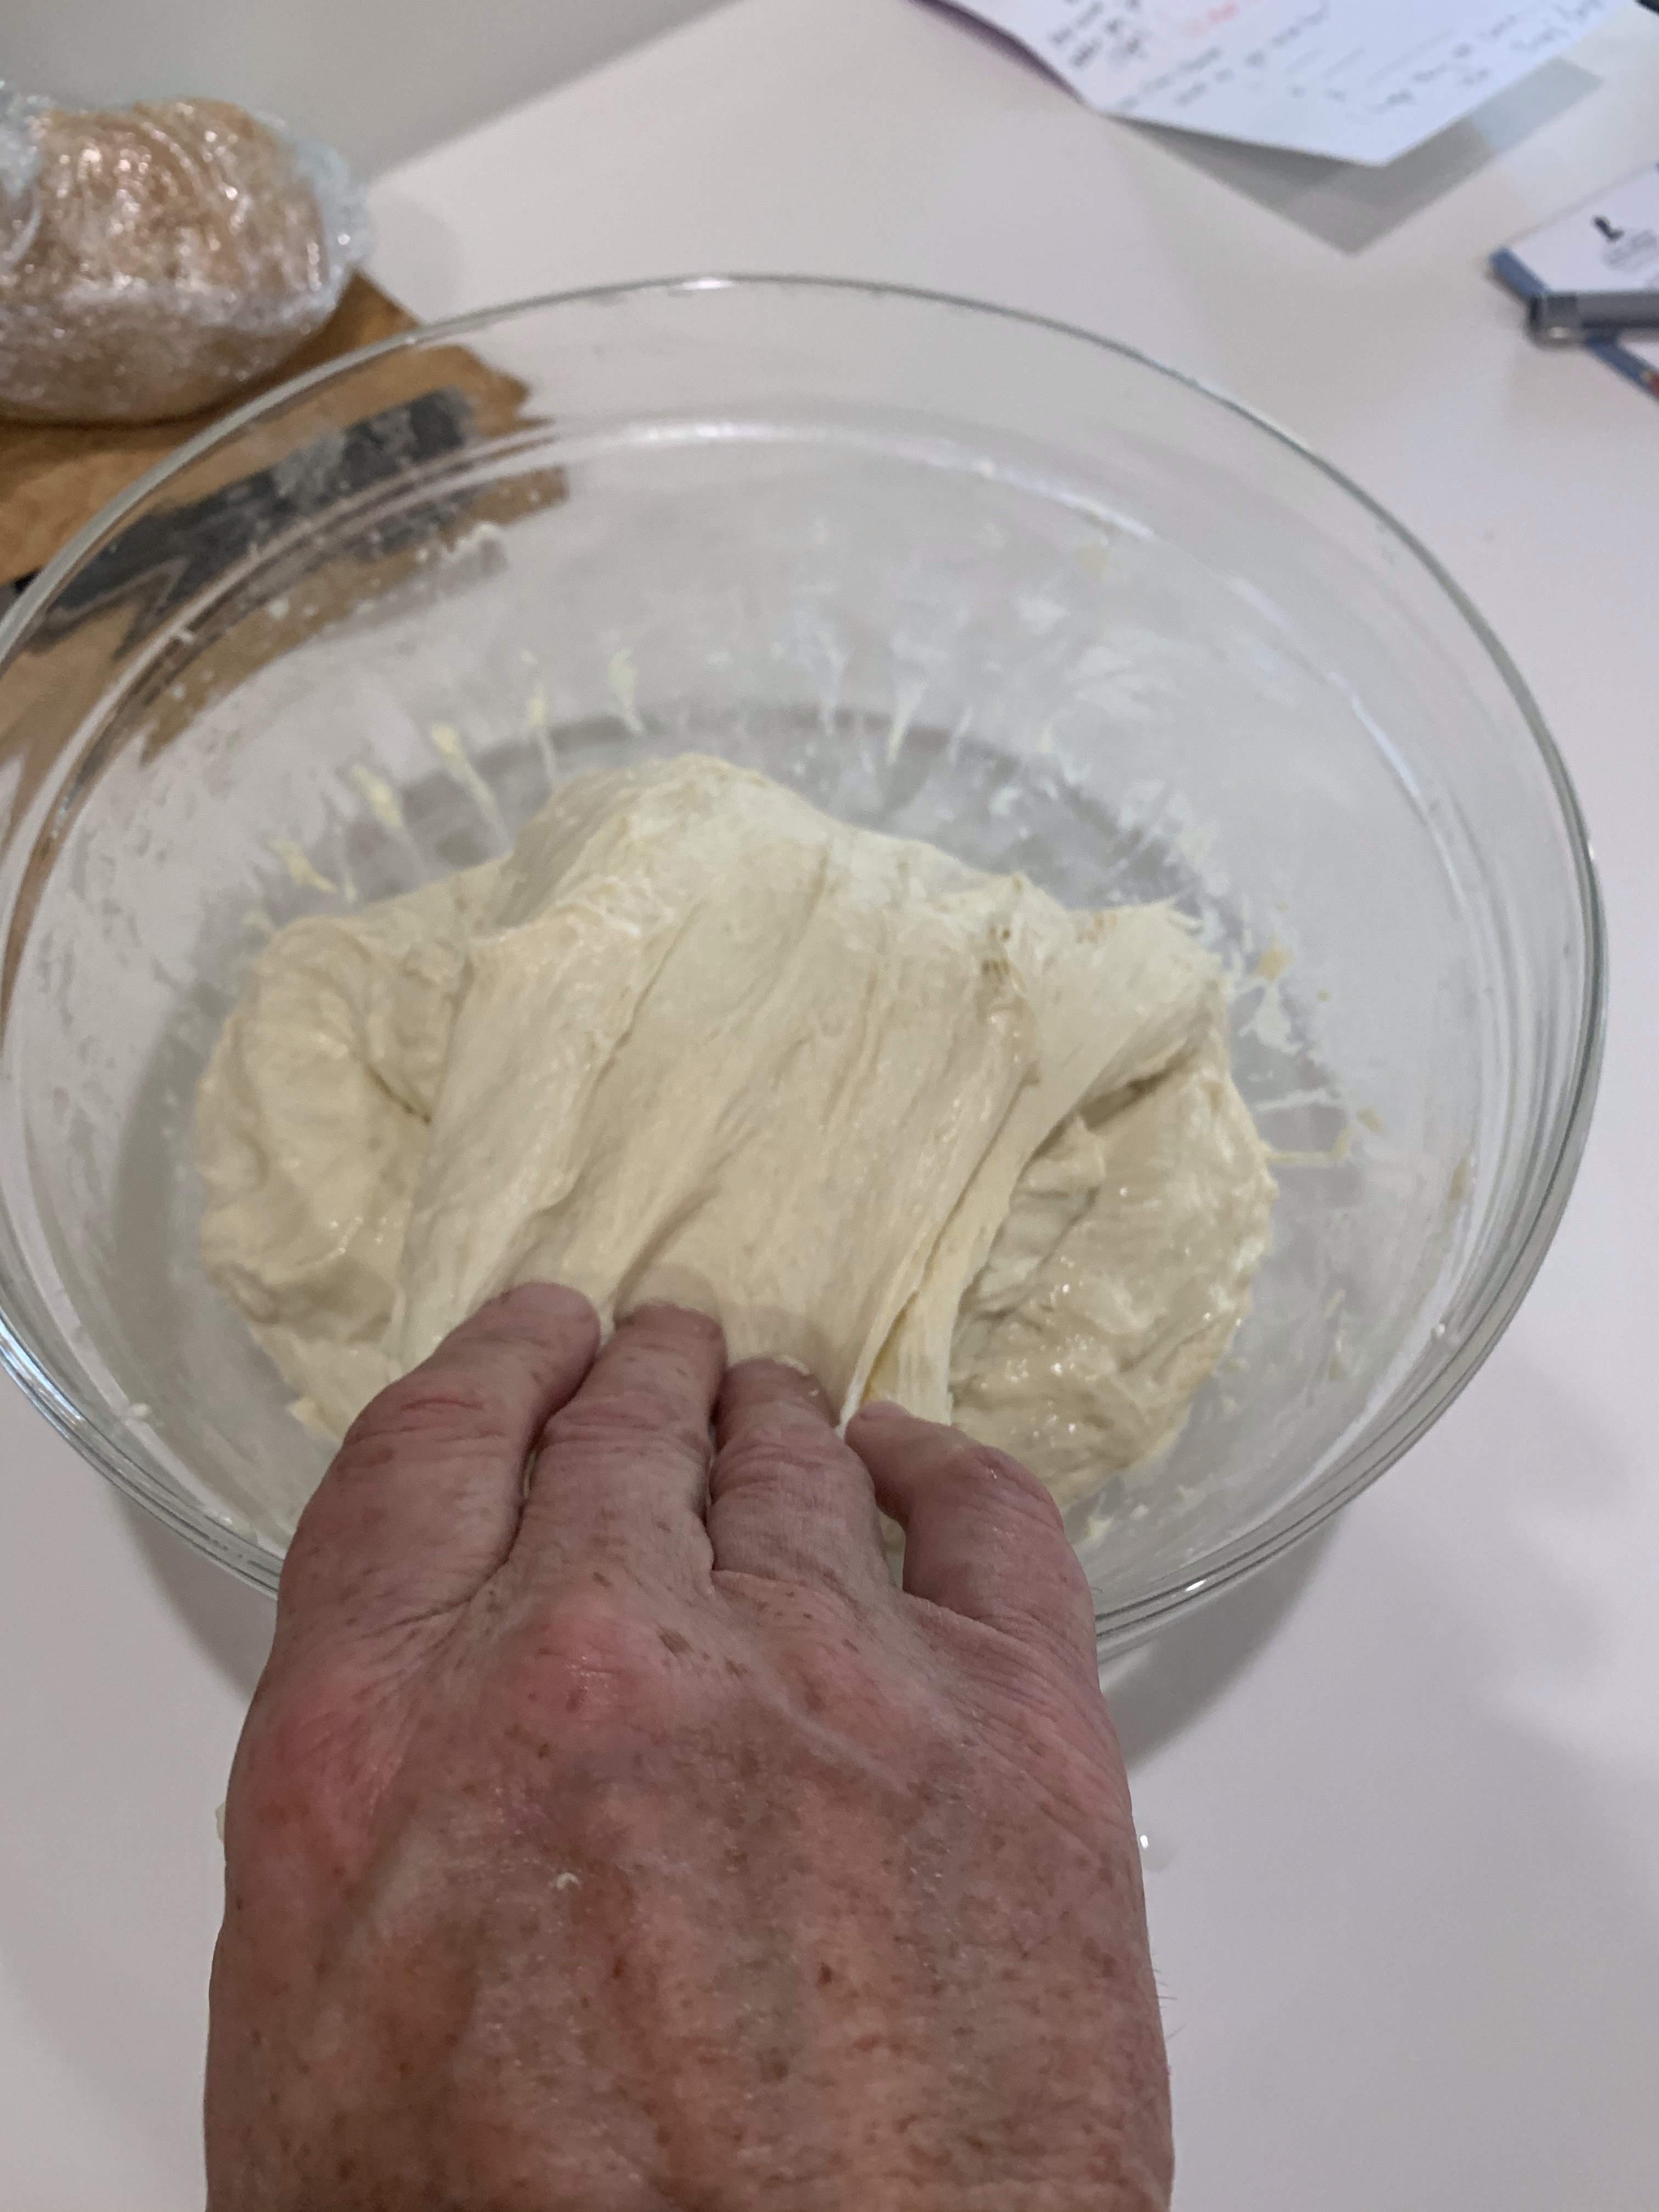
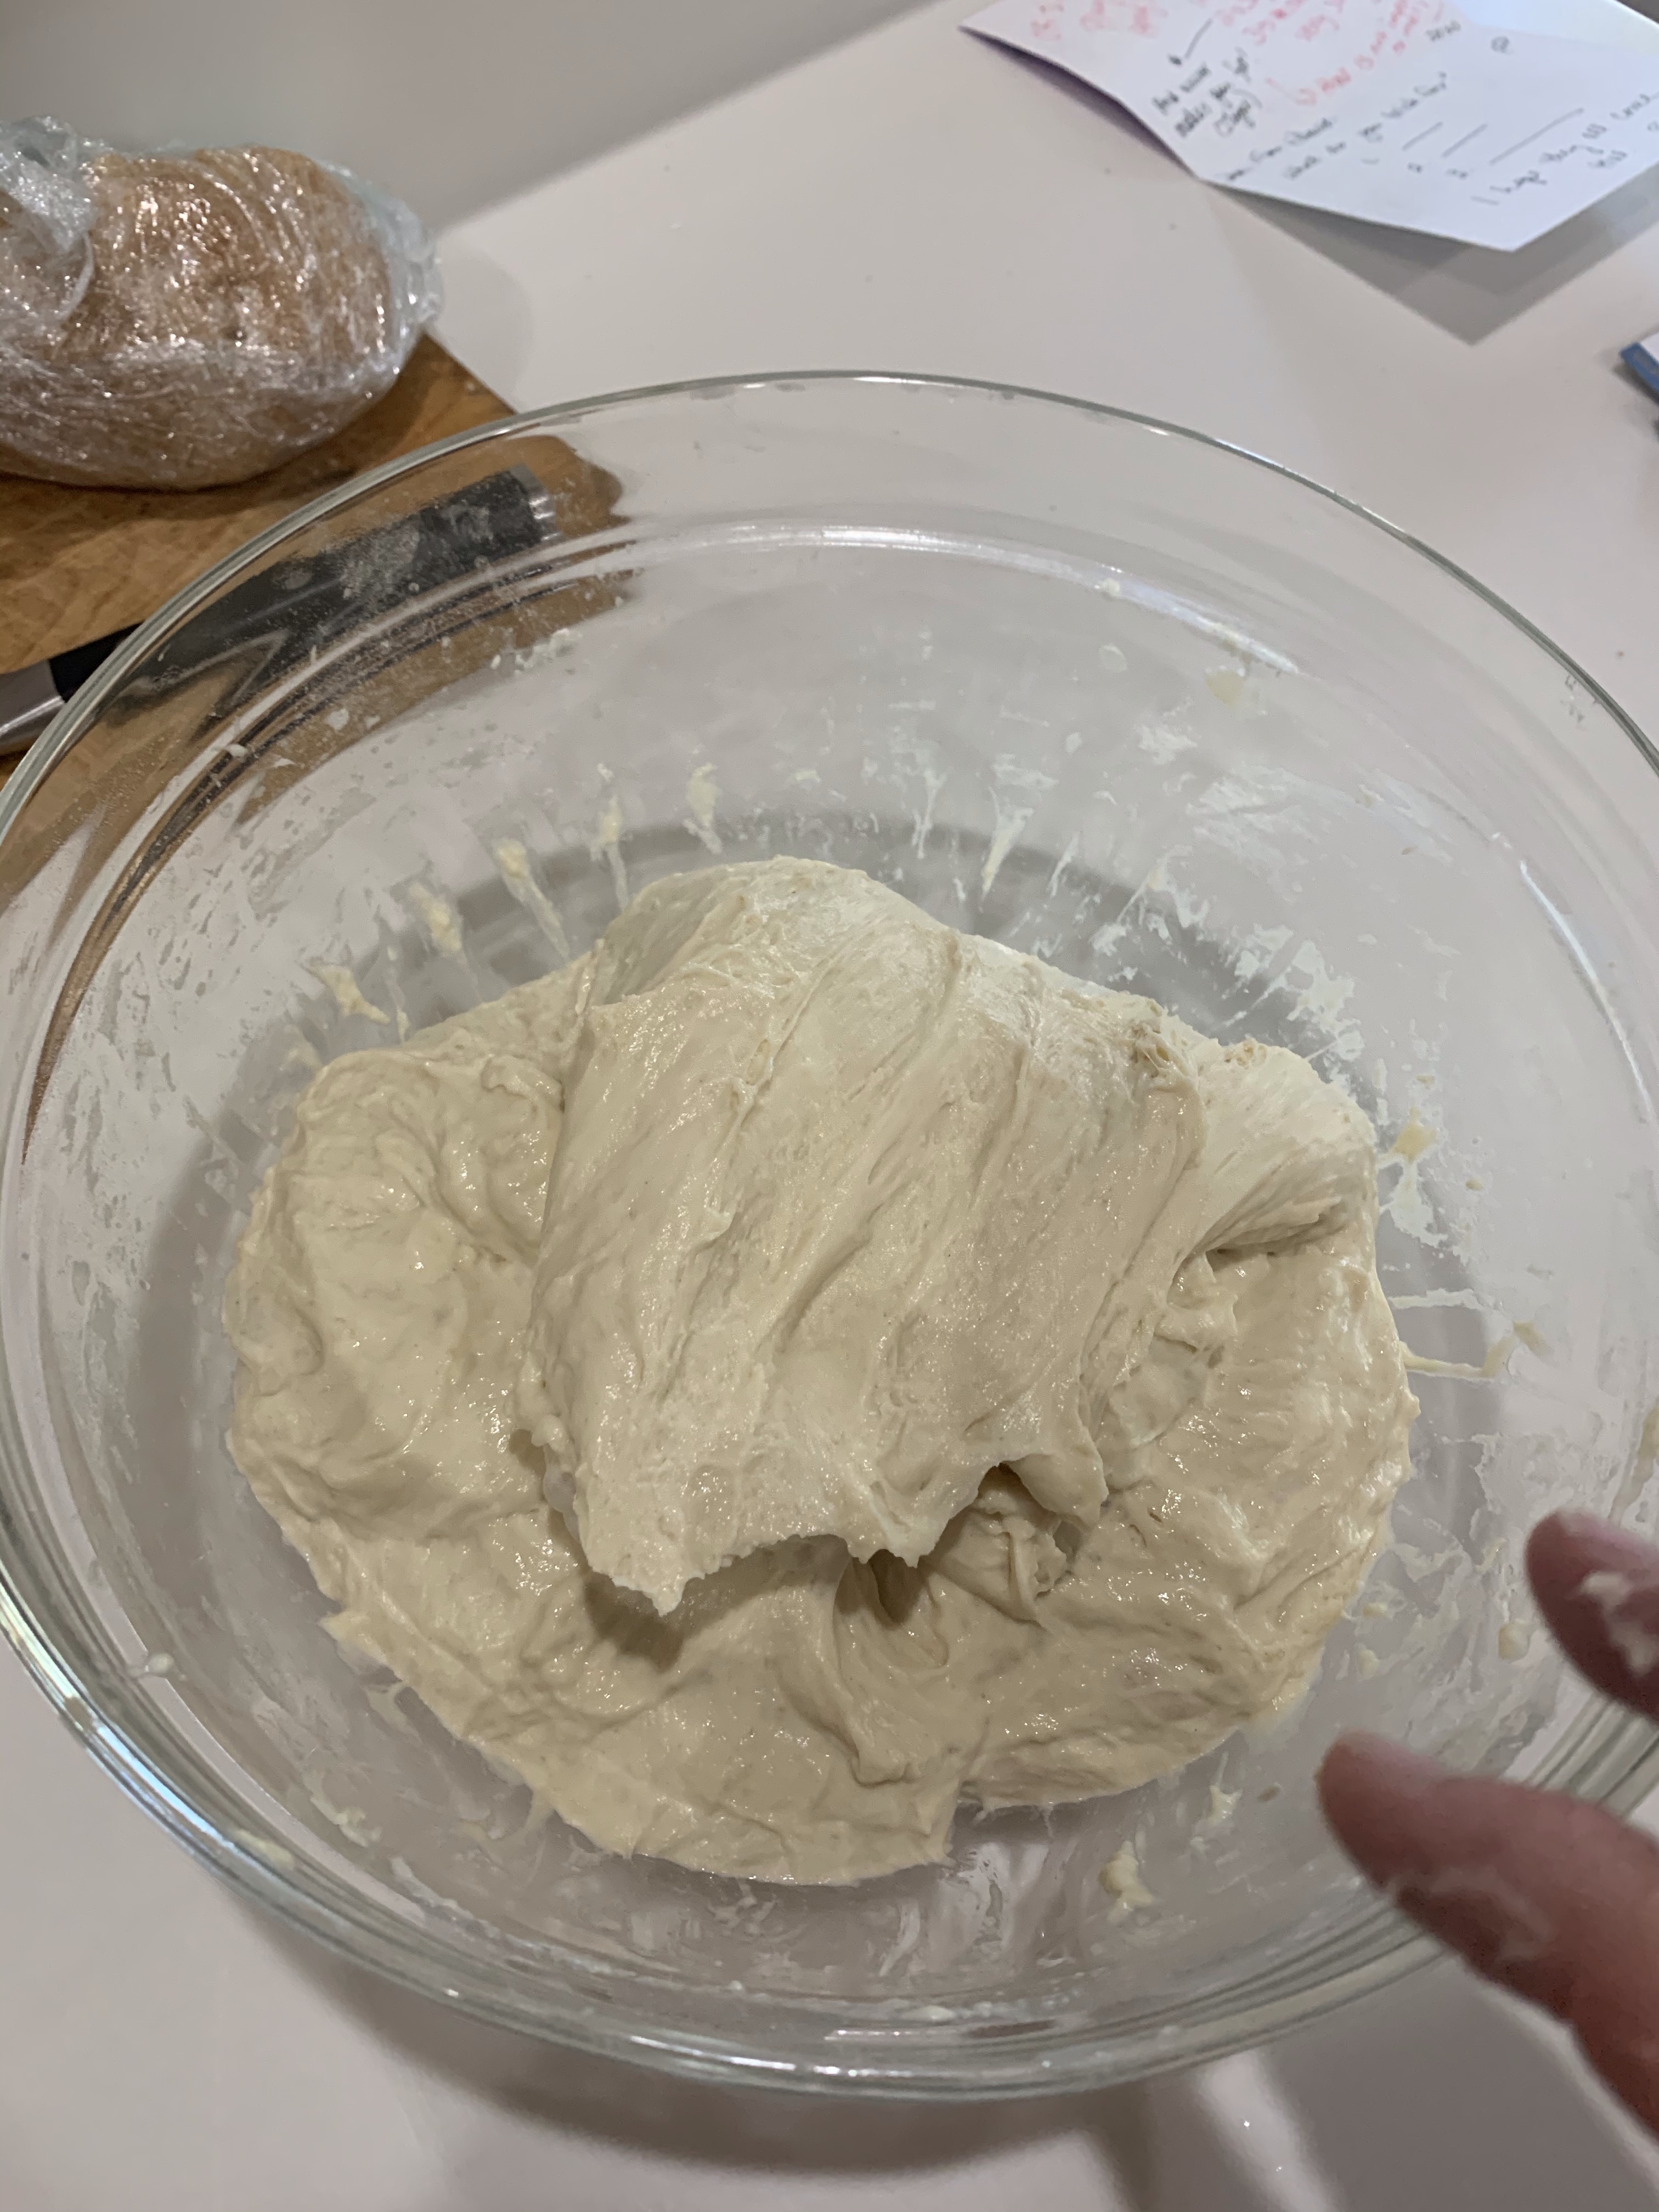
This high hydration (75%) breads use a stretch and fold technique rather than kneading. This degasses and equalizes the temperature of the dough and builds and aligns the gluten strands to form an excellent full body loaf.
Pick up the dough from one side, stretch it up and fold across the rest of the dough. Repeat for each side, top and bottom
Along with no pre-fermentation this recipe does not use the Tipo 00 flour.
Quality Assurance report is just in – Yes!! This is a great bread! Make more! It has similar flavor, crumb, crust and hole formation as the Pugliese, but can be made start to finish in about 5 hours.
INGREDIENTS – (I weigh everything) • 600 g all-purpose flour (about 4 cups using ‘scoop and sweep’ method) • 450 g water (2 cups, room temperature) • 21 g honey (1 Tbsp) • 14 g kosher salt (1 level Tbsp) • 3 g SAF Gold instant yeast (1 tsp)
METHOD
Add the water and honey to a large bowl and mix until the honey is dissolved.
Add the rest of the ingredients and mix by hand, until a sticky homogeneous mass is formed. Cover the bowl with a plastic wrap and let rest for 1 hour.
After one hour, perform stretch and folds every 30 minutes over the next 1½ hours. Let the dough continue its fermentation for additional 1½ hours or until it doubles in size.
Shape the dough in a ball and transfer to a proofing basket dusted with a 50/50 mix of all-purpose and rice flour, seam side up.
Cover with a piece of paper towel (this will prevent sticking of the dough to the plastic wrap), then with a plastic wrap. Let proof for about 60 minutes or until the dough passes the finger test. (Poked with a finger the indentation will spring back very slowly.) The dough will increase in size about one a half times or so.
Place a baking stone and a steam pan in the oven. Preheat the oven to 500F. An hour of preheating is recommended.
Turn the bread over on a piece of parchment paper. Score on top and place in the oven using a pizza peel. Be careful opening the oven, it will be full of hot steam. Spray the walls of the oven with a bit of water (gentle mist) to re-create some of the lost steam and close the door.
Immediately drop the temperature to 450F and bake for 25 minutes.
Remove the water pan from the oven, turn the bread 180 degrees and leave the door cracked open. You can use a wooden spoon for that. Bake until the internal temperature reaches 205-210F or about another 25 minutes.
When the baking is done, remove the bread from the oven and place on a cooling rack. Cool for 1 hour at room temperature before slicing.
Eventually we will no longer be sheltering in place. It will be exciting to roll out of the garage door, as the front door will no longer be large enough for me to fit through. I may need a bigger car, or maybe a flat-bed. Enough whining, this is about a new bread recipe.
KAF does it again. This is a crusty, chewy white bread that is delicious. My go to white sandwich bread has been Gold Medals recipe, but this may be the new standard. Even with the lower gluten AP flour this bread is chewy and soft. I had my quality assurance slice for dessert tonight and can only imagine my PB&J sandwich with it tomorrow.
It’s an easy recipe and can be made in a about 3 hours and as today is Monday, which is not a golf day, what else is there to do? Try it. It’s worth it.
Crusty Cloche White Bread
INGREDIENTS
• 1 ¼ cups (283g) lukewarm water • 2 teaspoons instant yeast • 1 ¼ teaspoons salt • 2 tablespoons (25g) olive oil • 3 ½ cups (421g) AP Flour
METHOD
Mix and knead everything together to make a smooth, slightly sticky dough.
Cover the dough, and let it rise for 1 to 1 ½ hours, until almost doubled.
Gently deflate the dough, shape it into a ball, place in a cloche baker, and cover with the lid.
Let the dough rise for 30 to 45 minutes, until it’s almost doubled in size.
Slash the top of the loaf several times, cover with the lid, and place the cloche in a cold oven.
Set the oven temperature to 400°F; bake the bread for 35 minutes, covered.
Remove the lid, and bake the bread until it’s golden brown, another 5 to 10 minutes. The internal temperature should be 205-210 degrees.
Take it out of the oven, and transfer the bread to a rack to cool.
Ever hear the third times a charm? Well, believe it—it’s true. This was my third attempt at this bread. The first two were disasters due to simple, stupid mistakes. In the first one I used 2 Tbl of salt instead of 2 tsp. I proofed the second one too warm. I tossed the first one. Not only did it take forever to rise due to the salt retarding the yeast, the salt taste was overwhelming. Plus I forgot the egg wash so the crust was dull and unappealing. The second was proofed in the proofing oven and rose too fast causing splits along the sides and when scored with the lame it flattened but was still ok to use for garlic bread.
The third and successful bake was proofed at room temperature for 15 minutes shorter than the recipe called for, but still doubling the size of the dough. I also activated the yeast for 10 min prior to adding the rest of the ingredients. (Step 1 below.)
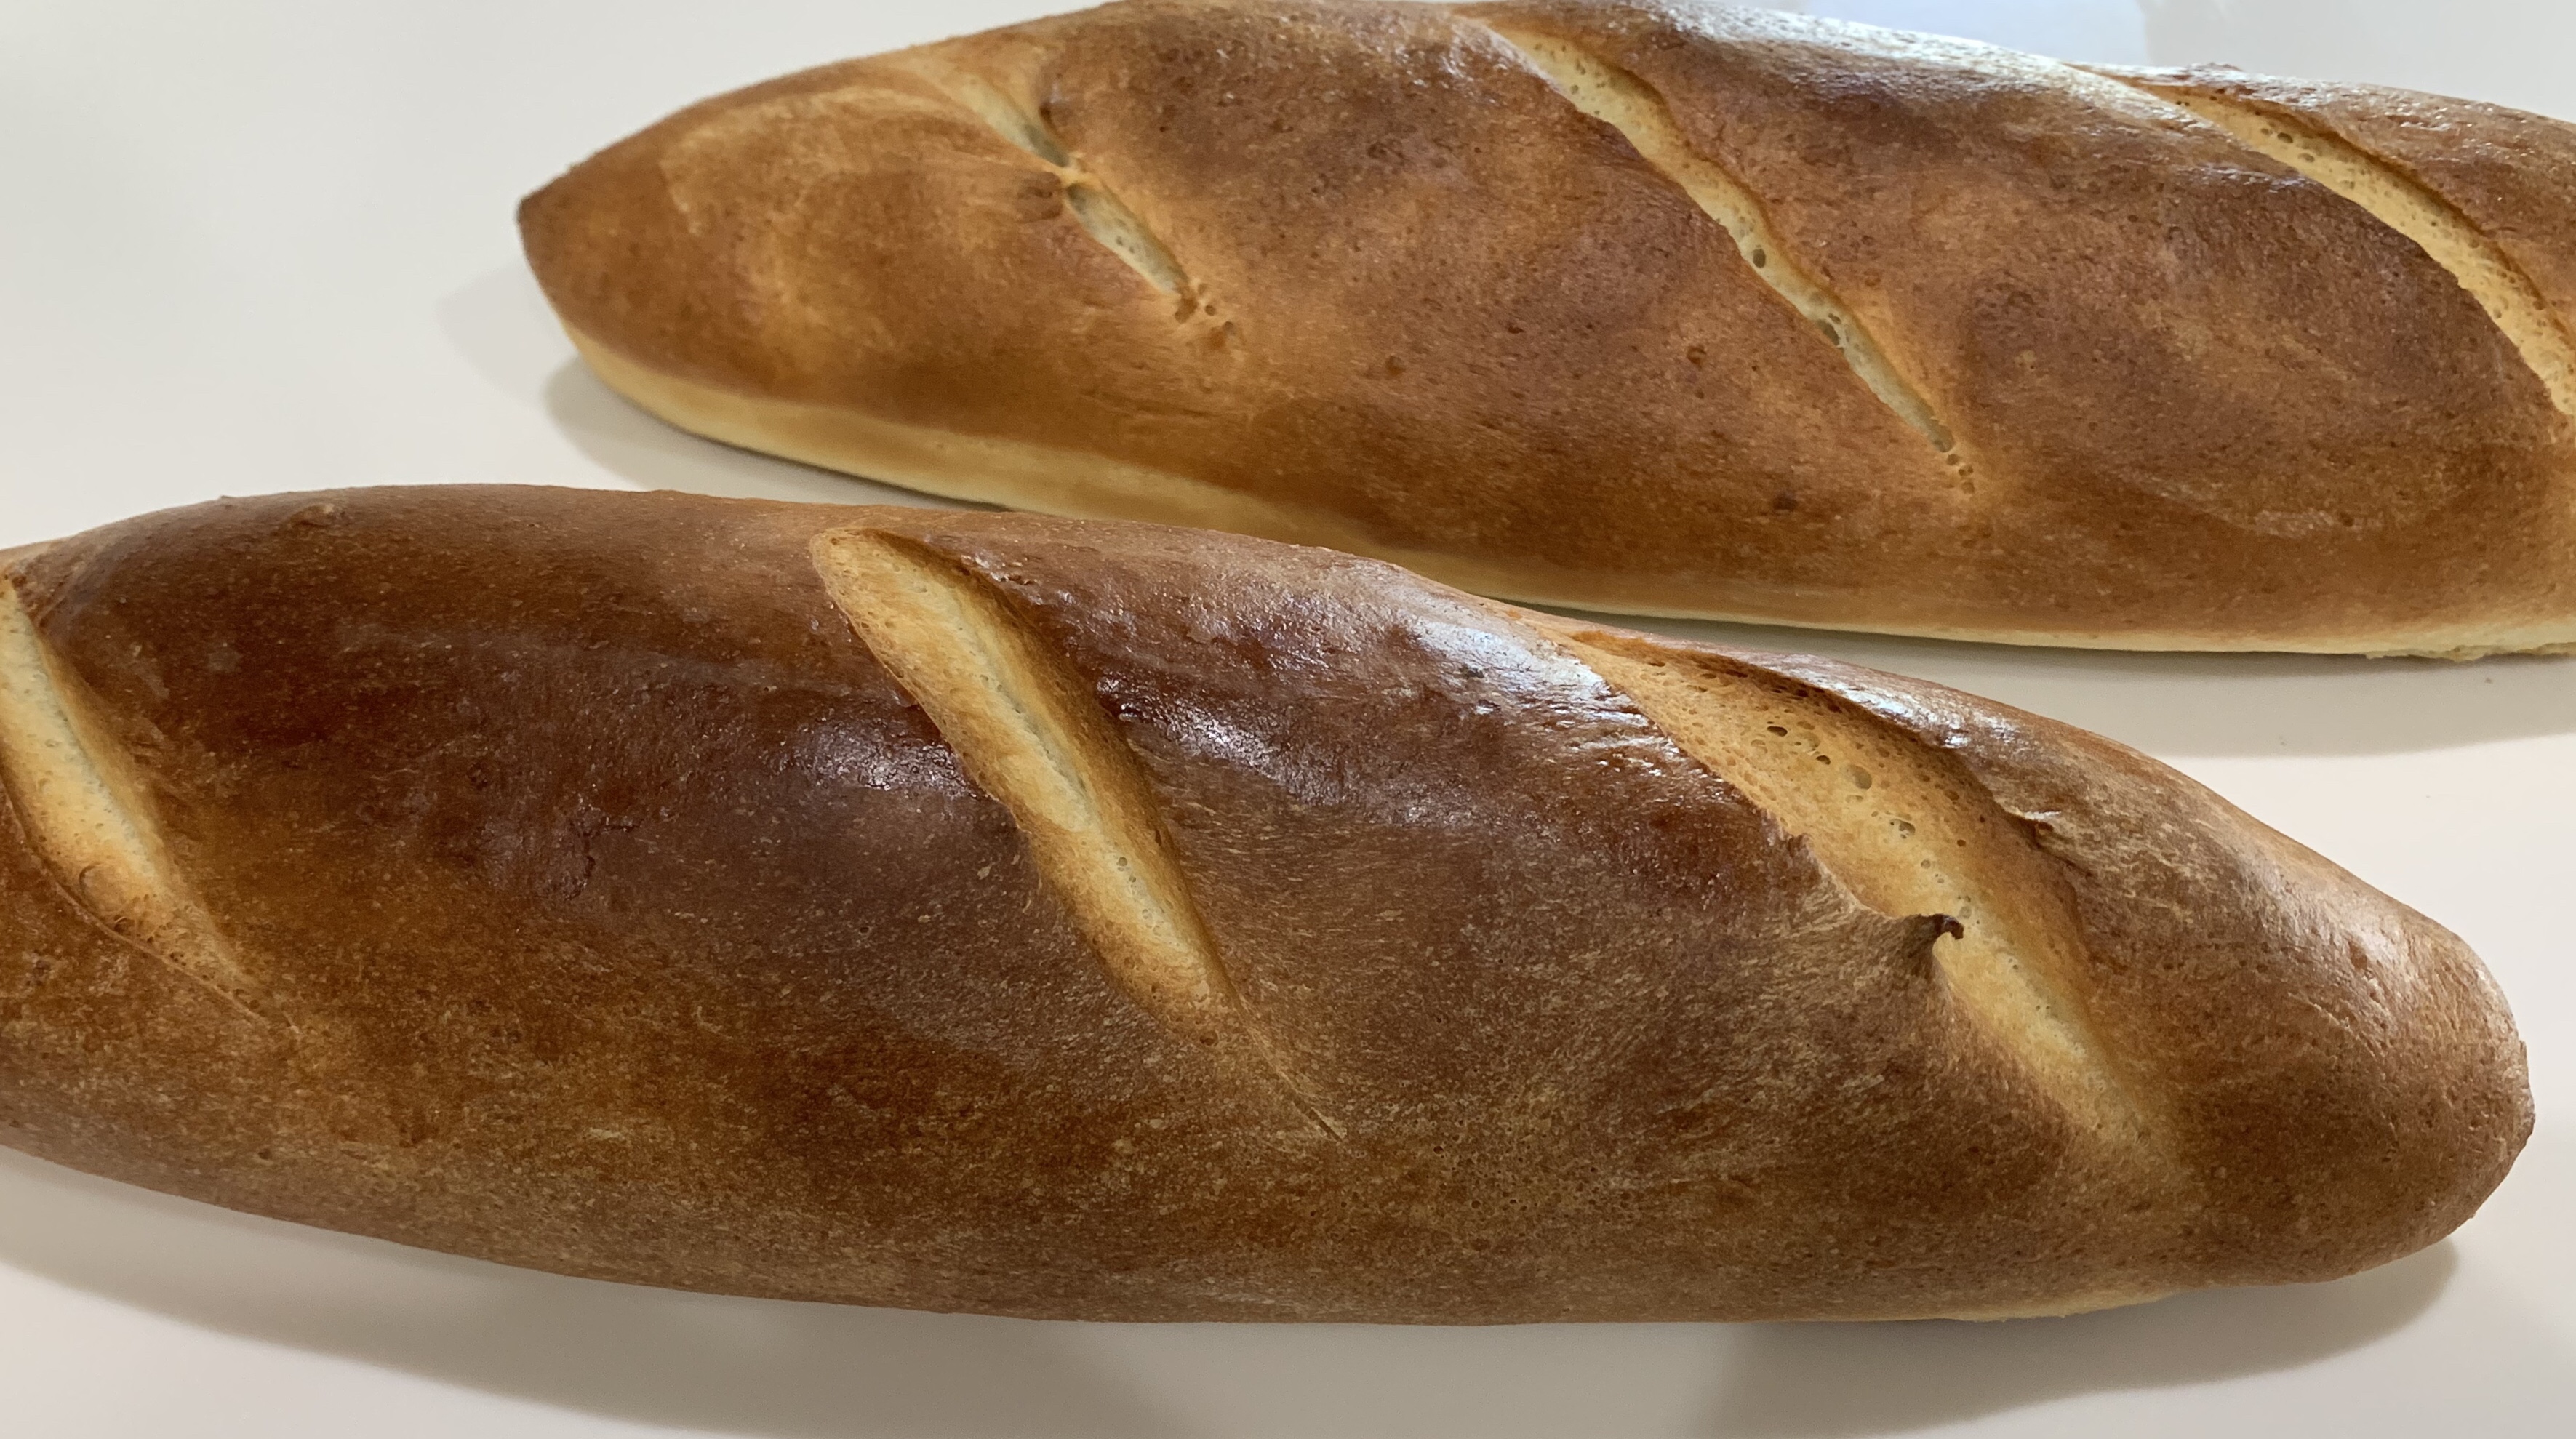
Italian Supermarket Bread KAF
INGREDIENTS Dough • 4 cups (482g) AP Flour • 2 tablespoons (21g) potato flour or 1/4 cup (21g) dried potato flakes • 1/4 cup (35g) nonfat dry milk • 2 teaspoons salt • 2 teaspoons sugar • 2 teaspoons instant yeast • 1 1/3 cups (301g) lukewarm water • 3 tablespoons (35g) olive oil Topping • 1 egg white, beaten with 1 tablespoon water, or substitute Quick Shine • sesame seeds METHOD
In your stand mixer bowl combine the yeast, sugar and water and allow to rest for 10 minutes
Add half of the flour and all of the rest of the dough ingredients till cohesive. Add the rest of the flour mixing between each addition
Knead the dough for 5 to 8 minutes, until it’s smooth and supple, adding more water or flour as needed.
Cover the dough and allow it to rise for 1 hour, or until it’s doubled in bulk.
Transfer the dough to a lightly greased work surface and divide it into two pieces. Shape each piece into a smooth 16″ log. Place the logs into the two wells of a lightly greased Italian bread pan, cover, and let the loaves rise until very puffy, about 1 hour.
Brush the loaves with the egg wash (or spray them with Quick Shine), then sprinkle heavily with sesame seeds. Slash the loaves diagonally, making 3 slashes in each, and immediately put them in the oven. Bake in a preheated 400°F oven for about 25 minutes, until the loaves are golden brown. For the crispiest crust, turn off the oven, prop the door open, and allow the bread to cool in the oven
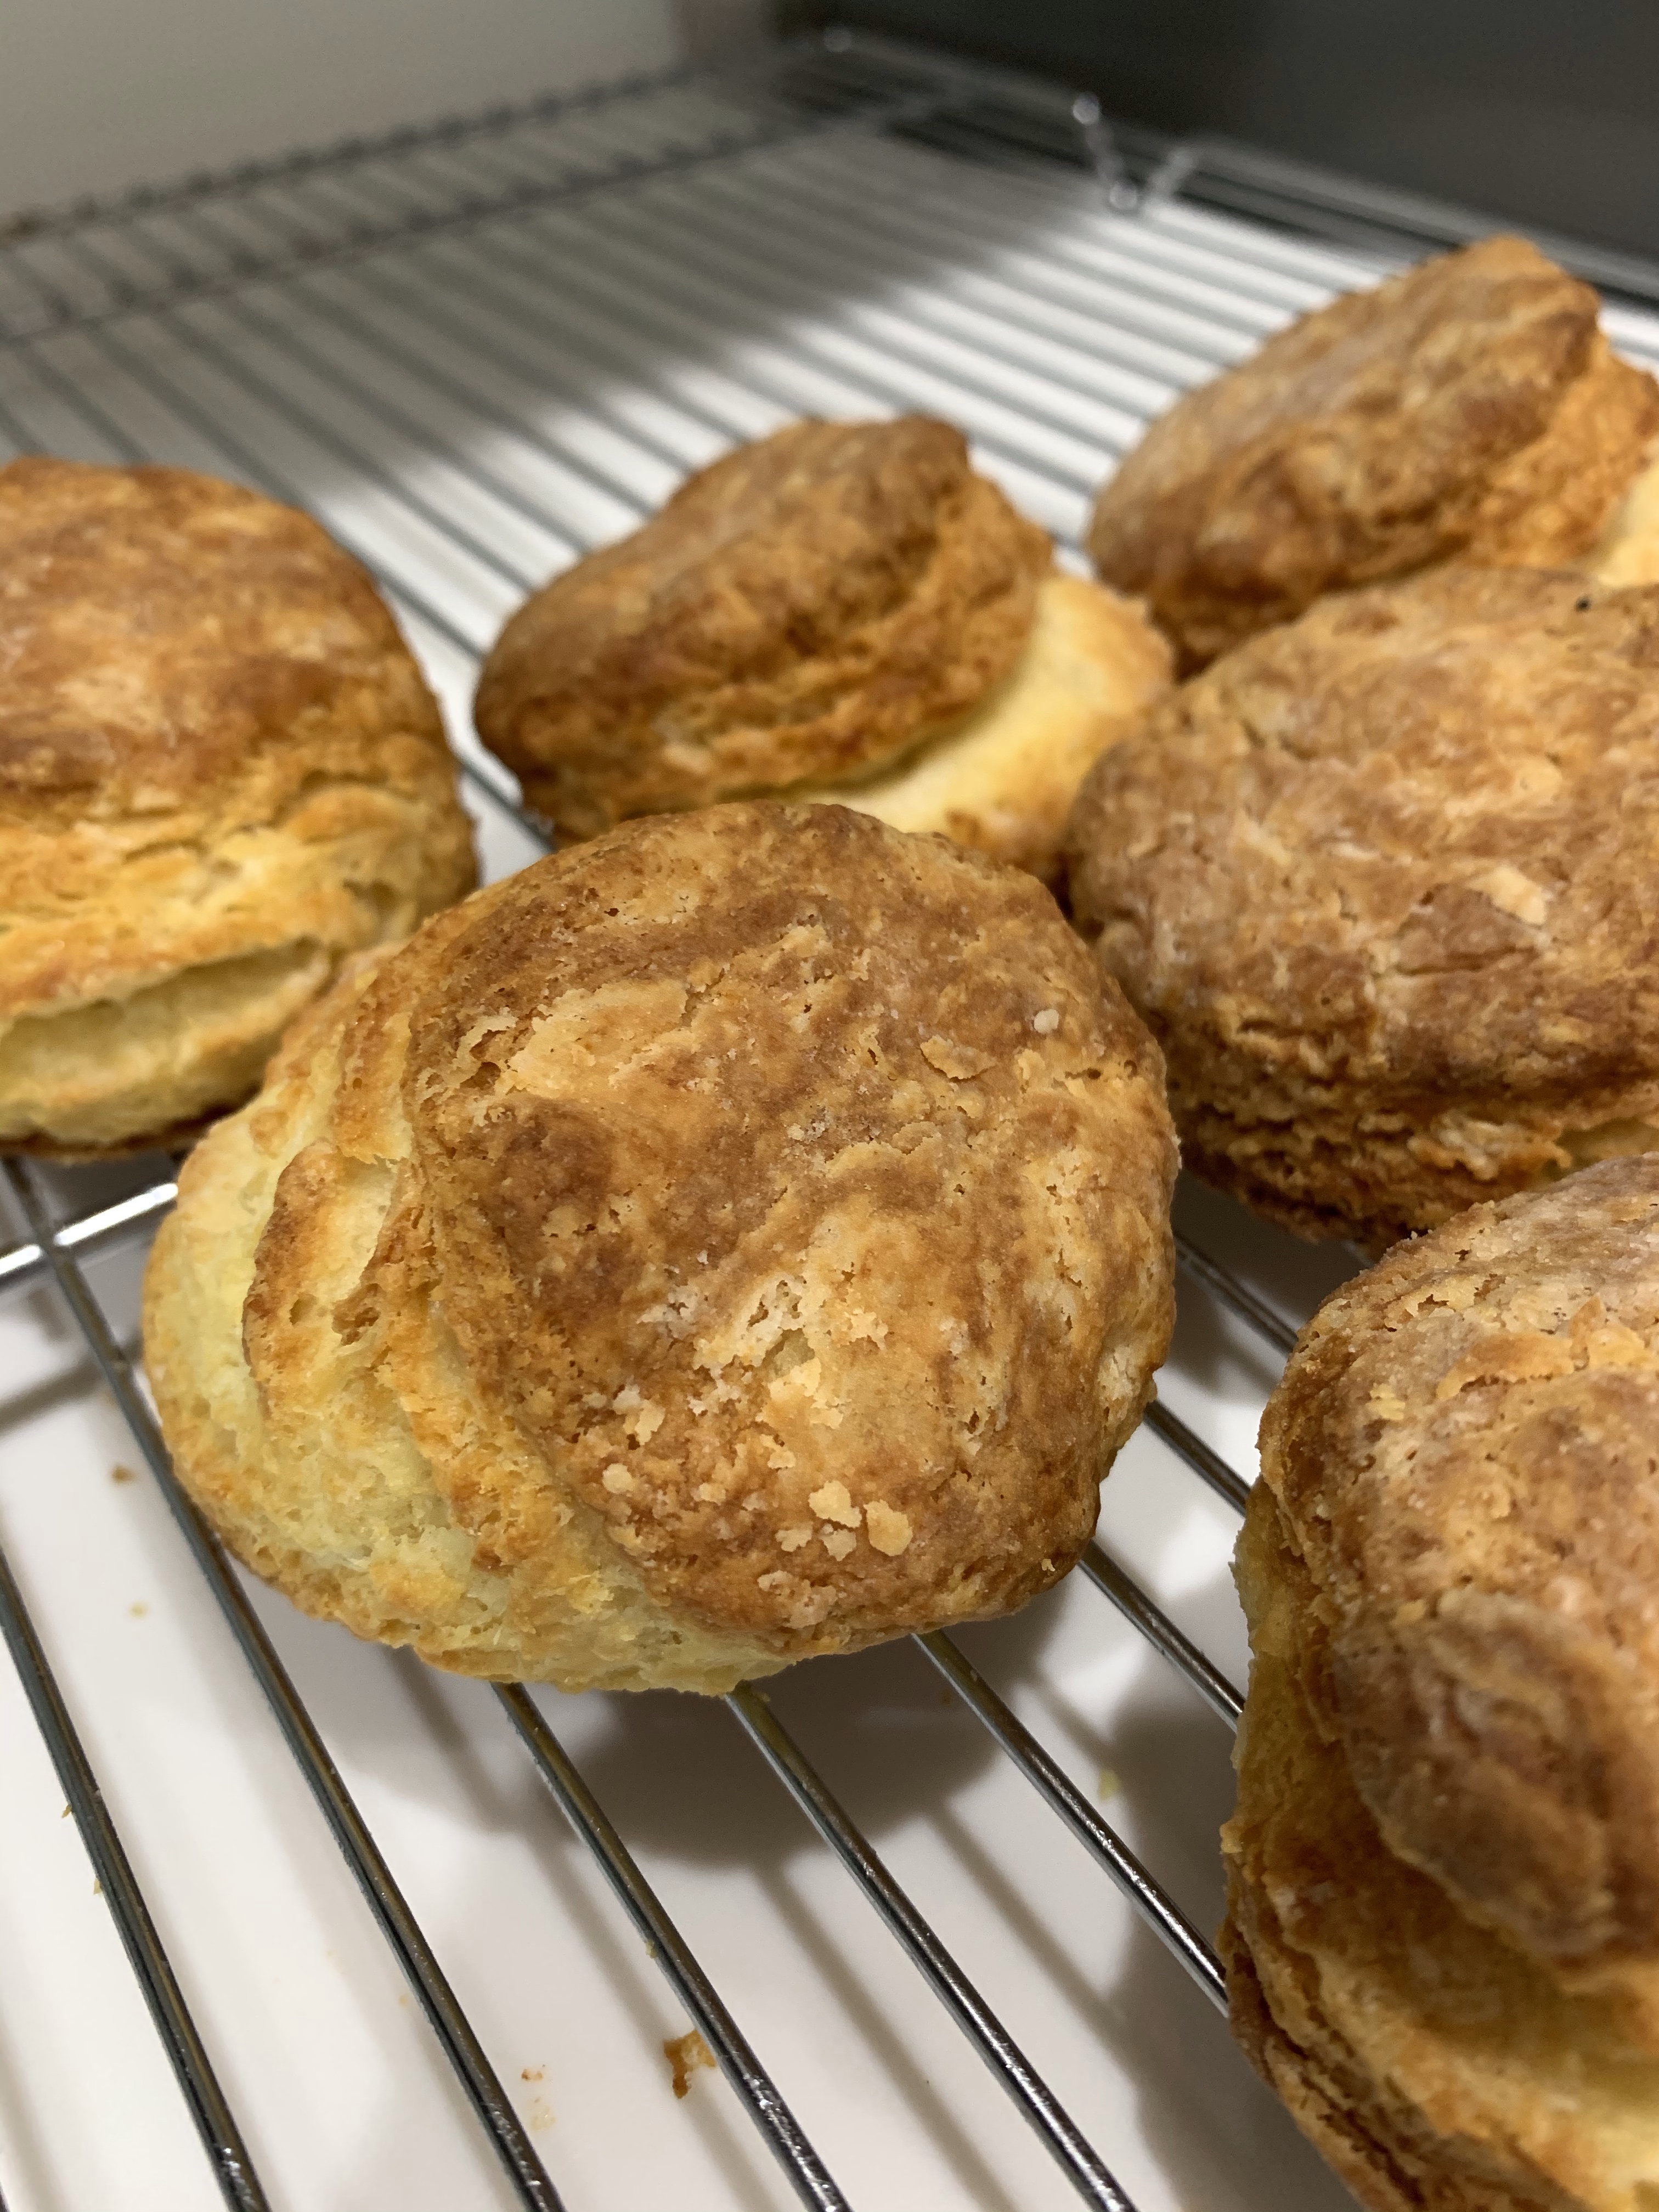
My friend, Maggie, and I have been trading recipes, tips and techniques for a while now. A couple of weeks ago she sent me this recipe for her biscuits, and it is outstanding. Making the batter takes 10-15 minutes, then 15 minutes in the oven and they are ready.
I followed her method exactly, except I cut the biscuits out with a 2” circular cutter. I then bunched the leftovers into a ball, patted them out and re-cut, twice. This provide a good sample for our Quality Assurance Department, who graded them A+
L – QA Samples are the rough ones on the left, R – Finished biscuits
Maggie’s Six Biscuits
INGREDIENTS • 1 tsp Baking Soda • 1 tsp Salt • 1 tsp Sugar • 1⁄2 tsp Baking Powder • 1 1/2 c AP Flour • 1 stick Cold Butter • 3/4 Sour Milk or Buttermilk (I soured whole milk with a bit o’lemon juice)
METHOD
Mix the dry ingredients.
Cut in the butter (fingers or pastry thingie, your choice) til it’s a shaggy mess … remembering that the less it’s messed with the flakier it’ll be.
Once it’s at the shaggy mess stage begin adding the liquid a bit at a time until it’s a soft dough … keeping in mind then”remembering” bit notes above.
Knead it a tiny bit.
Turn it out onto a lightly floured surface, pat it into a rectangle about 1/2” high, spread some melted butter on it,
Fold in half, pat it into a rectangle about 1” high, spread some melted butter on it.
Cut into 6 pieces, place on parchment papered baking sheet, bake at 425 for about 15 minutes.
You know those little cooking videos that pop up on FB occasionally, or in my case, constantly? Apparently, FB knows what you like and what you want to see. Think Orwell’s “Nineteen Eighty Four.”
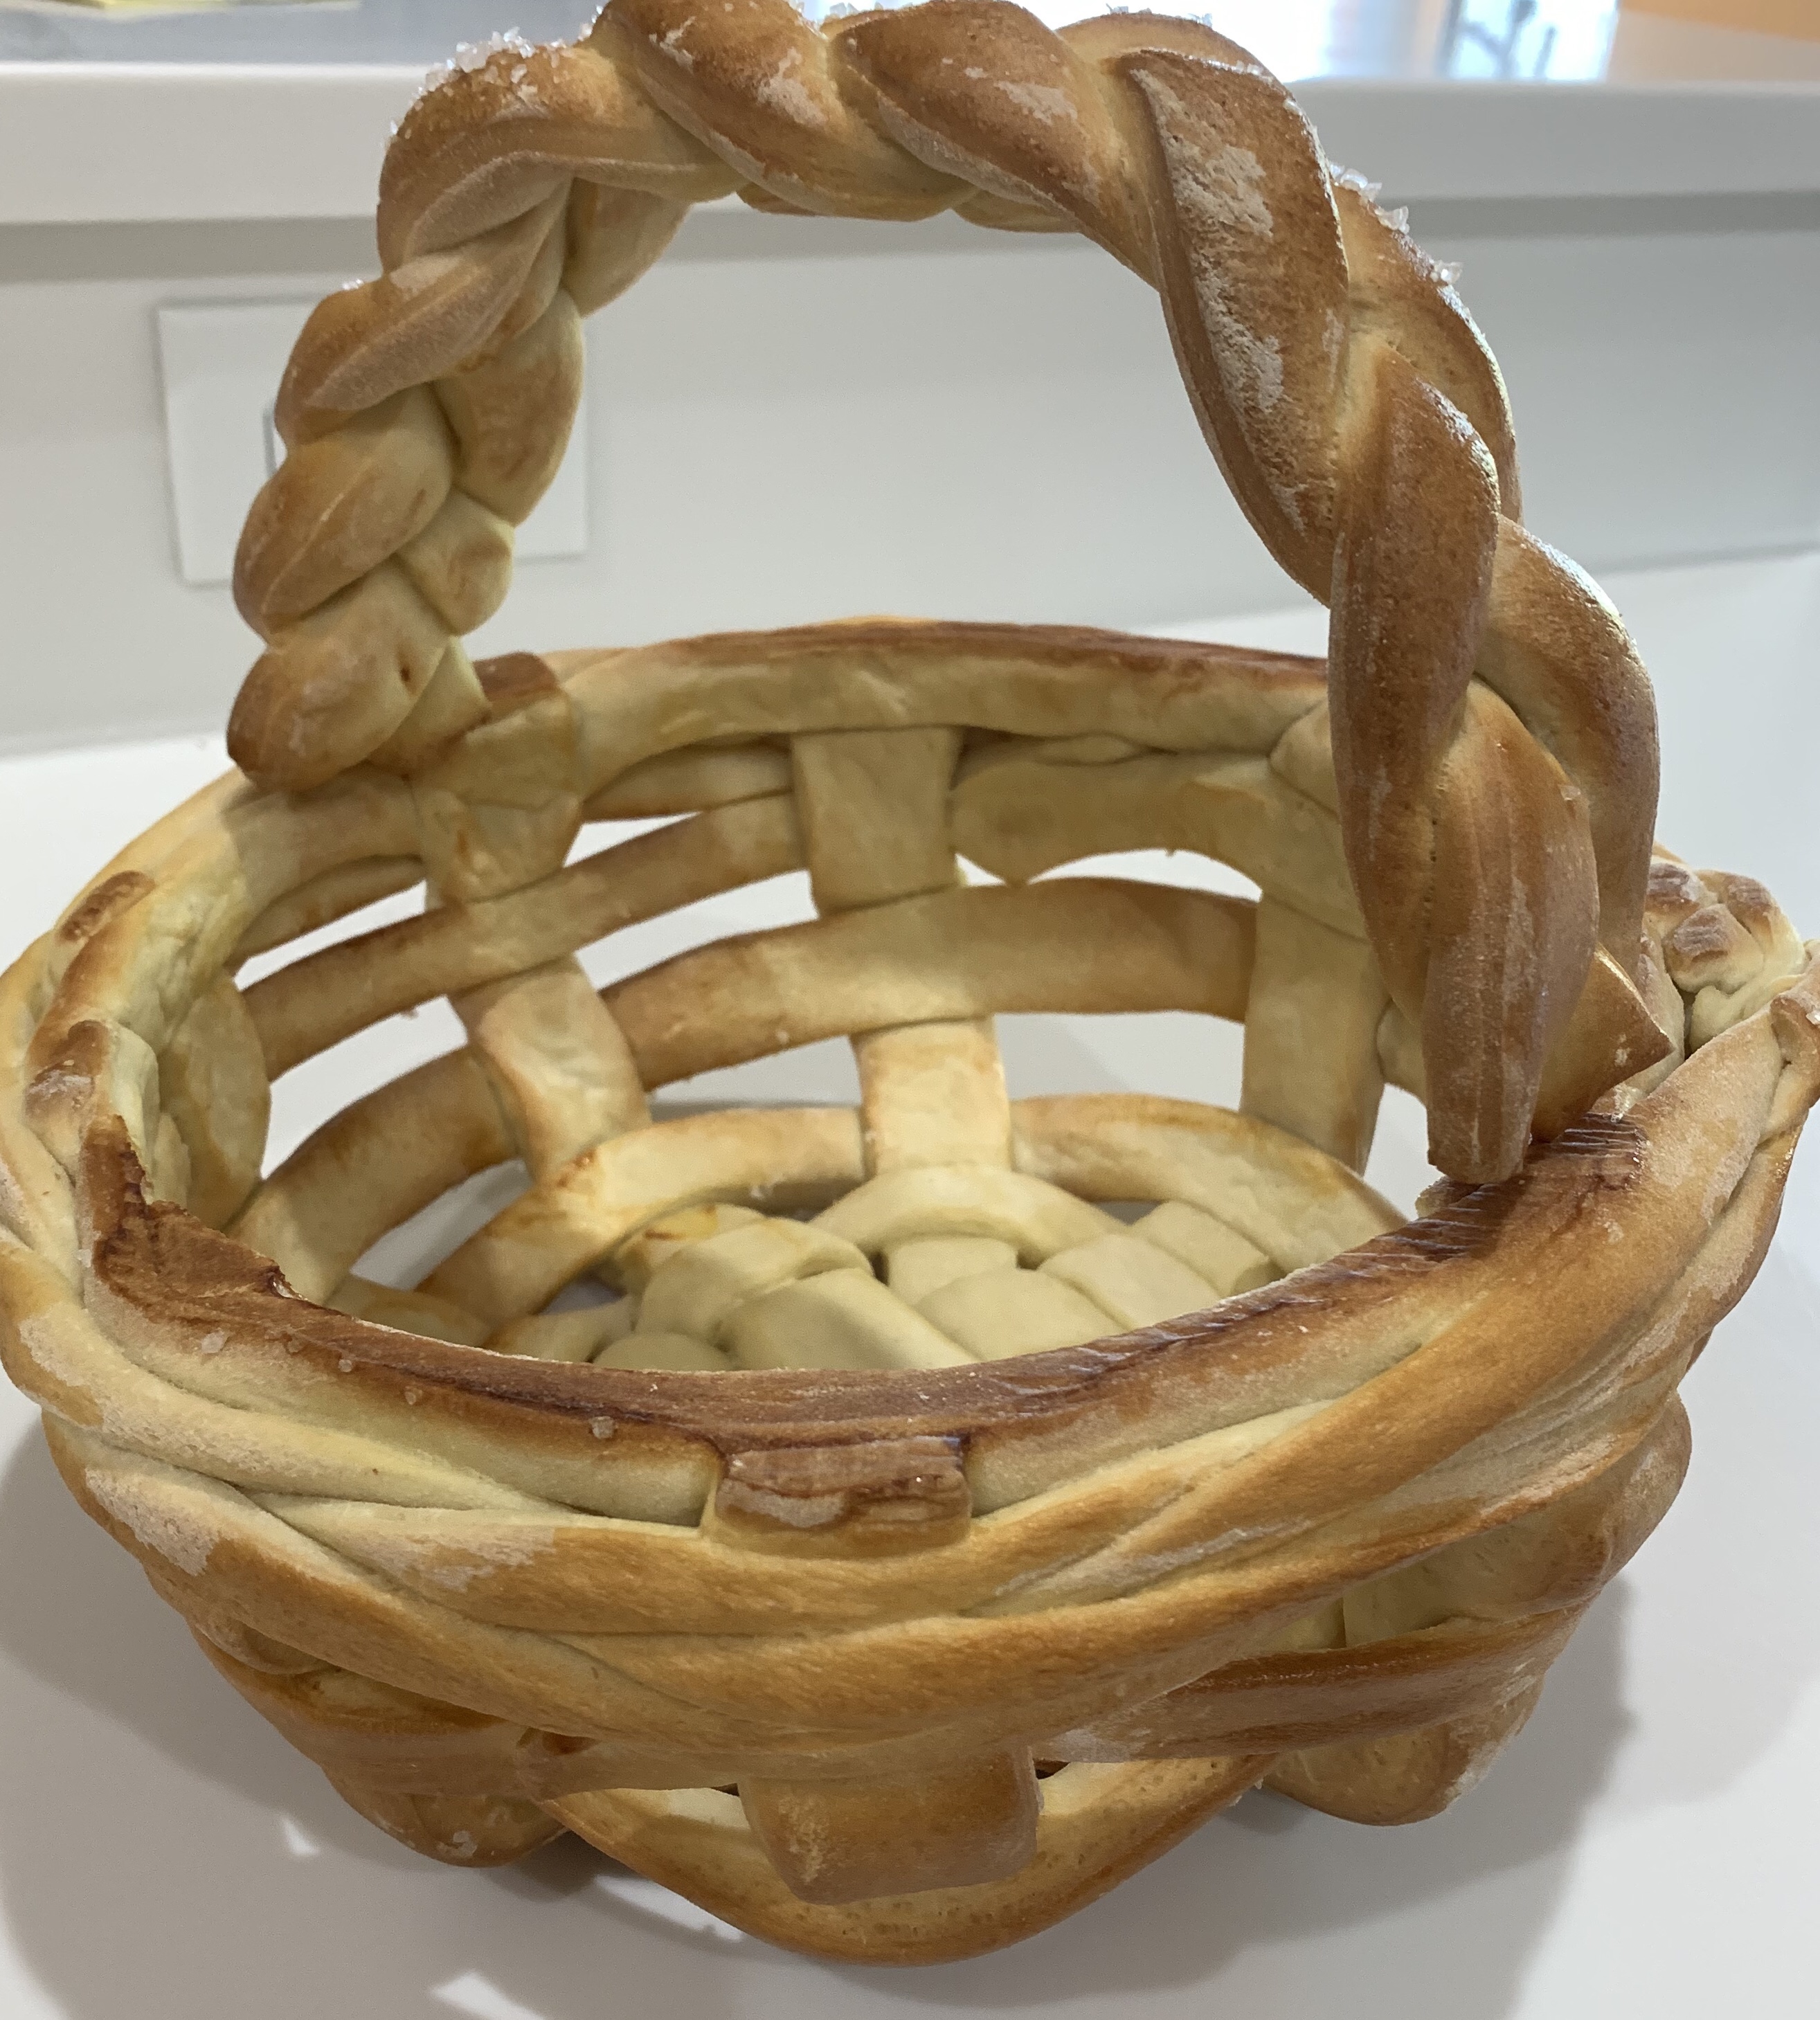
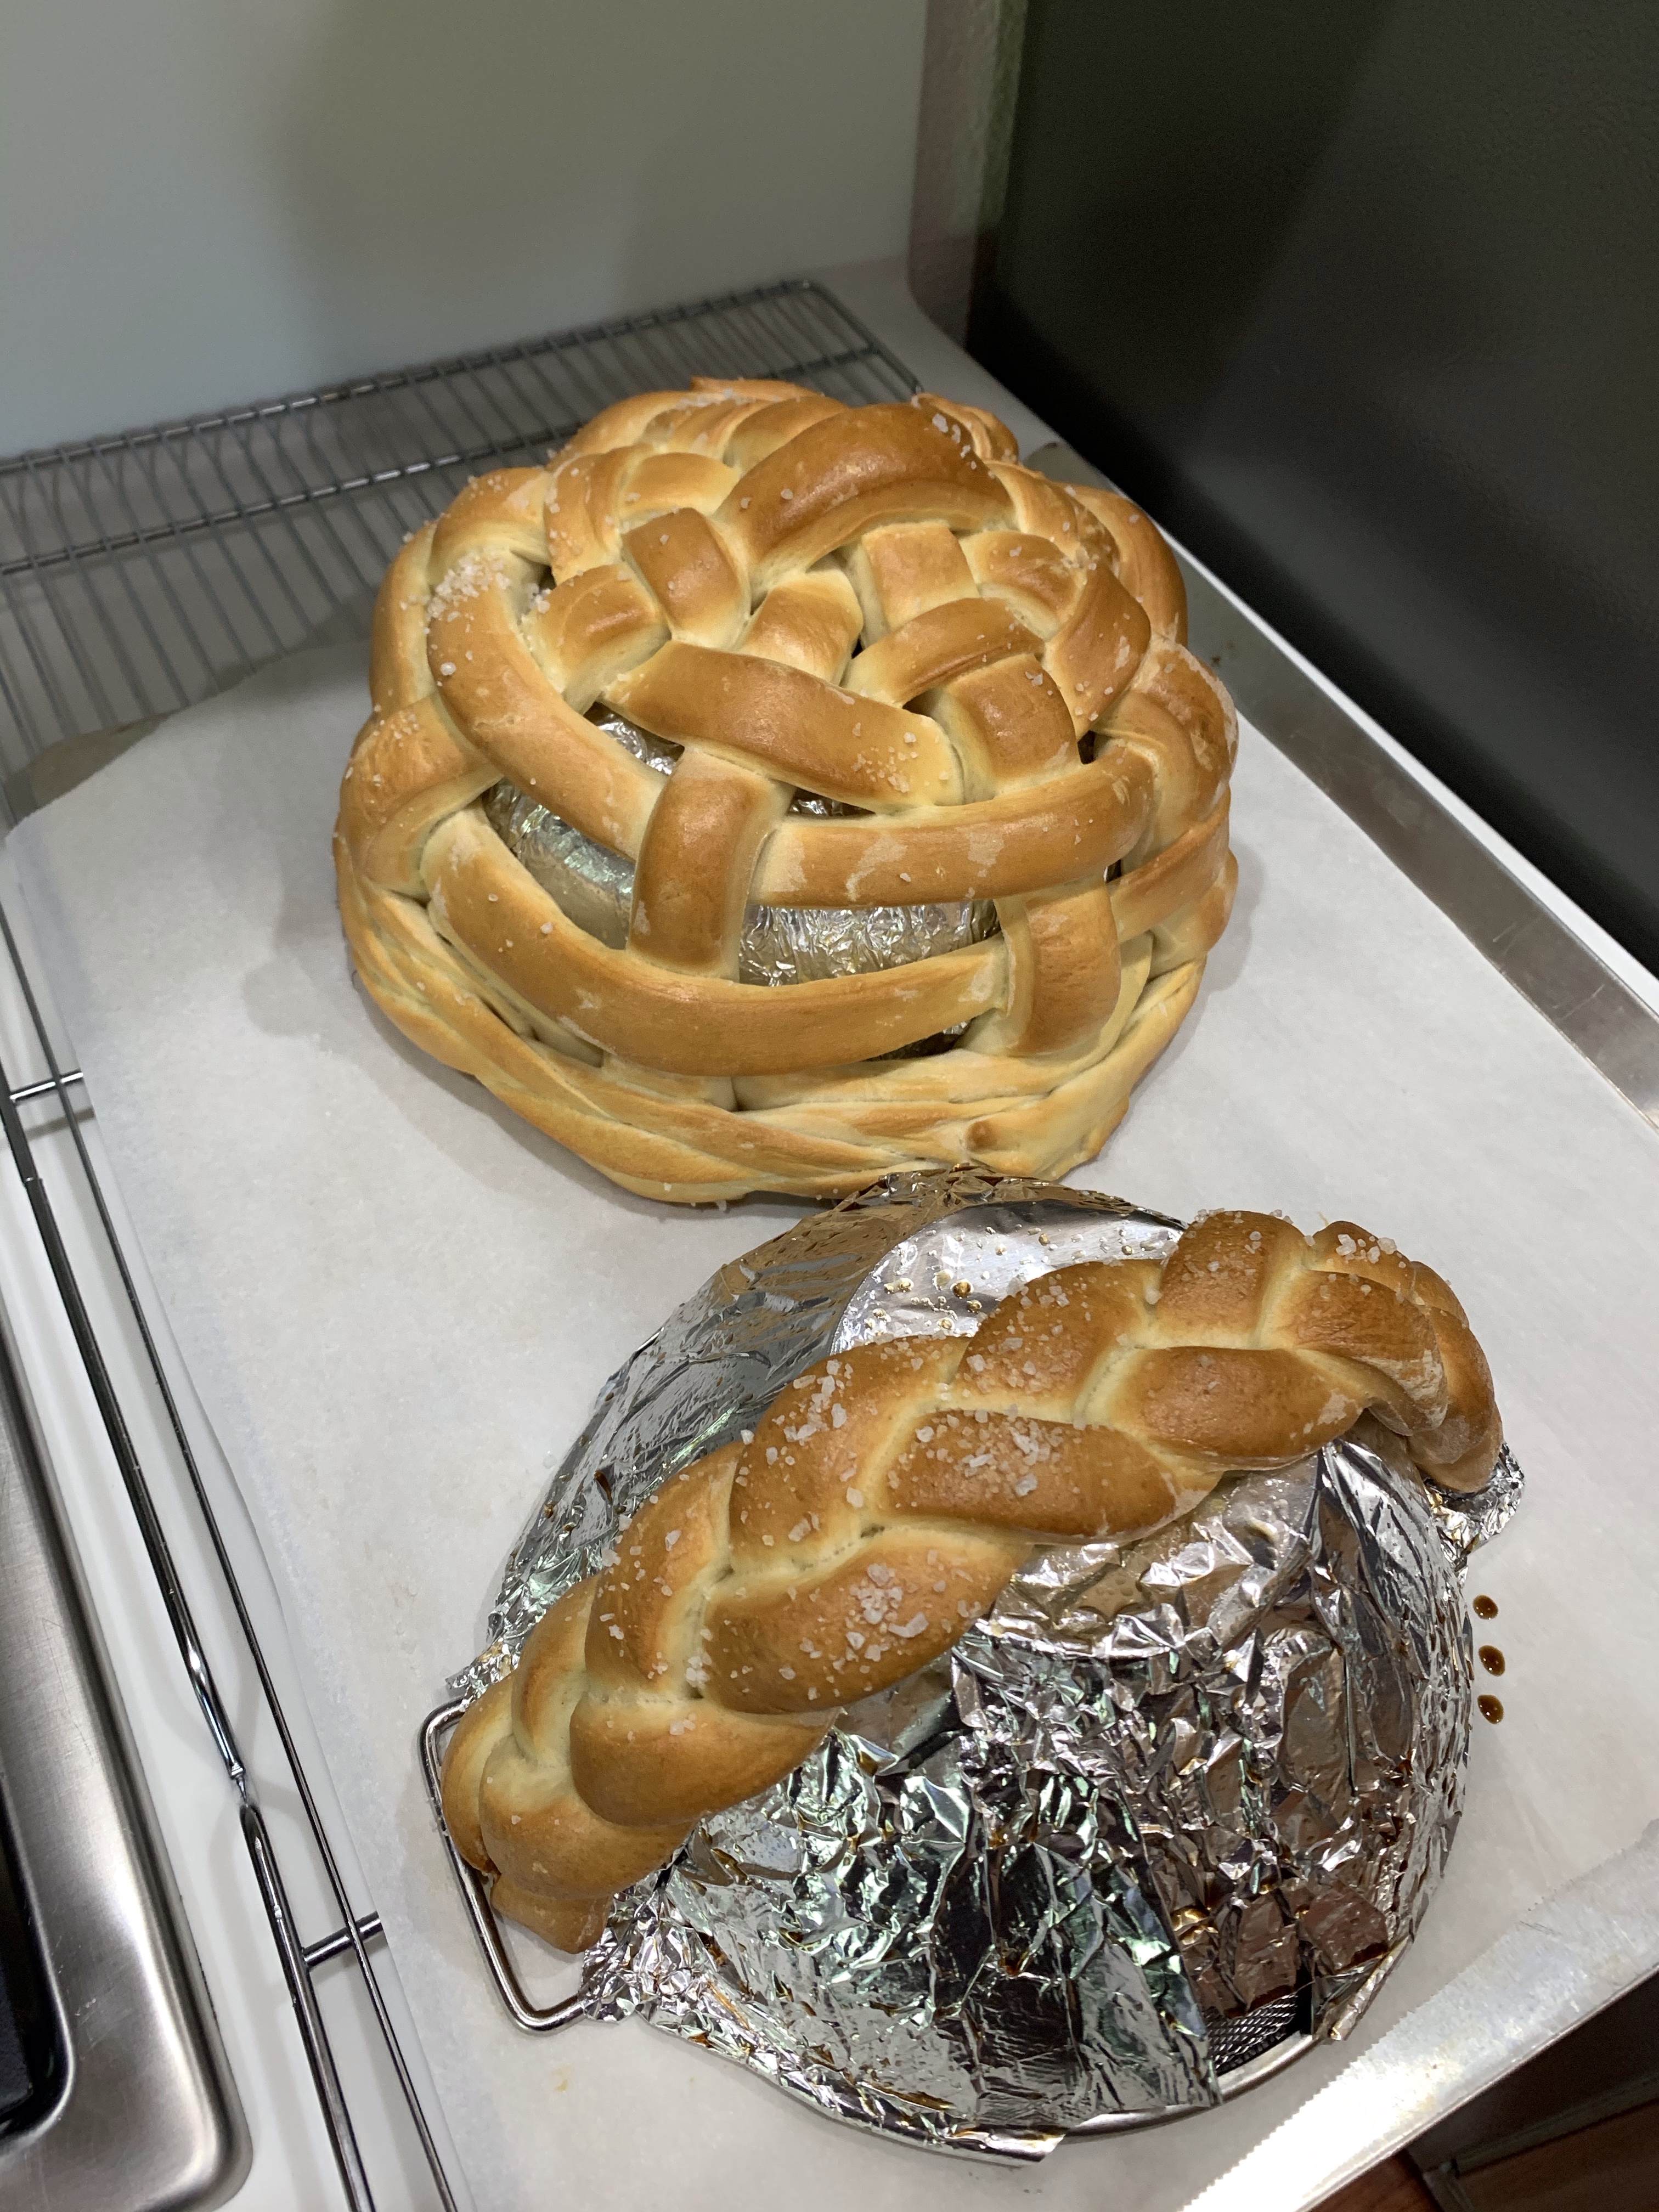
Tasty posted a video describing how to make a bread basket for Easter. If you know me, you know I never make anything without making a practice recipe before delivering the final product. This one is heading to Dan, Frances, Kathy, Grace and Vivian for their Easter Dinner on Sunday afternoon. (We would have been there but are still “sheltering at home.”) The final basket will be filled with dinner rolls, and maybe some berry popovers. (I haven’t made a practice recipe of those yet… maybe tomorrow?) I also asked for a few colored eggs to be added and photographed, so look for an update next week.
L – Practice Basket, R – Finished Basket with Easter Eggs and Cream-cheese and White Chocolate Hand Pies
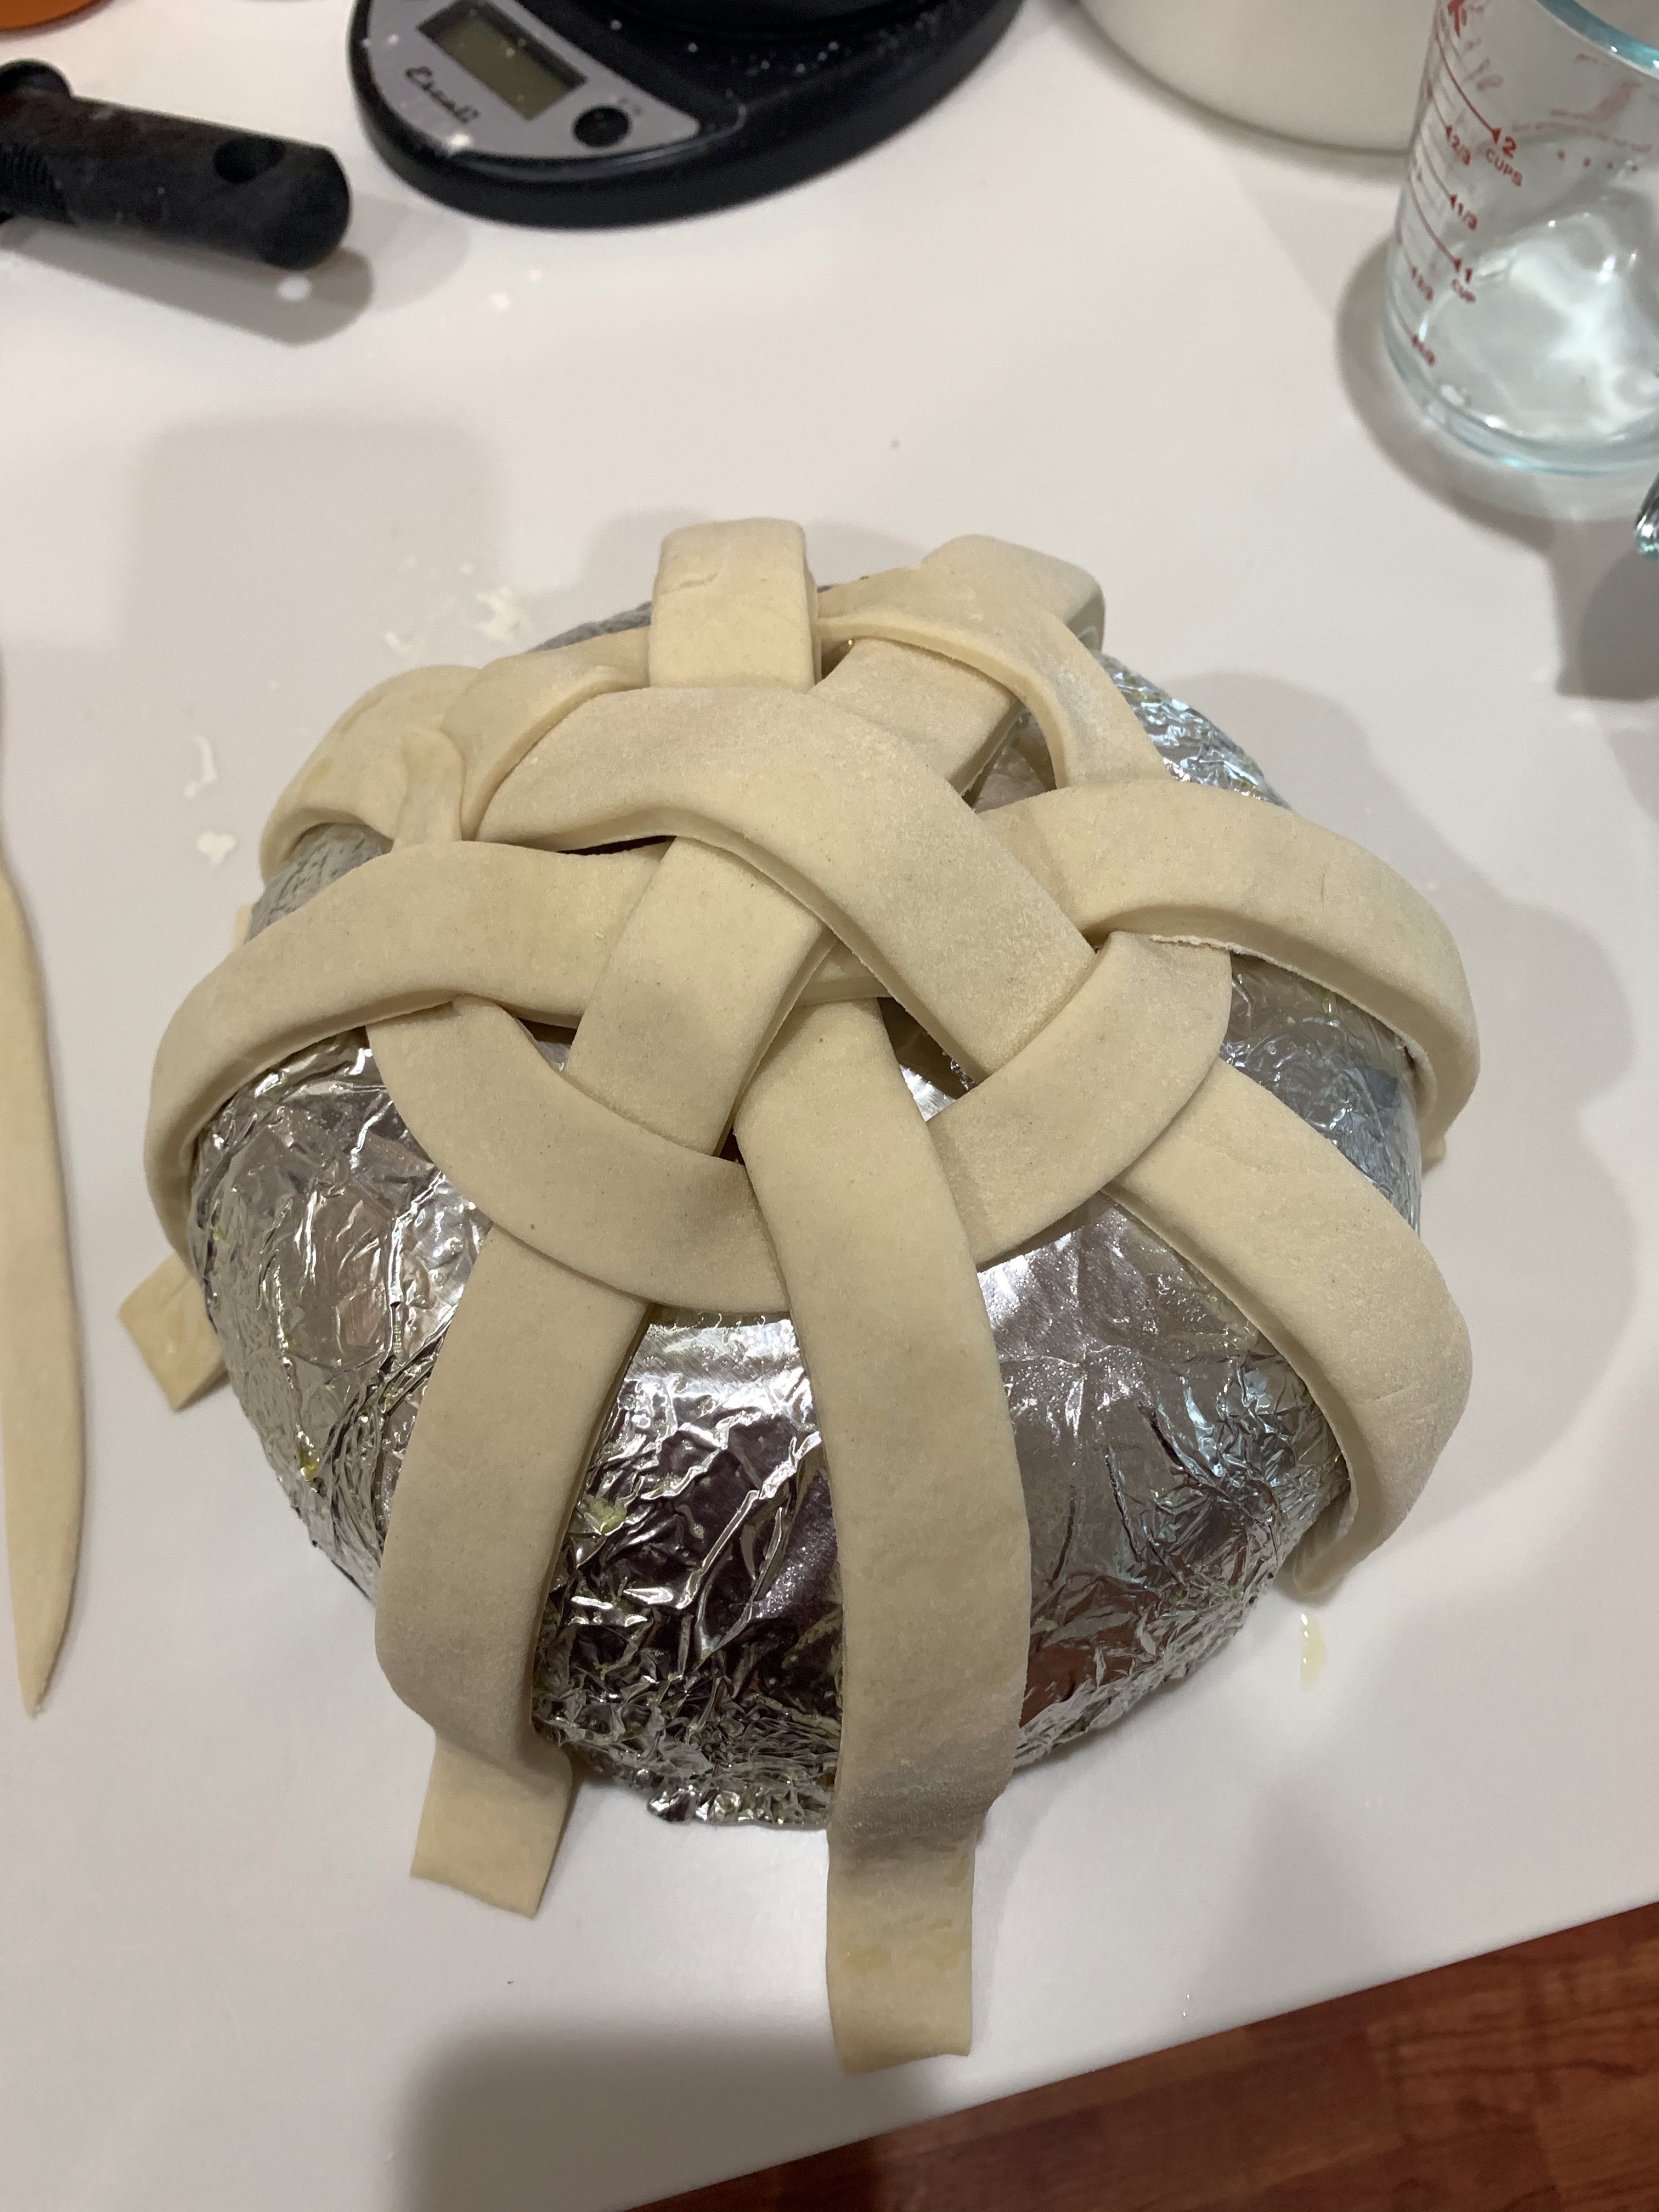
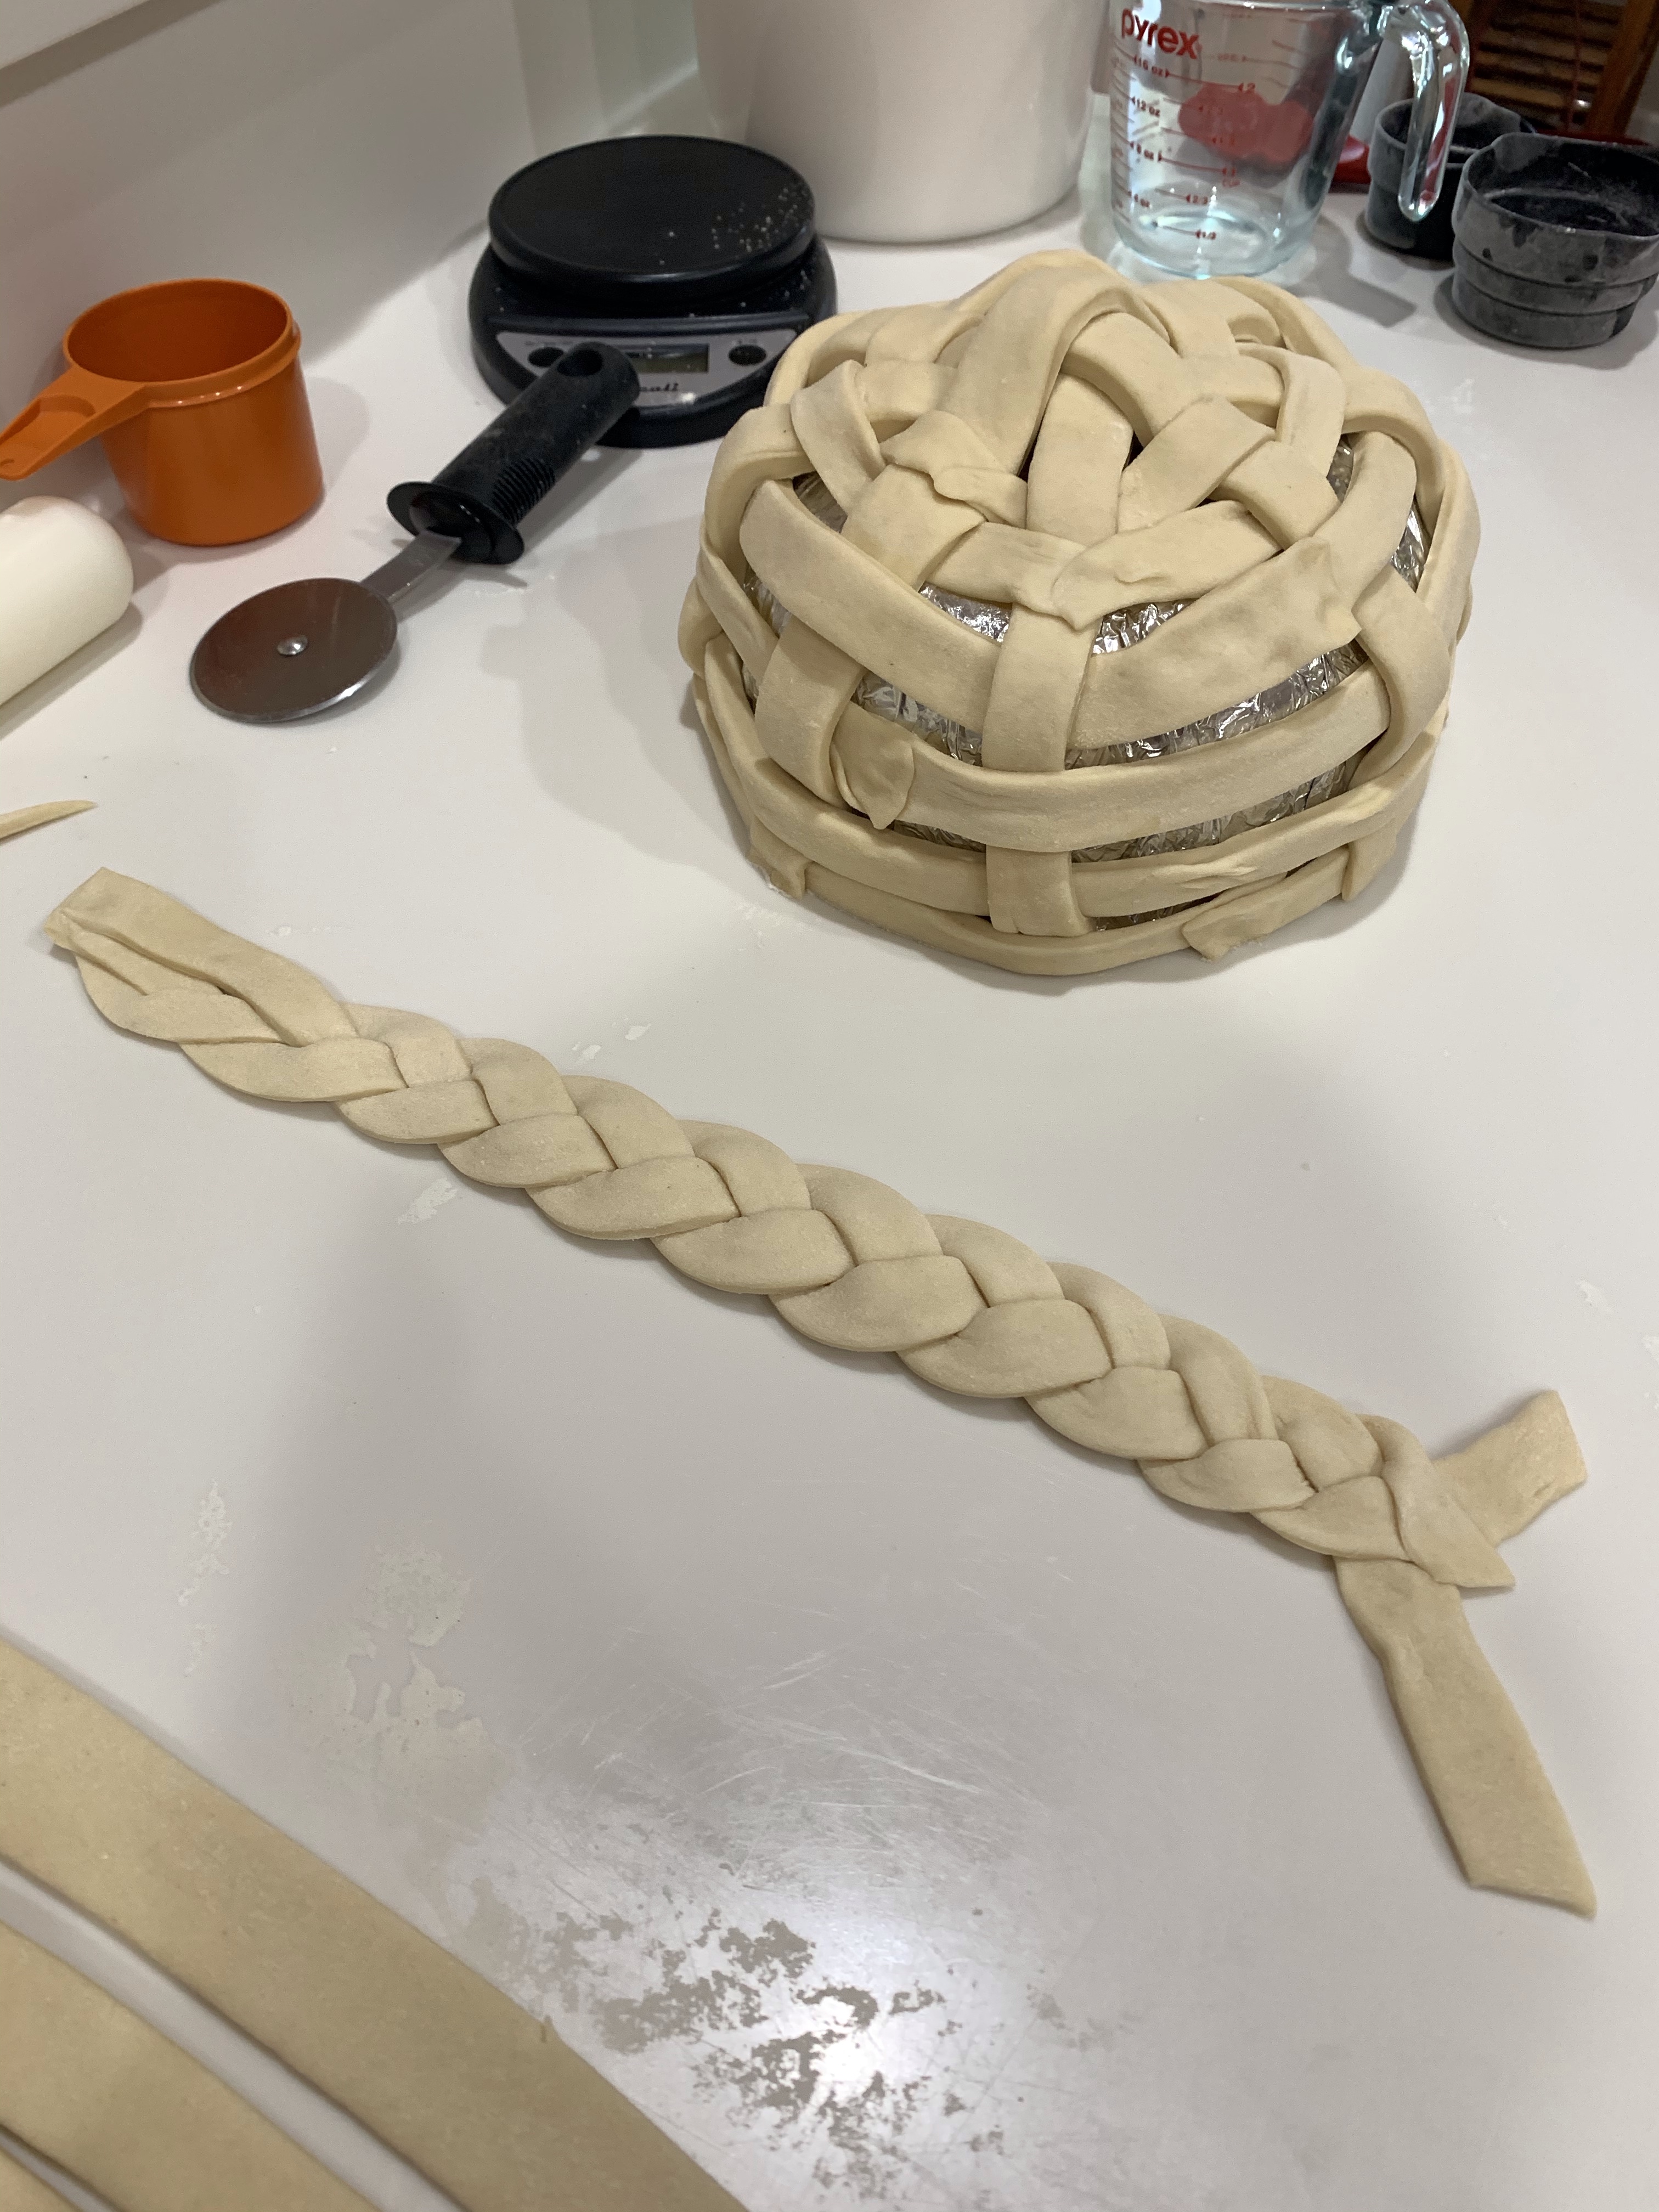
I made few changes to the method but not the ingredients. Here are some tips to the method:
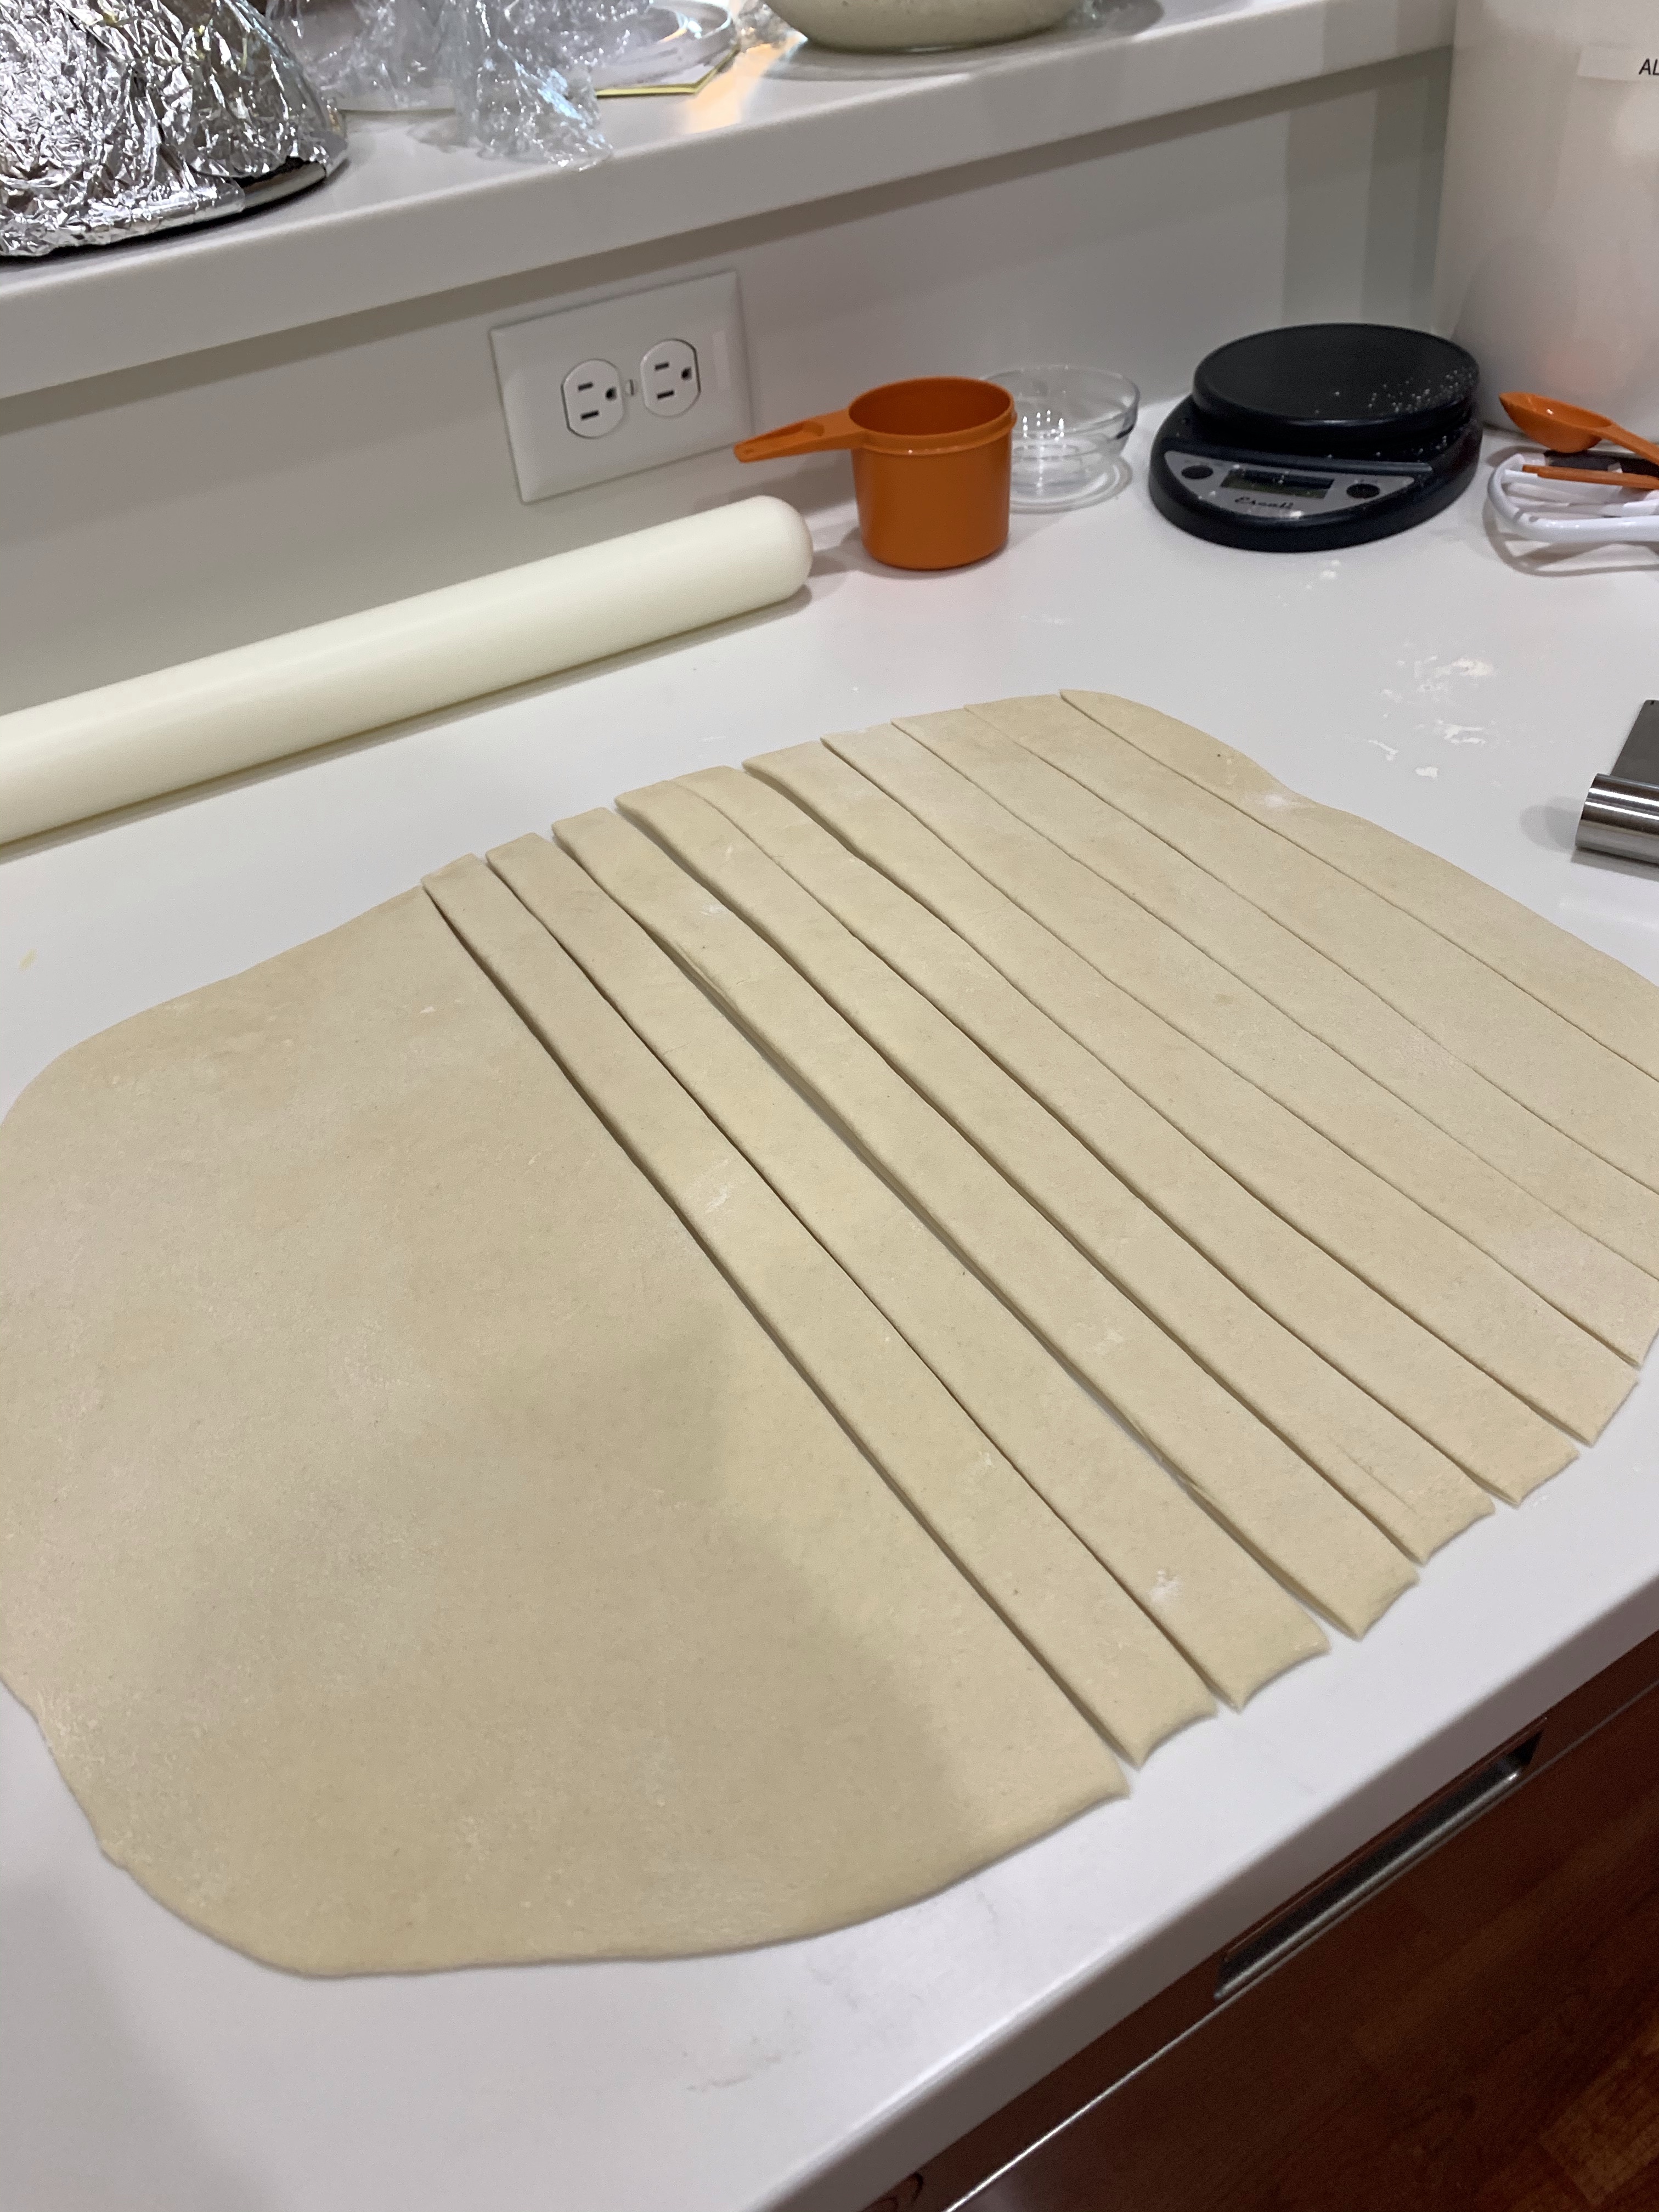
After the strips are cut, you can stretch them to fit around the bowl. The two braided strips can also be stretched to fit.
Put a little water on the ends of the dough strips as adhesive to join them together.
You will not end up with a perfect rectangle when rolled out. Cut equal width strips. Use the shorter dough strips (from the ends of your “rectangle” to circle the smaller bottom of the basket (which is the top of the upside-down bowl.)
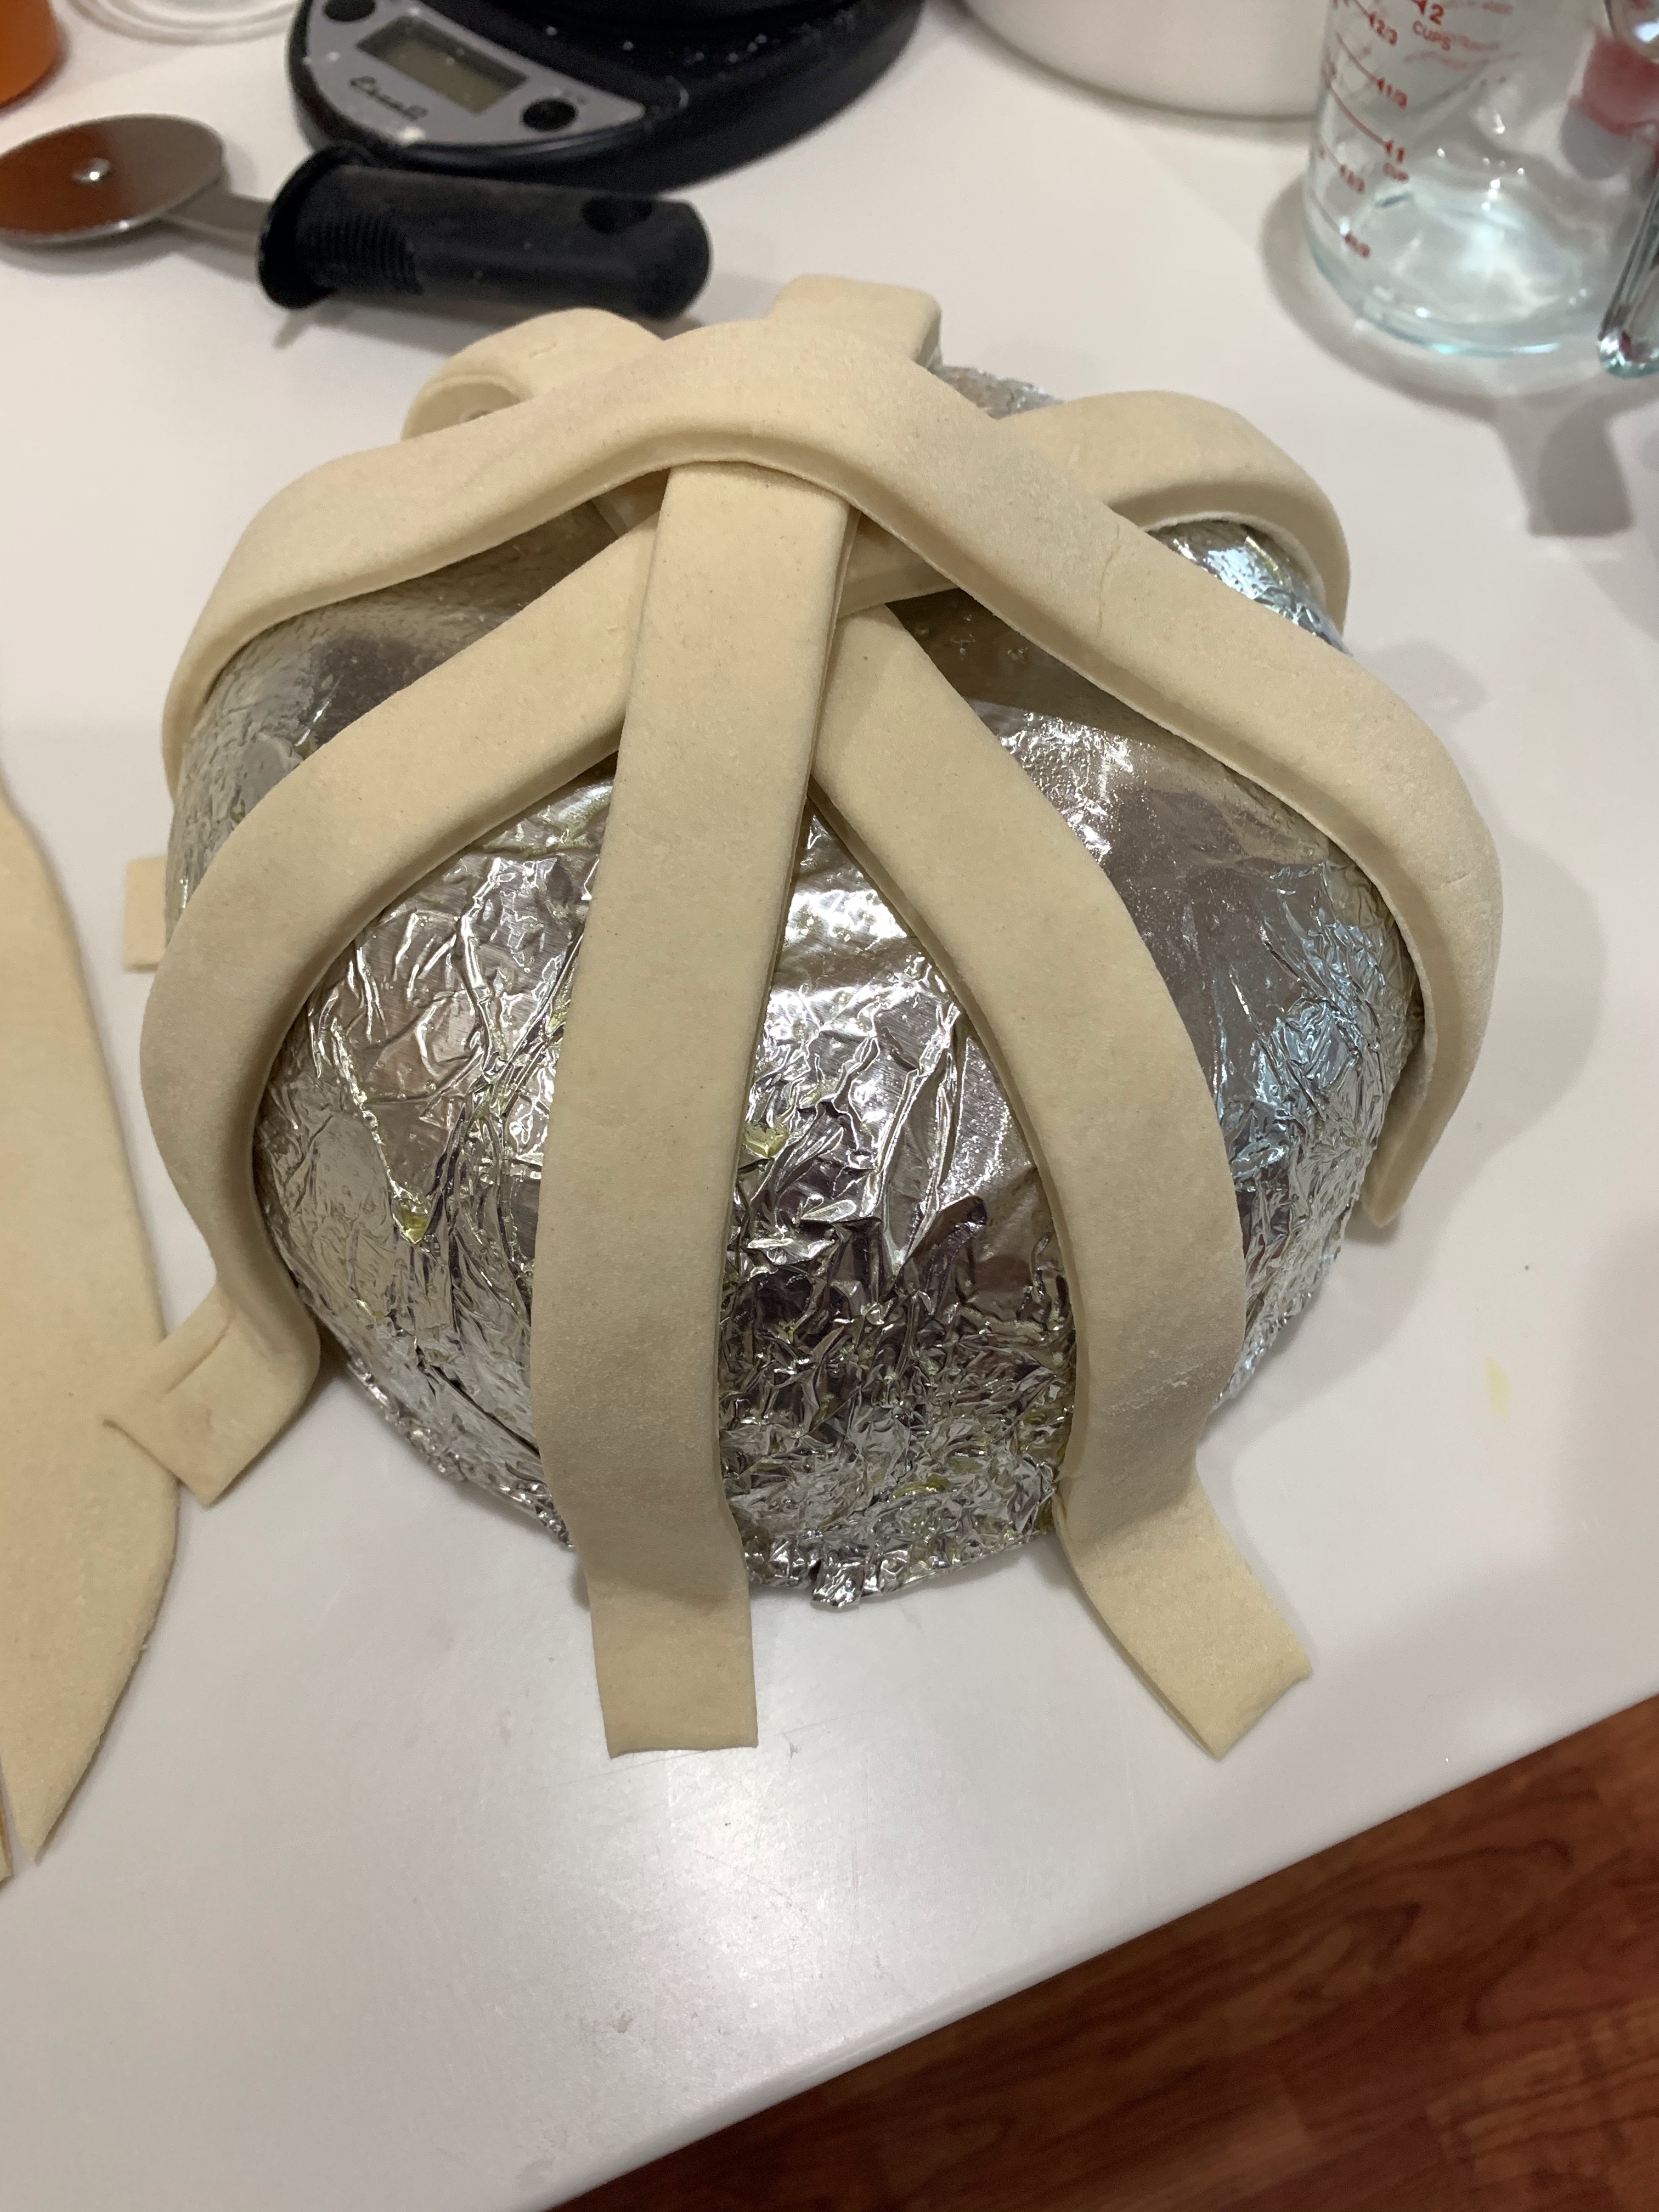
Use toothpicks to hold the dough strips in place, especially the latitudinal ones. They fall down the sides of the oiled bowl.
The longitudinal strips need to be flattened, or offset to keep them from being too high and not having a flat surface to stabilize the finished basket. I cut the peak off to make a nearly level bottom.
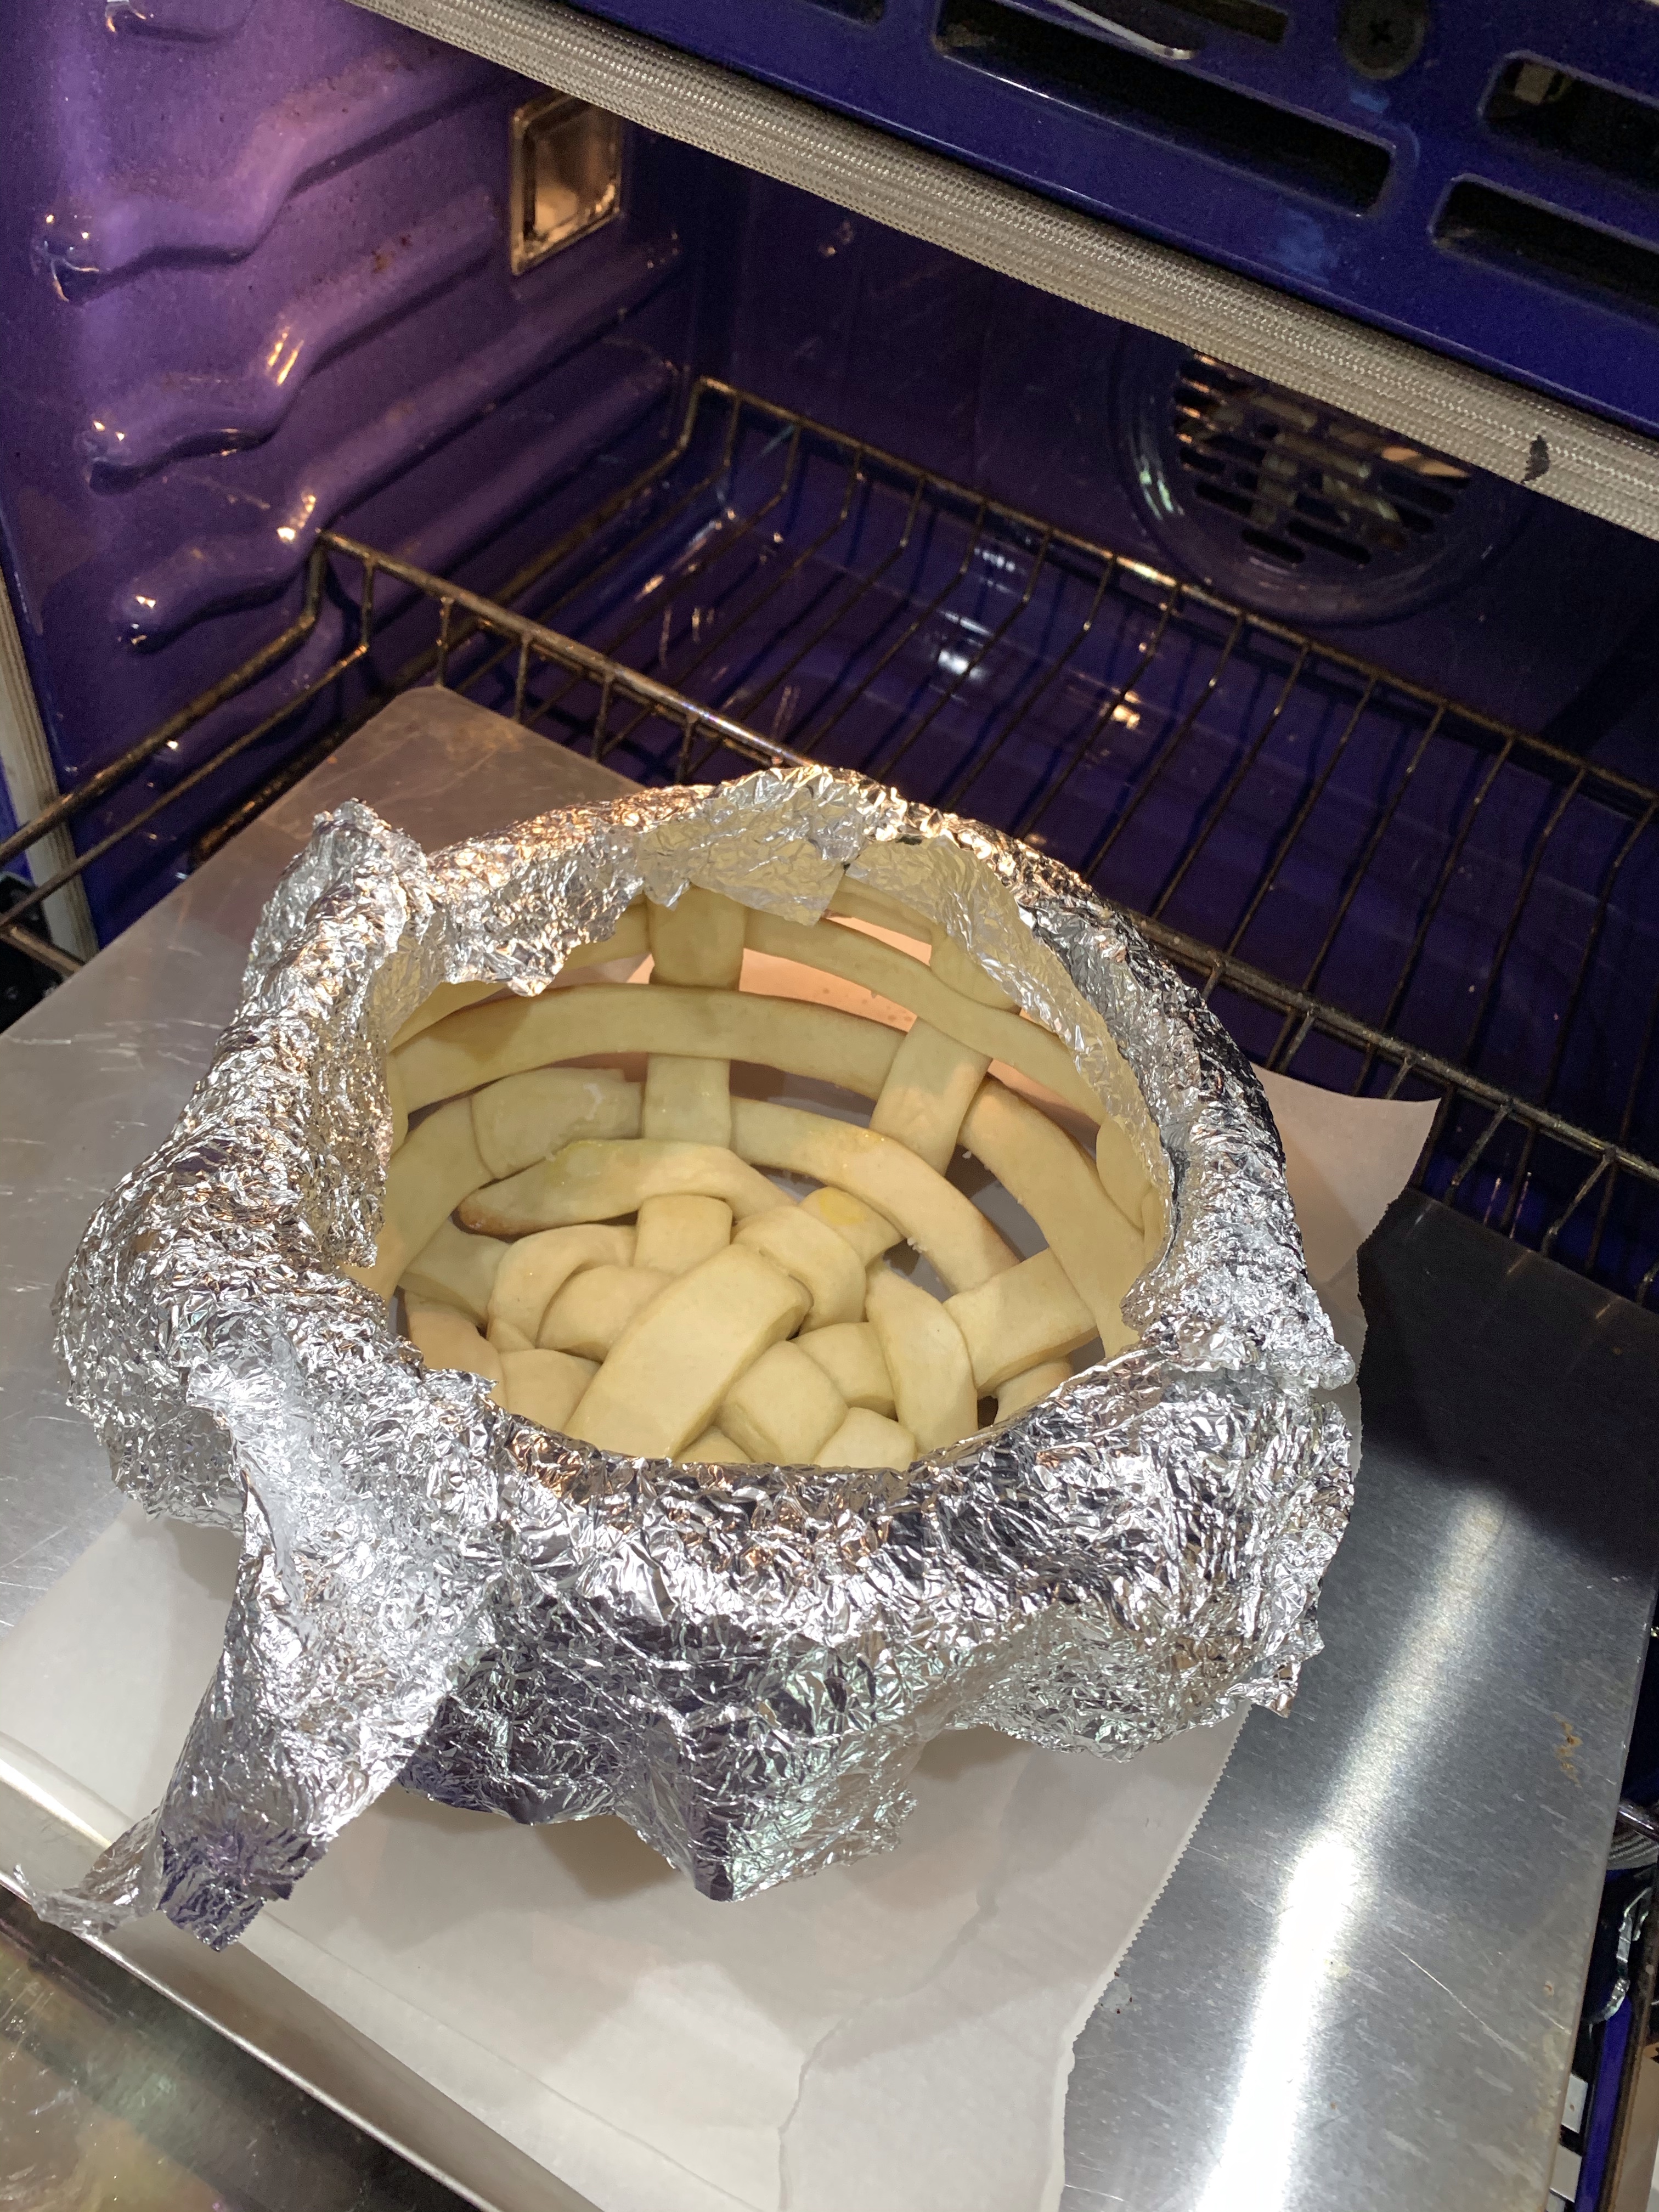
After removing the basket from the bowl and removing the aluminum foil I returned the basket to the oven, right side up, for about 10 min to completely cook the inside of the basket where it was in contact with the bowl. I also wrapped the edge of the basket that was fully baked to prevent it from further darkening.
L – “Rectangular” dough cut in strips, C – Longitudinal strips in place, R – First latitudinal “Ring” in place.
L – Completed dough basket and braided handle, C – Bread on bowl forms. Look close and you can see the un-flat “bottom”, R – Completing the bake of the inside of the bowl
Bread Basket – Tasty.co
INGREDIENTS • 1 ½ cups (350g) water • 1 Tbl 1 tsp (12g) brown sugar • 14 g yeast • 4 ¼ cups (531g) AP flour • 2 Tbl Canola oil • 1 Tbl salt
METHOD
Mix water, yeast and brown sugar. Let it sit five minutes
Add flour, canola oil, salt mix. Knead
Form into a ball then place in a greased bowl
Cover and let rise 30 minutes in a warm place
Roll to a 15 x 18“ rectangle when relaxed
Cut into 15 strips across the 18 inch direction.
Cover outside of the bowl with aluminum foil and spray with oil
Place four strips across the top of the bowl
Lift up every other strip wrap one strip around the circumference
Lift up alternate pieces and place another strip around lift up the first pieces place another strip around – use toothpicks to hold in place
Lay a total of 5 strips (or as many as required to fill the side of the “bowl.” (I used 7.) It depends on the width of the strips and size of the bowl.
Cut ends of the longitudinal strips to fit
Braid 3 pieces, cut the ends off to squared the ends of the braid.
Stretch and fit around the bottom of the bowl
Braid 3 more strips, place over a bowl to form the handle and cut the ends to square them up.
As we hunker down at home I realize I have to stop reading new recipes! Despite exercising nearly as much as pre-Covid19 my baking is up around 400%. While all this baking is increasing my skills, it is also increasing my belt size. Luckily, as we are sheltering-in-place stretch waist warmup pants are all the rage.
I saw this recipe from PopSugar online and as I had lemons and raspberries all I needed was the plain Greek yogurt, which was procured during our sanctioned grocery shopping yesterday. Speaking of grocery shopping, we find it difficult to buy a weeks, much less two weeks worth of groceries in one trip. Any suggestions?
The only change I made to the recipe was to substitute equal quantities of olive for canola oil. The intense flavor of the fresh raspberries complemented, but didn’t overpower the lemon. It may be fun to remake these muffins using AP flour rather than whole wheat. I’m thinking it may make a lighter muffin. We have weeks more hunkering down here. Who knows? Obviously, only the Shadow knows.
I also baked these using Convection, which dropped the temperature from 400 deg to 375. I set the timer for the lower range (18 min) and took the muffins out at 20 min.
The batter is very thick so folding in the berries without mashing them is difficult. Be gentle. Be patient.
Lemon Raspberry Muffins
from PopSugar
INGREDIENTS • 1 lemon • ½ cup sugar • 1 cup plain nonfat Greek yogurt • 1/3 cup canola oil • 1 large egg • 1 teaspoon vanilla extract • 2 cups white whole-wheat flour • 1 ½ teaspoons baking powder • 1 teaspoon baking soda • ¼ teaspoon salt • 1 ½ cups fresh raspberries
DIRECTIONS
Preheat oven to 400°F. Coat 12 large (½ -cup) muffin cups with cooking spray, or line with paper liners.
Use a vegetable peeler to remove the zest from the lemon in long strips. Combine the zest and sugar in a food processor; pulse until the zest is very finely chopped into the sugar.
Add yogurt, oil, egg, and vanilla. Pulse until blended.
Combine whole-wheat flour, baking powder, baking soda, and salt in a large bowl. Add the yogurt mixture, and fold until almost blended. Gently fold in raspberries. Divide the batter (it will be thick) among the muffin cups.
Bake the muffins until the edges and tops are golden, 18 to 25 minutes. Let cool in the pan for five minutes before turning out onto a wire rack. Serve warm.
While the dark rye I made last week was excellent, I really wanted a lighter rye. I have never had a lot of success with light rye but found a KAF recipe and gave it a go.
I followed the directions as written with just a couple of minor changes. I like to let the proofed dough rest as the oven preheats. I removed it from the proofing bowl, put on a lightly floured piece of parchment paper, form it into a ball and cover to rest. This lets me pick up the dough from the corners of the parchment paper and place into the Dutch Oven. The method below is as KAF published it.
After the recommended baking time the bread was only 145 deg in the center. It required almost 20 more minutes for the temp to be 195. This caused both the top and bottom to brown too much, and the center was barely cooked. Next time I’ll reduce the temperature to 400 and bake for 45 min, checking the internal temp at 30 minutes. Still, good flavor, even if it was a bit of a close texture.
Light Rye Bread – KAF
INGREDIENTS • 1 ½ cups (340g) lukewarm water • 2 1/3 cups (280g) Bread Flour • 1 ½ cups (163g) light rye flour • 1/4 cup (28g) nonfat dry milk • 1 ½ teaspoons table salt • 1 ½ teaspoons instant yeast • 1 ½ teaspoons Deli Rye Flavor, optional • 2 tablespoons (25g) vegetable oil METHOD
Place the water in a large mixing bowl.
Combine the flours with the remaining ingredients in a large mixing bowl, or the bowl of your stand mixer. Mix until there are no dry spots. Using a stand mixer, mix at low speed until all of the flour is moistened. The texture of the dough will be soft and sticky due to the pumpernickel flour.
Cover the bowl and let the dough rise at room temperature for 2 hours. Then refrigerate overnight, or for up to 48 hours.
To bake bread: Grease your hands, and scoop the dough out onto a lightly greased or floured work surface. Shape it into a ball and place it, smooth side down, in a floured brotform; or in a bowl lined with a floured smooth cotton dish towel. Let the dough rise, covered, for 2 to 3 hours.
About 45 minutes before the end of the rising time, start preheating the oven to 450°F with a 4- to 4 ½ -quart baking pot or casserole with a lid inside.
When the loaf is fully risen, remove the hot casserole from the oven, carefully grease it, and tip the risen ball of dough into it. Make several slashes in the dough. Cover the pot with the lid, and place it on a middle rack in the oven.
Bake the bread for 25 minutes. Remove the lid and bake for an additional 5 to 10 minutes; the loaf should be lightly browned, and the interior should register at least 195°F on a digital thermometer.
Remove the bread from the oven and turn it out of the crock onto a rack. Cool for several hours before slicing.
Standing in front of our open refrigerator door I noticed a partial tub of cream cheese we bought it for the granddaughters’ snack visit prior to the shelter-in-place order. As I stood there listening to the melodious door alarm-chime wondering what to do with it, I had an epiphany… bagels!! I haven’t made bagels in a couple of years and I was ready to try again. My first batch were ok, but not as good as what you can buy at a good bagel shop. Well, as time marches on my baking skills improve.
Bagels aren’t the easiest bread to make. It takes several proofs, rests and shaping over two days. Luckily, much of the time is consumed by proofing and resting the dough and not hands on activity. I now have some ET bagel topping so I made my favorite bagels as an extra treat.
The recipe I used last time, from ChefSteps, was good, but the resulting bagels were too small. This time I doubled the amount of dough in each bagel (from 65 g each to 130g.) This produced 8 larger bagels instead of 16 small ones.
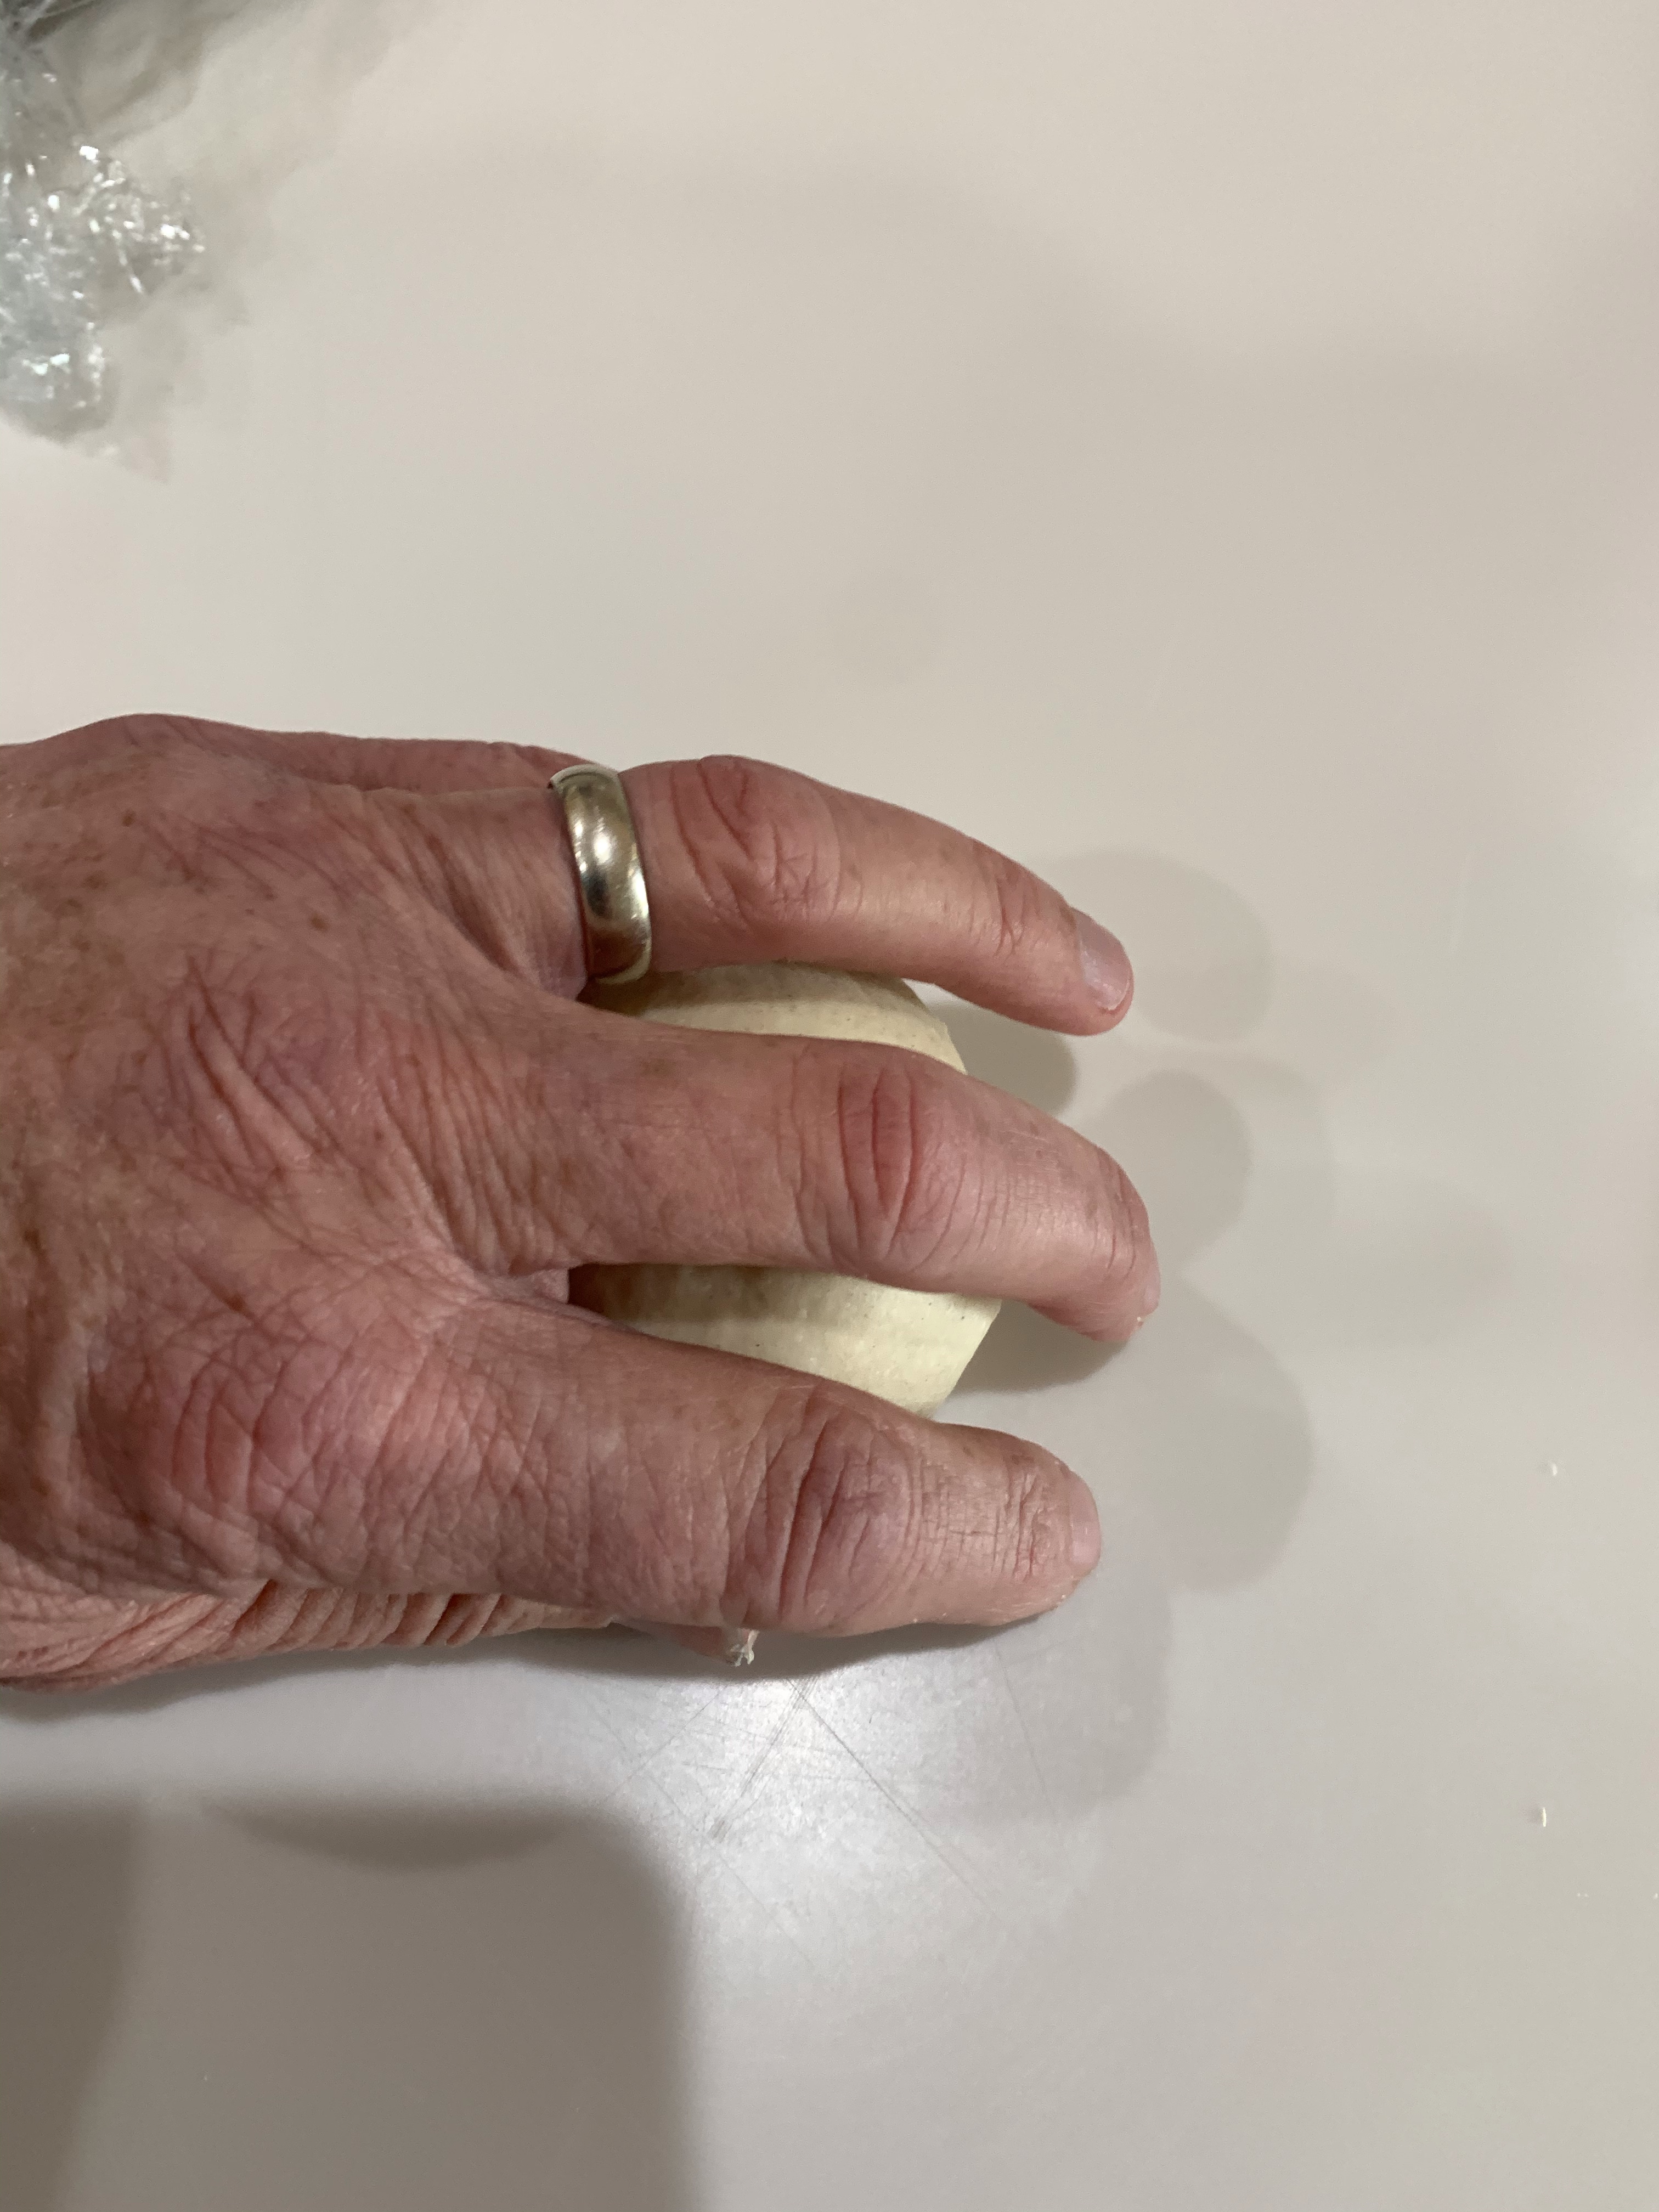
L – 130g pieces of dough, C – Shaping Dough Balls, R – Formed Balls
The bagels are shaped by pressing a forefinger on one side of a dough ball and a thumb on the opposite then pushing straight through forming a hole. Next, insert two forefingers inside the hole and spin around gradually separating the fingers and enlarging the hole to 3 or 4 times the original. The resulting dough rings were about 4” diameter with a 2” hole. After the dough relaxes in the fridge the bagels were about 3 – 3.5” diameter with a 1” hole. NOTE: They will rise in the refrigerator overnight.
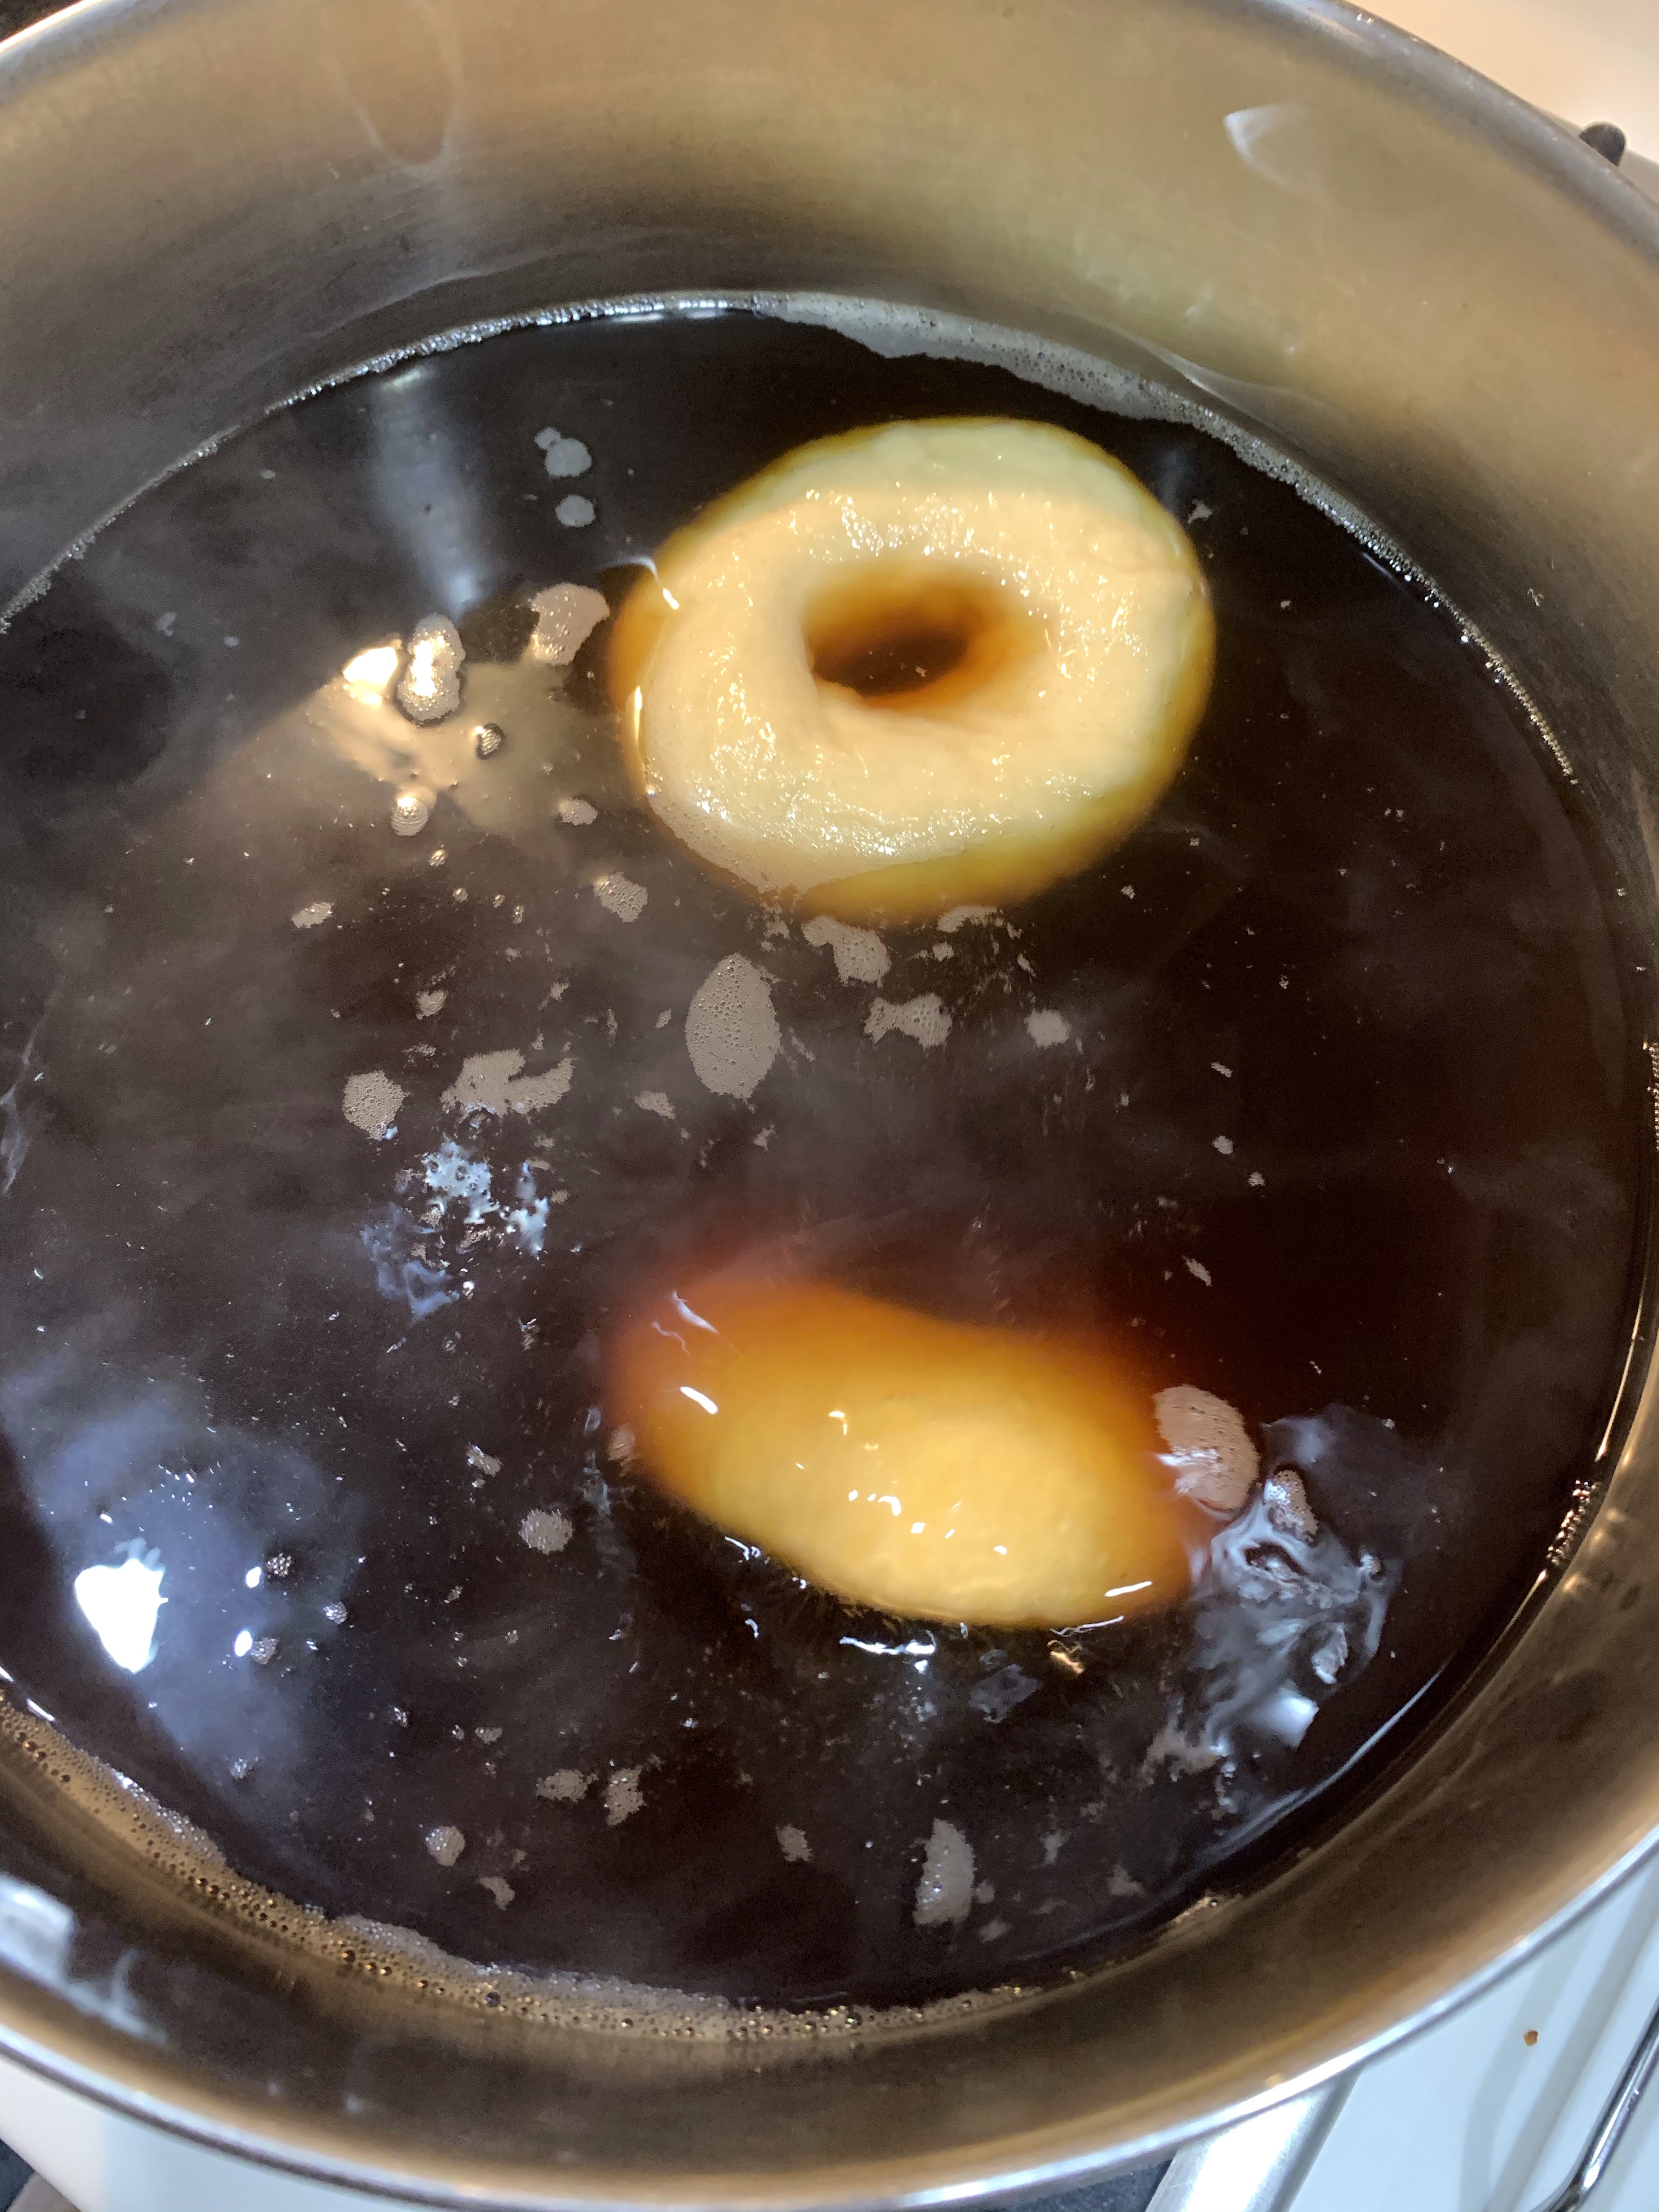
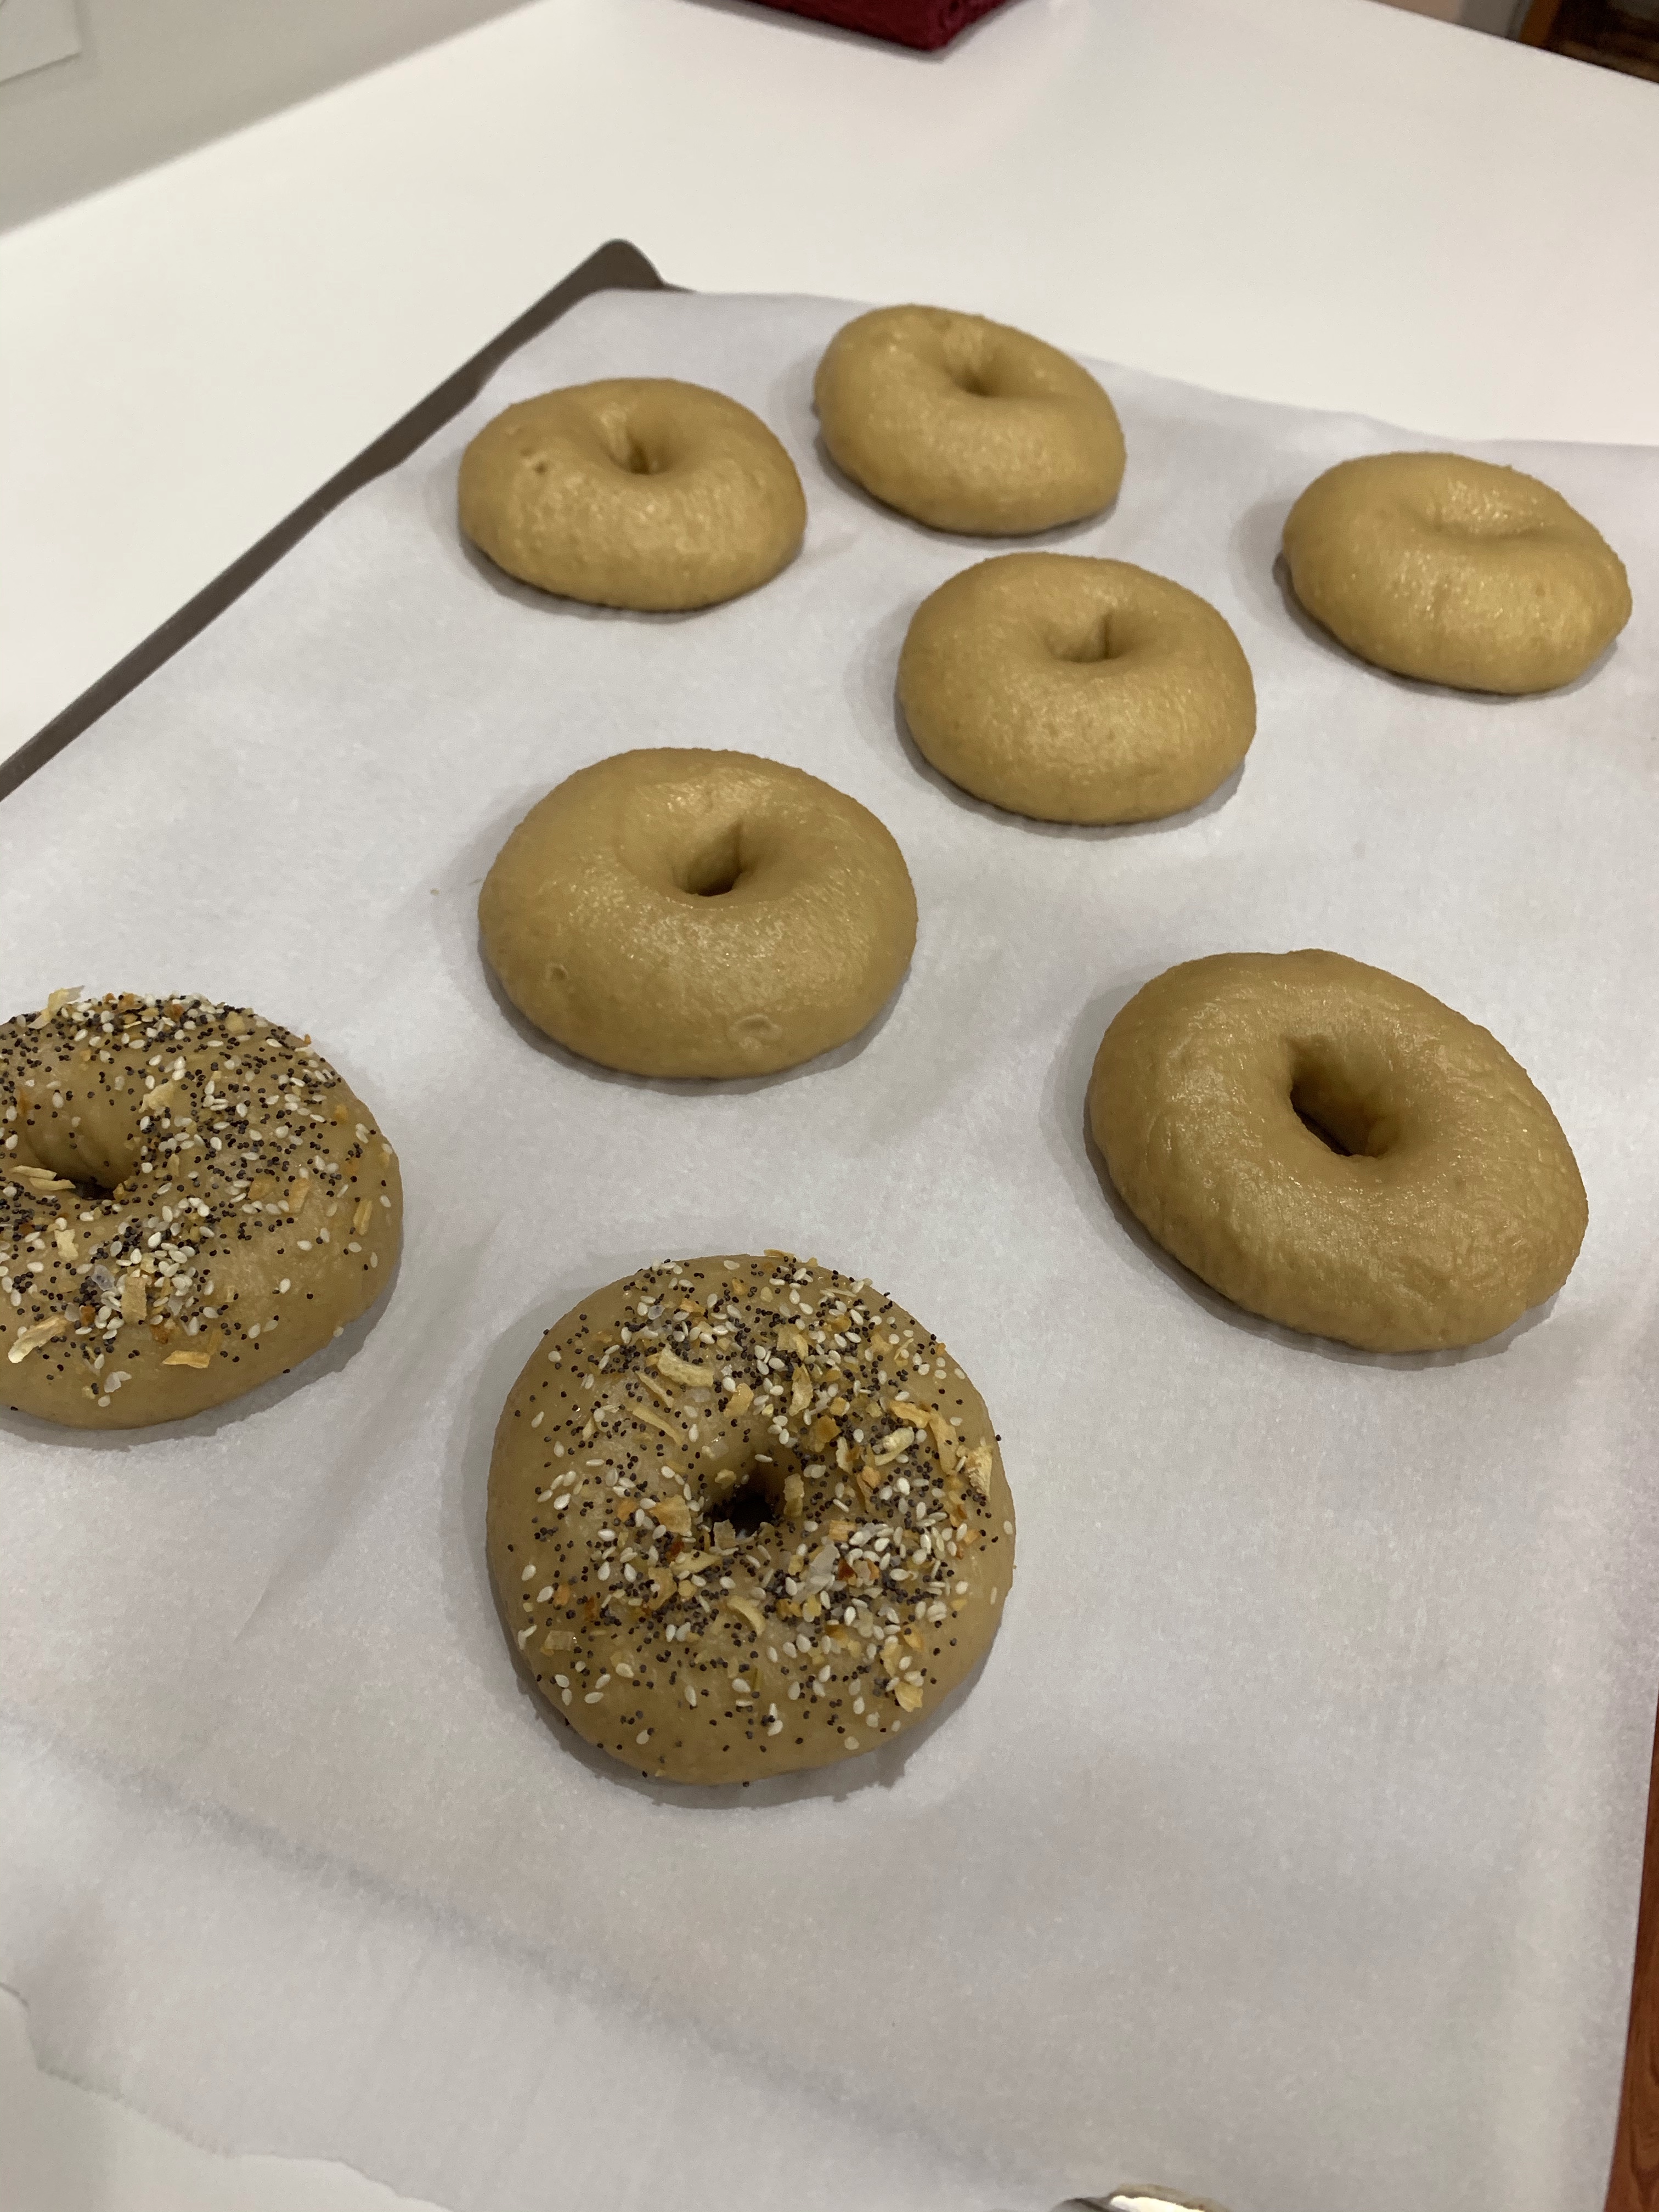
L – Covered Bagels Prior to Refrigerator Rise, C – Boiling Water Solution and Needed Utensils, R – Bagels Rising from Bottom of Boiling Water
It turned out the hole wasn’t quite big enough and the center closed up on most of the bagels. For the next batch I will stretch the dough to a 5” diameter and 2.5” hole. I would like the final hole, after proofing to be 1.5”. NOTE: The bagels do a final rise in the oven and the hole closes in even more.
L – Bagels Ready to Bake, C – Finished Bagels, R – Ready to Eat with a Schmear
Bagels from ChefSteps
INGREDIENTS • 350 g Water, plus more for boiling • 650 g Bread flour, divided • 3 g Active dry yeast • 25 g Sugar, granulated, optional • 25 g Diastatic malt powder • 10 g Salt • 25 g Molasses • 10 g Baked baking soda
OPTIONAL • 10 g ET bagel topping • 10 g Black sesame seed • 10 g Dried onion flakes • 10 g Salt, Maldon flake • 7 g Poppy seed • 5 g Sesame seed • 5 g Dried garlic flakes
METHOD
In a stand mixer bowl, combine 350 g room temperature water, 250 g of the flour, and the active dry yeast. Cover the bowl with plastic wrap or a damp cloth and let the mixture proof at room temperature until it doubles in size and makes frothy bubbles that collapse when you tap the bowl on the countertop. This takes about two to three hours. (Look for a foam that resembles the one on a root beer float. If you don’t see this yet, just give the yeast a bit more time to work its magic.)
In a bowl, combine the remaining 400 g of bread flour with 25 g sugar, 25 g diastatic malt powder, and 10 g salt.
Use the stand mixer and the dough hook, set the mixer to lowest speed. Gradually spoon in the dry ingredients and let the dough mix until it becomes stretchy and smooth and pulls away from the sides of the bowl, about 15 to 20 minutes.
Cover the bowl with a damp cloth and let the dough cool in the fridge for 20 minutes.
Working quickly to keep the dough cool, divide it into 130 g portions and set them on a parchment paper lined pan. Keep the entire sheet covered with plastic wrap as you work, tucking each new portion underneath the plastic wrap to keep any crust from forming.
First, form a dome. Make a circle with one hand, place a piece of portioned dough halfway inside it, and use one finger of your other hand to turn the dough while gradually pushing it through the circle tightening the dough as you work around the outside. You want to end up with a nice, taut dome.
Next, turn that dome into a ball. Hold the dome with the concave underside facing up. Pinch the dough closed across the “bowl,” then roll the seam on the work surface until smooth. When you finish each piece, return it to its spot under the plastic wrap on the sheet pan.
Cool the dough balls in the refrigerator for 20 minutes.
Working with one ball at a time, use two fingers to pinch a hole through the center of the dough, turning it while you work. Once you break through the dough, turn it on its side (like a spinning wheel). Stick both of your index fingers through the hole from opposite directions, and spin them around each other, slowly stretching out the hole until you can fit three fingers through it. Return the shaped dough to its covered spot on the tray. (You might need a second tray.)
Allow to proof at room temperature until a dough ring floats when set in a bowl of water. This will take about 20–40 minutes. (If the test ring sinks, proof a bit longer. The bagel I used for this test stuck to the parchment paper in the refrigerator overnight. Be careful.)
Make sure the tray(s) are wrapped tightly with plastic wrap, and let them cool in the refrigerator overnight to allow flavors to develop.
In a large pot over high heat, bring 5 L water, 25 g molasses, and 10 g baking soda to a roiling boil.
Preheat the oven to 425 °F / 218 °C (Use convection if available)
Working in batches, drop the bagels into the water and boil for 60 seconds, then flip them with a spider strainer or fork and boil for another 60 seconds. Transfer them with their smooth, rounded sides up, to a wire rack on a half-sheet pan.
If you’re adding the seasoning mix—or your own choice of toppings—now’s the time to sprinkle it over the tops of the bagels.
Transfer the bagels to a parchment paper–lined half-sheet pan and move it to the center rack of the preheated oven.
Bake for seven minutes, spin the tray around to ensure even cooking, and continue baking until bagels have a nice, brown color—about seven more minutes.. To be sure they are done check the internal temperature is over 190 deg.
You may have noticed that I’ve been on a no-knead bread kick lately. Kneading dough isn’t a problem. My Kitchen-aide stand mixer and dough hook are very happy to knead the dough for me. What’s nice about this bread, aside from flavor, crumb, crust and appearance, is that it takes less that 10 minutes to mix the dough in the evening. It then ferments overnight, building all that great texture-generating gluten. In the morning simply form the dough into a ball and let it rest for an hour as the oven and Dutch Oven are heating, then bake for 30-45 minutes.
I found this recipe for a whole wheat no-knead bread a week ago and have made several loaves, giving most to friends, neighbors and family. I made two loaves today, one without seeds for my granddaughters, and one with for Fran and me. I use King Arthur’s Artisan Bread Topping which is a mixture of many seed varieties.
Made in a Dutch Oven, this bread has a great crust and excellent crumb and flavor. I find comments from each loaf, delivered while still warm, typically are, “You really outdid yourself with this loaf. It’s the best ever!” There is a feeling of satisfaction when, in these times, you are able to provide a simple, sensory respite for someone.
No-Knead Whole Wheat Bread
INGREDIENTS
• 300 grams (2 1/4 cups) bread flour, plus more for the work surface • 100 grams (3/4 cup) whole-wheat flour • 1 1/4 teaspoons salt (table) • 1/2 teaspoon dried instant yeast • 300 grams (1 1/3 cups) cool water (55 to 65 degrees) • Wheat bran or cornmeal, for dusting (may use additional flour)
METHOD
Stir together the flours, salt and yeast in a medium bowl. Add the water; use a wooden spoon or your hands to mix until you have a wet, sticky dough, about 30 seconds. Cover the bowl and let the mixture sit at room temperature until its surface is dotted with bubbles and the dough has more than doubled in size, 12 to 18 hours.
Generously dust a sheet of parchment paper with flour. Use a rubber spatula or lightly floured hands to scrape the dough onto the parchment paper in one piece. Use your lightly floured hands to lift the edges of the dough up and in toward the center. Gently pinch the pulled-up dough together, cupping the edges in your hands as needed to nudge it into a round (don’t worry about making it a perfect circle.)
If the dough feels sticky, dust the top lightly with more wheat bran, cornmeal or flour. Place the plastic wrap used to cover the bowl of dough loosely over the dough. Place the dough in a warm, draft-free spot to rise for 1 to 2 hours. The dough is ready when it has almost doubled in size. When you gently poke the dough with your finger, it should hold the impression. If it springs back, let it rise for an additional 15 minutes.
About half an hour before you think the second rise is complete, position a rack in the lower third of the oven and place a 4 1/2- to 5 1/2-quart heavy Dutch oven or pot with a lid in the center of the rack. Preheat to 475 degrees.
Use pot holders to carefully remove the preheated pot from the oven, then lift off the lid.
Uncover the dough. Quickly, but gently slit the top with a lame or sharp knife. If you are going to add seeds, spray the loaf with a light coating of water and sprinkle the seeds over the top. Pick up the four corners of the parchment paper and place into the pot. (Use caution — the pot and lid will be very hot.) Cover with the lid; bake (lower rack) for 30 minutes.
Remove the lid; continue baking until the loaf is a deep chestnut color but not burned, 15 to 30 minutes more. (If you are like me and want a more precise measure, the bread is done when an instant-read thermometer inserted into the center of the bread registers 200 to 210 degrees. I use the thermometer on every loaf.) Use the parchment paper to carefully lift the bread out of the pot and place it on a rack to cool thoroughly before serving or storing. Note: The oven temp is 475 degrees and if you remember Ray Bradbury’s book, you will never forget paper burns at Fahrenheit 451. It will be brown, black and crispy. Be gentle.
Actually, it’s brown, not scarlet, but it is pumpernickel. Day 5 of shelter-in-place saw the grilling of English muffins, an apple pie and finally a loaf of pumpernickel. Previously I made dark rye both with and without that nicer chewy, crunchy crust and white sandwich breads. The last time I made pumpernickel it didn’t go well, but with my recent success I decided to try again. Good move!!
This is a recipe from King Arthur Flour, my favorite Vermont baking source. This has great crumb, flavor and crust. Definitely a keeper.
Pumpernickel Bread – KAF
INGREDIENTS
• 4 cups (482g) AP flour • 1 cup (96g) pumpernickel flour • 3 tablespoons (21g) rye bread improver, optional • 2 tablespoons (11g) black cocoa, for dark pumpernickel color • 1 teaspoon Deli Rye Flavor, optional • 2 1/4 teaspoons salt • 2 teaspoons instant yeast • 1 3/4 cup + 2 tablespoons (425g) lukewarm water
METHOD
Combine all of the ingredients and mix and knead — by hand, mixer, or bread machine — until the dough is elastic and slightly sticky.
Let the dough rise in a lightly greased, covered bowl for 1 to 2 hours; it should become puffy.
Transfer the dough to a lightly oiled surface. Gently deflate it, and shape it into a ball.
Place the shaped loaf onto a lightly-greased or parchment-lined sheet pan or into a Dutch oven and cover with the lid.
Let the loaf rise for 60 to 90 minutes, until it’s almost doubled in size.
Preheat the oven to 425°F.
Slash the loaf diagonally in several places.
Bake the loaf for 35 to 45 minutes until it is crusty, and a digital thermometer inserted into the center reads 190°F to 200°F. If using a stoneware baker, remove the lid for the final 5 minutes of baking for a crusty top.
Remove the bread from the oven, and transfer it to a rack to cool completely.
Tips from our Bakers While both the rye dough improver and the rye flavor are optional, we recommend using them if you can. The dough improver helps to improve the loaf’s rise and texture, while the rye flavor adds authentic pumpernickel flavor.