Catch Her in the Rye

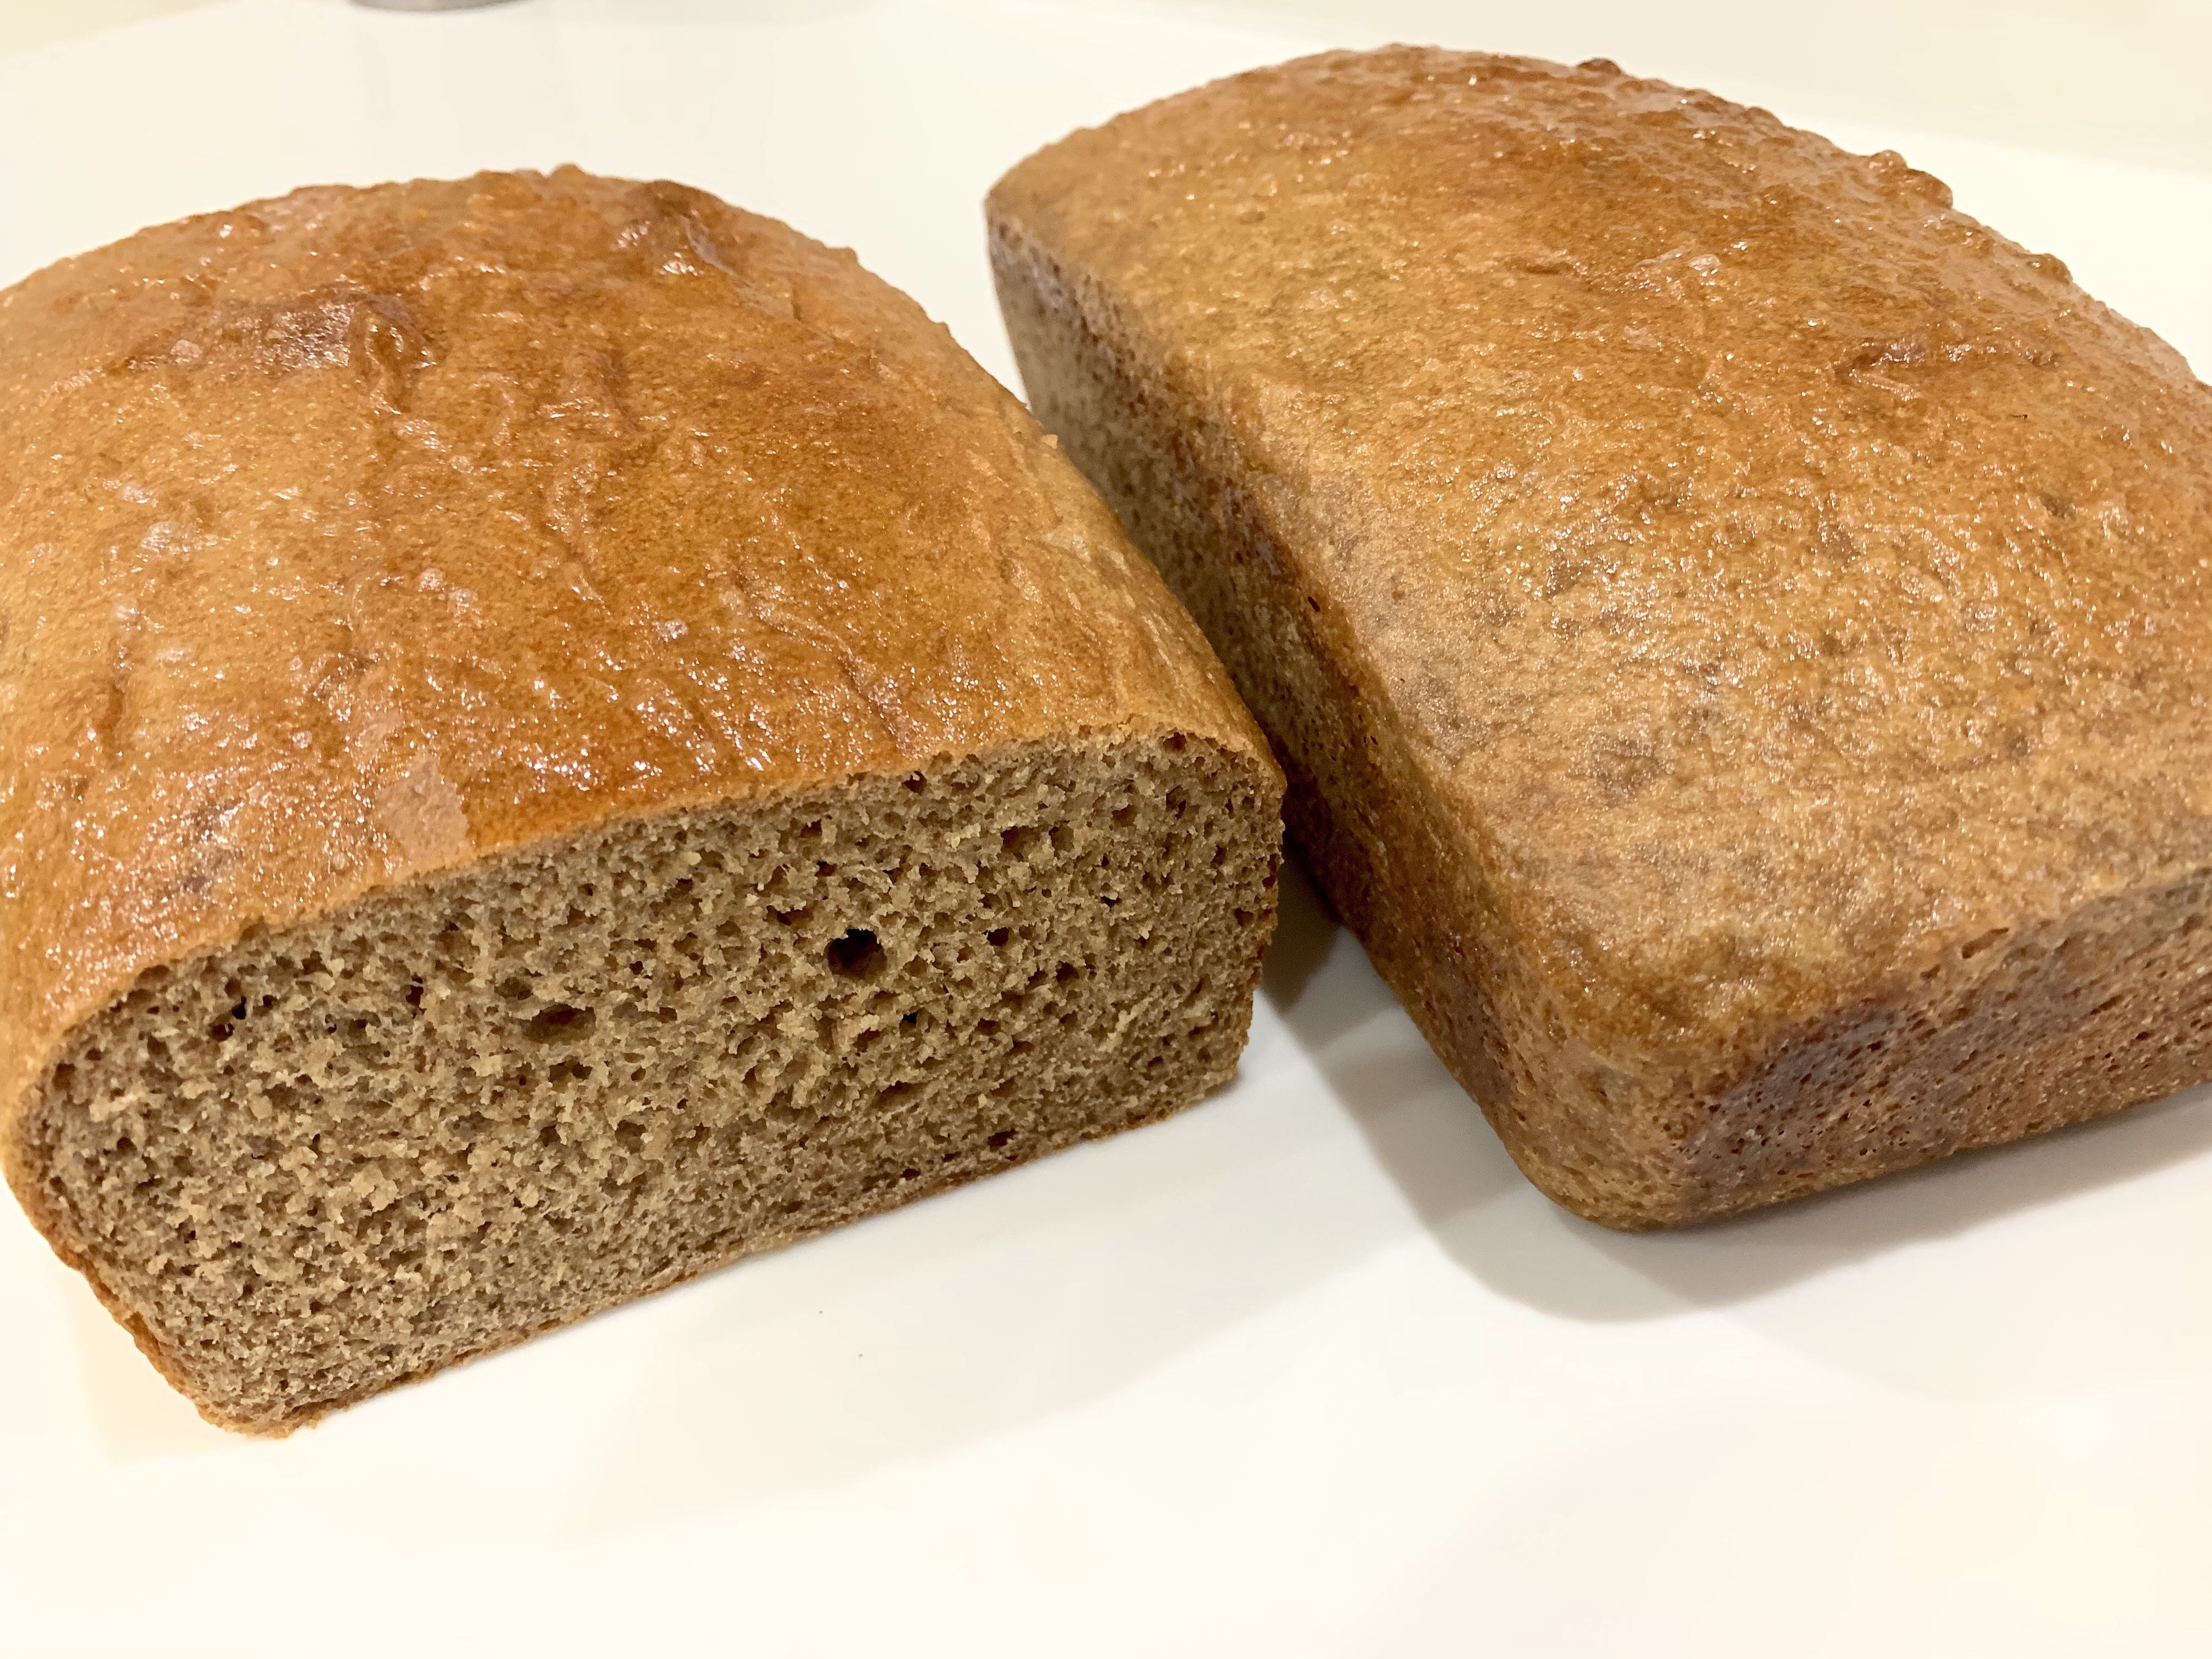
Day 2 of California’s Shelter-in-Place order and Bake #2 for “DeDe Bread.” Today I made two identical loaves of rye bread. One was delivered to my local family, and the other is currently being consumed by Quality Assurance Department.
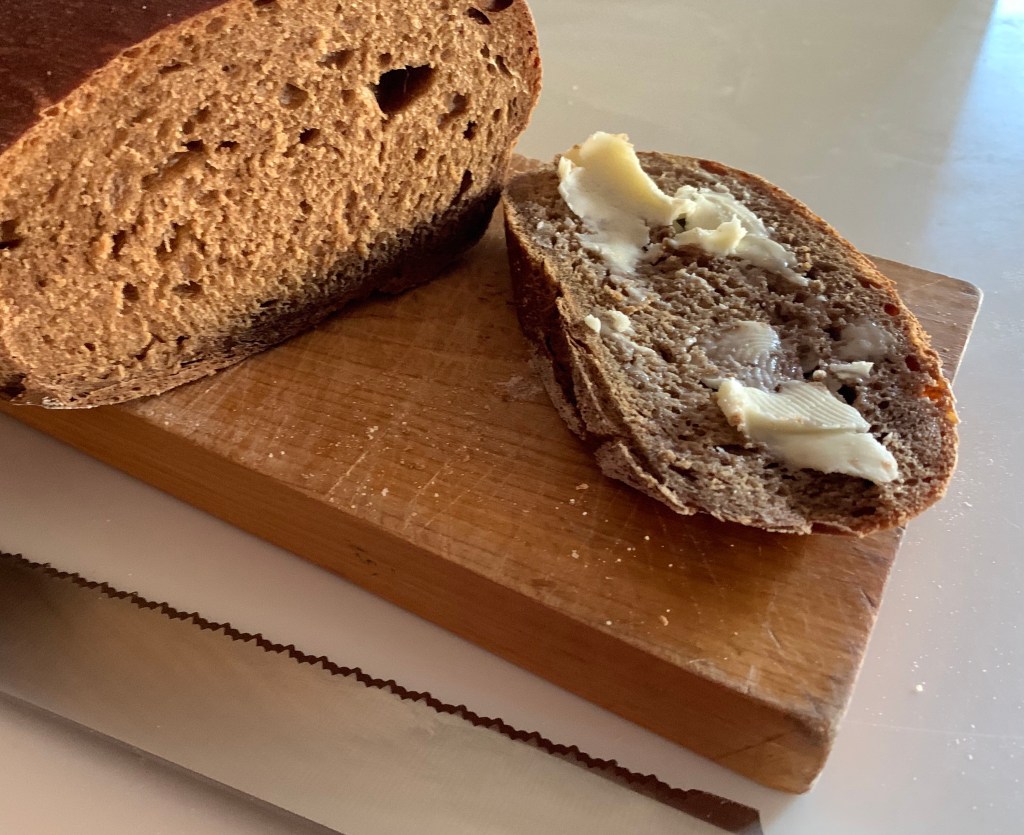
Day 3’s plan is to make a replicate of today’s loaf plus a crusty loaf made in the Dutch Over. Before either loaf is delivered to likewise Shelter-in-Place friends and family the QA Department will be sampling a slice or two.

Homemade Rye Bread

INGREDIENTS
4 ½ tsp (16 g) packages active dry yeast
2 ½ cups warm water (just barely warm to the touch)
2/3 (225 g) cup molasses
2 tbl caraway seeds (optional)
1 tbl salt
¼ cup vegetable oil
¼ cup cocoa powder
1 tbl Rye Bread Improver
2 cups rye flour
5 cups bread flour

METHOD

  1. Dissolve the yeast in the warm water with the molasses. Put yeast mixture into a large metal bowl.
  2. Add the caraway seeds, salt, vegetable oil, cocoa powder, 2 cups of rye flour and then 2 cups of bread flour, mixing into the yeast mixture after each addition with a wooden spoon.
  3. Add more bread flour, a cup at a time, until the dough is not so sticky and it is too hard to mix it with the wooden spoon. At that point, spread a half cupful of flour onto a large, clean, flat surface and put the dough onto the surface.
  4. Knead the dough with a Kitchen-aide bench mixer using the dough hook. Add more bread flour in small amounts until the dough begins to pull away from the sides of the bowl. Once the sides of the bowl are fairly clean then knead 8 minutes.
  5. Let the dough rise: Spread some vegetable oil around a large bowl and place the dough in it, turning it so it gets coated in the oil.
  6. Cover the bowl with plastic wrap or a damp cloth. Let rise at room temperature until it has doubled in size, 1 to 1 ½ hours.
  7. Gently press down on the risen dough so some of its air is released. Turn the dough out onto a lightly floured piece of parchment paper, knead the dough a few turns and then divide it by cutting it in half with a sharp knife.
  8. Shape each half into loaf. Place dough loafs into either oiled 8×4-inch bread loaf pans, or onto a flat baking sheet or peel that has been sprinkled with corn meal, depending if you want to cook the loaves in pans or directly on a baking stone. Cover with plastic or a damp cloth.
  9. Let the loaves rise: Let the bread rise again, this time not doubling in volume, but rising by about half of its volume, about 30 to 45 minutes, half as long as the first rising. The dough should be peeking over the top of the loaf pan if using a loaf pan.
  10. If you are using a Dutch Oven or baking stone, place it in the oven and preheat oven to 350°F for at least half an hour before baking.
  11. If baking in a Dutch Oven pick the dough up by the corners of the parchment paper and place the dough and parchment paper into the Dutch Oven or directly on the baking stone. Score the loaves a few times on the top of the dough right before putting it in the oven. Be careful, the Dutch Oven or baking stone will be hot.
  12. Put loaves in the oven. If you have a mister, mist the dough with a little water the first 10 minutes of baking. Bake for 40-50 minutes, or until done. The bread should sound hollow when tapped.

Re-No Knead

After my childhood Neighbor and still friend, Martha read my No Knead bread post she messaged me her go-to no knead bread recipe, which I tried and thought was both easy and excellent. I subscribe to the Washington Post weekly Voraciously Baking Basics Newsletter and last week was their no knead bread.

There is no question this is the best no knead bread I have made. Full disclosure I used Martha’s short rise version which only requires a 4 hour rise. I should go back and try the over night 14 hour rise to be a fair comparison to WashPo’s, which did undergo a 14 hour rise.

Voraciously Baking Basics No Knead Bread

INGREDIENTS

Makes one 8-inch round loaf (8 to 10 slices)
Prep time: 20 mins, plus 14 hours rising time
Bake time: 55 to 60 mins

  • 3 cups (375 grams) flour, plus more for kneading the dough
  • 3/4 teaspoon instant yeast
  • 1 3/4 teaspoons kosher salt
  • 2 tablespoons uncooked grits (optional)
  • 1 tablespoon flaxseeds (optional) 
  • 1 1/3 cups (319 milliliters) warm water
  • 1 tablespoon extra-virgin olive oil 

METHOD

  1. In a large bowl, whisk together the flour, yeast and salt, plus grits and flaxseeds (if using). Make a well in the center of the flour mixture and add the water and olive oil. Using a wooden spoon, stir until a shaggy, wet and sticky dough forms.
  2. Cover the bowl with greased plastic wrap — greased side facing inside the bowl — and leave at room temperature for at least 8 hours and up to 14 hours. The dough will rise and bubble and flatten across the top. 
  3. Toward the end of the rising time, place a 6-quart Dutch oven and lid on a rack in the middle of the oven. Preheat the oven to 450 degrees.
  4. Generously flour a clean work surface and, using a rubber bench scraper or lightly greased silicone spatula, scoop the dough out of the bowl onto the counter. The dough will still be very wet and sticky, but there’s no need to knead it — just flour the top and sides to keep the outside of the dough dry enough to shape it into a roundish ball by pulling the edges to the center of the dough. You can use the bench scraper to assist in the folding.
  5. Flour a 14- to 16-inch piece of parchment paper. Cupping your hands around opposite sides of the dough, gently but decisively transfer the dough to the paper, fold-side down. Dust with more flour wherever sticky dough becomes exposed and loosely cover with a clean, dry kitchen towel. Allow to rest for 30 minutes. The dough will have risen slightly and should bounce back when gently poked.
  6. Remove the Dutch oven from the oven and set the lid aside. (I like to keep pot holders on the lid and handle of the Dutch oven to remind myself it’s very hot.) 
  7. Lift the towel off the bread and, using a serrated knife, slash two vents into the surface of the dough to make a big “X.”
  8. Holding two sides of the parchment paper, lower the paper and dough into the hot Dutch oven. Re-cover the pot and place in the oven. 
  9. Bake for 35 minutes, then remove the lid and bake for another 20 to 25 minutes, until the bread is golden brown across the top and sounds hollow when tapped. Remove from the oven and let cool in the Dutch oven for 15 minutes, then transfer to a wire rack and cool for 1 hour before slicing and serving. 
  10. The bread is best within 2 days of baking but will keep, well wrapped, at room temperature for up to 4 days.

Yes, Need Bread

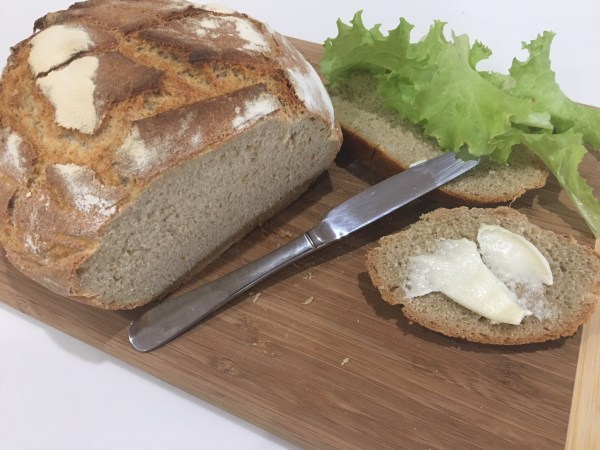
While traveling last week I saw a recipe for no-knead bread and today was my first chance to try it. Actually, I started it last night and finished it in time for a sandwich for lunch today. That seemed appropriate as the recipe described it as sandwich bread.

Rather than kneading the dough, once mixed into a wet sticky mess, it is rested, covered, in the refrigerator overnight. In the morning shape it into an 8” long log and place into a lightly greased bread pan. Allow the dough to warm to room temperature and rise under a clean, flour dusted kitchen towel for two hours.

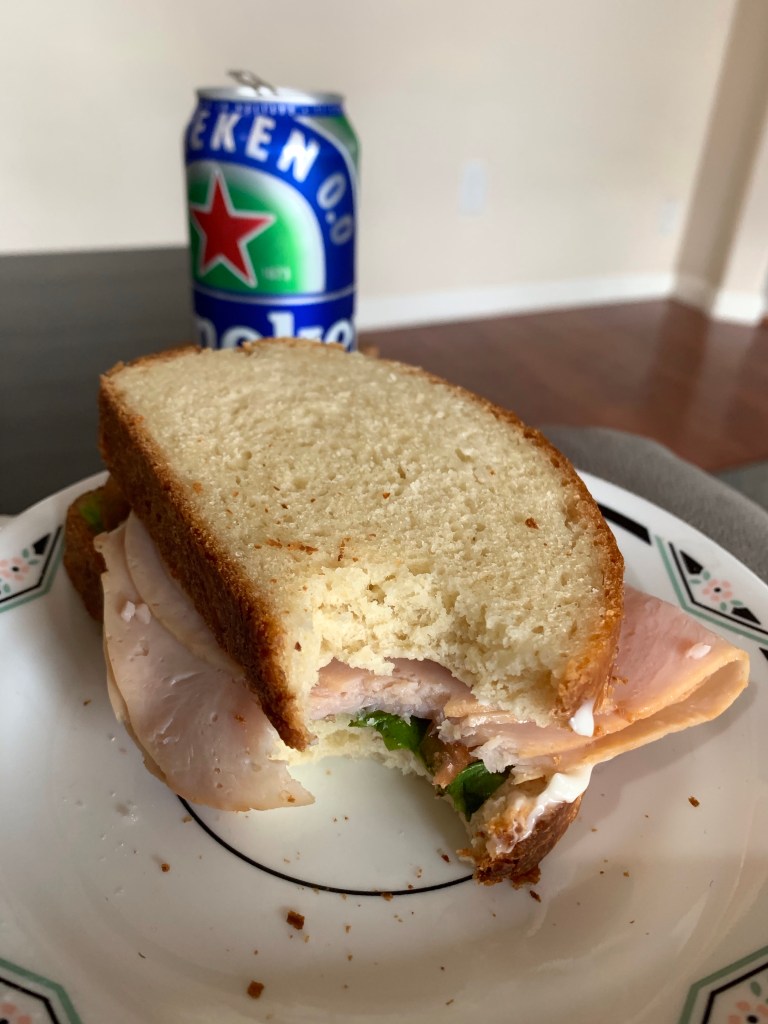
This recipe makes an enriched Pullman loaf, although I don’t actually have a Pullman Loaf Pan (a square bread pan with lid.) While the shape was off, the buttery flavor was excellent and it had the fine crumb a Pullman Loaf should exhibit. It made a wonderful turkey, tomato and home grown lettuce sandwich.

Bake at 375 deg F for about 40 minutes, or until the internal temperature is 200 deg F. Place on a cooling rack and coat the top with butter. Make your sandwich and sit back to watch the Tennessee vs Kansas City playoff game.

No Knead Sandwich Bread

INGREDIENTS
• 31⁄3 cups bread flour, plus more for work surface
• 11⁄2 cups whole milk, at room temperature
• 21⁄2 tablespoons granulated sugar
• 11⁄2 teaspoons active dry yeast (from 1 1⁄4-oz. envelope)
• 6 tablespoons unsalted butter, melted, divided
• 13⁄4 teaspoon kosher salt
• Cooking spray

METHOD
Stir together flour, milk, sugar, yeast, and 5 tablespoons of the melted butter in a large bowl. Stir with a wooden spoon until no dry spots remain. Cover the bowl with a clean dish towel and let stand 20 minutes. Add salt and stir until dough is sticky and elastic, about 2 minutes. Cover the bowl tightly with plastic wrap and transfer to the refrigerator; chill for 8 hours or overnight.

Lightly coat an 81⁄2-by-41⁄2-inch loaf pan with cooking spray. Turn chilled dough out onto a lightly floured surface. Using lightly floured hands, shape dough into a rough oval. (Dough may be difficult to shape.) Fold short ends of oval in toward the center, pressing gently to seal. Working in the same direction as the previous fold, fold dough in half over itself, pressing gently to seal and form an 8-inch-long log.

Transfer dough, seam side down, to prepared loaf pan, gently encouraging it into the pan. Cover loosely with plastic wrap that has been lightly coated with cooking spray. Let rest in a warm place (like the top of the refrigerator) until dough has risen just over the lip of the pan, about 2 hours. During the final 30 minutes of resting, preheat oven to 375°F with oven rack in lower third.

Bake until bread is golden brown and a thermometer inserted in center of loaf registers 200°F, 40 to 45 minutes, tenting with aluminum foil after 30 minutes if bread is browning too quickly. Invert loaf onto a wire rack; turn right-side up and brush top with remaining 1 tablespoon melted butter. Let cool completely before slicing.

Santa Bread Baby!

I saw a recipe and tutorial on Food.net last week and thought it would be fun to make and take to a Christmas party we are going to. This bread recipe is a little sweeter than my usual making it taste a little like a Danish pastry. Plus two eggs in 4 cups or 500g AP flour yields a Challah sort of flavor.

The Food.net video tutorial was a great help in cutting and arranging Santas parts. (Search for Food.net Santa Bread.

The instructions they provided were spot on. Follow them and you will have no problems.

INGREDIENTS

  • 3/4 cup whole milk
  • Two packages active dry yeast (4 1/2 tsp)
  • 1/3 cup granulated sugar
  • 4 tablespoons unsalted butter, melted and cooled, plus more for greasing and serving
  • 3 large eggs, at room temperature
  • 4 cups all-purpose flour, plus more for dusting (see Cook’s Note)
  • 1 1/2 teaspoons kosher salt
  • 1 tablespoon heavy cream or whole milk
  • 20 drops red gel food coloring
  • 2 large chocolate chips
  • Confectioners’ sugar, for dusting

METHOD


  1. Heat the milk in a small saucepan until it just begins to simmer, then remove from the heat and let cool to 115 degrees F. Stir in the yeast and let stand until the mixture is foamy, about 10 minutes.
  2. Pour the yeast mixture into the bowl of stand mixer fitted with a dough hook. Add the sugar, butter and 2 of the eggs and stir until smooth. Add the flour and salt and mix on medium-low speed until the dough comes together. Increase the speed to medium high and knead until the dough is smooth and elastic, about 8 minutes. Transfer the dough to a lightly greased large bowl, cover with plastic wrap and let stand until the dough doubles in size, about 1 hour.
  3. Preheat the oven to 350 degrees F and line a rimless baking sheet with parchment.
  4. Turn the dough out onto a lightly floured work surface. Pinch off 1 golf ball-size piece of dough and roll it into a ball for the pompom of Santa’s hat. Pinch off 1 ping pong ball-size piece of dough and roll it into a ball for Santa’s nose. Cut off a 1-inch-wide, 9-inch-long, 1/4-inch-thick strip and roll it into a smooth log for the brim of Santa’s hat. Cut another piece of dough into a roughly 2-inch-wide, 5-inch-long, 1/4-inch-thick strip of dough. Snip evenly from the bottom (but not all the way up) and spread the strips out slightly to form a mustache.
  5. Roll out the remaining dough into an elongated diamond with the top triangle of the diamond double the length of the bottom triangle. Position the diamond on the prepared baking sheet with the top of the longer triangle hanging over the edge. Working on the shorter triangle, use scissors or a knife to cut 1/2-inch-wide strips of dough up toward the middle, stopping at the imaginary line where the top and bottom triangles meet. Pick up each strip of the beard and twist it, if you like, lying the twists down next to each other naturally so they look like a beard.
  6. Fold over the overhanging corner of dough so that it fits back within the edge of the baking sheet and position it slightly to the right to form the tip of Santa’s hat. Position the dough log across the top triangle where the tip of Santa’s hat ends and tuck the ends under the sides of the triangle; this is the brim of Santa’s hat. Position the golf ball-size ball of dough over the tip and against the brim and press lightly to adhere for the pompom of Santa’s hat. Arrange the mustache at the top of the beard, then position the ping pong ball-size ball of dough above the mustache to make Santa’s nose.
  7. Beat the remaining egg with the cream in a bowl to make an egg wash. Using a pastry brush, brush the entire surface of the dough, including the pompom and brim of the hat but not the body of the hat, with the plain egg wash, making sure to get into all the crevices of the shapes. Add the food coloring to the egg wash, stir to combine, then carefully brush the body of the hat with the red egg wash, being careful not to let it stain the pompom or brim.
  8. Bake until the bread is golden brown and cooked through, about 20 minutes. Remove from the oven and immediately set the chocolate chips proportionally on either side and slightly above Santa’s nose to form his eyes. Let the bread cool for 10 minutes on the baking sheet, and then transfer to a wire rack. Using cut pieces of parchment paper or foil to shield Santa’s nose, face and the body of his hat, dust the beard, brim and pompom with confectioners’ sugar. Remove the paper and serve the bread while still warm with butter.

WHEAT Blew the Referee’s Whistle

So, as I know everyone does, I was browsing YouTube bread baking video tutorials yesterday while watching college football. As often happens as I spun down the YouTube rabbit hole I did a google search for “light, airy, whole wheat bread” and I found MelsKitchenCafe.com.

Having a few hours before the NFL games start today I decided to give it a try. No surprise, I had all the ingredients in my baking supplies, including vital wheat gluten.

Finished loaf – note low rise and tight crumb.
Shaped loaf in bread pan

Cheeburger, Cheeburger

No Peps, only Coke. We switch.

Given the responsibility for choosing tonight’s dinner I decided cheeseburgers would be perfect after (and during) a day of football watching—what could be better? I know! Home made hamburger rolls.

I received a new recipe designed for hamburger rolls from King Arthur this morning which may have influenced my dinner decision. These rolls are buttery and soft, but with some body which should hold up to a nice juicy cheeseburger. (Cheeburger is a nod to an old SNL skit.) The recipe made 6 rolls, each weighing in at about 135 grams when formed.

I thought it might be a good idea to freeze a couple of the rolls as an experiment so I under-baked them by 5 minutes, removed them from the over and let them cook before double wrapping them and freezing. I will let you know how they turn out when defrosted, warmed and finished baking.

The rolls in the back are the ones to be frozen. The rolls for dinner tonight are in the center and completed baking, and the ones cut in half and smeared with butter are the QC samples, or I should say, were the QC samples.

Total time to make was about 2 hours 20 minutes, which included 2 one-hour rises. If the freezing experiment is successful, it would be easy to double up the recipe and freeze enough for several dinners for two.

KING ARTHUR HAMBURGER BUNS

INGREDIENTS

  • ¾  to 1 cup (170g to 227g) lukewarm water*
  • 2 tablespoons (28g) butter, at room temperature
  • 1 large egg
  • 3 ½  cups (418g) All-Purpose Flour
  • ¼  cup (50g) sugar
  • 1 ¼  teaspoons salt
  • 1 tablespoon instant yeast

METHOD

  1. Mix and knead all of the dough ingredients to make a soft, smooth dough.
  2. Cover the dough, and let it rise for 1 to 2 hours, or until it’s nearly doubled in bulk.
  3. Gently deflate the dough, and divide it into 6 pieces about 125 -135 g each. Shape each piece into a round ball; flatten to about 3″ across. 
  4. Roll each bun with cupped fingers to tension the outside. Occasionally pinch and seal the underside seams.
  5. Place the buns on a lightly greased or parchment-lined baking sheet, cover, and let rise for about an hour, until noticeably puffy.
  6. Brush the buns with about half of the melted butter. 
  7. Bake the buns in a preheated 375°F oven for 15 to 18 minutes, until golden. 
    1. To freeze rolls
      1. Remove from oven with 5 min left to bake
      1. Cool and freeze
    1. To reheat
      1. Allow to come to RT
      1. Bake at 350 for 5-7 min
  8. Remove them from the oven, and brush with the remaining melted butter. This will give the buns a satiny, buttery crust.
  9. Cool the buns on a rack.

Not My Waterloo

85C73474-EA5B-44BD-83C5-6C3FA75720CFNeapolitans, not Napoleons, one-bite Blueberry Pie and Caramel Sauce while sporting a new Ugandan Youth Center produced apron Neil picked up for me on his trip to Africa last month, made for a good week in the bakery (not to mention the sandwich and NY rye breads… which I did just mention, didn’t I? Sorry ’bout that.)
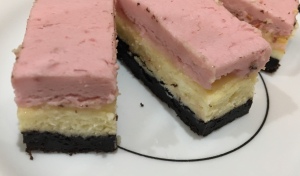
9E3D9EB7-31C6-4056-A2E2-EB98E5A96B0BThe Neapolitans are chocolate cookie based with a white cheesecake center and raspberry buttercream frosting, cut into 1” squares. Next time, I need to keep any skin from forming on the cheesecake. It kept the frosting from adhering properly.
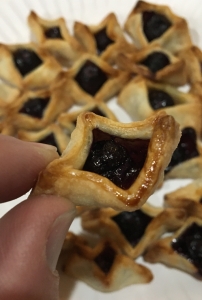
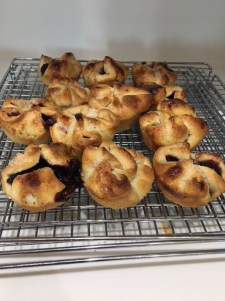
F226223A-A147-4E15-B8F6-5E3FBAA9DA1AThe Blueberry Bites should be dusted with some coarse sugar after being egg washed to add some sweetness and shine.  The caramelized sugar should add both. I may add a little lemon zest for a little tang.
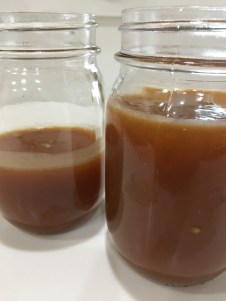
084CBE55-B2CD-4C2E-9F93-326140831A39The Caramel Sauce will be used later for a Peanut Butter/Caramel/Salted Chocolate petit four, but I had the time and it will keep in the fridge for a longtime so why not? The rest of the dessert will come later this week.
NEAPOLITAN CHEESECAKE COOKIES

Neapolitan Cheesecake Brownies

INGREDIENTS (Half Recipe)

COOKIE

  • 1 cup butter, softened (1/2)
  • 2 cups white sugar (1)
  • 2 eggs (1)
  • 2 teaspoons vanilla extract (1)
  • 2 cups all-purpose flour (1)
  • 3/4 cup unsweetened cocoa powder (6 Tbl)
  • 1 teaspoon baking soda (1/2)
  • 1/2 teaspoon salt (1/4)

VANILLA LAYER

  • 16 oz Cream Cheese
  • 2 Eggs
  • 1/2 cup Sugar

STRAWBERRY LAYER

  • 1/2 cup softened Butter
  • 6 cups Powdered Sugar
  • 1/2 cup Strawberry Preserves (optional)
  • 4-5 drops Red Food Coloring

METHOD

COOKIE

  1. Preheat oven to 350.
  2. Line a 13×15” pan and set aside. Be sure the paper extends over the sides of the pan.
  3. In a large bowl, cream together the butter and sugar until smooth.
  4. Beat in the eggs one at a time, then stir in the vanilla.
  5. Combine the flour, cocoa, baking soda and salt; stir into the creamed mixture.
  6. Bake for 12 to 16 minutes in the preheated oven, until top of cookies are completely set.
  7. Remove from oven and allow to cool for 30 minutes.

VANILLA LAYER

  1. Cream together cream cheese, sugar and eggs until well blended.
  2. Spread cream cheese mixture evenly over brownie layer.
  3. Bake for 25 – 30 minutes or until cheesecake layer is set. 1st try took 25 min
  4. Remove from oven and allow to cool at least 30 minutes until top is no longer warm to the touch.

STRAWBERRY LAYER

  1. Beat butter (and strawberry preserves if using) while slowly add in powdered sugar.
  2. Add in food coloring to achieve pink color, then whip to get uniform color.
  3. Frost cheesecake layer by spreading frosting with a spatula to completely cover.
  4. Refrigerate at least 2 hours before serving.

BLUEBERRY PIE BITES

Blueberry Pie Bites

INGREDIENTS

  • 1 refrigerated pie crust
  • about 45 blueberries
  • 2 Tbl raw or turbinado sugar
  • 1 egg + 1 teaspoon water (egg wash)
  • Special Equipment Required:
  • 1½” biscuit cutter
  • pastry brush

METHOD

  1. Preheat the oven to 450. Line a baking sheet with parchment paper. Use a pan with an edge so the pie bites don’t roll away when you place them in the oven.
  2. Lightly flour a clean work surface and unroll the refrigerated pie crust.
  3. Use a 1½” biscuit cutter to cut all your little pie bite circles out of the refrigerated pie crust.
  4. Place 1 blueberry in the center of each circle. Sprinkle each one with a little sugar (you probably won’t use all the sugar).
  5. Fold up two sides of one of the circles like a taco. The grab the adjacent sides and pinch the corners. This makes a little pocket for the blueberries. You can dip your fingers in egg wash to pinch the corners if you can’t get them to stick.
  6. Brush each bite with the egg wash. Place each bite on the prepared baking sheet.
  7. Sprinkle with a little more sugar and bake for about 10 minutes.

CARAMEL SAUCE

16 Servings, Prep Time: 10 Minutes, Cook Time: 15 Minutes


INGREDIENTS

  • 1/3 cup water
  • 1 1/2 cups white sugar
  • 2 tablespoons unsalted butter
  • 1 1/4 cups heavy cream
  • 1/2 teaspoon vanilla extract
  • 1 pinch salt

METHOD

  1. Bring the water, sugar, and butter to a simmer in a saucepan over medium heat. Do not stir the mixture until the sugar has completely dissolved in the water. Cook uncovered, stirring occasionally, until the caramel has turned golden brown, 5 to 10 minutes.
  2. Carefully pour in a slow, steady stream of cream into the caramel while stirring constantly. The hot caramel will boil vigorously when the cream is added and solidify in areas. Add the vanilla extract and salt. Continue stirring over low heat until the caramel is smooth and creamy, 5 to 10 minutes more. Allow to cool for at least half an hour before using.


When You Wish Upon A Star…


(a Cinnamon Star Bread that is,) “Makes no difference who you are.”
I saw this recipe on KAF as part of their CINNAMON STAR BREAD BAKEALONG: CHALLENGE #16.   These are fun ways to improve and augment anyones baking skills, no matter who you are, plus they result in a delicious product (when executed properly.)

Dusted Completed bread

INGREDIENTS

DOUGH

  • 2 cups Unbleached All-Purpose Flour
  • ¼ cup potato flour
  • ¼ cup nonfat dry milk
  • ¾ cup + 2 to 4 tablespoons lukewarm water, enough to make a soft, smooth dough
  • ¼ cup (4 tablespoons) unsalted butter, at room temperature
  • 1 teaspoon vanilla extract
  • 2 teaspoons instant yeast
  • 2 tablespoons sugar
  • 1 teaspoon salt

FILLING

  • 1 large egg, beaten
  • ½ cup sugar
  • 1 tablespoon cinnamon

METHOD

  1. First, measure the flour by gently spooning it into a cup, then sweeping off any excess. Next, sift the flour, potato flour, and dry milk through a strainer; this is an important step to prevent lumps in the dough. (If you’re using instant mashed potatoes rather than potato flour you can skip this sifting step.)
  2. To make the dough: Combine all of the dough ingredients and mix and knead —I use a mixer and dough hook — to make a soft, smooth dough.
  3. Place the dough in a lightly greased bowl, cover, and let it rise for 60 minutes, until it’s nearly doubled in bulk.
  4. Divide the dough into four equal pieces. Shape each piece into a ball, cover the balls, and allow them to rest for 15 minutes.
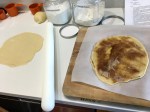
  5. On a lightly greased or floured work surface, roll one piece of dough into a 10″ circle. Place the circle on a piece of parchment, brush a thin coat of beaten egg on the surface, then evenly sprinkle with 1/3 of the cinnamon-sugar, leaving 1/4″ of bare dough around the perimeter.
  6. Roll out a second circle the same size as the first, and place it on top of the filling-covered circle. Repeat the layering process — egg, cinnamon sugar, dough circle — leaving the top circle bare.
  7. Place a 2 1/2″ to 3″ round cutter in the center of the dough circle as a guide. I used a 3/4 cup measuring cup and scored the center of the top ring. With a bench knife or sharp knife, cut the circle into 16 equal strips, from the cutter to the edge, through all the layers.
  8. Using two hands, pick up two adjacent strips and twist them away from each other twice so that the top side is facing up again. Repeat with the remaining strips of dough so that you end up with eight pairs of strips.
  9. Pinch the pairs of strips together to create a star-like shape with eight points. Be sure the ends are well pinched or they will separate.
  10. Transfer the star on the parchment to a baking sheet. Cover the star and let it rise until it becomes noticeably puffy, about 45 minutes.
  11. While the star is rising, preheat the oven to 400°F.
  12. Completed breadBrush the star with a thin coat of the beaten egg. Bake it for 12 to 15 minutes, until it’s nicely golden with dark brown cinnamon streaks; the center should register 200°F on a digital thermometer.
  13. Remove the loaf from the oven and allow it to cool for about 10 minutes before serving. Dust with confectioners’ sugar and serve warm or at room temperature.
  14. Store any leftover bread, well wrapped in plastic, at room temperature for several days. Freeze for longer storage.

The Scarlet Pumpernickel

Well maybe not scarlet, but not dark brown either. I slowly bought all the ingredients (or so I thought) to make a pumpernickel boule. KAF had a recipe I liked and ordered all the odd ingredients (or so I thought) to make it on my Wednesday “me day.” Somehow I missed it was supposed to be “White Whole Wheat Flour,” well, I had normal off-white whole wheat flour and it would have to do. I did buy the Deli Rye Flavor and the “Vital Wheat Gluten.” I forgot the Pumpernickel Artisan Bread Flavor is currently out of stock at KAF and is only on my wish list. With inspir/desperation, I removed 1//2 cup of the specified flours, added 1/2 cup pumpernickel flour, crossed my fingers and hoped for the best. According to comments on the KAF recipe omitting the Pumpernickel Artisan Bread Flavor will cause the bread to be a lighter color than the expected (and desired) chocolate/coffee/pumpernickel brown. It is, in fact, a good rye bread color. Actually, the taste was pretty darned ok also.pumpernickel boule 1

PUMPERNICKEL BOULE

INGREDIENTS

  • 4 cups King Arthur Unbleached All-Purpose Flour
  • 1 cup King Arthur Unbleached White Whole Wheat Flour
  • 1/2 cup Pumpernickel Artisan Bread Flavor
  • 2 tablespoons vital wheat gluten, recommended to prevent a collapsed loaf
  • 1/2 teaspoon Deli Rye Flavor, optional, for more assertive rye flavor
  • 2 1/4 teaspoons salt
  • 2 teaspoons instant yeast
  • 2 cups lukewarm water

METHOD

  1. Combine all of the ingredients and mix and knead — by hand, mixer, or bread machine — until the dough is elastic and slightly sticky.
  2. Let the dough rise in a lightly greased, covered bowl for 1 to 2 hours; it should become puffy.
  3. Transfer the dough to a lightly oiled surface. Gently deflate it, and shape it into a ball.
  4. Place the shaped loaf into a round brotform covered with a flour dusted liner.
  5. Let the loaf rise for 60 to 90 minutes, until it’s almost doubled in size.
  6. Preheat the oven to 425°F with the stoneware baker (e.g., Emile Henry) inside to pre-heat it.
  7. Spray the bottom of the stoneware baker with olive oil and carefully tip the loaf into it.  The loaf will deflate slightly, so be careful.
  8. Slash the loaf diagonally in several places, and cover with the lid. .
  9. Bake the loaf for 30 to 40 minutes, remove the lid, and bake for another 5 minutes; the bread will be dark. When done, it’ll be crusty, and a digital thermometer inserted into the center will read 190°F to 200°F.
  10. Remove the bread from the oven, and transfer it to a rack to cool completely.

Guess Who Came to Dinners?

We just had a weekend guest, and sadly, put her on a plane to return to her home last night. This woman prefers to eat healthy, in moderation and occasionally diet. Boy did she come to the wrong place!

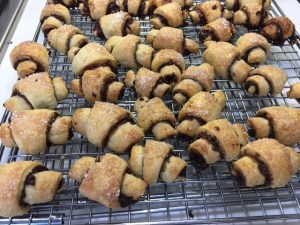
We started with some rugelach. I made apple/cinnamon, chocolate and hand pies
chocolate/blackberry. They are very similar except the for filling.  I added an apple tart, (I got to use my new spiralizer so am happy.) Fran and I had some fruit dumplings from Apple Hill (much like my hand pies but bigger, so I added blueberry, apply and blackberry hand pie/filled rough puff pastry dumplings. For dinner we had my homemade pizza margherita: sweet/salty sauce, home made dough (ala pizza 2 Independent Pizza in Seattle), basil and fresh mozzarella, baked 6 minutes at 600 degrees in my gas grill. I added some garlic bread knots to accompany.  It was so good, I made second one for Sunday night.  Unfortunately, we at all the garlic bread knots, so I made some chocolate mousse with pink whipped cream topping. Oh, we also had a salad.

mousse

RUGELACH

INGREDIENTS

CRUST

  • 16 tablespoons (1 cup) unsalted butter, at room temperature
  • 3/4 cup cream cheese, at room temperature (2 T cream cheese = 28g. 3/4 Cup = 12 T, ¾ C = 4oz.)
  • 1/3 cup sour cream
  • 1/2 teaspoon salt
  • 2 cups King Arthur Unbleached All-Purpose Flourrugelach1

FILLING CINNAMON RAISIN

  • 1/2 cup brown sugarrugelach2
  • 1 cup walnuts, chopped
  • 1/2 cup dried cranberries, raisins, or currants
  • 1 tablespoon cinnamon
  • water for brushing dough

DARK CHOCOLATE:

  • 1 T brown sugar
  • 1 Tsp unsweetened cocoa power
  • ¼ Tsp cinnamon (optional)

TOPPING

  • granulated sugar or coarse white sparkling sugar
  • milk or cream

METHOD

  1. To make the dough using a mixer: Beat together the butter, cream cheese, sour cream, and salt until smooth. Add the flour, mixing to make a stiff dough.
  2. Divide the dough into three equal portions. Press each gently into a disk. Make the disks as round as possible, smoothing their edges; this will allow you to roll the disks into a perfectly round circle, making the resulting rugelach more attractive.  (Note how :perfect this dough circle is.) Wrap the disks in plastic, and chill the dough for about 1 hour, until it’s firm but not rock hard. Or chill longer (up to overnight), then warm for about 45 to 60 minutes at room temperature, until the dough softens enough to roll out without cracking.
  3. To make the CINNAMON RAISIN FILLING: process the sugar, walnuts, dried fruit, and cinnamon in a food processor or blender until finely chopped and well combined (but not pasty). Don’t have a food processor? Simply stir together the filling ingredients; your filling will be chunky rather than smooth.
  4. To make the CHOCOLATE FILLING: Whisk together 1 tablespoon brown sugar and 1 teaspoon unsweetened cocoa powder; add 1/4 teaspoon cinnamon, if desired. Sprinkle atop rolled-out dough. Sprinkle with 1/4 cup (1 1/2 ounces) mini chocolate chips or chopped semisweet chocolate.
  5. Working with one piece of dough at a time, place it on a generously floured surface. Roll it into a 10″ circle and brush it lightly with water. For a flavorful touch, brush the rolled-out rugelach dough with a thin layer of boiled cider, warmed apple or 

    currant jelly, or puréed fruit preserves, instead of water.

  6. Use your fingers to spread about 1/3 of the filling onto the round, going all the way to the edges and gently patting the filling to help anchor it to the dough.
  7. Using a pizza cutter, baker’s bench knife, or sharp knife, divide the dough into 12 equal wedges. Roll each wedge up, beginning with the wide end and ending with the narrow end. Place the rolls point-side down on a baking sheet; lining the baking sheet with parchment will help with cleanup. Repeat with the remaining two pieces of dough.
  8. Brush the rugelach with milk or cream; and sprinkle with granulated or coarse white sparkling sugar, if desired.
  9. Preheat the oven to 350°F. Refrigerate the rugelach while the oven is preheating.
  10. Bake the rugelach for 25 to 30 minutes, or until golden brown. Remove from the oven, and cool right on the pan. Serve warm or at room temperature.
  11. Store leftover rugelach in an airtight container at room temperature for several days. Freeze for longer storage.

APPLE TART

TART SHELLS


INGREDIENTS

  • 100 g cold butter cut into small cubes
  • 200 g all-purpose flour
  • 60 g icing sugar (Splenda?)
  • ½ tsp vanilla
  • ¼ tsp salt
  • 1 egg (50g)

APPLE FILLING

  • 3 apples (sliced thin or spiralized with skins on)
  • 1/2 cup sugar
  • 1 Tsp cinnamon

METHOD

  1. Mix butter with sugar
  2. Add salt then vanilla
  3. Add egg
  4. Stir in flour.
    1. Mix by hand until incorporated
    2. Add 3-5 Tbl water to make dough sticky
  5. Cover with plastic and refrigerate for 30 min
  6. Butter tartlet pans
    1. Roll dough to about ⅛” thick
    2. Lay over tart mold and press into all crevices
    3. Roll top to cut off excess
  7. Prick holes in bottom and sides of formed dough
  8. Add pastry weights to each pan
  9. Bake in preheated oven 350o F (175o C) for 17 min
    1. Remove pastry weights with 5 min left in the bake
    2. Remove pastry shells from pans and let cool on wire rack
  10. Fill cooled tart shell with sliced apples. I put them in a spiral shape but any way will do
  11. Sprinkle sugar and cinnamon over the apples.
  12. Cover exposed edges of tart with aluminum foil to prevent over browning.
  13. Back at 375 F for 20-30 min. When apples have reduced and mixture is bubbling.
  14. Remove from over and cool on a wire rack.

Sweet and Salty Pizza Sauce

INGREDIENTS

  • 1 tablespoon olive oil
  • 2 cloves garlic, minced
  • 3 medium tomatoes, diced
  • 1 can tomato paste
  • 1 Tbsp sugar
  • ½ teaspoon salt
  • 1/8 teaspoon pepper, freshly ground
  • 2 tablespoons (4 large leaves) fresh basil, coarsely chopped

METHOD

  1. Heat oil in medium saucepan over a medium heat until hot.
  2. Add garlic; cook 30 seconds or until fragrant.
  3. Stir in tomatoes, tomato paste, salt and pepper and cook for 8-10 minutes or until slightly thickened, stirring and mashing tomatoes with potato masher until crushed.
  4. Stir in basil.
  5. Place in small bowl; cool to room temperature This sauce may be made up to 3 days ahead and refrigerated or up to 2 months ahead and frozen.