Grace’s Baptism Cake

Saturday October 28, 2016 was our granddaughter Grace’s baptism. completed-cakeAround 60 family members and friends attended at a Catholic church in Roseville for a short but meaningful service, then gathered at Frances and Daniel’s for brunch. I was asked to provide a cake for 60 people. (This may be the largest cake I have made.) The specific request was for a layer cake with chocolate mousse filling and a quilted finish.

For 60 servings the cake needed to be about 4″ high and 11″ x 15″. Knowing I would lose a little from the edges to square the sides I assumed there would be at least a few sheetcakepeople who do not eat cake (friends of Marie Antionette, no doubt) and I could get away with this size. Therefore I needed two sheet cakes. (Note: about 10 slices were left at the end of the event.)

To have a decent thickness of mousse separatinbuttercream-dam-4g the cake layers I built a dam of crusting buttercream around the edges of the top crumb coated cake. Crusting buttercream has a little more body and will keep the mousse in place. Add a tablespoon of meringue powder to the confectioners sugar to make regular buttercream into crusting buttercream. After the second sheet cake is cool, add the buttercream-dam-2mousse to the damned 🙂 bottom cake. Top with the second layer, crumb coat the entire cake and refrigerate. stacked-layersA cold cake is easier to trim to make nice square edges and setting the mousse will retard the effects the moisture will have on the fondant coating.

I used an electric knife to trim the edges of the cake prior to covering with fondant. After trimming crumb coat the nice, straight smooth edges of the cake. stacked-and-cut-layers

I rolled out a 17″ x 22″ piece of fondant to have enough to cover the cake. Once it was covered and smoothed, 45 degree crisscrossed lines were embossed into the sides of the cake. Then it was dusted with pearl luster to add a little sparkle to the fondant and little pink rosettes were piped into each intersection of the quilt pattern.

Egraces-cake-quiltingarlier in the week I made the pink orchid, cross and text backing from gumpaste.graces-orchid I purchased the text from a company that makes sugar images and pasted it onto the backing gumpaste.

YELLOW SHEET CAKE – SERVES 60

INGREDIENTS:

  • 4 1/2 cups (570g) all-purpose flour
  • 2 teaspoon baking soda
  • 1 teaspoon salt
  • 2 cup (460g) unsalted butter, softened
  • 3 3/4 cups (700g) granulated sugar
  • 4 large eggs, at room temperature
  • 4 teaspoons pure vanilla extract
  • 1 cup (240g) sour cream, at room temperature
  • 2 cup (480ml) whole milk, at room temperature

DIRECTIONS:

  1. Preheat oven to 350°F (177°C). Generously grease and lightly flour a 12×17 inch half sheet/jelly roll pan. The pan should be at least 2″ deep. Set aside.
  2. Whisk the flour, baking soda, and salt together in a large bowl. Set aside. Using a handheld or stand mixer fitted with a paddle attachment, beat the butter on high speed until smooth and creamy – about 1 minute. Add the sugar and beat on high speed for 3 full minutes until creamed together. The mixture should be a light yellow color. Scrape down the sides and up the bottom of the bowl with a rubber spatula as needed. On medium-high speed, add 1 egg at a time, beating well after each addition until both are mixed in. On high speed, beat in the vanilla extract and sour cream. Scrape down the sides and up the bottom of the bowl with a rubber spatula as needed.
  3. With the mixer running on low speed, add the dry ingredients to the wet ingredients alternating with the milk. Start and end with the dry ingredients. Mix each addition just until incorporated. Do not overmix this batter. The batter will be smooth, velvety, and slightly thick.
  4. Spread the cake batter into the prepared pan. Smooth it out into a thin, even layer. Bake for 20-22 minutes (less for a half recipe or 35-40 minutes for a double. Actual times depend on pan used, less time for shallow pan, more for deeper, or until the top is lightly browned and a toothpick inserted in the center comes out clean. Make sure you rotate the cake pan once or twice during bake time if your oven has hot spots. Remove from the oven and allow the cake to cool in the pan placed on a wire rack. As the cake is cooling, make the frosting.
  5. Make ahead tip: Cake can be made 1 -2 days in advance, covered tightly at room temperature.

BUTTERCREAM FROSTING – I made several batches of this frosting

INGREDIENTS

  • 4 cups of powdered sugar (or 1 box)
  • 1 Cup (2 sticks) of softened butter
  • 2-3 teaspoons of vanilla
  • 1-2 tablespoons of milk
  • Violet food coloring

INSTRUCTIONS

  1. Add powdered sugar to mixing bowl.
  2. Add softened sticks of butter
  3. Add vanilla. If you want white buttercream use clear imitation vanilla.
  4. Add 1 tbsp of milk.
  5. Beat on low until powdered sugar is incorporated. Then move mixer up to medium-high speed. Scrape sides and bottom of bowl often. When completely mixed the frosting may appear dry.
  6. Add more milk, a little bit at a time until frosting is the proper consistency.
  7. Again, for white frosting now add a little violet food coloring. I use the end of a toothpick and add just a little at a time. Mix thoroughly.

CHOCOLATE MOUSSE

INGREDIENTS

  • 4 egg yolks
  • ¼ cup sugar
  • 1 cup whipping (heavy) cream
  • 1 package (6 ounces) semisweet chocolate chips
  • 1 ½ cups whipping (heavy) cream

DIRECTIONS

  1. Beat egg yolks in small bowl with electric mixer on high speed about 3 minutes or until thick and lemon colored, then gradually beat in sugar.
  2. Heat 1 cup whipping cream in 2-quart saucepan over medium heat until hot. Temper the eggs by gradually (i.e. slowly, a little at a time) stirring (rapidly) at least half of the hot whipping cream into egg yolk mixture; stir back into hot cream in saucepan. Cook over low heat about 5 minutes, stirring constantly, until mixture thickens (do not boil). Stir in chocolate chips until melted. Cover and refrigerate about 2 hours, stirring occasionally, just until chilled.
  3. Beat 1 ½ cups whipping cream in chilled medium bowl with electric mixer on high speed until stiff. By hand fold chocolate mixture into whipped cream to not collapse the whipped cream. Pipe or spoon mixture into serving bowls. Immediately refrigerate any remaining dessert after serving.

Summertime, And The Livin’ is Easy

It’s summertime again. Actually, it is the end of May and summer is still 3 weeks away but if you live in South Florida summer began months ago. I needed a cake for a dinner party this weekend and said to myself, “Self, what springs to mind when you think about summer?” After a moment, I replied, “Well, after a long hot winter I want to fall into a cool, refreshing cake that shrieks summer.” I decided on a Watermelon Cake. It doesn’t taste like watermelon (it is actually a white cake dyed reddy/pink) but sure looks like one. IMG_1421[1]

Bake the cake in a greased and flowered Wilton Egg Pan (because I own one.) Fill the pan to within an inch of the top and be sure to put a cookie sheet under it while baking as it will overflow the pan. My oven is slow so I baked it for an hour at 350 F. Remove from the oven and let cool completely. Trying to remove the cake while warm will destroy it.

After the cake is completely cool, (I know, the cake is very cool, but in this case I mean the temperature) cut the excess cake along the edge of the Egg Pan to make a perfectly flat side then turn it out onto a wire rack. If necessary loosen the edges of the cake from the pan with a flexible spatula.

Frost the cake with a heavy IMG_1422[1]layer of white crusting butter cream frosting (I made a double recipe of the below) and place in the freezer. When the frosting is set, about an hour, coat with another layer of white frosting making it as smooth as possible, returning to the freezer. This makes the thicker white watermelon rind. While the twice white frosted cake is again setting add some green food coloring to the remaining frosting. This green should be the background green of the watermelon, not the dark green lines. Add a little additional milk to reduce the viscosity, or to the non-scientists among us, reduce the “thickness.” After the frosting on the cake is set, smooth a layer of the light, thinner green frosting over the entire cake and return to the freezer. After the now light green cake is set, remove from the freezer and smooth the surface. I like to use a latex gloved hand wetted by holding it under the faucet. A bowl of water would also work but then you have to clean another bowl. You will have to clean and re-wet your hand a few times to smooth the entire cake. Once the light green frosted cake is smooth, guess what? Return it to the freezer to set.
IMG_1427[1]Remove the smooth light green frosted cake from the freezer and paint the dark green stripes. I used Duff green airbrush dye and a 3/8″ brush (because I own them.) If you are the artistic type with a good eye and imagination this is no biggie. If you are the more analytical, fallen chemist type, set your iPad with a picture of a watermelon next to your cake and copy to the best of your limited artistic ability.

BTW, here is a tip I found online: to disperse the chocolate chips and not have them settle to the bottom of the cake batter mix them into the flour mixture being sure the are well coated with flour. This seems to help them “float” in the cake batter as it bakes.

Here is another tip: don’t let the cake with the thick frosting warm up in the car ride to your party. Soften or melted rind signficantly affects the overall impression of the cake.

Recipe: Heavenly White (Watermelon Colored) Cake

Ingredients

  • 2 3/4 cups sifted cake flour
  • 4 teaspoons baking powder
  • 3/4 teaspoon salt
  • 4 egg whites ( or substitute)
  • 1 1/2 cups white sugar
  • 3/4 cup butter
  • 1 cup milk
  • 1 teaspoon vanilla extract
  • 1/2 cup of chocolate chips
  • Red dye

Directions

  1. Measure sifted flour, baking powder, and salt; sift together three times.
  2. Add chocolate chips and mix being sure the chips are well coated with the flour mixture
  3. In a mixing bowl, beat egg whites until foamy. Add 1/2 cup sugar gradually, and continue beating only until meringue will hold up in soft peaks. Add red dye to approximate a watermelon color.
  4. Cream butter or margarine. Gradually add remaining 1 cup sugar, and cream together until light and fluffy. Add sifted ingredients alternately with milk a small amount at a time, beating after each addition until smooth. Add red food dye until the same watermelon pinky/red is achieved. Mix in flavorings. Add colored meringue, and beat thoroughly into batter.  Pour into well greased and floured Egg Pan.
  5. Bake at 350 degrees F (175 degrees C) for about 60 minutes. Check the springiness of the cake after about 45 min. Guess when it is done (when the depression caused by your finger is anti-depressed, or springs back up.) Leave the cake in pans until completely cool, then trim the bumpy puffed up cake above the rim of the Egg Pan and remove and transfer to a wire rack.

Basic Crusting Butter Cream

Ingredients:

  • 1/2 cup solid high ratio shortening
  • 1/2 cup butter softened
  • 1 tablespoon of meringue powder
  • 1 teaspoon Clear Vanilla Extract (or extract of choice)
  • 4 cups sifted confectioners’ sugar (approx. 1 lb.)
  • 2 tablespoons milk
  • Green food color (add after cake is frosted with the white frosting)

In large bowl, cream shortening and butter with electric mixer. Add vanilla and milk. Gradually add sugar, one cup at a time, beating on a slow speed. Scrape sides and bottom of bowl often. Keep bowl or covered with a damp cloth until ready to use. Refrigerated in an airtight container, this icing can be stored 2 weeks. Don’t overwhip or it will bring air to the icing and is impossible to smooth. If you have a kitchen Aid use white attachment, not whip attachment.


TBE Logo Cake

Robin asked for anyone planning to attend her and Andi’s Open House last night to let her know in advance so they could plan on what and how many desserts to expect. I immediately told her I would bring a cake. As this open house was in part to celebrate their new home (which was wonderful by the way.) I decided to celebrate the new 5f2349a5-ad83-4fd7-ac6d-47f32f3bbd8a
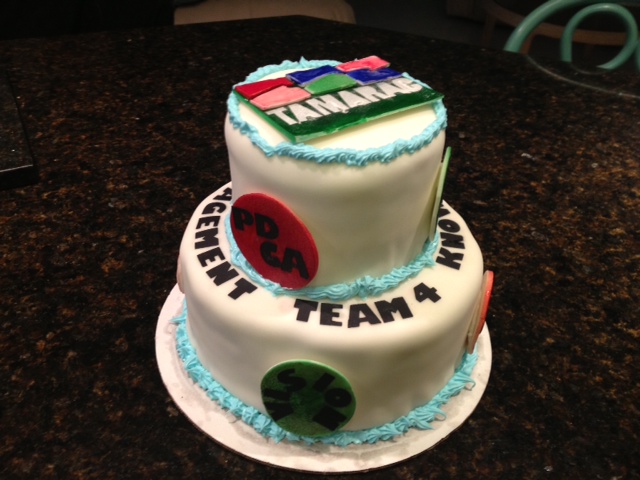
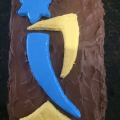
branding of TBE by making a chocolate cake with the new TBE logo on top.  The cake and chocolate fudge frosting use the standard recipe found elsewhere in this blog.

The new TBE logo was designed with careful attention to both geometric design and color. I am not good with colors and only approximated the CMYK color of the actual image. The logo is made with cut out, rolled sugar cookies. I made a 3709785b-9975-4bc7-ae2d-fb2e189b5ce3template by printing the logo scaled to size. In this case the overall height was about 10″.  I then cut out the colored parts of the logo and placed the template on the rolled out cookie dough and trace the outline with a knife. Next, remove the template and carefully cut out the dough along the tracings and transfer it to a 4bc8d4aa-341f-4088-8d3a-edd0d5227ef9parchment covered cookie sheet., being careful not to distort the shapes. Check them against the template and correct any distortions. Bake the cookies as per the directions below and allow to cool. I actually made the cookies 2 weeks ago and froze them between layers of waxed paper.

The color was added by “float frosting” the shapes with colored royal icing. I made small recipes of royal icing (3 tbl meringue power, 1 cup powered sugar and 4–6 tablespoons warm water or enough to make the icing just barely pipeable. I am not sure pipeable is a word, but it is now.) Pipe the thick icing around the edges of the appropriate shape. In my case the star and the long curvy thing were blue (I used Wiltons Royal Blue gel icing.) The base and ASL sideways “L”, or if you are left handed its a backwards ASL sideways “L”,  was mostly yellow with a little orange. Once the edges are coated (don’t worry if it runs a little you can trim it later) pipe a bead around the top edge of the piece letting it just run into the sides to make a seamless seam (hmmmm.)  Once that is completed, dilute the royal icing with a couple more tbls of warm water to the point is just barely drips out of the piping bag. Flood the top of the cookie letting the icing run together into a solid smooth coating. Let it dry, or refrigerate if you are the annoying, impatient, Type A person. After refrigerating, I trimmed runny frosting from the edges of the cookies.

Arrange the cookie shapes on the chocolate cake. A bit of advice – make sure the top of the cake carrier will not squish the cookies into the cake and stick to the top of the carrier causing them to rip out of the cake when setting out for display. Just sayin.

Basic Sugar Cookie Recipe for Cut out Cookies

Incredients

  1. 3 cups all-purpose flour
  2. 1 teaspoon baking powder
  3. 1/4 tsp kosher salt
  4. 2 sticks (1cup) butter, unsalted, softened to room temperature
  5. 1 cup granulated sugar
  6. 1 large egg, room temperature
  7. 1 tbl vanilla extract, vanilla bean past or almond extract
  • Sift together flour, baking powder, add salt, set aside.
  • In a small dish whisk together egg and vanilla extract, set aside.
  • In a mixing bowl cream together room temperature butter and sugar, about 5 minutes, scrape the bowl twice. Butter and should be light and fluffy.
  • Gradually add vanilla egg mixture, beating anywhere from 30 seconds to minute until well mixed in.
  • Now gradually in 3 additions add flour. Lower the speed of your mixer to low. Scrape the bowl well after the last addition and beat just until flour is combined.
  • Scrape the cookie dough into a large bowl, and using your hand knead it for about 30 to 60 seconds, until dough comes together.
  • Wrap the dough in a plastic wrap and refrigerate overnight (8 hours) or minimum 4 hours.
  • Preheat oven to 375F
  • Divide cookie dough in half. Roll one half of the cookie dough into about 1/4 inch thick, between 2 pieces of parchment paper using rolling guides. (2 painter’s sticks glued together on each side, or 2 pieces of 1/4 inch molding.
  • Cut out the shapes. Place the cookies on a light colored baking sheet lined with parchment paper. (I use a double walled insulated baking sheet.)  You can re-knead and re-roll the dough to cut additional shapes. Chill the cut outs in the fridge for about 15 minutes or in the freezer 8 minutes. This will help them hold their shape during baking.
  • Bake for 9 min, depending on the oven, turn the sheet once half way through the baking.
  • Let the cooking cool on the baking sheet for 5-7 minutes, transfer to cooling rack.
  • Store in the airtight container for up to 2 weeks or freeze un-decorated cookies between pieces of wax paper in a large freeze safe container, for up to 2 months.

Baked Almost Donuts

About mid-morning yesterday I realized the banana I had for breakfast several hours earlier was not going to sustain me until lunch. Suddenly I had a donut craving. IMG_1145Remembering that I had a mini-donut baking pan I searched AllRecipes for a baked donut recipe, assuming it would be healthier (and easier) than frying. I chose a recipe for “Donut Muffins” and planned on baking them in my donut baking pan. I started assembling all the pans and ingredients but couldn’t find the ^#&%#* donut baking pan.

Finally I realized the recipe directions were inaccurate. I should have planned 15 minutes for preparation and 15 minutes for baking and 20 minutes to find the ^#&%#* donut baking pan. Ultimately I had to settle and use mini-cupcake pans. Also, the recipe says it makes 24 servings. In my humble opinion this recipe makes 24 delicious mini-muffins which are one serving, unless there are two people home, when it could then, under duress, be 2 servings. I strongly suggest not making these if there are more than 2 people home, there won’t be enough. You could always double up the recipe, if you really wanted to.

 Donut Muffins

24 Servings, Prep Time: 15 Minutes, Cook Time: 15 Minutes, Time to find the ^#&%#* donut baking pan: 20 min

Ingredients

  • 1/2 cup white sugar
  • 1/4 cup margarine, melted
  • 3/4 teaspoon ground nutmeg
  • 1/2 cup milk
  • 1 teaspoon baking powder
  • 1 cup all-purpose flour
  • 1/4 cup margarine, melted
  • 1/2 cup white sugar
  • 1 teaspoon ground cinnamon

Directions

  1. Preheat convection oven to 350 degrees F.
  2. Search every cupboard, drawer and cabinet for the ^#&%#* donut baking pan.
  3. Failing to find it, grease and flour 24 mini-muffin cups.
  4. Mix 1/2 cup sugar, 1/4 cup margarine, and nutmeg in a large bowl. Stir in the milk, then mix in the baking powder and flour until just combined. Fill the prepared mini muffin cups about half full.
  5. Bake in the preheated oven until the tops are lightly golden, 15 to 20 minutes.
  6. While muffins are baking, place 1/4 cup of melted margarine in a bowl. In a separate bowl, mix together 1/2 cup of sugar with the cinnamon. Remove muffins from their cups, dip each muffin in the melted margarine, and roll in the sugar-cinnamon mixture. Let cool slightly and serve.

Take Me Out to the Ball… Park

For her birthday all Fran wanted was one of my cakes. For the woman who starts counting the days until pitchers and catchers report from the last out of the World Series (114 days) I thought a baseball themed cake would be perfect. I mulled it over for a while, discarding baseballs, gloves and bats before deciding on a baseball park.BB Stadium 3

As I often do, I searched Google images for ideas of a design for a baseball park cake. Not finding any that caught my eye or attention, I designed my own. The first thing I discovered is it is very difficult to make a small cake with any detail. I compromised and used M&M’s for fans and Peanut M&M’s for players. The scoreboard is a Hershey bar (one of Fran’s favs) with a Happy Birthday message piped with royal icing. You can tell I did that, the piping is mediocre and the penmanship is atrocious. The BB Stadium 4
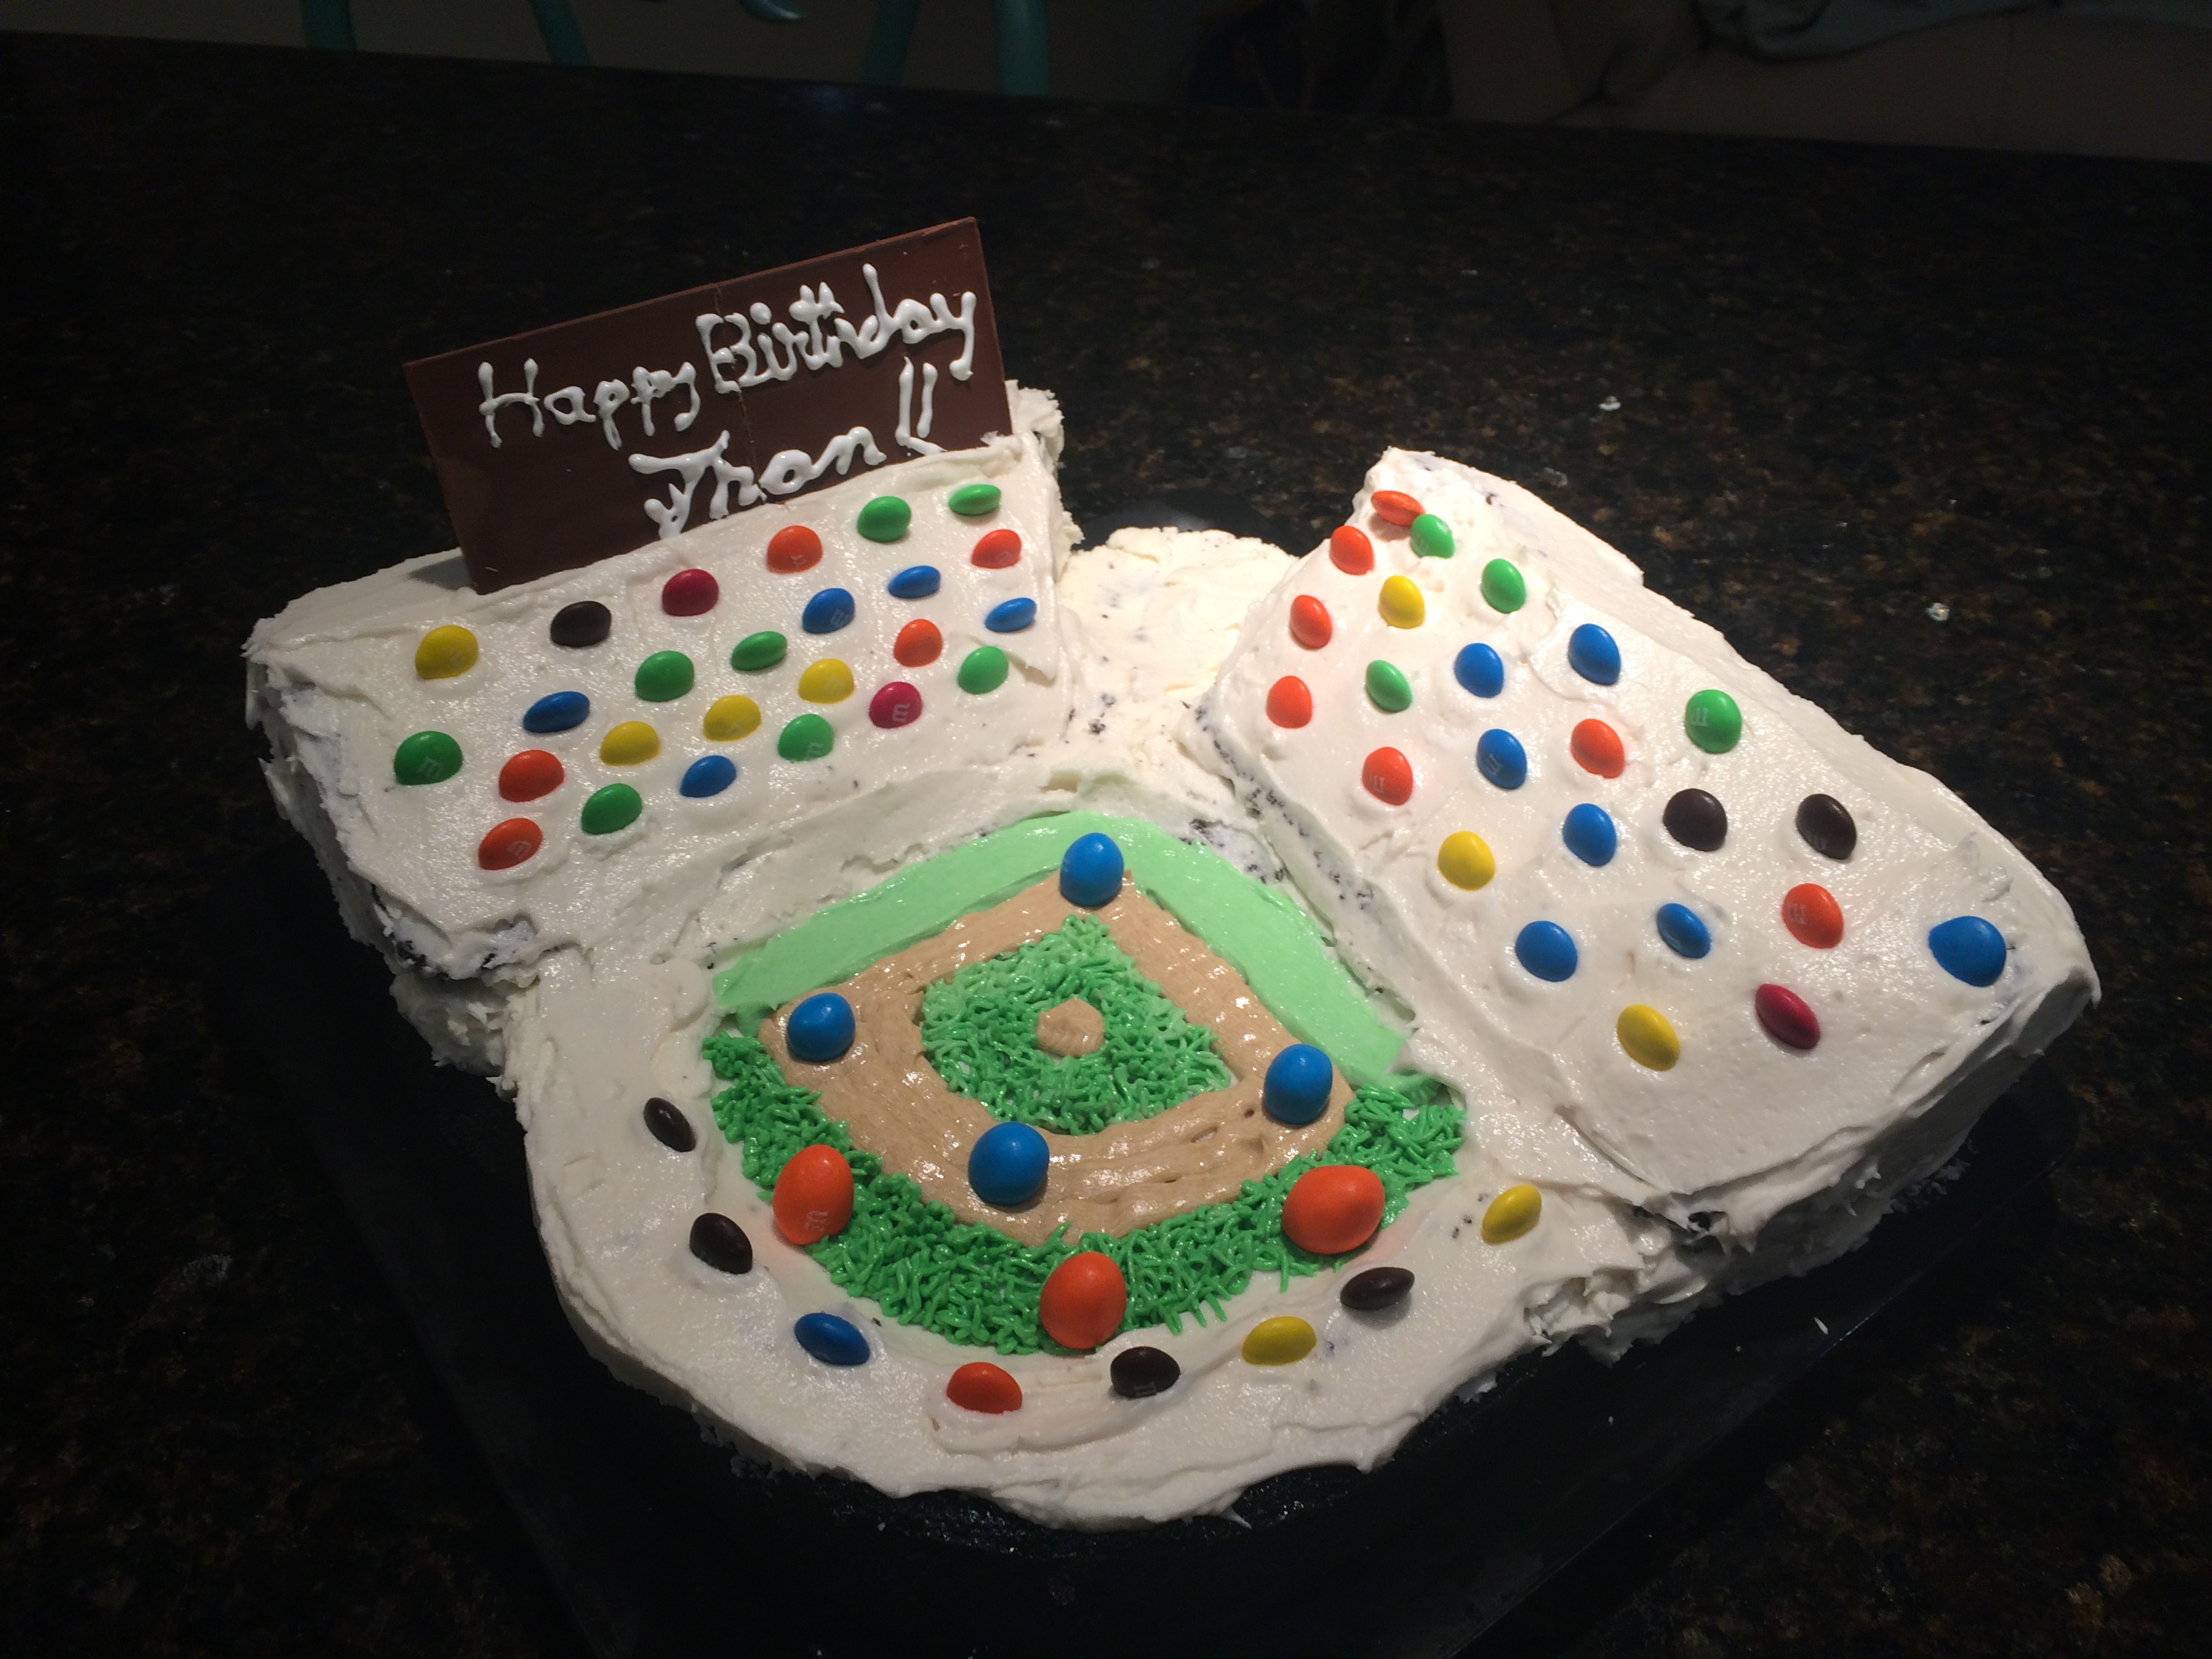
playing field is chocolate cake with the outfield carved into a curved radius and grand stands are white velvet cake baked in a bread loaf pan then cut at an angle to make parallel triangular wedges for the grand stands. Everything was crumb coated with white butter cream frosting, chilled overnight and a finish frosting coat added the next day.

The infield was made from green dyed butter cream and piped onto the cake with a grass tip (Wilton #233.) M&M’s were placed strategically around the ball park and the scoreboard on top of the right field grand stand.

Recipes for all cakes, frostings and icings can be found in other posts in my blog.

M&Mmmmmmmm Cake

M&M 3

If it works, don’t fix it. My chocolate cake is probably the best cake I make (In My Not So HO). The Heavenly White is a very close second, but I really think the chocolate is #1.

Anyway, when invited to Robin’s open house, and knowing Robin has some sort of M&M obsession (in the nicest sense of the word), and being asked to inform them if I was bringing a

MM 1 Small

dessert, I had some initial anxiety deciding on a “theme” for the cake (between a Robin’s Egg Blue cake, which could have been Heavenly White, or an M&M cake, which HAD to be chocolate) I ultimately chose the M&M cake. (Please see my Facebook “Chicken and Egg” post for a further discussion of life’s anxieties.)

I used a Wilton’s 3D Egg Pan which I found on eBay for $6. This is a very versatile pan if you want to make egg (bird, chicken, bunny, Fabrege, etc) or football, or even Peanut M&M shaped cakes. It is very important to allow the cake to cool completely. I untied the two pans and left them in place overnight, otherwise they are hard to remove from the pans and will break apart. Crumb coat the ovoid cake with a relatively thin version of the butter cream frosting. Add a little milk if it is too thick. Let the butter cream set for a couple of hours in the refrigerator. After it is set, put on some latex gloves and smooth the entire cake.eggpan 1 small eggpan 3 small

Roll out some red fondant and lay it over the cake, tucking it in and under the sides and smoothing as best you can. I am not good with rounded ends and can never get them smooth enough to satisfy me. If anyone has some tips here I would love to hear them. I do the typical stretch, smooth etc etc etc but it still wrinkles.

To make the “M” use the Rockwell font which is similar to what is found on the candy and print it about 2″ high. Cut the “M” our and use as a stencil. Roll out some gum-paste, lay the stencil over it and cut out the “M” using an Exacto knife. Wet the area backside of the the “M” and stick it in place on the cake.

Chocolate Cake

Ingredients

  • 2 cups white sugar
  • 1 3/4 cups all-purpose flour
  • 3/4 cup dark unsweetened cocoa powder
  • 1 1/2 teaspoons baking soda
  • 1 1/2 teaspoons baking powder
  • 1 teaspoon salt
  • 2 eggs
  • 1 cup milk
  • 1/2 cup vegetable oil
  • 2 teaspoons vanilla extract
  • 1 cup boiling water

Preheat oven to 350 degrees F (175 degrees C). Grease and flour the two Wilton 3D Egg cake pans. Use the first set of ingredients to make the cake. In a medium bowl, stir together the sugar, flour, cocoa, baking soda, baking powder and salt. Add the eggs, milk, oil and vanilla, mix for 3 minutes with an electric mixer. Stir in the boiling water by hand. Pour evenly into the one half of the egg pan. It should almost overflow. Place the empty half over the filled half, tie both halves together tightly with string and place in the oven balanced on one of the stabilizing ovals.

Basic Butter Cream

Ingredients:

  • 1/2 cup solid high ratio shortening
  • 1/2 cup butter softened
  • 1 teaspoon Clear Vanilla Extract (or extract of choice)
  • 4 cups sifted confectioners’ sugar (approx. 1 lb.)
  • 2 tablespoons milk

In large bowl, cream shortening and butter with electric mixer. Add vanilla and milk. Gradually add sugar, one cup at a time, beating on a slow speed. Scrape sides and bottom of bowl often. Keep bowl or covered with a damp cloth until ready to use. Refrigerated in an airtight container, this icing can be stored 2 weeks. Don’t overwhip or it will bring air to the icing and is impossible to smooth. If you have a kitchen Aid use white attachment, not whip attachment.

Thanksgiving 2013 or Another Step on the Road to Gluttony

OK, Turkey Day 4 is over and I am officially done. Turkey, sides and desserts 4 days in a row beat me. Of course, it is also Chanukah! I could tell because the one bottle of London Pub Ale miraculously transformed into eight bottles to last all eight days. (Claiming literary license here as I am only drinking one bottle per week these days.) Pumpkin Pie Chocolate Cake The pumpkin pie is actually a chocolate cake in disguise. Use about 1/3 of the batter and spread it out in a pie plate that was baked along with the rest of the batter which was put into two 6″ cake pans with their bottoms covered with quick release silicone sheets, greased and floured. (Only fill the pie platter a little less than half full or the cake will rise over the top.) Make a double batch of butter cream frosting. One cup was diluted slightly to make it easily spreadable and dyed with a mixture of orange and brown food coloring to match the color of the traditional pumpkin pie Fran made. This was spread over the top of the cake. Another cup was dyed to match the crust (more brown, less orange.) Use a #125 petal, or similar,  tip to pipe the darker brown frosting around the edge to form the crust and an open star tip to form the whipped cream from the balance of the white butter cream. (Save a little white buttber cream for later.) Dreidle Cake While the small chocolate cakes are baking, make a batch of chocolate frosting. You will need lots of chocolate frosting. Don’t be afraid to make a double batch here. It will not go to waste. Any left-over makes an excellent side for lunch or even a wonderful breakfast dessert. The two 6″ round chocolate cakes were cooled and one of the layers was cut into two thinner disks. One of the thinner disks was stacked on top of the full layer which was topped with a chocolate frosting cover, then the entire small cake was frosted. The remaining thin disk of cake was crumbled, mixed with a little chocolate frosting, shaped to resemble a turkey body, neck and head and then frozen. Don’t use all the chocolate frosting as you will need more than a cup for the turkey cake. While the oven is still hot make the Heavenly White cake in two 9″ parchment paper bottom lined round cake pans. While it is baking, make another (double) recipe of butter cream frosting. Dye 1/4 cup green, 1/4 cup blue, about 3/4 cup yellow and the rest dark orange. When cool, crumb coat the double layer Heavenly White cake and refrigerate. Use multiple piping bags as some colors will need to be used more than once. Use the blue frosting to pipe the outline and fill the dreidel. Smooth it with a spatula and use a petal tip or other ribbon making tip to pipe one of the Hebrew letters on the blue dreidel. (I made a Hei, it seemed the easiest.) This cake is complete. TurkeyCake1 Add about a tablespoon of milk to a cup of white butter cream and mix well to thin it. Use the thin frosting to coat the white cake with a smooth outer shell. I used a star tip to pipe the outer dark chocolate turkey feathers. Start about 2″ from the edge of the cake. As you squeeze the piping bag move slowly toward the edge then back towards the beginning point, releasing pressure as you go. Repeat as necessary to cover about 200 degrees of the perimeter of the cake. (I am basically a scientist. Deal with it.) Next use the dark orange butter cream and same tip form the next layer of feathers using the same technique. While you have the orange in the bag pipe the perimeter around the bottom of the cake. Pipe some of the yellow frosting inside the orange feathers and save the rest in the bag. Use the green frosting with a #233 grass tip to make the grass. Coat the frozen chocolate turkey-looking-thing with chocolate frosting, shaping it to be a little more turkey-ish. Lay it inside the semi-circle of yellow feathers and across the grass. Use the remaining yellow frosting to pipe the turkey feet. Use some remaining chocolate frosting to make the wings and dye a little left over white butter cream red to make the beak and comb. Taa-daa!

Chocolate Cake

Ingredients

  • 2 cups white sugar
  • 1 3/4 cups all-purpose flour
  • 3/4 cup dark unsweetened cocoa powder
  • 1 1/2 teaspoons baking soda
  • 1 1/2 teaspoons baking powder
  • 1 teaspoon salt
  • 2 eggs
  • 1 cup milk
  • 1/2 cup vegetable oil
  • 2 teaspoons vanilla extract
  • 1 cup boiling water

Preheat oven to 350 degrees F (175 degrees C). Grease and flour two 9 inch cake pans. Use the first set of ingredients to make the cake. In a medium bowl, stir together the sugar, flour, cocoa, baking soda, baking powder and salt. Add the eggs, milk, oil and vanilla, mix for 3 minutes with an electric mixer. Stir in the boiling water by hand. Pour evenly into the two prepared pans. Bake for 30 to 35 minutes in the preheated oven, until a toothpick inserted comes out clean. Cool for 10 minutes before removing from pans to cool completely.

Chocolate Fudge Frosting

Ingredients

  • 3/4 cup butter
  • 1 1/2 cups unsweetened cocoa powder
  • 5 1/3 cups confectioners’ sugar
  • 2/3 cup milk
  • 1 teaspoon vanilla extract

To make the frosting, use the second set of ingredients. Cream butter until light and fluffy. Stir in the cocoa and confectioners’ sugar alternately with the milk and vanilla. Beat to a spreading consistency.

Recipe: Heavenly White Cake

Ingredients

  • 2 3/4 cups sifted cake flour
  • 4 teaspoons baking powder
  • 3/4 teaspoon salt
  • 4 egg whites ( or substitute)
  • 1 1/2 cups white sugar
  • 3/4 cup butter
  • 1 cup milk
  • 1 teaspoon vanilla extract

Directions

  1. Measure sifted flour, baking powder, and salt; sift together three times.
  2. In a mixing bowl, beat egg whites until foamy. Add 1/2 cup sugar gradually, and continue beating only until meringue will hold up in soft peaks.
  3. Cream butter or margarine. Gradually add remaining 1 cup sugar, and cream together until light and fluffy. Add sifted ingredients alternately with milk a small amount at a time, beating after each addition until smooth. Mix in flavorings. Add meringue, and beat thoroughly into batter. Spread into cake pans with parchment paper lining the bottom.
  4. Bake at 350 degrees F (175 degrees C) for 30 to 35 minutes. Cool cake in pans for 10 minutes, then remove and transfer to a wire rack to finish cooling.

Basic Crusting Butter Cream

Ingredients:

  • 1/2 cup solid high ratio shortening
  • 1/2 cup butter softened
  • 1 tablespoon of meringue powder
  • 1 teaspoon Clear Vanilla Extract (or extract of choice)
  • 4 cups sifted confectioners’ sugar (approx. 1 lb.)
  • 2 tablespoons milk

In large bowl, cream shortening and butter with electric mixer. Add vanilla and milk. Gradually add sugar, one cup at a time, beating on a slow speed. Scrape sides and bottom of bowl often. Keep bowl or covered with a damp cloth until ready to use. Refrigerated in an airtight container, this icing can be stored 2 weeks. Don’t overwhip or it will bring air to the icing and is impossible to smooth. If you have a kitchen Aid use white attachment, not whip attachment.

Break The Fast 2013

BreakTheFast2013InvitationSmall

Ilayne’s Break The Fast Invitation

Each year I make a “themed cake” for Break the Fast. This year, I was so blown away by the incredible invitation we received I decided I had to take homage to Ilayne’s talent. Her invitation used lace for borders and the silverware was punched out of used (and cleaned) soda cans. Absolutely amazing.

BreaktheFastCake2013 InvitationSmall

Dave’s 2013 Break The Fast Cake

The cake I made was a simple white velvet, two layer 9′ x 13″ cake, roughly the same aspect ratio of the invitation. I used a crusting dark chocolate frosting, substituting 6 tbs dark cocoa plus 3 tbs vegetable oil for 3 bittersweet chocolate squares to darken the color of the frosting. Nuke the chocolate, oil and 1 cup butter until almost melted then add 1 tsp vanilla. Stir 1 cup of milk into 2 lbs confectioners’ sugar, add the chocolate mixture and stir. The frosting will harden as it cools. Add more milk to make it spreading consistency. (Warm the milk if you think you need more time before spreading the frosting.)  Frost the bottom layer, stack the second layer and frost completely. To evenly smooth the frosting, heat a long spatula in boiling water, wipe dry and use the warm spatula  to smooth the top and sides of the cake. (Thank you Patty Beck for that great hint.)

BreaktheFastCakeLace2013 InvitationSmall

Gum Past Lace

Roll out white gumpaste to a large thin layer. Cut one piece into a strip 1″ wide and 13″ long and allow to dry flat. Cut another piece into an isosceles  triangle 4″ high with an 8″ base and allow to dry flat.  (In Euclidean geometry, the isosceles triangle theorem, also known as the pons asinorum, states that the angles opposite the two equal sides of an isosceles triangle are equal. It is, in essence, the content of proposition 5 in Book I of Euclid’s Elements.) When dry, cover the cut, white gumpaste with a lace paper doily and airbrush with black edible airbrush paint. (Use alcohol as the solvent. I use vodka, purchased in the little bottles airlines use. They are inexpensive and do not require much storage space.) The round place mat was cut from the same gumpaste using two round lids as templates. The larger circle was airbrushed silver, the other left white. The words “Dig In” were sugar sheet punch-out letters. I wish I could have done script, but I only had block letters and my piping skills are not adequate to small script lettering.

BreaktheFastCakeSilverwarewith template2013 Invitation

Gumpaste Silverware and Template Image

Make the silverware by cutting gumpaste in the shape of a knife, fork and spoon. Lay the cut gumpaste on a similar sized real knife, fork and spoon so the gumpaste utensils conform to, and 3 dimensionally take the shape of the real silverware. (Note 1: 3 tines are much easier than 4.) (Note 2: Do not set heavy objects on the dried, completed gumpaste silverware. It causes bad language to be spoke out loud.)


RECIPES:

White Velvet Cake (Requires two cakes this size)

INGREDIENTS:

  • 1 1/2 cups butter, softened
  • 1 1/2 cups white sugar
  • 2 eggs
  • 1 cup buttermilk
  • 1 teaspoon baking soda
  • 2 cups all-purpose flour
  • 1/2 teaspoon salt

DIRECTIONS:

  • Preheat oven to 325 degrees F (165 degrees C). Grease and flour a 9″ x 13″ pan. Sift the flour and salt together and set aside.
  • Cream butter and sugar until light and fluffy. Add eggs and mix well. Dissolve baking soda in buttermilk. Alternately add flour and buttermilk, beginning and ending with the flour. Pour into the 9″ x 13″ inch pan.
  • Bake at 325 degrees F (165 degrees C) for about 30 minutes, or until toothpick inserted into cake comes out clean. Cool cake completely before icing. Each finished cake should be 1″ to 1.5″ high, slightly dense and very moist.

Chocolate Fudge Frosting

  • 1 cup butter
  • 3 (1 ounce) squares unsweetened chocolate
  • 6 tbl dark chocolate cocoa
  • 3 tbl vegetable oil
  • 2 pound confectioners’ sugar
  • 1 teaspoon vanilla extract
  • 1 – 1.5 cup milk

Directions

Melt chocolate and butter in the microwave, or in the top of a double boiler. In a large bowl, combine confectioners’ sugar, vanilla and 1/2 of the milk. Blend in the melted chocolate mixture. Add remaining milk, a little at a time, until desired consistency is achieved.
Let stand until spreadable (frosting will thicken as it cools).

I was working on the railroad…. err kitchen, yeah!! that’s the ticket… kitchen!!

Remember the yellow cake with meringue frosting from a couple of weeks ago. I bet you didn’t realize that was just a practice cake! The real one was for Fran’s work where they are working on a strategic plan. I used David’s Yellow Cake (that is just a name. It could just as easily been Ralph’s Yellow Cake, its just someone named David published the recipe first) as the basis of a commemorative cake for the City of Tamarac.Tamarac Cake

The difference between this cake and the original Yellow Cake is I used fondant to cover this cake and gum paste to make all the emblems and logos. I cheated and used sugar letters to spell “Team 4 Information Management”. My piping skills to write that much just aren’t there… yet. As usual, everything is cake or candy and edible.

David’s Yellow Cake

No, no no!! Not ME David!! David someone else from AllRecipies.com. I needed a yellow cake recipe for our staff pot luck lunch and decided to try this as a test. The final will be quite different but I wont make it until next month. This recipe was moist, flavorful and a great texture. Here is the yellow cake.

12 Servings, Prep Time: 20 Minutes, Cook Time: 30 Minutes

IngredientsYellow Cake Meringe Frosting 1Small

  • 1 cup butter
  • 1 1/2 cups white sugar
  • 8 egg yolks
  • 3/4 cup milk
  • 1 1/2 teaspoons vanilla extract
  • 2 cups cake flour
  • 2 teaspoons baking powder
  • 1/2 teaspoon salt

Directions

  1. Preheat oven to 350 degrees F (175 degrees C). Grease and flour 2 – 8 inch round pans.
  2. Sift together the flour, baking powder and salt. Set aside.In a large bowl, cream together the butter and sugar until light and fluffy.
  3. Beat in the egg yolks one at a time, then stir in the vanilla. Beat in the flour mixture alternately with the milk, mixing just until incorporated. Pour batter into prepared pans.
  4. Bake in the preheated oven for 25 to 30 minutes, or until tops spring back when lightly tapped.
  5. Cool 15 minutes before turning out onto cooling racks.

12 Servings, Prep Time: 20 Minutes, Cook Time: 30 Minutes

Ingredients

  • 1 cup butter
  • 1 1/2 cups white sugar
  • 8 egg yolks
  • 3/4 cup milk
  • 1 1/2 teaspoons vanilla extract
  • 2 cups cake flour
  • 2 teaspoons baking powder
  • 1/2 teaspoon salt

Directions

  1. Preheat oven to 350 degrees F (175 degrees C). Grease and flour 2 – 8 inch round pans. Sift together the flour, baking powder and salt. Set aside.
  2. In a large bowl, cream together the butter and sugar until light and fluffy. Beat in the egg yolks one at a time, then stir in the vanilla. Beat in the flour mixture alternately with the milk, mixing just until incorporated. Pour batter into prepared pans.
  3. Bake in the preheated oven for 25 to 30 minutes, or until tops spring back when lightly tapped. Cool 15 minutes before turning out onto cooling racks.
  4. I used my torch to lightly scorch the meringue to give it some contrast and that slightly smokey taste.