Japanese Cream Pans

If you have previously read my blog you know I tend to create a title that is a little sarcastic, punny (not puny as in “small”, but punny and in “with puns”) and snarky. This time, I admit my ignorance. For fear of insulting a people and culture I of which I have little knowledge, I simply titled this one as Japanese Cream Pans.Final Cream Pans

Another more snarky point: I tried one of these pastries courtesy of my son’s mother in law’s cousin, or my cousin-in-law once removed. (I made that up. I find it annoying to have to describe a full family tree to delineate the connection of two people related via someone’s marriage.)

Anyway, these pastries are light, soft and delicious. I found a recipe online and followed it with two exceptions and one caution Rolled formed doughlearned after making them. See below.

You can make the tangzhong and cream filling as much as 3 days in advance. Both will stay in the refrigerator that long if covered. Tangzhong is a water roux used to lighten the texture and provides the more tender crumb these pastries require.

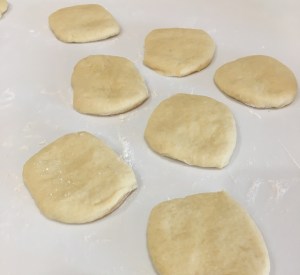
Flattened dough

INGREDIENTS

Cream Pan Dough:

  • 2 1/2 c. bread flour
  • 2 tsp. active dry yeast
  • 4 T. sugar
  • 3 T. unsalted butter
  • 1/2 tsp. salt
  • 1/2 c. tangzhong
  • 1 egg
  • 1/2 c. milk

Tangzhong:

Cream Filled unfolded dough

  • 1/3 c. bread flour
  • 1 c. water

Japanese custard cream:

  • 1 3/4 c. milk
  • 4 T. unsalted butter
  • 4 egg yolks
  • 1/2 c. sugar
  • 5 T. flour
  • 2 T. cornstarch
  • 1/2 tsp. salt
  • 2 tsp. vanilla bean paste (or vanilla extract, or seeds scraped out of 1 vanilla bean pod)

Egg Wash:

  • 1 egg yolk beaten with 2-3 T. waterCream Filled Folded dough

METHOD

  1. Make the tangzhong. In a small saucepan, gently heat the bread flour + water, while slowly whisking.  When the mixture thickens, and swirl lines appear – remove from heat and cool.  You will only end up using half of this mixture – store the other half in the refrigerator (covered) for up to 3 days.
  2. Make the cream pan dough.  Add the tangzhong, butter, sugar, salt, and egg beaten with the milk to a mixer bowl.  On top of those ingredients, add the bread flour.  Make a depression in the center of the bread flour, and add the yeast.  Turn the mixer fitted with adough hook to low until a basic dough is formed. The increase speed to medium to knead for 8 minutes, then allow the dough to rise (covered) for 1 hour in a warm place.  Punch down, and allow to rise another 30 minutes.) While the dough is rising, make the custard cream.
  3. HERE IS ONE OF THE CHANGES: I use the Martha Stewart method of making cream patisserie. Put all the ingredients into a large sauce pan and heat with constant stirring until the mixture begins to set (looks like loose scrambled eggs), strain the mixture and add the vanilla. Much easier that tempering the eggs etc.
  4. The original recipe follows here:
    1. Scald the milk and butter in a large pyrex measuring cup by microwaving for 2-3 minutes.
    2. Beat the egg yolk with a whisk, and add the flour, cornstarch, salt, and sugar. Whisk together to form a thick paste.
    3. Add about 1/3 of the warm milk mixture to the paste, and whisk constantly. (This step tempers the egg, and loosens up the paste so that you can add the remaining warm milk.)  Add the second 1/3 of the warm milk, and whisk until combined.  Then add the last 1/3 of the warm milk, and whisk until combined.
    4. Strain the egg mixture into a saucepan. (This will catch any lumps, and any bits of egg that may have “scrambled”.)
    5. Add the vanilla bean paste (or vanilla extract, or scraped vanilla bean guts), then slowly heat the saucepan over medium low heat (whisking constantly). When the mixture thickens so that swirl lines appear, remove from heat and continue whisking another 30 seconds.
  5. Refrigerate the custard cream until cold and thick in a covered container for several hours.
  6. Dust a work surface liberally with flour. Divide the dough into 16 pieces.  Using a cookie scoop, portion out 16 balls of chilled custard cream.  (I usually set the custard portions on top a sheet of Reynold’s non-stick foil.)
  7. I WAS NOT HAPPY WITH BAKING THE CREAM. Skip this and inject the cream after the pastry has cooled. Be gentle with the dough, don’t over deflate. This will keep it lighter and less bread-like.
  8. The original instructions follow here.
    1. Flatten each piece of dough with the palm of your hand and place in a small custard cup. Use a small spoon to put a portion of chilled custard into the depression.
    2. Pinch the edges upwards to seal and place seam side down on a silicone lined cookie sheet.
  9. Cover with plastic wrap and allow to rise for another 30-60 minutes. Brush the tops of the buns with the egg wash, and bake at 335 degrees for 15 minutes. Use a dilute egg wash. I increased the water from 1 Tablespoon to 3.
  10. Remove from oven and cool thoroughly.
  11. Inject cooled creampat. You should feel the pastry become heavy. That is enough filling.
  12. Refrigerate to store.

Fig and Oatmeal and Chocolate, Oh My!

I am expecting to harvest over 100 pounds of fig from our single tree in the back yard. We are leaving the very high figs for the birds and squirrels. They don’t seem to understand that and keep raiding my allotment on the lower branches. To date I ate figs, froze figs, made fig preserves, fig spread, fig newtons, fig cake and now fig/oatmeal/chocolate chip cookies. Daniel is making some figgy pudding, I am planning some fig hand pies and we gave away 20 lbs to friends, family and neighbors. What’s next, Fig fudge? Fig ice cream? Fig bread? You know, sometimes there may be too much of a delicious thing.

cookie and milk small

I searched a number of recipes to find one I liked for fig cookies. The one I chose also had oatmeal and chocolate. Think oatmeal/chocolate/raisin cookies except the fig imparts a softer and more subtle flavor and texture the raisin would. I upped the fig content being sure to not use any fully or over ripe figs. They would kick up the moisture content making the cookies too soggy. I also omitted the coconut (not a favorite of Fran.) Chilling the batter is essential. I chilled for 2 hours and it may not have been enough. The first batch were a little flat, the second were better.

Fig and Chocolate Oatmeal Cookies

Based on post from fiveandspice at Food52.com

Makes about 2-dozen cookies

INGREDIENTS

  • ½ cup plus 3 tablespoons salted butter, at room temp.
  • 2/3 cup sugar
  • 2/3 cup dark brown sugar
  • 2 large eggs
  • 1 teaspoon vanilla extract
  • 1 ¾ cups all-purpose flour
  • 1 ½ cups rolled oats
  • 1 teaspoon baking soda
  • ½ teaspoon salt
  • 9 ounces chopped dark chocolate (I like 70% cacao)
  • 1½ cup chopped fresh figs (not over ripe)

METHOD

  1. Cream the butter and sugars together until light and fluffy (3-5 minutes) in a standing mixer fitted with the paddle attachment. Add the eggs and vanilla and beat until fully incorporated, scraping down the sides of the mixer as needed.
  2. In a separate bowl, stir together all the remaining ingredients. Stir these into the butter mixture on low speed until fully combined with no dry floury patches left.
  3. Refrigerate the dough 30-60 minutes before proceeding. Heat your oven to 350F. Scoop the dough in 2-3 Tbs. scoops onto baking sheets. Bake each sheet one at a time (keep the full sheets that aren’t being baked in the fridge until it’s their turn) until the cookies are golden around the edges but still look a tad doughy in the middles, about 15-18 minutes, rotating each baking sheet halfway through the bake time.
  4. Let the cookies cool on the sheet for 5 minutes before transferring to a cooling rack to finish cooling.

Shield of David

Our best friend gave me two gifts for my recent birthday. Now, I am not saying there were ulterior motives here, but she is visiting us this fall. Coincidence? Perhaps not.

The Shield of David (Mogen David, or Jewish Star) is a six pointed star symbolizing the internal and external connections of Torah, God and Israel. A Shield of David bundt pan makes an awesome cake, too.

You may have read elsewhere in this blog, we had a bumper crop of figs in our backyard tree this year. My challenge was how to use all these fresh figs. I froze a few pounds but our freezer is pretty small and already has chocolate chip cookie dough ready for baking, extra tartlet shells for an emergency snack or drop in guests and several quarts of Vermont maple syrup from near my home town in Vermont, so I have frozen enough already.

slice 2

Today I made a fig-spice cake in my new pan. Think apple-spice but with figs instead. The Bundt pan worked really well. Spraying with some Baker’s Joy helped the cake slide out of the pan perfectly. The cake is moist with good texture and is sweet.  (It was even  sweeter after dusting with confectioners sugar.) The figs were well dispersed throughout the cake and the edges had a nice caramelized crunch.


Based on hungryforlouisiana.com/figging-out-fresh-fig-cake/

INGREDIENTS

  • 3 eggs
  • 2 cups sugar
  • 1 cup canola oil
  • 1 cup buttermilk (or 1 Tbl white vinegar mixed into 1 Cup milk)
  • 1 teaspoon baking soda
  • 2 cups all-purpose flour
  • 1 cup chopped fresh figs (between 15-20 small to medium figs)
  • 1 teaspoon cinnamon
  • ¼ teaspoon ginger
  • ½ teaspoon salt
  • 1 pinch nutmeg
  • Confectioner’s sugar and fig leaves for garnish

METHOD

  1. Heat oven to 350 degrees. Using a standing mixer or bowl, whisk eggs briefly. Add sugar and beat until light and fluffy, about one minute. Add oil, and beat until just combined.
  2. In a separate medium bowl, add buttermilk and stir in baking soda.
  3. Beginning with flour, add flour and buttermilk mixture alternately and mix until combined.
  4. Add chopped figs, cinnamon, ginger, salt and nutmeg, and mix until thoroughly incorporated.
  5. Pour batter into a greased and floured Bundt pan, and bake until done (50-60 minutes).
  6. Cool in baking rack for 5-10 minutes, then remove from pan. Allow to cool another 5-10 minutes. Arrange on plate, and garnish with confectioner’s sugar and fresh figs.

More Hookers! NYT Fake News! Sad!

A couple of weeks ago, while reading the NYT online I saw this recipe for a Chocolate/Salted Caramel tart. I thought, how could you go wrong with this combination? I mean, salted caramel, chocolate and hookers (tarts), plus wanting to support the poor failing NYT! I planned on making this the first weekend my crack QC/Taster panel was back home. Tada!!

nyt-revenue-report.jpg

Unsurprisingly, the recipe posted in the successful, reliable and accurate NYT made anBroken Baked Tart Shell excellent tart. I made two error with this pastry. First I removed it from the tart pan too soon. The shell was still very fragile and I put a thumb through the side.

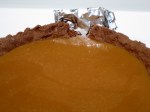
Repaired Filled Tart Close Up


I used a little foil to dam the flow of caramel and chocolate, plus I tipped it away from the breach so there is a thinner layer on that side of the tart. SAD!


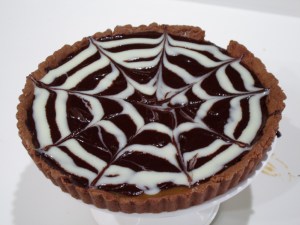
I also poured the chocolate ganache when it was a little too thick. That may have helped plug the leak in the damn dam, but did not have the nice smooth, shiny top I was looking for. Finished Tart I also added some white chocolate ganache in a spiral and cut it through with a clean knife to make the star like pattern.


Hover your mouse over these three pictures to see the caption.

Anyway, here is the recipe. I followed it pretty closely and really wouldn’t change anything, except adding the white chocolate starburst. Oh, I did use sour cream instead of creme fraiche. Any notes are in red below.

INGREDIENTS

  • FOR THE CHOCOLATE DOUGH:
    • ½ cup (1 stick) salted butter, at room temperature
    • ½ cup plus 1 tablespoon confectioners’ sugar
    • ¼ cup unsweetened cocoa
    • 1 large egg yolk
    • ¾ teaspoon vanilla extract
    • 1 ¼ cups all-purpose flour
    • Optional: water, a tablespoon at a time until the dough is pliable.
  • FOR THE CARAMEL FILLING:
    • 2 cups sugar
    • ½ cup water
    • ¼ cup corn syrup
    • ½ cup (1 stick) unsalted butter
    • ½ cup heavy cream
    • 2 tablespoons creme fraiche or sour cream
    • Pinch of salt
  • FOR THE CHOCOLATE GLAZE:
    • 3 ½ ounces extra-bittersweet chocolate (70 to 85%), chopped
    • ½ cup heavy cream
    • Sea salt

PREPARATION

  1. Prepare chocolate dough: In bowl of an electric mixer, combine the butter, confectioners’ sugar and cocoa. Beat until smooth. Add egg yolk and vanilla, and beat until blended.
  2. Sift flour into dough mixture. Beat on low speed until combined. (Note: next time I will add a little water here to make the dough a little more pliable. I will also rest in in the fridge for 20-30 minutes.) Press the dough into the bottom and up the sides of a 10-inch tart pan. (You can use a 9-inch pan, but the crust will be thicker and the caramel may take longer to set in step 4.)
  3. Preheat oven to 350 degrees. Line tart with foil, and fill with dried beans, rice or pie weights. Bake for 15 minutes. Remove foil and weights, and bake until pastry is dry and set, another 10 to 15 minutes. Transfer to a wire rack to cool. The shell is fragile. Be sure to wait until it is cool before handling.
  4. Prepare caramel filling: In a large saucepan, bring sugar, water and corn syrup to a boil. Stir or swirl the pan occasionally, until mixture is a medium amber color, about 12 minutes. Remove from the heat. Caramel will continue to cook and darken off of the heat. Carefully but quickly whisk in the butter, cream, creme fraiche and salt until smooth (mixture will bubble up). Pour hot caramel into tart, and allow to cool and set, at least 1 hour.
  5. Prepare chocolate glaze: Place chocolate in a bowl. In a small saucepan, bring cream to a boil. Pour hot cream over chocolate and whisk until chocolate has melted and mixture is smooth. Pour glaze over tart, tilting tart for even coverage. (At this point, I piped a spiral of white chocolate ganache on the tart and used a butter knife to cut through the ganache to make the starburst design.) Refrigerate until tart is set, at least one hour, then sprinkle with a few granules of sea salt. Keep refrigerated until serving.

Clouseau, Clafoutis Hasenfeffer Incorporated

Honey Whole Wheat Clafoutis With Raspberries

One of my favorite bits from the old Peter Sellers Inspector Clouseau Pink Panther movies (imagine Clouseau’s fake French accent)

Clouseau: Does your dog bite?
Hotel Clerk: Non.
Clouseau: [bowing down to pet the dog] Nice doggie.
[Dog barks and bites Clouseau in the hand]
Clouseau: I thought you said your dog did not bite!
Hotel Clerk: That eez not my dog.

I saw this recipe online and followed it back to the source (Ellie Krieger, Special to The Washington Post) and as I had a pint of raspberries left over in the fridge I thought this would make a good, perhaps even, elegant breakfast, rather than a dessert.  Actually, clafoutis [klah-foo-TEE] is a basic pancake which is baked rather than cooked on a griddle, but it sure sounds fancy.

The recipe calls for pastry flour (low gluten) to make a more tender, “pancake” type structure. Not having any whole wheat pastry flour, I substituted regular whole wheat flour and added a little cornstarch. I didn’t have a lemon so substituted ½ teaspoon of key lime juice for a little tartness. I made a half recipe, used a 6” pie plate and topped it with some fresh Vermont maple syrup, cutting the ingredients below in half. Perhaps next time I would add a little baking powder to help the rise some.


Using low-fat milk, whole wheat flour and honey rather than sugar increases the healthfulness of this recipe. I did dust the oiled pie plate with a little caster sugar. In hindsight, I probably wouldn’t do that again. It didn’t add anything to the clafoutis.

INGREDIENTS

  • 2 large eggs, beaten
  • 1/2 cup low-fat (1 percent) milk
  • 1/4 cup honey
  • 2 tablespoons unsalted butter, melted and cooled
  • 1 1/2 teaspoons finely grated lemon zest (from 1 lemon)
  • 1/8 teaspoon salt
  • 1/2 cup whole-wheat pastry flour
  • 9 ounces (2 cups) fresh raspberries
  • 1 tablespoon confectioners’ sugar, for serving

METHOD

  1. Preheat the oven to 325 degrees. Grease a 9-inch pie plate or ceramic dish with cooking oil spray.
  2. Whisk together the eggs, milk, honey, butter, lemon zest and salt in a mixing bowl until well incorporated, then gradually whisk in the flour, to form a smooth batter.
  3. Pour into the pie plate, then add the raspberries; top sides down will help them to stay upright as you work. Bake (middle rack) for 40 to 50 minutes, until the clafoutis is golden brown and center is set.
  4. Dust the top with confectioners’ sugar and serve right away.

Mousse and Squirrel… “Squirrel!!”

I know, mixing cartoons is never a good idea, but I couldn’t resist. Boris Badenov was never successful at deceiving Rocky and Bullwinkle, despite trying every week and oddly, neither Moose nor Squirrel recognized them time after time. The second Squirrel in the title is and a wink to “UP” and a nod to how easy it is to be distracted from what is important.

Originally, I was thinking about making a key-lime mousse, but then saw this recipe for a margarita mouse and pounced like a dog on a chew toy. I saw the raspberry and chocolate moussessess, or meece on GBBO (not their recipes) and decided to add a variety of mousse to my file, and I love raspberries, and chocolate is the universal food so why not?

I wanted to use recipes that do not use gelatin to make the mousse. I try very hard not to use gelatin to keep as much as possible vegetarian. From what I found authentic french mousse does not use gelatin, and neither to I.

Margarita Mousse

INGREDIENTS

  • 2 tablespoons sugar
  • 1 tablespoon lime zest
  • 1⁄2 fresh lime, cut into wedges
  • 1 (14 ounce) can sweetened condensed milk
  • 2 tablespoons orange liqueur, such as Triple Sec
  • 3 tablespoons tequila
  • 1⁄3 cup fresh lime juice
  • 1 cup whipping cream

METHOD

  1. Combine sugar with 1 tsp lime zest. Rub the rims of 4-6 margarita glasses with lime wedges to moisten, crunch into granulated sugar mixture, and place in the freezer.
  2. In a separate bowl, combine remaining lime zest, condensed milk, Triple Sec, tequila, and 1/3 cup lime juice. Set aside.
  3. Whip cream until stiff peaks form. Fold whipped cream into tequila mixture, working carefully to keep the air in the whipped cream.
  4. Spoon into prepared frozen glasses, making sure not to disturb the sugared rims.
  5. Refrigerate for 4 hours or until firm.

Chocolate Mousse

INGREDIENTS

  • 200-250g 70%+ cacao chocolate (more is better for stability)
  • 400g heavy whipping cream
  • 1 egg yolk

METHOD

  1. melt chocolate in a baine-marie
  2. whip cream
  3. whip egg yolk in a baine-marie until fluffy *
  4. mix the chocolate into the egg yolk
  5. carefully fold the cream into the chocolate
  6. refrigerate 3-4 hours

This mousse will set after a few hours in the fridge.

Raspberry Mousse

INGREDIENTS

  • 400g fresh raspberries
  • 100g caster sugar
  • 3 medium egg whites
  • 300g heavy whipping cream
  • icing sugar to dust

METHOD

  1. Reserving some raspberries for decoration, place the remainder in a pan with 50g of the caster sugar and cook on a medium heat for 4-5 minutes, stirring until the fruit collapses.
  2. To make a coulis, place a fine sieve over a bowl and pass the fruit through to de-seed. Cool for 10 minutes, then keep in the fridge until needed.
  3. In a clean bowl, whisk the egg whites with the remaining sugar for 2-3 minutes or until stiff peaks form.
  4. Whisk the cream until it forms soft floppy peaks.
  5. Add 2-3 tbs of the coulis to the cream and stir very gently until nicely mixed. Once mixed add in the rest of the coulis until well incorporated.
  6. With a metal spoon gently fold one large spoon of egg white mixture into the coulis and cream mixture. Mix very gently until all incorporated. Repeat until all egg white is mixed in.
  7. Gently divide the mixture between 6 glasses or mugs. Chill for 4-5 hours. To serve, decorate with raspberries, dust with icing sugar.

Wascally Easter Wabbit

It’s always fun when Easter and Passover coincide. This doesn’t happen as often as you might imagine, and this non-coincidelitization is not by accident. In 325 CE the Council of Nicaea established that Easter would be held on the first Sunday after the first full moon occurring on or after first day of spring unless the full moon is on Sunday when Easter is delayed by 1 week. Passover commences on the 15th of the Hebrew month of Nisan and lasts for either seven or eight days depending on the Jewish tradition being observed. The Jewish month is lunar based and varies substantially from the Gregorian calendar. I know, TMI. Anyway, this decreases the chances of Easter falling on the same day as Passover, but doesn’t eliminate it, as in this year. Following the Jewish Passover dietary restrictions for the 8 days of Pesach (which I don’t; The first two days are enough for me) while preparing desserts for Easter is… interesting.

Several years ago I purchased a Wilton Egg Mold to make an M&M cake for Robin’s birthday and a football for another party, and now an Easter egg cake. This mold creates perfect egg shaped cakes, but has some challenges. The mold measures 9″x6″x6″ which means you need to time the bake for a 6″ deep cake, but the ends are thinner so don’t over bake and burn the ends. I found doubling the baking time is about right, i.e. 60 minutes for a recipe for a standard 2″ deep pan calling for 30 min.

Another problem is sealing the two halves during the bake. The chocolate cake recipe I prefer adds a cup of boiling water just prior to pouring. This makes a very low viscosity batter which is easy to spill, hence you don’t want to move the mold after it is filled. Mold with stringTying the two mold halves together without sloshing batter is a challenge. I place the string across the oval stand prior to placing the empty mold on it. The mold should be filled to the top rim with batter. Thus far, doing this assured the top half is filled with cake. I Egg Mold with Clipsthen place the top half on and tie the string around both. This time I also added 5 paper binder clips positioned around the edge of theEgg Mold two molds. (I would use 7-10 clips, if I had them.) Do place the mold on a cookie sheet to catch spills and choose one that does not warp in the heat.

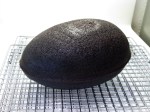
If there is little leakage, and the bake is properly timed, and you coated the molds with release spray you should end up with a beautiful Peanut M&M – Football – Easter Egg – shaped cake. A couple of other hints with this mold: remove the top half 5 minutes after removing the cake from the oven, Chocolate Cakethen remove the cake from the bottom mold 5 minutes later. You may have to shake the pan slightly for the cake to release. Cool on a rack.
For Grace’s 1st birthday I am making a cake for  about 100 people. I want this to be a smooth surface (i.e. fondant) but dislike store bought fondant. This weekend I made a Fondant Covered Chocolate cakebatch of marshmallow frosting to try it on the Easter egg cake. It was easy to make, roll and drape. While intensely sweet (read: marshmallow and confectioners sugar) it tasted much better than store bought, plus it cuts easily to make decorations. This fondant may be flavored, but will be very sweet no matter what flavor. This fondant is smooth and soft, IMG_0025easy to drape and form. The pink band around the cake is a band of colored fondant, wetted and wrapped around the cake.
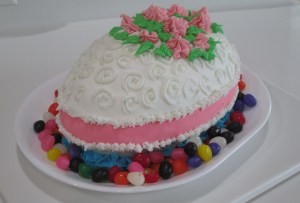
I wanted the second cake to be a chocolate covered egg with lots of colored royal icing decoration. I envisioned a chocolate egg, like the hollow chocolate eggs you buy in the market for Easter. Alas, my tempered chocolate set to quickly and would not pour over the crumb coated cake. I had to spread it as quickly as possible, but was not quick enough. It was too thick and lumpy.  If anyone has suggestions to remedy this I would appreciate your input. The Finished Tempured Chocolate Yellow Cakepiping is all buttercream, both white and colored. I was going to make buttercream roses for the toppers, but by the time I finished the rest, my hand was cramping and decided simple dropped flowers (Wilton #193 tip) would suffice. I added the jelly beans for some additional color, they probably weren’t needed but we like jelly beans.

At the end of the meal there was 1/3rd of the white frosted cake left, a 1/4 of the chocolate and almost none of the outstanding carrot cake Fran made. Both 9″ tarts (one creme patisserie/fruit and one chocolate/orange) were left. Not a bad effort for 20 adults.

INGREDIENTS

Chocolate Cake

  • 2 cups white sugar
  • 1 3/4 cups all-purpose flour
  • 3/4 cup unsweetened cocoa powder
  • 1 1/2 teaspoons baking soda
  • 1 1/2 teaspoons baking powder
  • 1 teaspoon salt
  • 2 eggs
  • 1 cup milk
  • 1/2 cup vegetable oil
  • 2 teaspoons vanilla extract
  • 1 cup boiling water

Yellow Cake

  • 4 1/2 cups (570g) all-purpose flour
  • 2 teaspoon baking soda
  • 1 teaspoon salt
  • 2 cup (460g) unsalted butter, softened
  • 3 3/4 cups (700g) granulated sugar
  • 4 large eggs, at room temperature
  • 4 teaspoons pure vanilla extract
  • 1 cup (240g) sour cream, at room temperature
  • 2 cup (480ml) whole milk, at room temperature

Buttercream

  • 4 cups of powdered sugar (or 1 box)
  • 1 Cup (2 sticks) of softened butter
  • 1/4 cup meringue powder to make a crusting frosting
  • 2-3 teaspoons of vanilla
  • 1-2 tablespoons of milk
  • Violet food coloring (a little of this will make the frosting white, not yellow from the butter coloring. Just a little on the end of a tooth pick is enough)

Marshmallow Fondant

  • 500 g marshmallows
  • 1000 g confectioners sugar
  • 1 tsp white vanilla
  • 2-3 Tbl water

Tempered Chocolate

  • Scharffen Berger Semi-Sweet Dark Chocolate (I like this brand but any would do)

METHOD

Chocolate Cake

  1. Preheat oven to 350 degrees F (175 degrees C). Spray both halves of the egg mold.
  2. Use the first set of ingredients to make the cake. In a medium bowl, stir together the sugar, flour, cocoa, baking soda, baking powder and salt. Add the eggs, milk, oil and vanilla, mix for 3 minutes with an electric mixer. Stir in the boiling water by hand. Pour to fill the bottom mold to the brim.
  3. Bake for 60 minutes in the preheated oven. (Bake time make take some experimentation)  Cool for 5 minutes before removing the top half and another 5 minutes before rolling the cake on a rack to cool completely.

Yellow Cake

  1. Preheat oven to 350°F (175°C). Spray both halves of the egg mold.
  2. Whisk the flour, baking soda, and salt together in a large bowl. Set aside. Using a handheld or stand mixer fitted with a paddle attachment, beat the butter on high speed until smooth and creamy – about 1 minute. Add the sugar and beat on high speed for 3 full minutes until creamed together. The mixture should be a light yellow color. Scrape down the sides and up the bottom of the bowl with a rubber spatula as needed. On medium-high speed, add 1 egg at a time, beating well after each addition until both are mixed in. On high speed, beat in the vanilla extract and sour cream. Scrape down the sides and up the bottom of the bowl with a rubber spatula as needed.
  3. With the mixer running on low speed, add the dry ingredients to the wet ingredients alternating with the milk. Start and end with the dry ingredients. Mix each addition just until incorporated. Do not overmix this batter. The batter will be smooth, velvety, and slightly thick.
  4. Pour the cake batter into the prepared pan. Smooth it out into an even layer.
  5. Bake for 60 minutes in the preheated oven. (Bake time make take some experimentation)  Cool for 5 minutes before removing the top half and another 5 minutes before rolling the cake on a rack to cool completely.

Buttercream

  1. Add powdered sugar and meringue powder to mixing bowl.
  2. Add softened sticks of butter
  3. Add vanilla. If you want white buttercream use clear imitation vanilla.
  4. Add 1 tbsp of milk.
  5. Beat on low until powdered sugar is incorporated. Then move mixer up to medium-high speed. Scrape sides and bottom of bowl often. When completely mixed the frosting may appear dry.
  6. Add more milk, a little bit at a time until frosting is the proper consistency.
  7. Again, for white frosting now add a little violet food coloring. I use the end of a toothpick and add just a little at a time. Mix thoroughly.

Marshmallow Fondant

  1. Grease (well with Crisco or equivalent) a heat proof microwavable bowl
  2. Place marshmallow in the bowl and sprinkle 2-3 Tbl water over the marshmallows
  3. Heat in a microwave in 30 second increments until the marshmallow is melted and smooth. Don’t overcook and burn.
  4. Grease (well) dough hook and stand mixer bowl and add melted marshmallow.
  5. Add confectioners sugar a cup at a time and stir on medium until incorporated.
  6. Add the vanilla during one of the sugar additions.
  7. Reserve about a cup of sugar to use during hand kneading
  8. Grease (well) your workspace and hands and turn the fondant out.
  9. Cover with sugar and begin kneading, adding more sugar as necessary until the fondant is smooth and not sticky.
  10. Use a greased rolling pin and roll the fondant out to required size. For this cake I rolled it out to about 18″ x 14″. It was easy to pick up and drape over the cake.

Tempered Chocolate

  1. Cut 1 lb of chocolate into small pieces (or pulse in a food processor)
  2. Place chocolate in a heat proof bowl over simmering water (the bowl should not touch the water.)
  3. Heat the chocolate while stirring until melted, continue heating to 120 deg
  4. Remove the bowl from the heat (dry the bottom of the bowl. Any water will cause the chocolate to seize.)
  5. When the chocolate cools to 82 deg, place back on the heat and heat to 90 deg.
  6. Pour the liquid chocolate over the cake. This will cool the chocolate and make it set into a thin crust. My problem was I let the chocolate cool too much before trying to pour. Next time I will leave the bowl on the hot water and remove both from the heat. Hopefully this will keep the chocolate thin enough to pour. If anyone has suggestions I would appreciate them.

Tart vs. Prostitute

I decided to make a new dessert for Passover this year. Of course, leavening agents, such as flour, yeast etc are prohibited from Passover foods, so the chocolate/orange tart I was considering was out… or was it?

My research into Passover prohibitions and tarts logically led me to a discussion of the difference between tarts and prostitutes. Using the Wiki dictionary (the source of all truths) I find the word prostitute, as a verb, is to use one’s talents in return for money, or fame, or perhaps a few nights lodging, whereas a tart, as a noun, is a small open pie, or piece of pastry. Dictionaries are like statistics: what do you want them to say?

This research actually stemmed from looking at the story of Solomon deciding which woman was the real mother by offering to split the child with his sword and giving half to each woman. The women were actually prostitutes, but their profession was either superfluous to the story, and Solomon’s decision, or not, depending on the interpretation. And, of course, as usual in midrash, there are many more opinions than “opinioners.”

I find it interesting that a judge can rule on a case 3000 years ago by purely considering the facts of the case and not the legal standing of the two women. Some say wisdom began flowing from his mouth when he threatened to cut the child in half. Today so many people with questionable legal standing are unable to appeal to the legal establishment for fear of reprisal due not to the injury they may have sustained but rather for the superfluous state of their resident status. And therefore, so often judgement is rendered without any wisdom present.Almond Flour Tart Shell

Anyway, I decided an almond flour tart shell with chocolate mousse and orange zest swirl is appropriate and fitting for our Passover this year. I made a shell to be confident it would have the taste and texture required, and it did. It doesn’t roll our like a standard AP flour
dough, but can be formed into the tart shell by hand and pastry weights should keep the shape well enough to form the final tart. Because there is less binding agent in almond flour, I doubled the amount of egg.  I will probably increase the almond flour content by 25-50% to make the dough easier to handle and hopefully a little more pastry-like. The chocolate and orange ingredients are allowed anyway, substituting almond flour for AP flour where appropriate.

Please pass over me when the gefilte fish is served!

INGREDIENTS

For the Tart Shell

  • 100 g cold butter cut into small cubes
  • 200 g almond flour (I may increase this by 50g, not sure yet)
  • 60 g icing sugar
  • ½ tsp vanilla
  • ¼ tsp salt
  • 2 eggs (100g)

For the Chocolate Filling

  • 75g butter
  • 115g dark chocolate (no more than 60% cocoa solids), finely chopped
  • 115g caster sugar
  • 55g almond flour
  • 4 medium eggs

For the Orange Filling

  • 25g butter
  • 50g white chocolate
  • 1 orange, finely grated zest only
  • 35g caster sugar
  • 25g almond flour
  • 2 medium egg yolks

METHOD

Tart Shell

  1. Mix butter with sugar (I break up the chunks of butter by rubbing them into the sugar with my hands)
  2. Add salt then vanilla
  3. Add egg and mix well
  4. Stir in flour. Mix by hand until incorporated. I did this in 3 parts mixing well between each.
  5. Cover with plastic and refrigerate for 30 min until it firms up a bit.
  6. Butter (spray) tartlet pan
  7. Coat hands with flour and press the sticky dough into tart mold
  8. Prick holes in bottom and sides of formed dough
  9. Add pastry weights to the pan
  10. Bake in preheated oven 350o F (175o C) for 17 – 20 min
    1. Remove pastry weights with 5 min left in the bake
    2. Remove pastry shells from pans and let cool on wire rack

Chocolate Filling

  1. Melt the butter and chocolate in a heatproof bowl set over a pan of gently simmering water until melted and smooth.
  2. Remove from the heat and stir in the sugar and flour.
  3. Beat in the eggs, one at a time, and leave to stand.

Orange Filling

  1. Melt the butter and white chocolate in a heatproof bowl set over a pan of gently simmering water until melted and smooth.
  2. Remove from the heat and stir in the orange zest, sugar and flour.
  3. Beat in the egg yolks, one at a time and pour the mixture into a bowl.

Assemble and Bake the Tart

  1. Place the tart shell on a baking tray.
  2. Pour the chocolate mixture into the shell.
  3. Drizzle or pipe the orange filling over the chocolate filling to create a swirl effect.
  4. Draw a tooth stick through the filling to create a marbled effect.
  5. Bake for 10-12 minutes, or until just set around the edges, but still slightly wobbly in the centre.
  6. Remove from the oven and allow to cool slightly, until warm but not piping hot, then serve. It is actually very good cold also.

Somewhere, Under the Rainbow

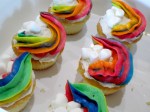
Frances sent me a picture of these cupcakes thinking I might like the design and might make them. She was right, I did and I did. Sadly, she is not eating any added sugar at the moment… sigh. I also had a new white cake recipe I wanted to try and the confluence of these two irresistible forces resulted in an almost perfect cupcake. However, my unpaid, full time, in-house taste tester felt the cupcake was sweet and adding the buttercream frosting just put her over the edge. You know, the typical shakes, cold sweats and hyperactivity of a pure sugar high. The white cake recipe is a keeper though. Maybe a cream cheese frosting…

Land o’Lakes published the rainbow piping concept. I read it but then I did it my way

Yes, there were times, I’m sure you knew
When I bit off more than I could chew (get it?)
But through it all, when there was doubt
I ate it up and spit it out (never!)
I faced it all and I stood tall
And did it my way

Buttercream Frosting

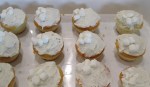
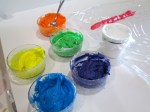
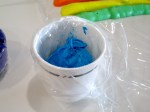
Previously if I wanted multi-colored piping I will fill small piping bags with different colored frosting, snip the ends off and cram them into a large bag. This worked fair at best. This technique is far superior, and maybe even easier. I use Wiltons Icing Colors. They are concentrated and you don’t need much for very vibrant colors.

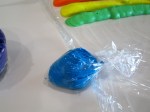
Once the colored frosting is piped into rows on a piece of food wrap, roll the wrap up and snip off the end. Put the rolled frosting into a large piping bag with a large star end.

Run a little of the frosting out until the mixture comes out evenly distributed, then pipe the rainbows, surrounding the marshmallow clouds.

Thank you Land o’Lakes, this was a great technique.

THE BEST BUTTERCREAM FROSTING

INGREDIENTS

  • 4 cups of powdered sugar (or 1 box)
  • 1 Cup (2 sticks) of softened butter
  • 2-3 teaspoons of vanilla
  • 1-2 tablespoons of milk
  • Violet food coloring

METHOD

  1. Add powdered sugar to mixing bowl.
  2. Add softened sticks of butter
  3. Add vanilla. If you want white buttercream use clear imitation vanilla. Also, adding a little violet food coloring (like the end of a toothpicks worth) will help lighten the yellowish color due to the butter.
  4. Add 1 tbsp of milk.
  5. Beat on low until powdered sugar is incorporated. Then move mixer up to medium-high speed. Scrape sides and bottom of bowl often. When completely mixed the frosting may appear dry.
  6. Add more milk, a little bit at a time until frosting is the proper consistency.

White Cup Cakes –

I don’t remember where I saw this recipe but it is a basic white cake with whipped egg whites (meringue) gently folded into the batter. I made a half recipe just to try it. This made 15 medium sized cupcakes. Either follow the instructions and make cakes, or do what I did, or both, and make a lot of cupcakes!

INGREDIENTS

  • 1 cup milk
  • 1 ½ teaspoons vanilla extract
  • 1 cup butter, softened
  • 2 cups sugar
  • 3 cups cake flour
  • 1 tablespoon baking powder
  • 5 egg whites

METHOD

  1. Preheat oven to 350°. Grease 3 (8-inch) round cake pans; line bottoms with parchment paper, and grease and flour paper.
  2. Stir together milk and vanilla.
  3. Beat butter at medium speed with a heavy-duty electric stand mixer until creamy; gradually add sugar, beating until light and fluffy. Sift together flour and baking powder; add to butter mixture alternately with milk mixture, beginning and ending with flour mixture. Beat at low speed just until blended after each addition.
  4. Beat egg whites at medium speed until stiff peaks form; gently fold into batter. Pour batter into prepared pans.
  5. Bake at 350° for 20 to 23 minutes or until a wooden pick inserted in center comes out clean. Cool in pans on wire racks 10 minutes. Remove from pans to wire racks; discard parchment paper. Cool completely (about 40 minutes).
  6. Spread Vanilla Buttercream Frosting between layers (about 1 cup per layer) and on top and sides of cake.

Happy New Year!!

With Chinese New Year (year of the rooster) fast approaching, and as we are hosting a family dinner the same img_0003night I thought it appropriate to have some Chinese desserts. I saw both fortune cookies (ok not a dessert per se, but usually served after the meal) and black sesame macarons on the cooking shows we regularly watch.
I made “un-fortune” cookies the other day and the macarons today. For the uninformed, “un-fortune” cookies are fortune cookies without the little paper fortune tucked inside. I neglected to document the making of these cookies so will  omit them from img_0002this post, intending to document it the next time I make them. I found black sesame seeds at a specialty market near home and ground them to make a coarse powder. This gave the macaron a different texture than simply using fine almond powder.

The photos are bizarre. They are all color photos, but the gray coloring of the macarons and filling make everything monochrome.

Here is Stephanie Chen’s recipe with only three modifications. First, she didn’t indicate where to add the black sesame powder so I just mixed it in with the dry ingredients prior to img_0001adding the egg white. Second, she didn’t say when to add the black food coloring, so I added it after mixing the hot sugar mixture to the soft peak egg white and lastly I didn’t have any champagne so I just skipped it. The honey butter cream was awesome anyway.

INGREDIENTS

Macarons

  • 280 g ground almond meal, sifted at least twice
  • 240 g powdered sugar
  • 40g toasted ground black sesame powder
  • 100 g egg whites- for whipping, room temp
  • 100 g egg whites – for mixing into dry ingredients
  • Pinch of cream of tartar
  • 200 g granulated caster sugar
  • 80 g water
  • deep black americolor food coloring

Honey Champagne Buttercream

  • 56 g unsalted butter
  • 1 cup of powdered sugar
  • 2 tablespoons of clear clover honey
  • 2-3 tablespoons of good quality champagne (or more depending on consistency)

METHOD

Make the Black Sesame macarons:

  1. Prep 2 baking sheets with parchment paper with drawn circles. Separate your egg whites and clean all your appliances to ensure there are NO traces of yolk, oil, fat, etc.
  2. In separate bowls, sift the almond meal at least TWICE and sift the powdered sugar once. Whisk the two together and break up any lumps. Pour in half of the egg whites and fold them gently until the mixture is thick and paste like.
  3. In a stand mixer bowl fitted with a whisk attachment, add the other half of egg whites and leave it there.
  4. Start making the simple syrup. In a small saucepan, combine the granulated sugar and water together till they dissolve over a medium heat. Add candy thermometer.
  5. Start to mix the egg whites until they get to a soft peak. If they get there too soon before the sugar is ready then slow the mixer down. The egg whites will need some volume before adding the sugar.
  6. When the syrup hits 240 degrees F / 118 C, remove from heat and carefully pour into the side of the bowl while mixer is running. Make sure the mixture is being poured right where the egg and side of the bowl meet.
  7. Add food coloring to darken the mixture to a medium gray color.
  8. Whip on high until the bowl is cooled and glossy stiff peaks have formed.
  9. Add half of the meringue to the almond mixture and gently fold until combined and smooth. Then Add the rest of the meringue until batter is smooth and ribbons form. Do NOT over fold or mix.
  10. Preheat oven to 300 F / 148 C. Fill piping bag. Might want to secure the parchment paper down with a little of the macaron mixture.
  11. Pipe small rounds with the bag perpendicular to the baking sheet and make sure they’re the same size by counting how long you pipe them out. When you’re done, tap the trays on the table to get rid of the air bubbles.
  12. Add a few toasted black sesames to each of the cookies.
  13. Let the piped macs sit out until a shell is formed. Should be 20-30 minutes (maybe less).
  14. Bake one sheet at a time for 15-18 minutes. Rotate the tray after 7 minutes. Test the macs by wiggling the top of the shell back and forth. If the shell moves from the feet then they need another minute or two. Perfect macs should be a little wiggly but overall firm.
  15. When done, remove parchment paper from the sheet and let cool for 30 minutes on cooling rack. Gently peel the parchment paper off when they are cooled. (Be sure they are fully cooked. The cookie will pull apart when removing from the parchment paper if not.)

Honey Champagne Buttercream Filling

METHOD

  1. In a stand mixer bowl, beat the butter using a whisk attachment for 2 minutes until light and airy.
  2. Slowly add the powdered sugar and whisk until it’s all incorporated. Then add honey and champagne with the mixer on. Keep whisking for another minute until everything is incorporated.
  3. Add more champagne until the right consistency is met for a firm, pipeable filling.