
The weather was, and still is, unusually cold the past few weeks here in the Sierra Nevada foothills. A cup of hot chocolate is a welcome, warming treat. A Hot Chocolate Joconde cake ain’t too shabby either. I made a variation of Amanda Faber’s (The Great American Baking Show champion) Hot Chocolate Cake. First I reduced the recipe by 1/3rd to suit my family’s and tasters (who happen to be the same people) appetites and thinking marshmallow pairs properly with hot chocolate, I substituted mint marshmallow frosting for the mint vanilla butter cream. The first modification was a good choice, although it added a couple of challenges, the second did not work as well as I hoped. The marshmallow frosting did not set firm which resulted in smeared lines between the layers. It looked ok for a few  minutes, but the frosting started to flow a short time later. The other issue was tempering a small amount of chocolate. Because the cake was 1/3rd the original size I cut the
chocolate glaze to about 1/3rd as well. That mean starting with 40g of bittersweet chocolate and adding 20 g to temper. Accurately measuring and stabilizing the temperature of small amounts of chocolate and controlling the temperature is a challenge. I think I was lucky as the resultant glaze was well tempered and glossy.
Peppermint Hot Chocolate Cake Amanda Faber – The following is the full recipe as posted by the GABS with comments by me reflecting any modifications.
INGREDIENTS
Chocolate Joconde
- 171g almond flour
- 171g confectioners sugar
- 171g all-purpose flour
- 45g unsweetened cocoa powder
- 9 large eggs
- 3 large egg yolk
- 6 large egg whites
- 96g granulated sugar
- 84g (2tbsp) unsalted butter, melted
Peppermint Buttercream
- 1/2c water
- 150g granulated sugar
- 4 large egg yolks
- 226g unsalted butter, room temperature
- 1tsp pure peppermint extract
Chocolate Glaze
- 80g unsalted butter, room temperature
- 200g bittersweet chocolate chips, divided
Chocolate Milk Soak
- 1tsp cocoa powder
- 1/2c water
- 115g granulated sugar
- 1/2tsp pure vanilla extract
- 1/2tsp pure chocolate extract
- 1tbsp heavy whipping cream
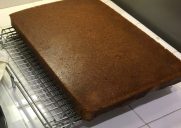
-

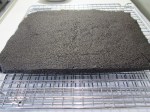
- Joconde
-
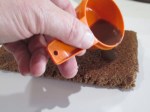
- Soaking Joconde
-
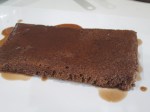
- Soaked Bottom Layer
METHOD
Chocolate Joconde – Remember I only made 1/3rd of this recipe, so only made one pan of sponge
- Pre-heat the oven to 400° F/205° C .
- In a stand mixer fitted with a paddle attachment, combine the almond flour, confectioners sugar, flour, and cocoa.
- Add eggs and egg yolk. Mix on high for 5 minutes. Set aside.
- Put a new bowl on the stand mixer and change to a whisk attachment. Whisk the egg whites with the granulated sugar until soft peaks.
- Fold half of the egg whites in to the other mixture. Then, stir in the melted butter.
- Fold in the rest of the egg whites.
- Using a scale with a bowl on top divided batter evenly among 3 sheet pans. Spread with off-set spatula to smooth.
- Bake one at a time for ~7 minutes.
- When the sponge is removed from the oven, slice around the edges to loosen.
- Invert the cake on to a large cutting board covered with a piece of parchment paper. Cool.
Peppermint Buttercream – I didn’t make this frosting. I used the marshmallow below
- In a heavy-bottomed sauce pan over high heat, boil the water and sugar until 238° F/114° C.
- In a stand mixer fitted with a whisk attachment, beat the egg yolks for one minute.
- Once the sugar has reached the proper temperature, stream it in to the stand mixer with eggs while it is running.
- Beat until completely cooled, 5-7 minutes.
- Beat in the butter little by little until thick and smooth.
- Add in the peppermint extract.
Chocolate Glaze – using 60 g of chocolate rather than 200 g was challenging
- Over a bain-marie, gently melt the butter and 170g of the chocolate. Stir constantly to keep an even temperature.
- Once melted and smooth, stir in the remaining 30g of chocolate.
- Cool until room temperature but still liquid. Reheat if necessary.
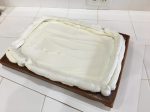
-

- Frosted Bottom Layer
-
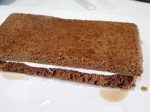
- Adding Second Layer
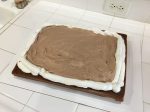
-
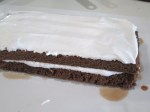
- Frosted Second Layer
-

- Adding Third Layer
-

- Glazed Joconde
Chocolate Milk Soak
- In a heavy-bottomed saucepan over a medium-high heat, stir the cocoa powder, water, and sugar until the sugar is dissolved.
- Stir in the vanilla extract, chocolate extract, and heavy whipping cream.
ASSEMBLY
- Assembly the cake on a large cutting board.
- Soak the first cake with the chocolate milk soak. Cover with a thin layer of buttercream. Repeat with remain two layers. The top layer of buttercream should be very, very thin. You should see the cake through it in all places. It’s only there to make it smooth.
- Pour on the chocolate glaze. Spread it to be smooth. It’s okay if it runs off.
- Chill the cake for ~10-15 minutes.
- Cut in to 12 equal pieces, probably about 4×1.5 inches.
- Garnish each cake bar with a marshmallow and a mint leaf. (I had the mint leaf, but not marshmallows so I skipped this. It was for tasting anyway.)


SUBSTITUTED MINT MARSHMALLOW FROSTING
INGREDIENTS
- 5 tablespoons cool water, plus more for the double boiler
- 1/4 teaspoon cream of tartar
- 1 1/3 cups granulated sugar
- 2 egg whites, room temperature
- 1 tablespoon light corn syrup
- 1 teaspoon vanilla extract
- Pour some water, about 2 inches deep, into a saucepan to create a makeshift double boiler. Put the pan on the stove and bring the water to a gentle simmer. Dip the instant-read thermometer into the simmering water to clean any impurities off the end and to test that the thermometer works.
- In a clean, large mixing bowl, combine the 5 tablespoons of cool water, cream of tartar, sugar, egg whites and corn syrup. Gently lower the bowl over the simmering water. Turn off the heat under the pot. Use an electric hand beater to whip the whites over the water. Do not leave the egg white mixture unattended or stop beating any time during this process.
- After about 3 minutes, remove the bowl from the heat, set the beater down and quickly take the temperature of the egg whites. You want them to reach 140 degrees F. If you measure the temperature before they reach that point, immediately put the bowl of whites back over the water and resume beating until they are finished, an additional 2 to 3 minutes.
- Remove the bowl from the water and fold in the vanilla extract. It should look like marshmallow fluffiness. Set the frosting aside to allow the mixture to cool. Frost the cake by, as my father used to say, “glopping” the frosting all over the top and the sides. Serve immediately
 A canelé is a small French




 New Zealand and is a favorite around Christmas in the summer. Wait! Is it a Christmas treat, or a summer treat? Isn’t that a North American oxymoron? Ah, well, it is Christmas Eve, therefore, this time, it is a Christmas treat. (I just realized, I could have used the blueberries and made it a Chanukah treat in Israeli colors of white and blue.)
 Deceptively easy and insidiously versatile. You can top your pavlova with berries, nuts, chocolate, mocha, fruit, lemon curd or as King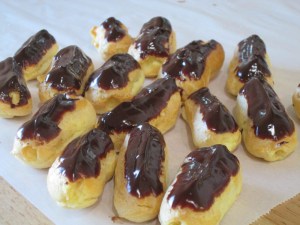
 larger 3″ diameter, wanting more surface area
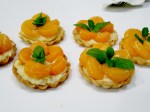 for the orange slices. Because the oranges are very sweet and the creme de Patisserie is likewise sweet, I wanted to add something to balance. I added the zest of three small mandarin oranges to the creme pat to add just a little bitter to the mix. (Hindsight – use 3 slices, not 5. Even small slices were too big/many.)
 correct it before the party.) Happily, I had some extra creme pat so I could substitute some
  blackberry tarts for the ganache/caramel/sea-salt ones originally planned. (Remember, disasters stay home.)

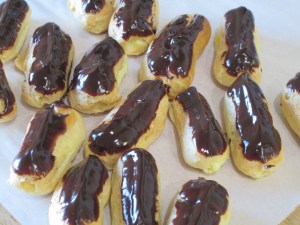
 The recipe I used did not include the step to dry the choux after the bake. Typically, after the first bake at 425 F, each piece of pastry is punctured and returned to the over for
 another 30 min at 375 F. This lets the steam out of the inside of the pastry and gives them that little crispness usually found it cream puffs or eclairs.
 I love black and white cookies and I wish I could make them, oh wait, I did make them. I like to eat the white side first and save the chocolate side for dessert dessert.
 Around 60 family members and friends attended at a Catholic church in Roseville for a short but meaningful service, then gathered at Frances and Daniel’s for brunch. I was asked to provide a cake for 60 people. (This may be the largest cake I have made.) The specific request was for a layer cake with chocolate mousse filling and a quilted finish.
 people who do not eat cake (friends of Marie Antionette, no doubt) and I could get away with this size. Therefore I needed two sheet cakes. (Note: about 10 slices were left at the end of the event.)
 g the cake layers I built a dam of crusting buttercream around the edges of the top crumb coated cake. Crusting buttercream has a little more body and will keep the mousse in place. Add a tablespoon of meringue powder to the confectioners sugar to make regular buttercream into crusting buttercream. After the second sheet cake is cool, add the
  mousse to the damned 🙂 bottom cake. Top with the second layer, crumb coat the entire cake and refrigerate.
  A cold cake is easier to trim to make nice square edges and setting the mousse will retard the effects the moisture will have on the fondant coating.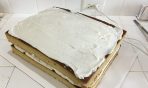
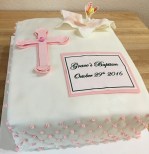 arlier in the week I made the pink orchid, cross and text backing from gumpaste.
 I purchased the text from a company that makes sugar images and pasted it onto the backing gumpaste.
 aBatteredOldSuitcase