Dave Oney was born mid last century in Middlebury, Vermont. He received his BS in Chemistry and worked as a polymer chemist in Massachusetts and New Jersey. He became a microscopist (someone who studies little bitty things using a microscope) and photomicrographer (someone who photographs little bitty things) before settling into a 35-year career in technical sales of scientific imaging equipment (the science of digitally recording itty bitty things, sending the image to a computer for analysis.) He designed and created a number of products contributing to this field. He is (was) proficient in several computer languages and is currently working on mastering English.
After making a few more paradigm shift career changes Dave and his wife, Fran, retired and moved closer to their children and granddaughters and now live in the foothills of the Sierra Nevadas.
We love shortbread cookies, and we love chocolate. Combining the two is a step from ecstasy. Also, this gave me the excuse… I mean opportunity… to use the hexagonal cookie cutters Fran (aka QC) bought me.
Using hexagonal cutters reduces dough waste as there are no gaps between each cut.
Hexagonal Cookie Cutters with the one used on the lower right.
L: Rolled out, cut dough. R: Cut cookies on baking tray.Shortbread Cookies surrounded by Raspberry Hand Pies.
Shortbread Cookies
INGREDIENTS • 3/4 pound unsalted butter, at room temperature • 1 cup sugar, plus extra for sprinkling • 1 teaspoon pure vanilla extract • 3 ½ cups all-purpose flour • ¼ teaspoon salt • 6 to 7 ounces very good semisweet chocolate, finely chopped
METHOD
Preheat the oven to 350 degrees F.
In the bowl of an electric mixer fitted with a paddle attachment, mix together the butter and 1 cup of sugar until they are just combined. Add the vanilla.
In a medium bowl, sift together the flour and salt, then add them to the butter-and-sugar mixture. Mix on low speed until the dough starts to come together. Dump onto a surface dusted with flour and shape into a flat disk. Wrap in plastic and chill for 30 minutes.
Roll the dough 1/2-inch thick and cut with a 3 by 1-inch finger-shaped cutter. Place the cookies on an ungreased baking sheet and sprinkle with sugar. Bake for 20 to 25 minutes, until the edges begin to brown. Allow to cool to room temperature.
When the cookies are cool, place them on a baking sheet lined with parchment paper. Put 3 ounces of the chocolate in a glass bowl place over a pan of boiling water. Turn the burner down to simmer and heat with stirring until the chocolate is nearly all melted. Stir vigorously until the chocolate is smooth and slightly cooled; stirring makes it glossier.
Drizzle 1/2 of each cookie with just enough chocolate to coat it.
Dan and Frances made these pretzel knots yesterday and sent me the recipe. They are every bit as good as they said. Great texture and perfect soft pretzel taste.
This recipe avoids the nuisance of placing the pretzels in a an alkaline and malt bath but doing that may make the nice pretzel color. Maybe next time. This is much easier and makes clean-up a snap.
L: Rolled out dough, C: Knots in oven, R: Finished Pretzel Knots
Jack’s Garlic Pretzel Knots
• ¾ cup warm water (105°F to 115°F) • 1 tablespoon maple syrup • 1 (¼-ounce) package active dry yeast • 1½ cups all-purpose flour, plus more for kneading • ½ cup whole wheat flour • 1 teaspoon sea salt • 4 tablespoons extra-virgin olive oil, plus more for brushing • 1 garlic clove, minced • ¼ teaspoon lemon zest • Coarse salt, for sprinkling
Prep and Cook
In a small bowl, stir together ¼ cup of the water, maple syrup, and the yeast. Set aside for 5 minutes, until the yeast is foamy
In the bowl of a mixer fitted with a dough hook, place the flours and salt. Add the yeast mixture, 2 tablespoons of the olive oil, and the remaining ½ cup of water. Mix on medium speed until the dough forms a ball around the hook, 5 to 6 minutes.
Turn the dough out onto a lightly floured surface and knead several times, sprinkling with more flour, as needed, and form into a ball. Brush a large bowl with olive oil, and place the dough inside. Cover with plastic wrap and set aside to rise until doubled in size, 40 to 60 minutes.
Preheat the oven to 450°F and line a baking sheet with parchment paper. Uncover the dough, punch it down and transfer to a lightly floured surface. Cut the dough into 8 equal sections, and roll each section into a 9-inch-long rope. Grab the ends of each dough rope, tie into a knot, and tuck in the ends.
In a small bowl, combine the remaining 2 tablespoons olive oil, the garlic, and lemon zest. Set aside.
Bake the pretzel knots for 10 to 12 minutes, or until golden brown. Brush the garlic oil onto the hot pretzel knots and sprinkle each with coarse salt.
The more important thing is I was able to try out my new hexagonal cookie cutter. I never liked the square, or triangular (folded squares) hand pies. Circular were good, but the space between the circles wasted a lot of puff pastry. The hexagonal cutter was nearly as efficient as cutting squares, but look more like round pies.
My new hexagonal cookie cutters
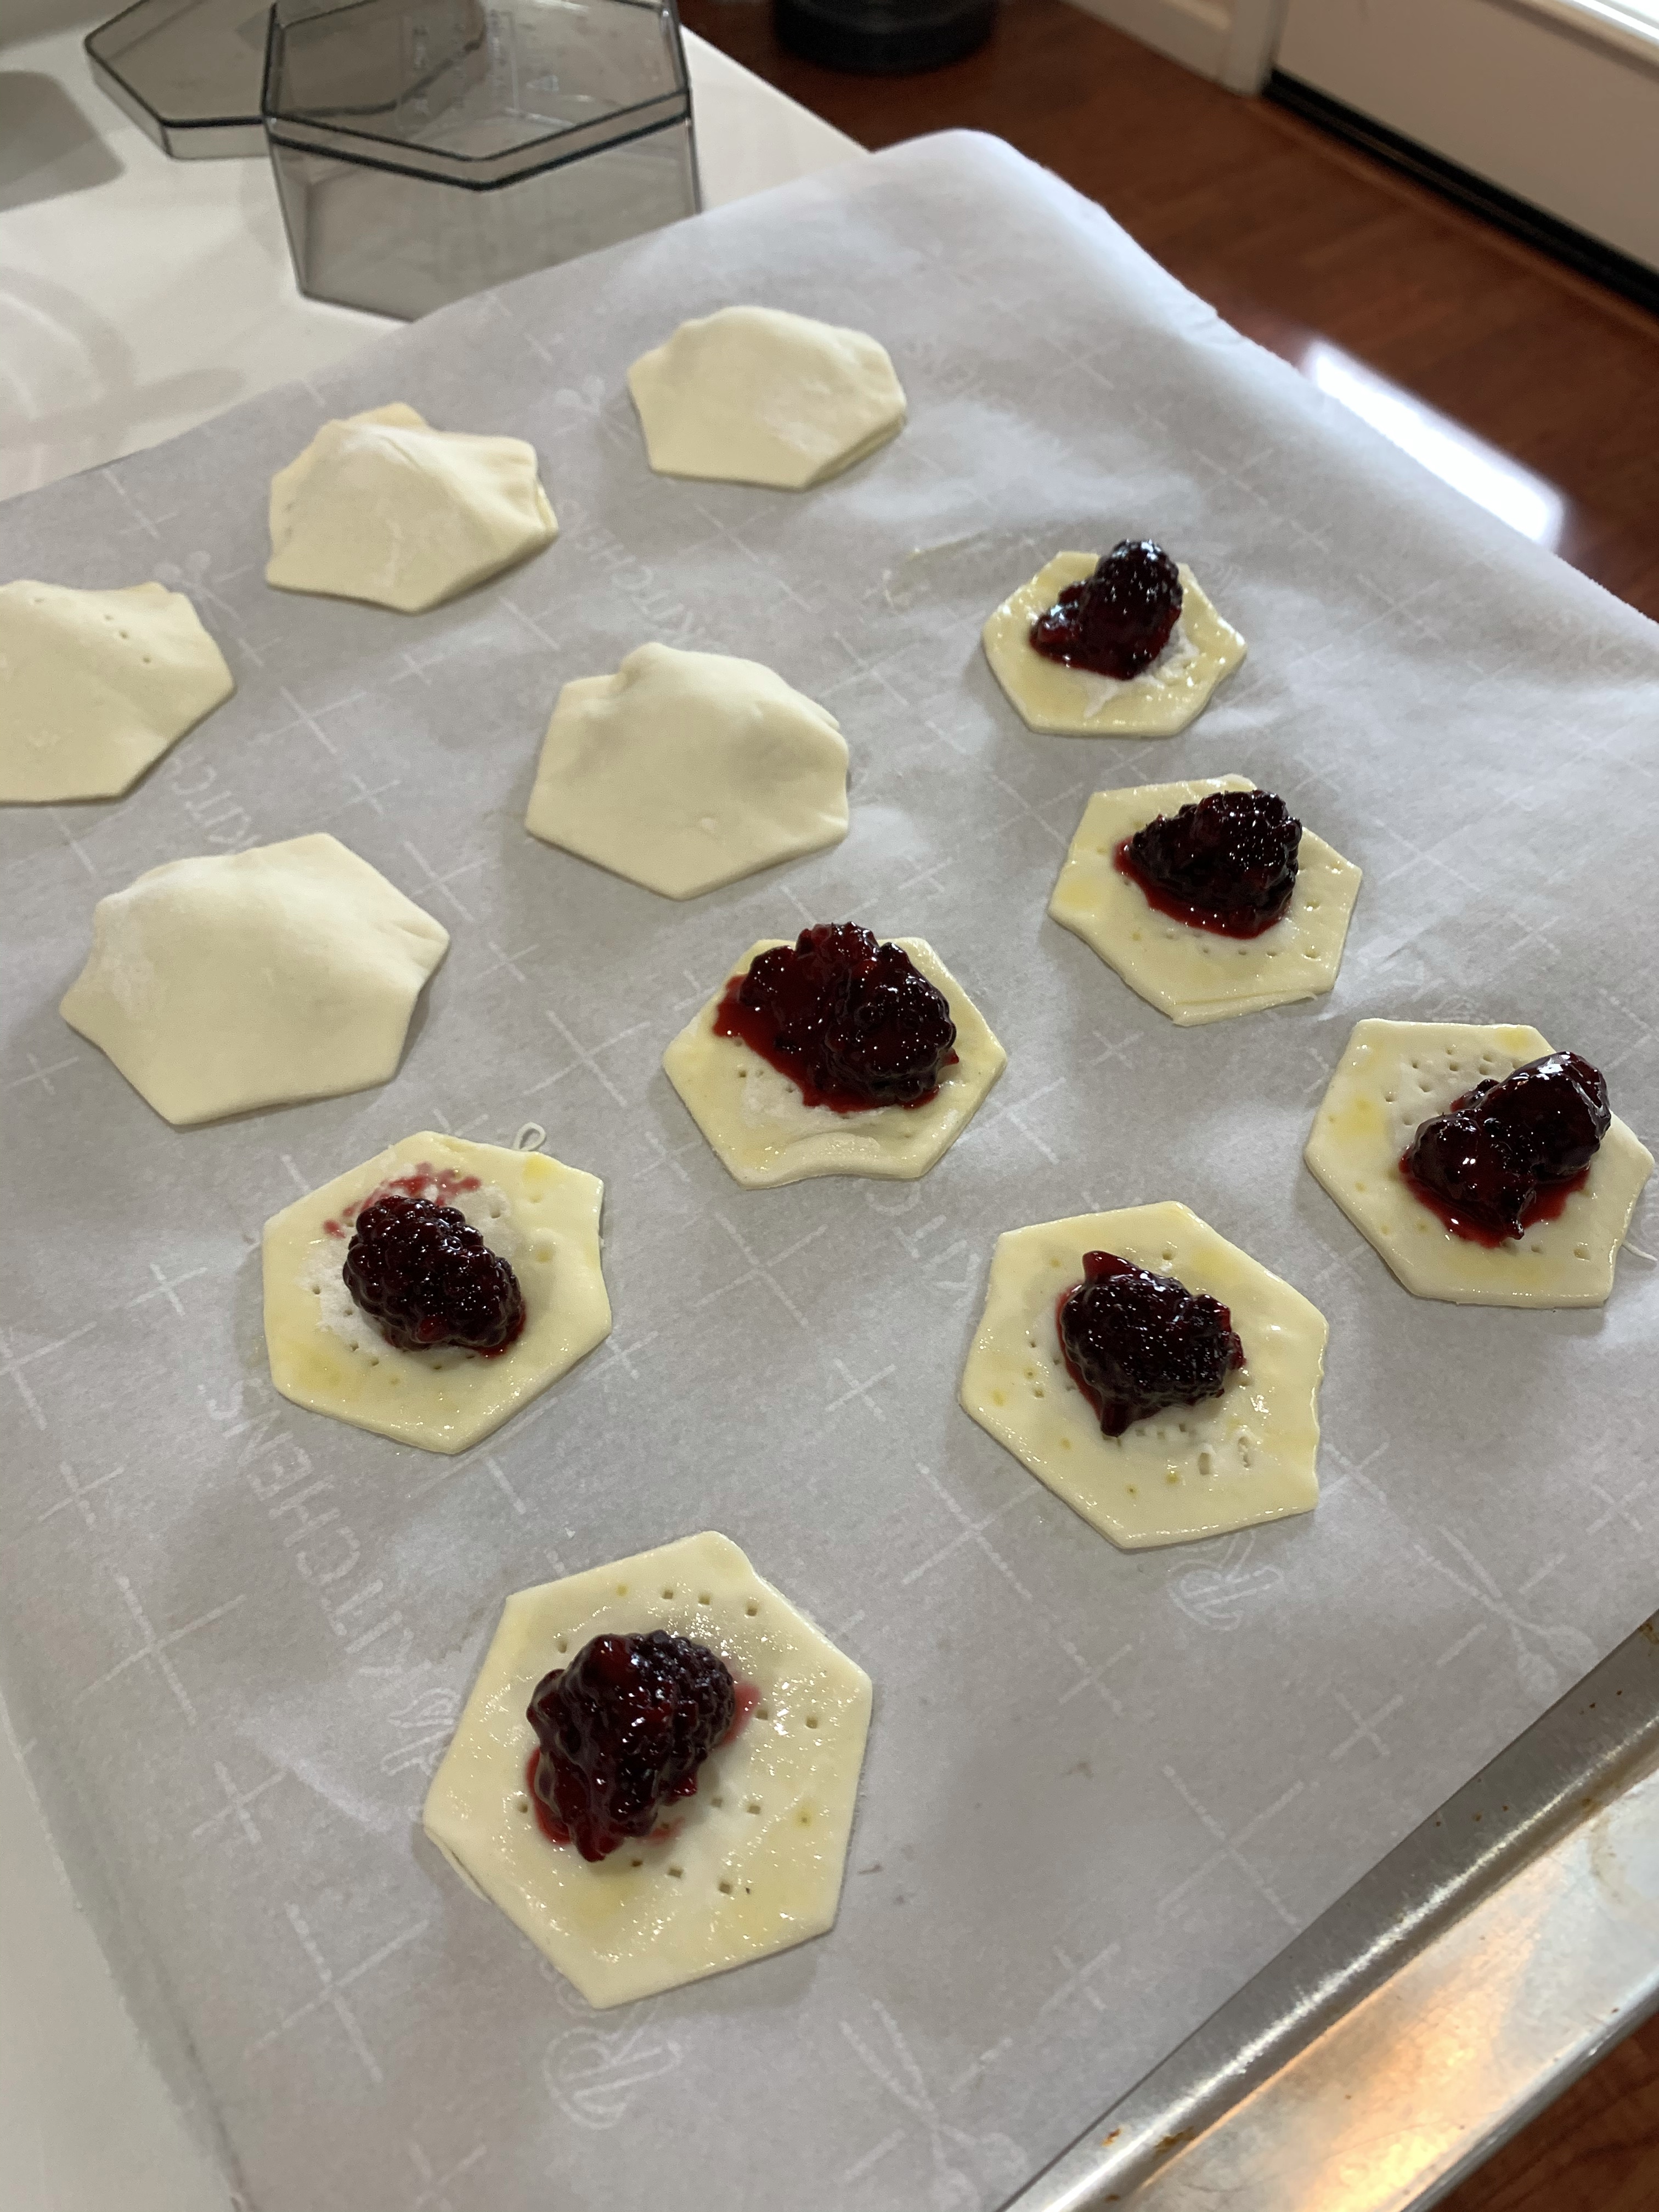
I used a larger cutter for the top to assure good coverage of the smaller bottom. I docked the bottom piece with a fork to manage the puff of the pastry.
The edges of the covered pies were pinched with the fork, and egg wash painted on, a steam vent cut on the top and sparkling sugar sprinkled on each pie before baking.
Last week I made a light right sandwich rye. Good crumb, great taste, nice crust. Today I kicked up the percent pumpernickel flour and reduced the light rye flour. I added an egg wash to increase the color of the crust. Better taste, similar crumb and great crust!
Along with the rye experiment, I made another loaf of Honey White bread which has become our staple. I also made some raspberry scones and blackberry hand pies. Busy morning!
INGREDIENTS • 1 ½ cups (340g) lukewarm water • 2 1/3 cups (280g) Bread Flour • 1 cups (108g) light rye flour • ½ cups (54g) pumpernickel flour • 1/4 cup (28g) nonfat dry milk • 1 ½ teaspoons table salt • 1 ½ teaspoons instant yeast • 1 ½ teaspoons Deli Rye Flavor, optional • 2 tablespoons (25g) vegetable oil METHOD
Place the water in a large mixing bowl.
Combine the flours with the remaining ingredients in a large mixing bowl, or the bowl of your stand mixer. Mix until there are no dry spots. Using a stand mixer, mix at low speed until all of the flour is moistened. The texture of the dough will be soft and sticky due to the pumpernickel flour.
Cover the bowl and let the dough rise at room temperature for 2 hours. Then refrigerate overnight, or for up to 48 hours.
To bake bread: Grease your hands, and scoop the dough out onto a lightly greased or floured work surface. Shape it into a ball and place it, smooth side down, in a floured brotform; or in a bowl lined with a floured smooth cotton dish towel. Let the dough rise, covered, for 2 to 3 hours.
About 45 minutes before the end of the rising time, start preheating the oven to 450°F with a 4 to 4 ½ -quart baking pot or casserole with a lid inside.
When the loaf is fully risen, remove the hot casserole from the oven, carefully grease it, and tip the risen ball of dough into it. Make several slashes in the dough. Cover the pot with the lid, and place it on a middle rack in the oven.
Bake the bread for 25 minutes. Remove the lid and bake for an additional 5 to 10 minutes; the loaf should be lightly browned, and the interior should register at least 195°F on a digital thermometer.
Remove the bread from the oven and turn it out of the crock onto a rack. Cool for several hours before slicing
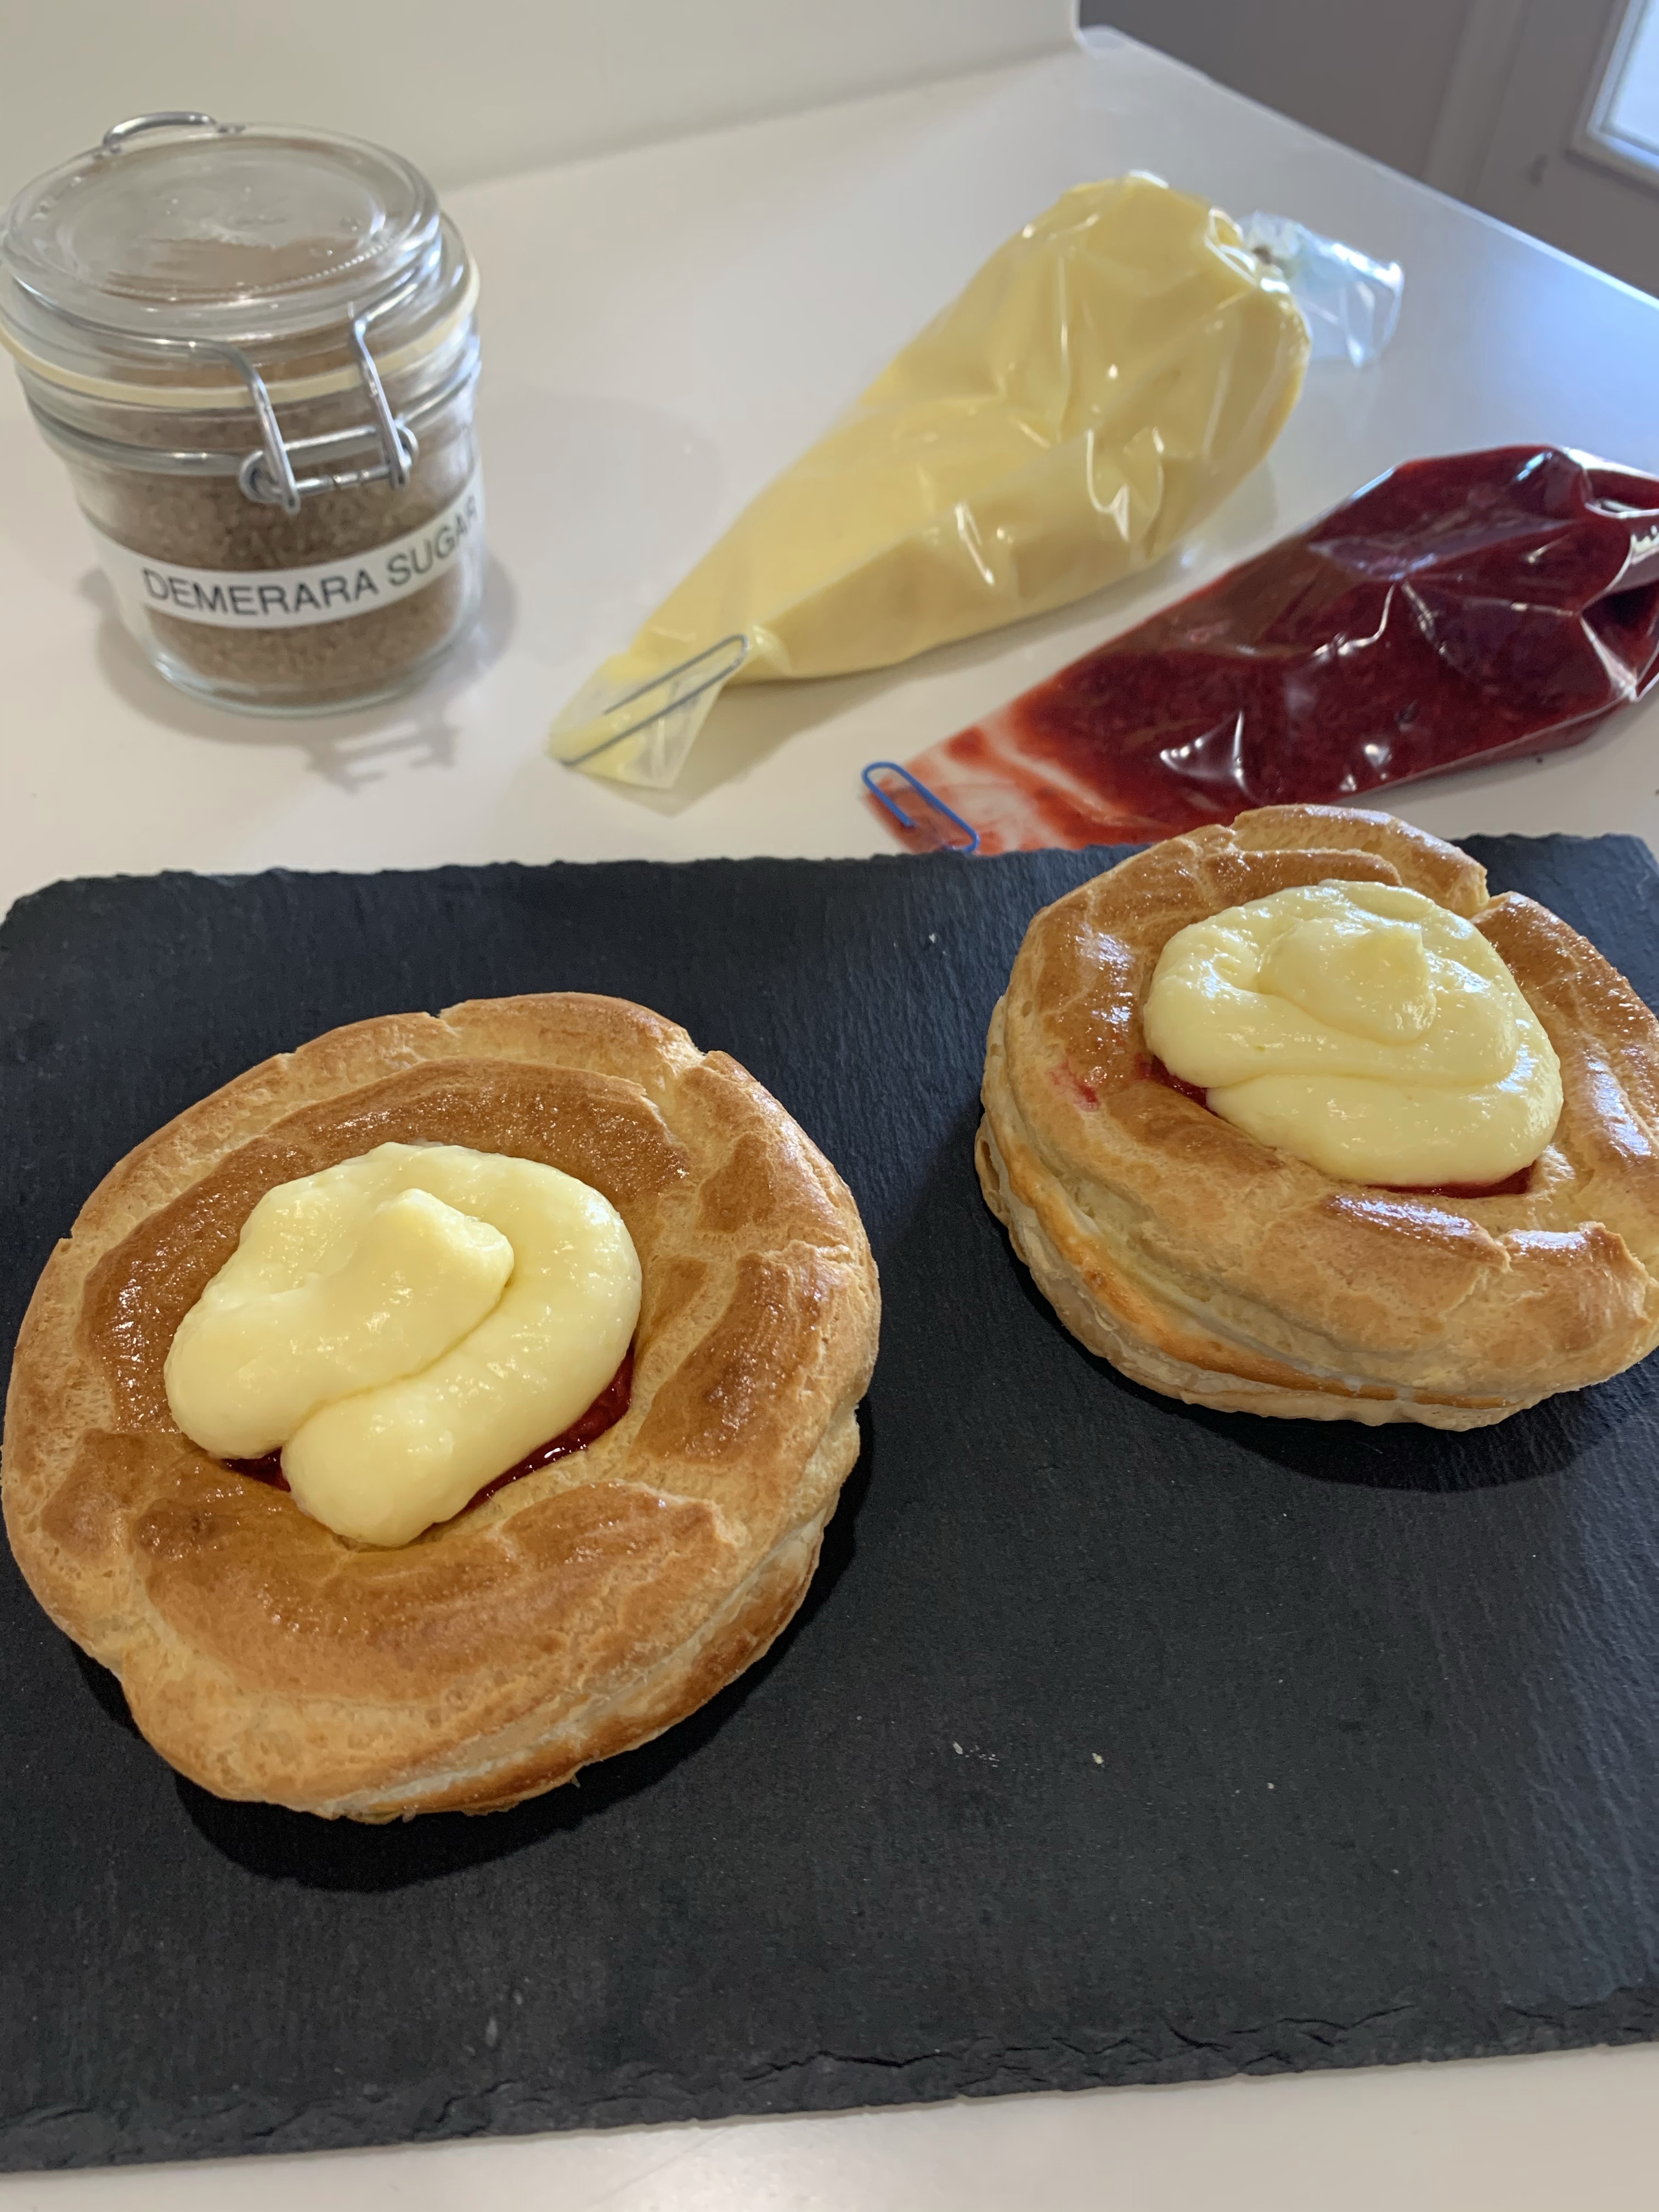
We saw this pastry on GBBO. I hadn’t made any complex pastries in a while so thought this would be fun to try. I made a few changes to Prue Leith’s recipe. I used my own recipe for the creme patisserie and choux. The recipe and method below are as I made it.
I also found a new puff pastry I wanted to try. You may know my preferences in puff. Trader Joe’s is good but doesn’t puff as much as Pepperidge Farms. This new one is Wewalka European Bakery Style which seem to have a puff ratio about in the middle. It has good flake an layers. The only problem is they do not recommend freezing it before using.
Choux Dough. Left is to dry while the right has the “V” drip from the beater.
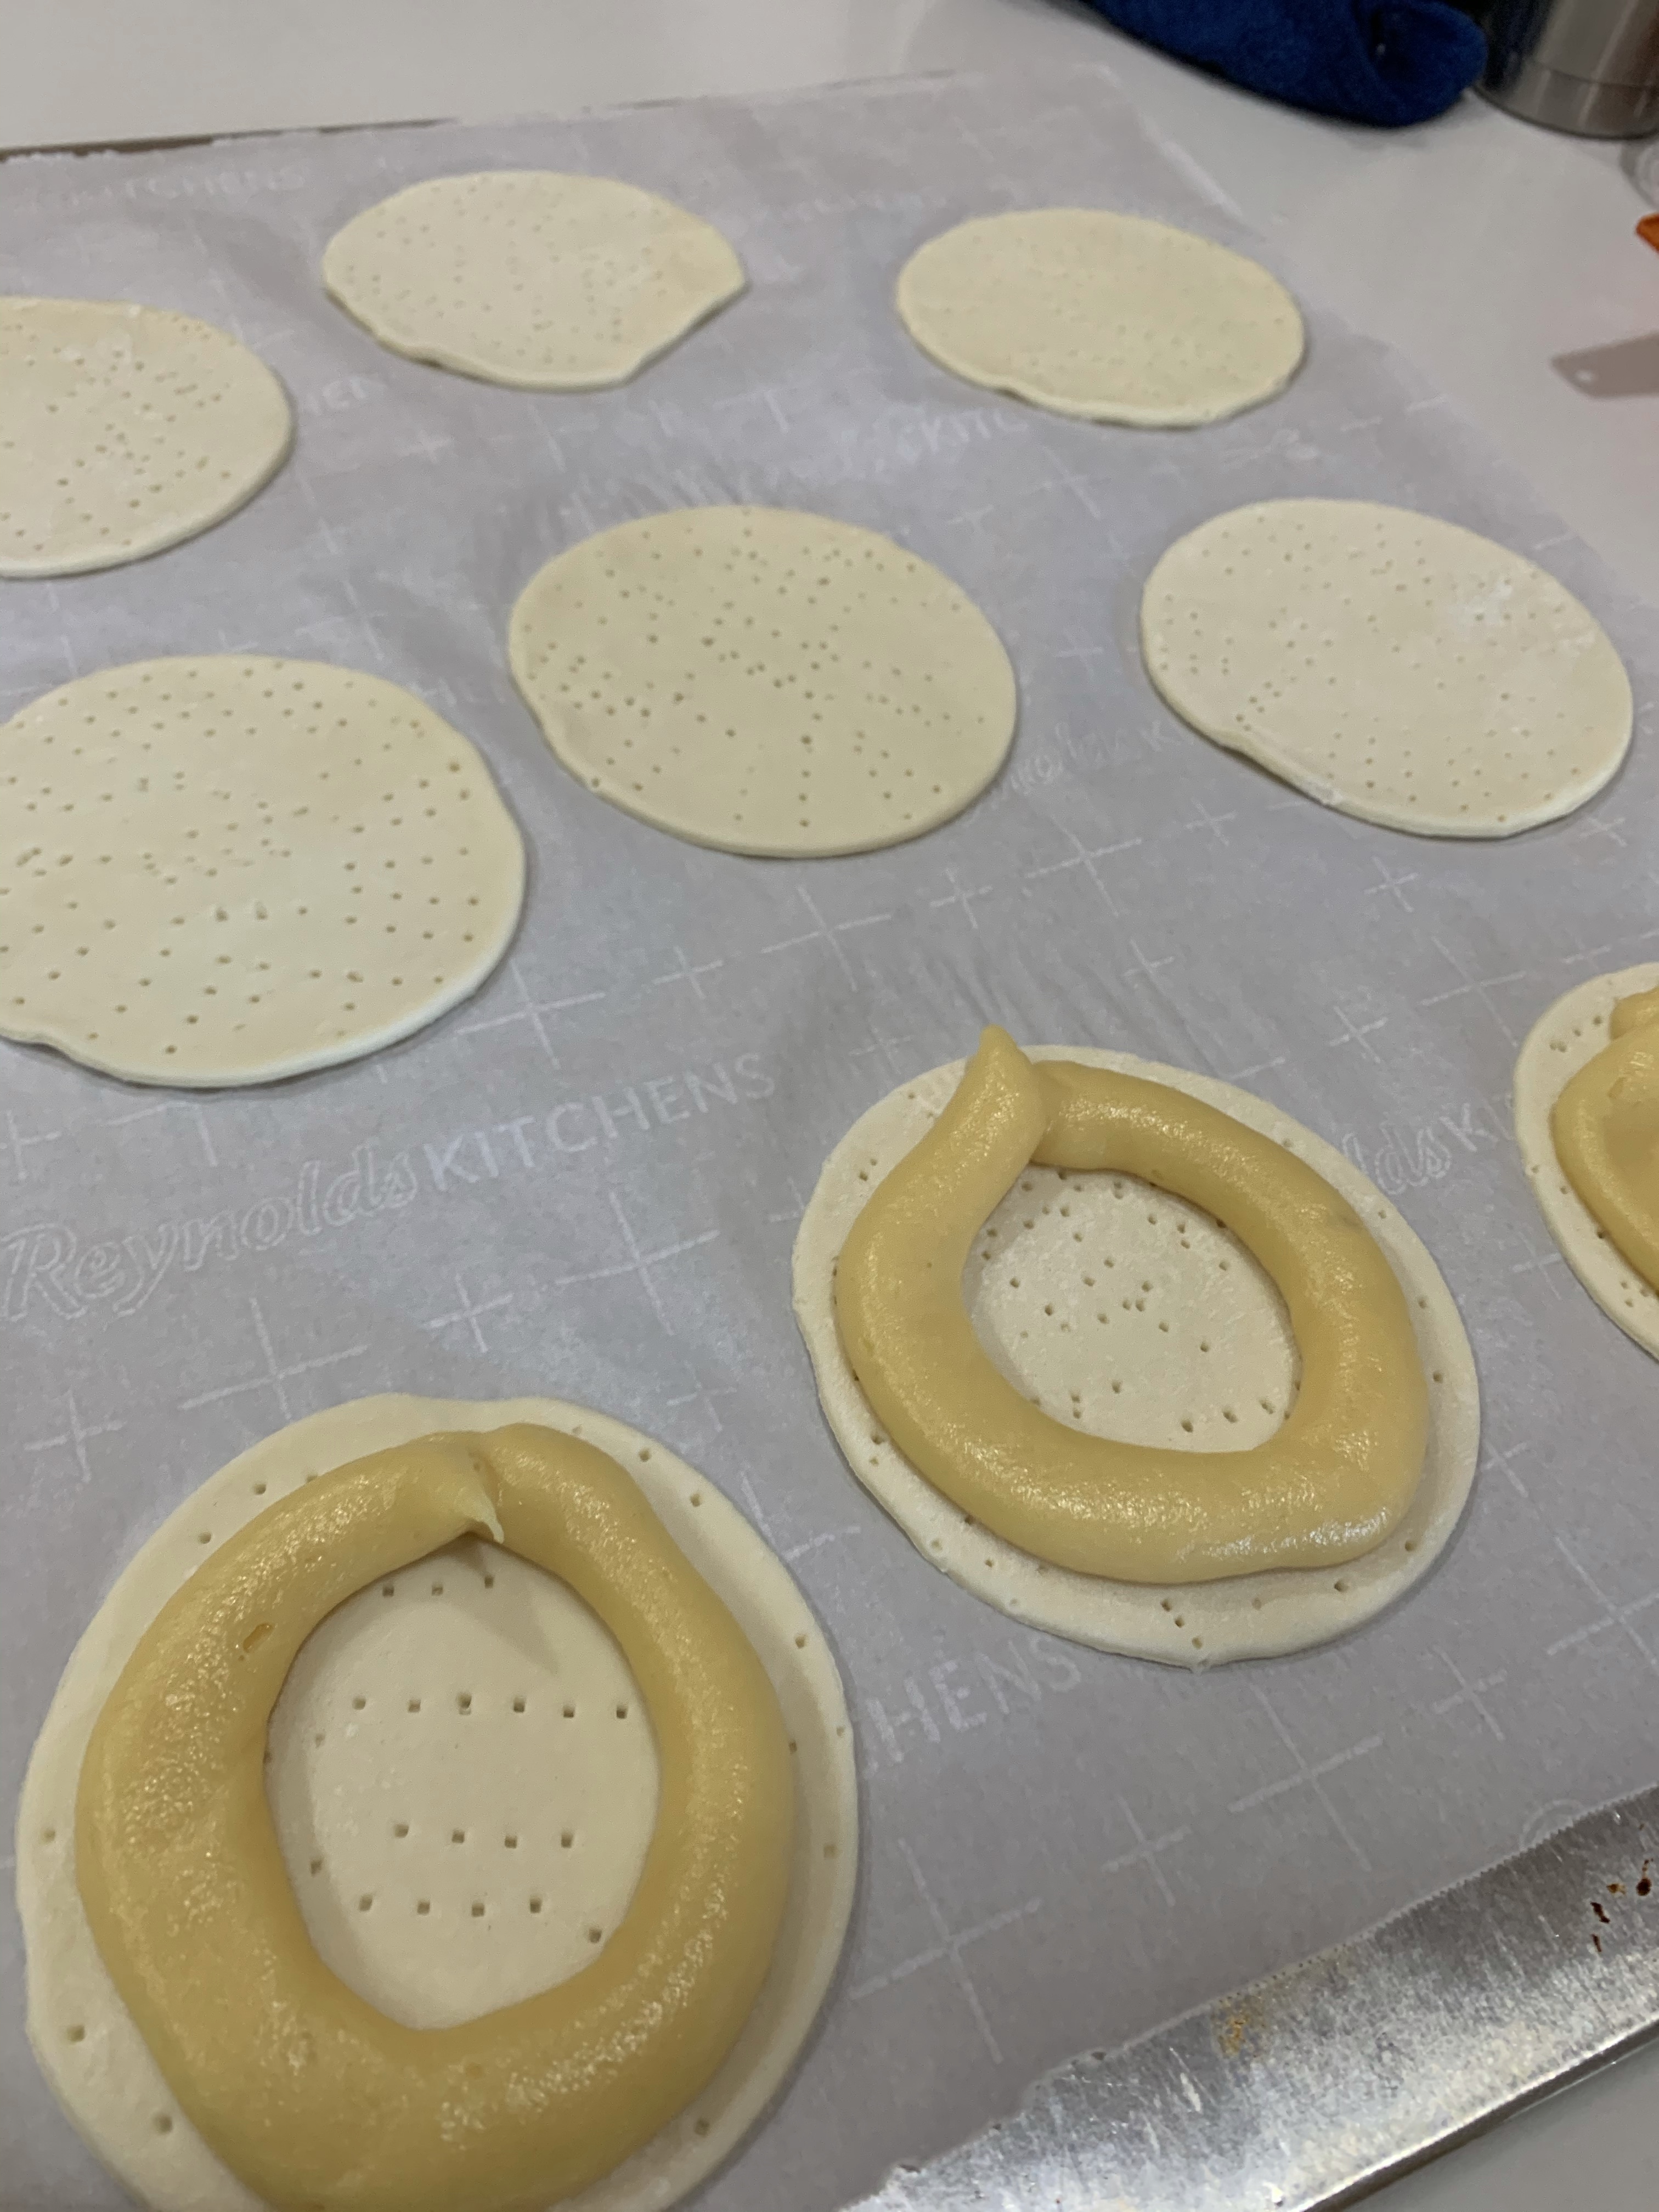
Assembled pastry. Chilled puff pastry disk and piped choux on Left. All piped on Right.
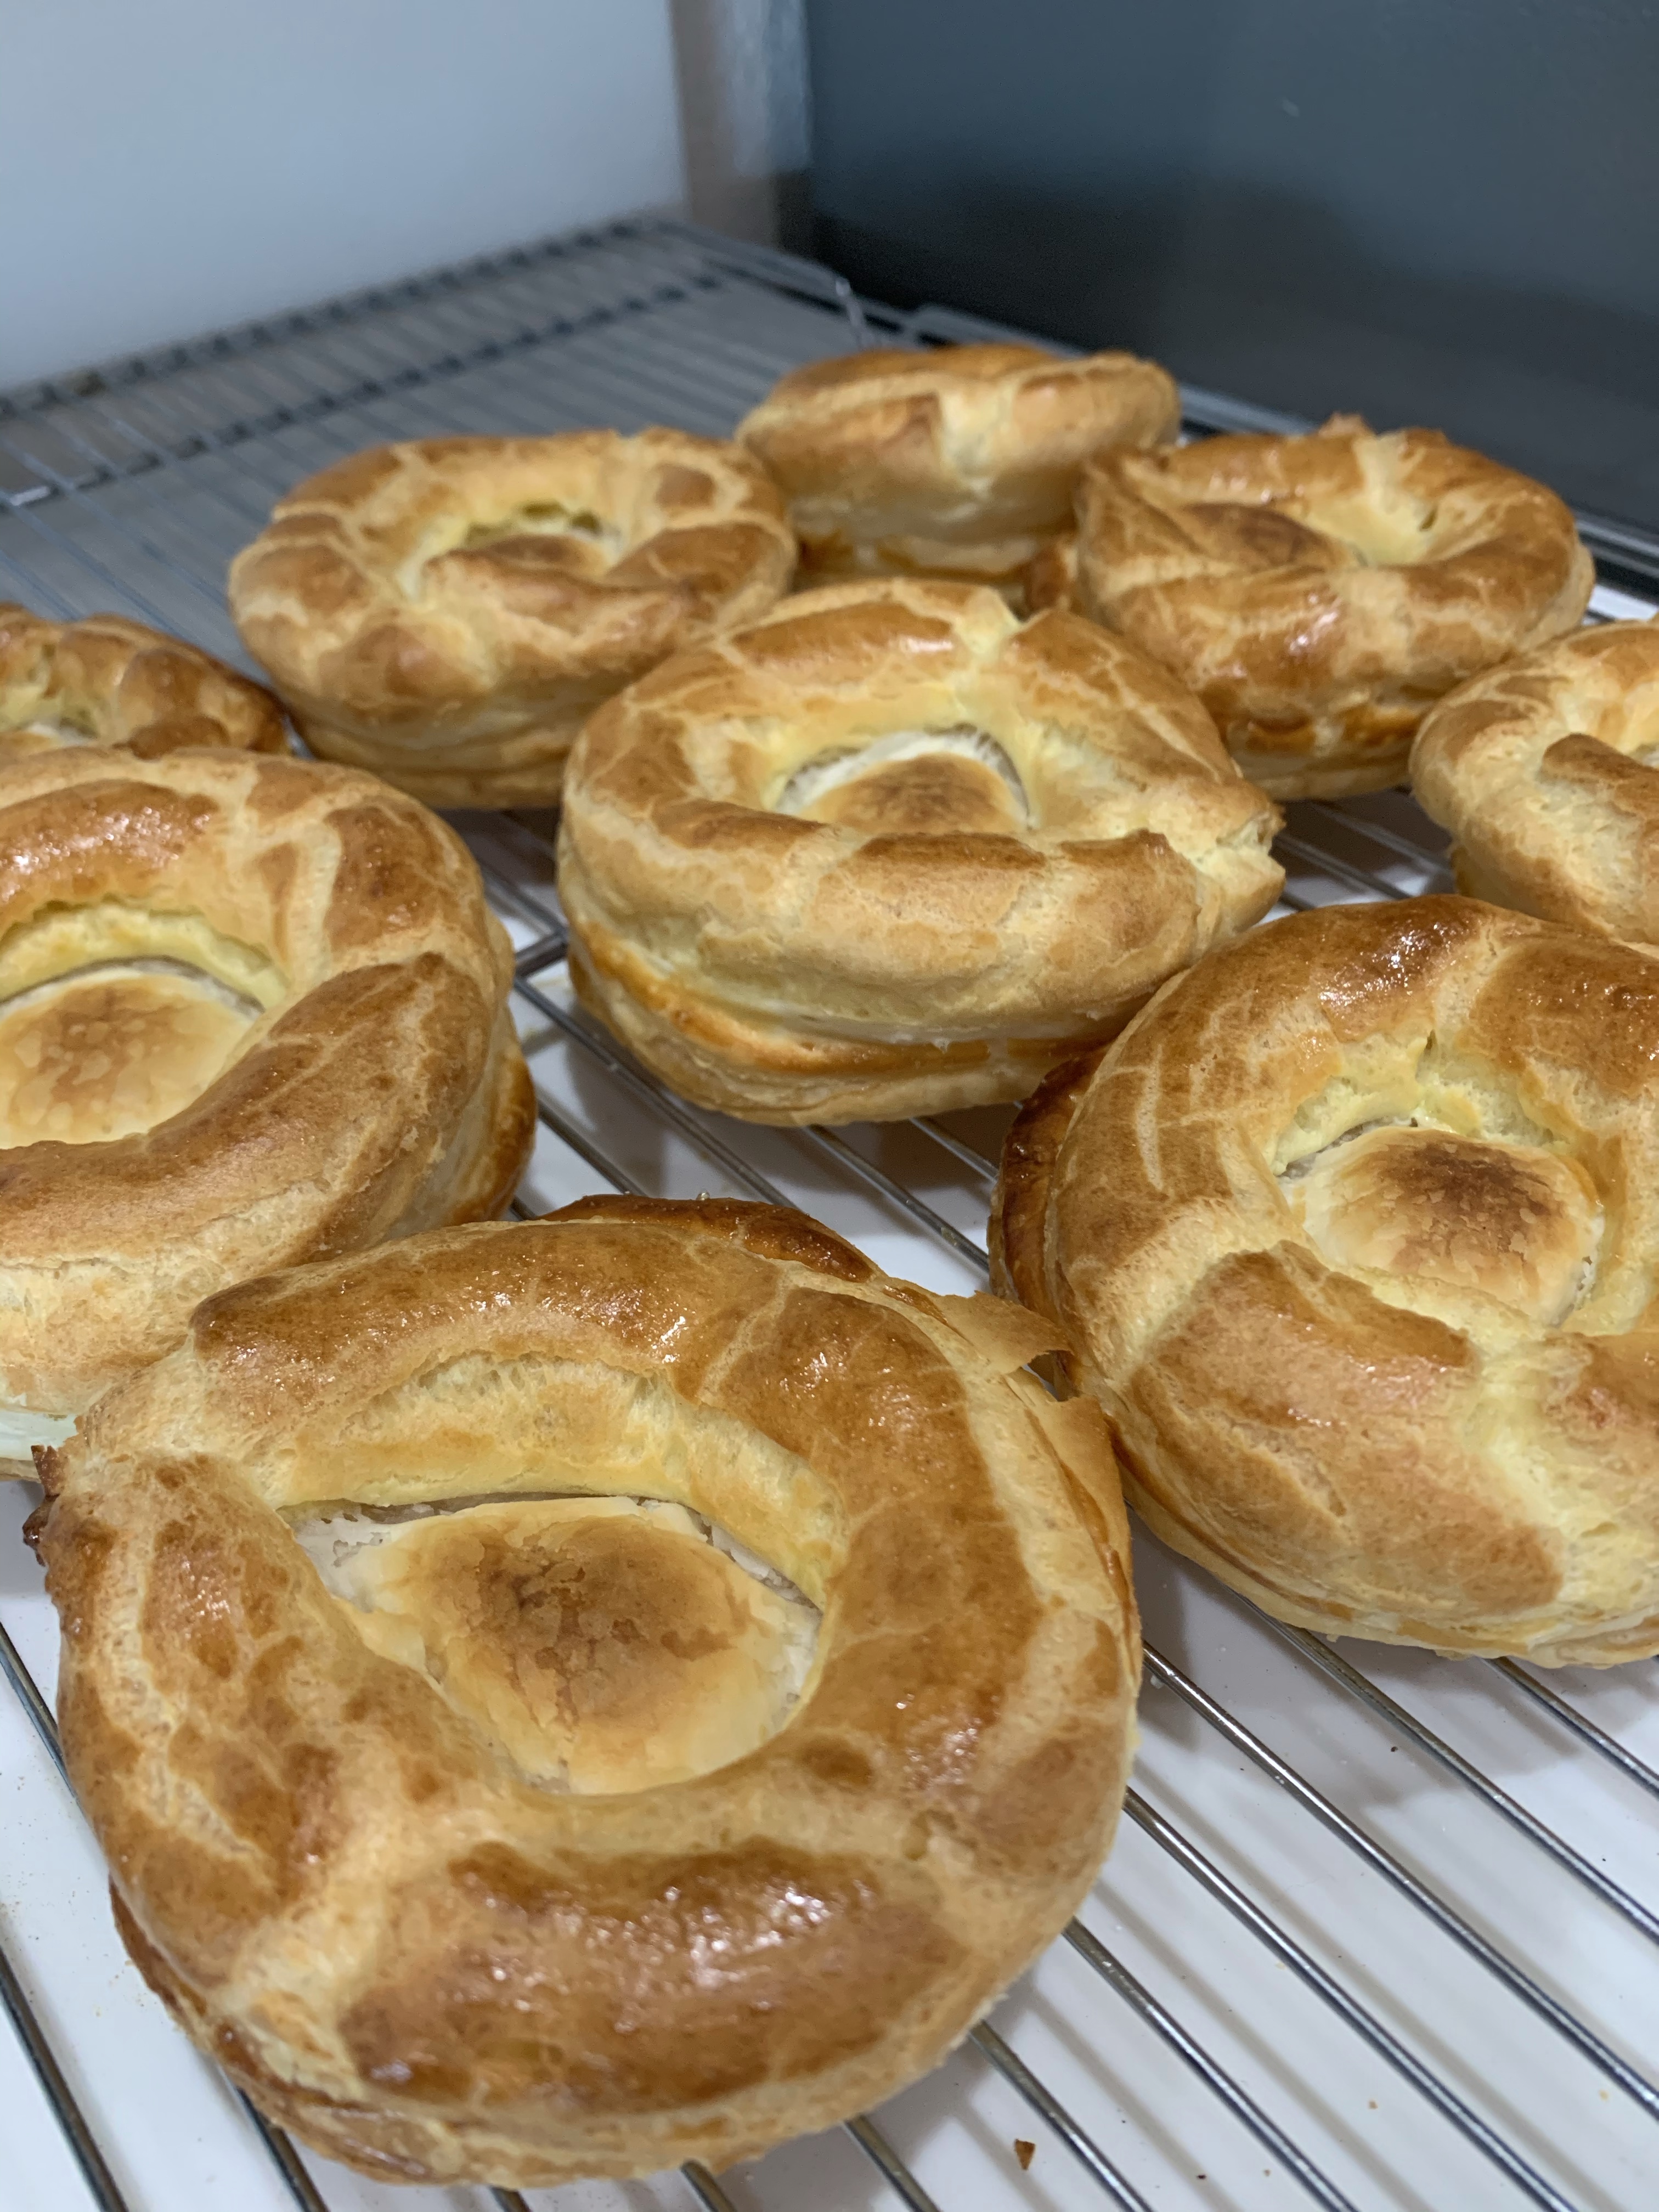
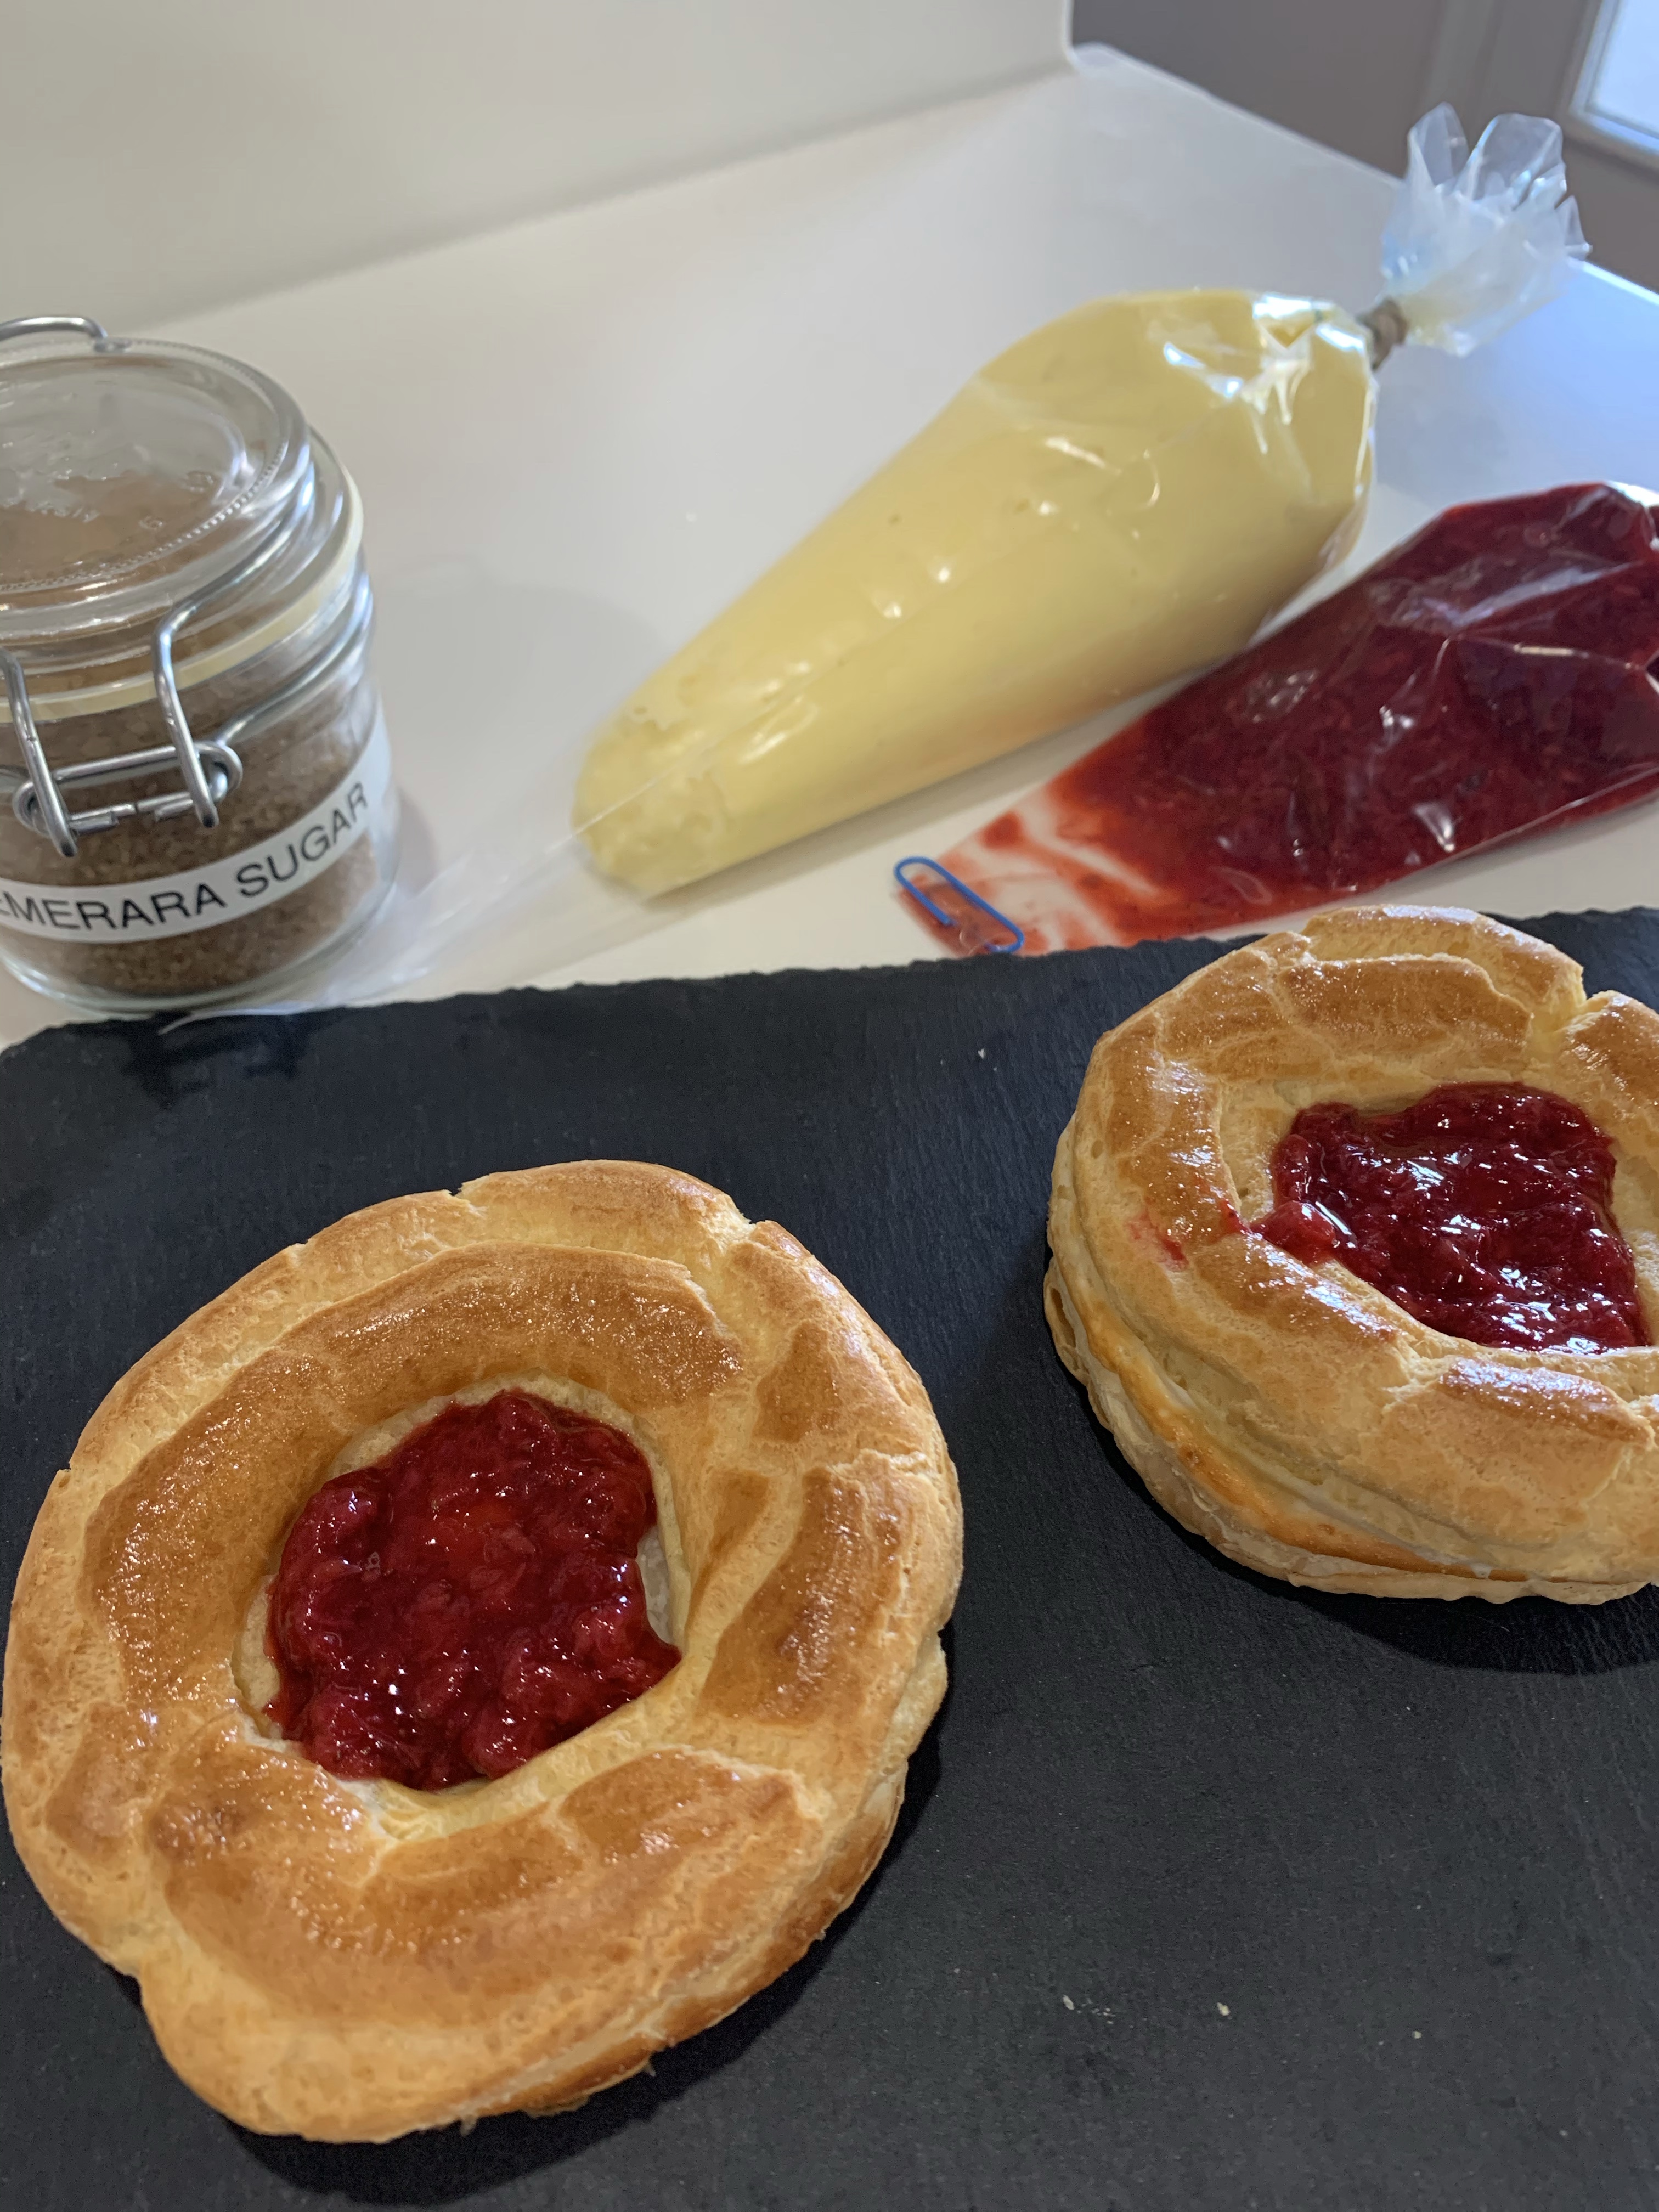
Upper left: Finished pastry shell. Top center: ready to fill. Upper right” Berry compote added. Bottom creme patisserie piped on pastry.
Left: Torching Demerara sugar. Center brûléed. Right: Completed pastry cut in half to show layering.
Puits d’Amour – ‘wells of love’
INGREDIENTS Puff pastry Compote: • 250g strawberries, hulled and chopped • 25g caster sugar • 1 tbsp lemon juice • 50g raspberries Crème Pâtissière: • ½ c sugar • ¼ c corn starch • Pinch salt • 2 c whole milk • 4 egg yolks • 2 Tbl butter 4 ½ tsp demerara sugar, to brûlée Choux Pastry: • ½ c (65 grams) AP flour • ½ tsp granulated white sugar • ¼ tsp salt • 4 tbsp (55 grams) unsalted butter, cut into pieces • ½ c (120 ml) water • 2 large eggs, lightly beaten Sparkling sugar
METHOD Compote
Add the strawberries to a pan with the sugar and lemon juice and cook over a medium heat for 10 minutes. Add the raspberries and cook for a further 5–10 minutes, until reduced to a thick compote (but not a jam). Remove from the heat, cool, then chill. Crème Pâtissière
Whisk eggs and milk together and add to all other ingredients (except vanilla) to a medium saucepan.
Bring to boil whisking constantly
Cook until thickened (it will look lumpy, its ok)
Sieve lumpy mixture into a bowl and add 1 tsp vanilla, mix thoroughly
When incorporated, cover with plastic directly on the cream and cool.
Remove from the heat and pass through a sieve into a clean bowl. Add the butter and stir until melted. Leave to cool, cover with cling film and chill until cold.
Cut Pastry Disks
Heat the oven to 220°C/200°C fan/425°F/Gas 7. Lightly dust your worktop and roll out the rough puff to a 35cm square. Using the 10cm cutter, cut out 9 discs. Place on the baking sheets and prick each disc all over with a fork. Chill for 30 minutes. Choux
In a bowl whisk the flour with the sugar and salt.
Place the butter and water in a saucepan over medium high heat and bring to a boil.
Remove from heat and, with a wooden spoon, add the flour mixture, all at once, and stir until combined. It will look like mashed potatoes. Return saucepan to the heat and stir constantly until the dough comes away from the sides of the pan and forms a thick smooth ball (about 1-2 minutes). The dough will film the bottom and sides of the saucepan and make cleaning a pain.
Transfer the dough to an electric mixer and beat on low speed to release the steam from the dough (about 1 minute).
Once the dough is lukewarm start adding the lightly beaten eggs (dough will separate and then come together) and continue to mix until you have a smooth thick paste (dough will fall from a spoon in a thick ribbon).
Pipe the choux in a circle ½cm in from the edge of each disc. Brush each choux ring with beaten egg and sprinkle with sparkling sugar. Bake for 20–25 minutes, until puffed, crisp and golden. Remove from the oven and transfer to a wire rack to cool completely.
To assemble, spoon the crème pâtissière into a piping bag fitted with a 1.5cm plain nozzle. Spoon the strawberry compote into the pastry shells and pipe the crème pâtissière over the top. Sprinkle half a teaspoon of demerara sugar on top and, using a blowtorch, brûlée the sugar. Serve immediately.
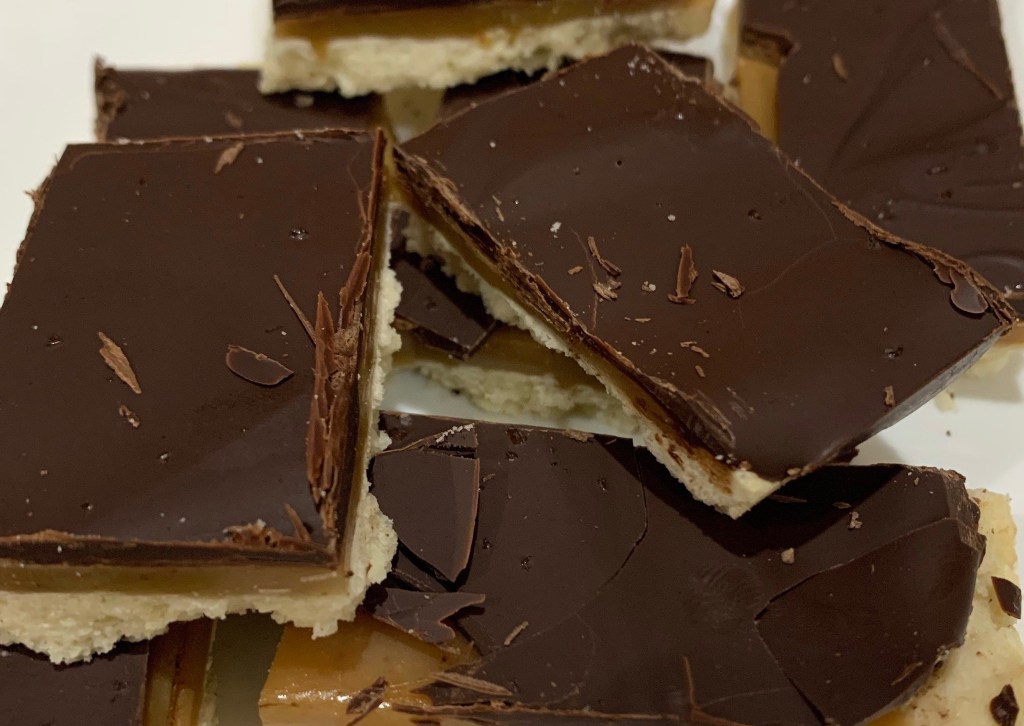
I saw these on GBBO and decided to give them a go. (Kind of English slang for “try to make them”.) Millionaires Bars are layers of shortbread, caramel and chocolate.
I used a jelly roll pan, which is about 25% bigger than the specified pan. This caused each layer to be thinner than I expected. As they were setting I considered increasing the recipe quantities by about 50%. After cutting and eating them I think I am going to leave them the way they are. They ended up being about 1/4” thick and if I cut them into 1” square pieces they will be perfect bite sized pieces.
Self induced problems: 1) Forgot to use the parchment paper making me worry about releasing the bar from the jelly roll pan. No problem. I cut around the outside and across the center. Each large piece came out easily. 2) I should have poured the chocolate on the caramel before it set. Not doing so caused the chocolate to not adhere to the caramel. Cutting the bars into 1” squares, so you can just pop them into your mouth without taking a bite and “breaking” them, converts the problem into an enhancement.
Overall, these are delicious cookies. The caramel was heated to 242 deg which made it a perfect softness and texture. The chocolate wasn’t tempered but resulted in a nice layer with a good snap. The short bread base was difficult to push to the edges of the pan, but perhaps rolling it out before placing in the pan would help. I also skipped the macadamia nuts as my pantry was bare. If you saw my pantry, you wouldn’t believe that possible.
INGREDIENTS • ⅓ cup granulated sugar • 1⅓ cups unsalted butter, softened and divided, plus more for greasing • 1¾ cups all-purpose flour • ½ tsp. table salt • ¾ cup packed light brown sugar • ⅓ cup sweetened condensed milk • 3 tbsp. golden cane syrup (or honey as a substitute) • 1 tsp. flaky sea salt • 7 oz. dark chocolate baking bar, chopped • ½ cup coarsely chopped macadamia nuts
METHOD
Preheat oven to 300°. Grease a shallow 11×7-inch baking dish with butter.
Line baking dish with parchment paper, allowing paper to extend by 2 inches on each side; grease parchment.
Beat granulated sugar and 2/3 cup butter in a large bowl with an electric mixer on medium speed until light and fluffy, 2 to 3 minutes. Add flour and table salt; stir with a spoon, and then combine with your hands to form a smooth dough (try not to overwork it). I ended up adding a couple of Tbl water to the dough so it would come together,
Press dough into pan in an even layer, and prick surface all over with a fork. Bake in preheated oven until pale golden and cooked through, 30 to 35 minutes. Cool completely in pan, about 45 minutes.
Combine brown sugar, condensed milk, golden syrup (or honey) and remaining 2/3 cup butter in a medium-size heavy saucepan over medium heat. Cook, stirring often, until butter melts and mixture is smooth, about 3 minutes. Bring to a boil, and cook, stirring constantly, until the caramel bubbles become larger, mixture thickens and turns a rich, glossy caramel color, about 10 to 12 minutes. Pour caramel evenly over the shortbread, and sprinkle with sea salt. Cool completely until set, about 1 hour.
Melt chocolate, stirring often, in a heatproof bowl suspended over a pan of simmering water, making sure the bottom of the bowl doesn’t touch the water. Pour melted chocolate evenly over caramel layer; spread with an offset spatula until level and smooth. Sprinkle with nuts. Let stand until chocolate is set, about 1 hour. Use a knife to release ends of bars from pan; use the parchment paper as handle to remove from pan. Cut into bars.
Every Little Leaguer heard to “keep their eye on the ball” ad nauseam. It’s good advice—in more ways than being able to hit a ball.
I had some fresh blueberries and a sheet of puff pastry left over from a previous bake so decided to make some blueberry hand pies. At the same time, as long as the over was hot, I made our granddaughters’ heart shaped Valentine’s Day cakes.
I made the blueberry filling and set it aside to cool to room temperature, then made the two cakes (plus five cupcakes from the extra batter. QC has to have her input, doesn’t she?) I rolled out the puff pastry, cut it into 9 pieces about 3.5” square, put about a half teaspoon of filling on one side, painted half with an egg wash, folded each square into a triangle and sealed the edge with a fork before slashing a small vent hole in the top. Cover with egg wash, a sprinkling of sparkling sugar and put into in the oven at 425 deg for 18 minutes. (The directions said 18- 22 min.)
Well… there’s 18 minutes, and then there’s 18 minutes. In this case 18 minutes was about 3 minutes too long. My hand pies were “well done,” instead of “just right” done. I did not keep my eye on the ball… or the hand pies. QC said they tasted fine, but were too dark to leave the bakery. Oh the trials and tribulations of being the QC department for such a demanding Manufacturing organization. Lesson learned.
The cakes and cupcakes were perfect. More on that closer to Valentine’s Day.
I tried something new today. I use my sous vide for many, many things, but never thought of using it for tempering chocolate. I researched online and the sous vide companies described several different techniques. The problem with them is they bag the chocolate, like you would a steak, and heat and cool it in the bag. I wanted to dip my chocolates, so decided to use a pan to hold the chocolate. I had to be careful as any water that splashed into the melted chocolate would seize and ruin it. (I managed to temper 3 batches with no failures.
I made sure the large pot, plus sous vide was just big enough to allow the sauce pan to sit in the water without tipping too much. It also let the water circulate from the sous vide without splashing.
By the third batch I had the timing down. Setting the sous vide temperature a few degrees higher, or lower, than the chocolate required compensated for our ambient room temperature of 64 deg. I was using dark chocolate so set the sous vide to 126 deg and let the chocolate heat to 122 deg F and hold until I was sure it was all at temperature. That’s the beauty of using the sous vide to temper. It will hold indefinitely at any temperature you select. I then removed the sauce pan containing the melted chocolate, wiped the pan dry and set it aside before replacing 5 cups of water with 5 cups of ice, dropping the temperature to 75 deg. Returning the saucepan to the water quickly cooled the chocolate to 80 deg. I then set the temperature to 95 which held the chocolate in temper at 90 deg for over an hour.
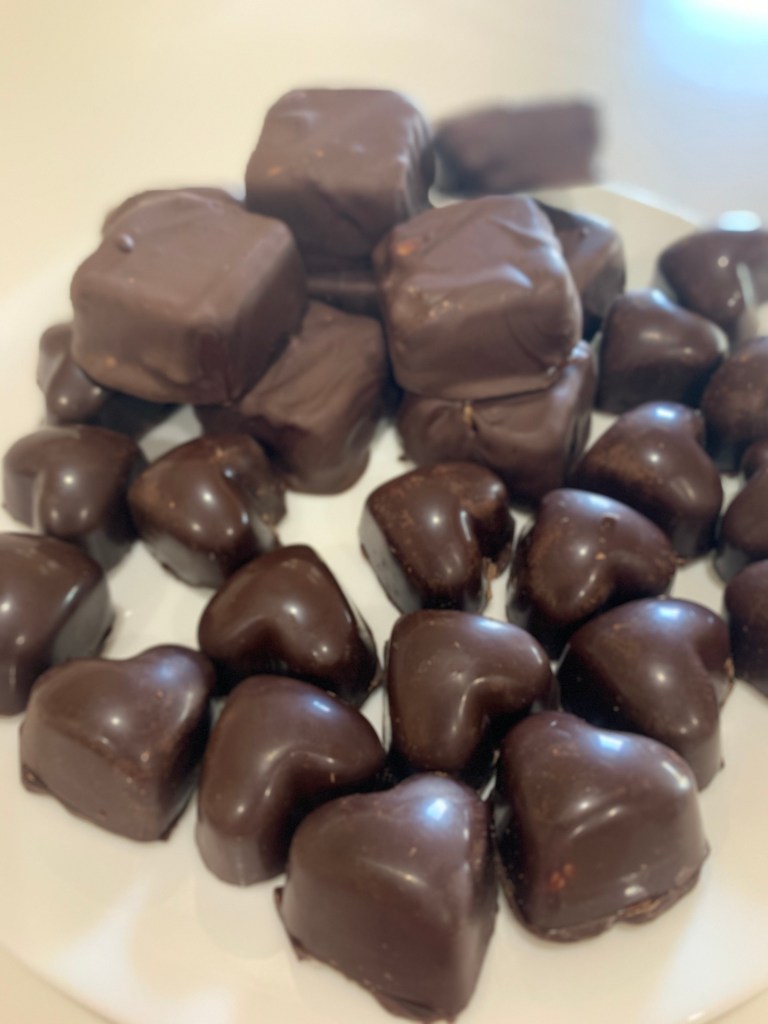
After making the centers by pouring the candy filling into a jelly roll pan, cooling and cutting into 1” x 2” pieces, I dipped to coat the Butterfingers candy bars. The resultant center was too thin for the candy bar. I then tried pouring it into a mold, but it was too thick. Nothing I have was “just right.” However, the flavor and texture was spot-on compared to the commercial candy bar.
I used a heart shaped polycarbonate mold to make the vanilla cream and Mounds Bar clone. (It is almost Valentines Day after all.) I made a half recipe although the recipe below is for a full recipe Two coats of tempered chocolate painted into the mold made a shell for the filling.
The vanilla cream readily piped into the mold, but the coconut was too dense and lumpy with the coconut so I greased my hands and rolled small balls of the mixture then pressed them into the shell. (I warmed the coconut mixture for the second batch and was able to pipe it.)
Once filled, a layer of tempered chocolate was poured over the top and the excess was scraped off. Tapping the cooled mold on the table released the finished candies.
Mounds Bars
INGREDIENTS • 5 oz condensed milk, sweetened • 1 tsp vanilla extract • 2 cups confectioners’ sugar • 14 oz coconut, shredded • 4 cups dark (64% cacao) couverture chocolate
METHOD
Mix the condensed milk and vanilla extract in a bowl.
Add the confectioners’ sugar a little at a time, blending until smooth.
Stir in the coconut.
Temper the chocolate and paint the inside of the mold. It will probably take 2 coats to completely cover the mold. Cool the chocolate between coats.
Grease you hands and roll a small quantity of the mixture into a ball and force into the chocolate coated mold.
Pour chocolate over the top and scrape off the excess. Chill until the top is firm.
Scrape any residual chocolate from the mold and tap on the counter to release.
Add the softened butter, meringue powder, light corn syrup, and water to your mixing bowl Using a stand mixer or a hand mixer beat until mixed completely, scraping the bowl to ensure everything is incorporated well.
Add fondant sugar and mix on low speed until the sugar is incorporated, then, beat on medium speed for about 1 minute until it all creams together.
Add invertase, and food coloring and mix well. This was my first recipe using invertase. It is a natural enzyme used to break down the sugar and change it from grainy to smooth.
Scoop the cream filling into a disposable pastry bag and twist the end tightly, securing with a clip or a rubber band.
INGREDIENTS • 1/3 cup light corn syrup • 1/3 cup water • 1 cup granulated sugar • 1 cup peanut butter • Spray Vegetable Oil (Pam, etc.) for keeping the knife lubricated in scoring • 1 Pound of Tempered Semi-Sweet Chocolate for dipping
METHOD
First begin by greasing a 12-by-17-inch jelly roll pan (with 1-inch sides) with safflower, vegetable or canola oil. Place the pan into a slightly warm oven to warm the pan while making the candy. (Don’t allow the pan to become hot, only barely warm to give you more time to spread and score the candy later.)
In a heavy 2-quart saucepan, combine the corn syrup and water, stirring well to combine. Place over medium-low heat and add the sugar. Cook the mixture, stirring constantly, until it is clear and then stirring often until it reaches a full boil. Clip on your calibrated candy thermometer, raise the heat to medium-high and continue to cook – without stirring – until the mixture reaches 310 degrees (F). During this cooking period, should sugar crystals form above the boiling line, carefully wipe away using a damp pastry brush, but be careful not to touch the boiling mixture. Rinse the pastry brush well – and make certain to blot-dry the brush well – between each swipe.
Remove your pan from the warming oven and place on your work surface.
Remove the candy from heat and add the peanut butter, stirring to blend completely using a clean wooden spoon. Working quickly, pour the mixture onto your well-greased jelly roll pan, and spread as evenly as possible. Score the mass with an oiled, heavy chef’s knife into 1-inch by 2-inch pieces, cutting at least half way through the candy. (The more quickly you do this, the easier and deeper your scoring will be.) It is helpful to spray the knife with cooking oil occasionally to aide the knife in scoring.
Allow the scored mixture to cool at room temperature about 2 hours. When cool and hard, complete cutting the scored pieces using a sharp, heavy knife (I like to use my Chinese cleaver here) and break into individual pieces.
Place the cut candies into the refrigerator while you temper your dipping chocolate and allow to chill for 15 to 30 minutes. Remove the candies from the fridge and dip each piece into the chocolate, then place on parchment paper to allow the chocolate to harden completely (About 3 hours).
Note: You can add a certain flair to the candy by taking a clean dinner fork and touching the tops of each freshly dipped piece raising lines of “peaks” (akin to meringue peaks). Just use the back of the fork laid parallel to the chocolate cops, touch, lift and slightly pull to one side. Looks pretty snazzy….
Store on waxed-paper sheets in an airtight container for up to two weeks.
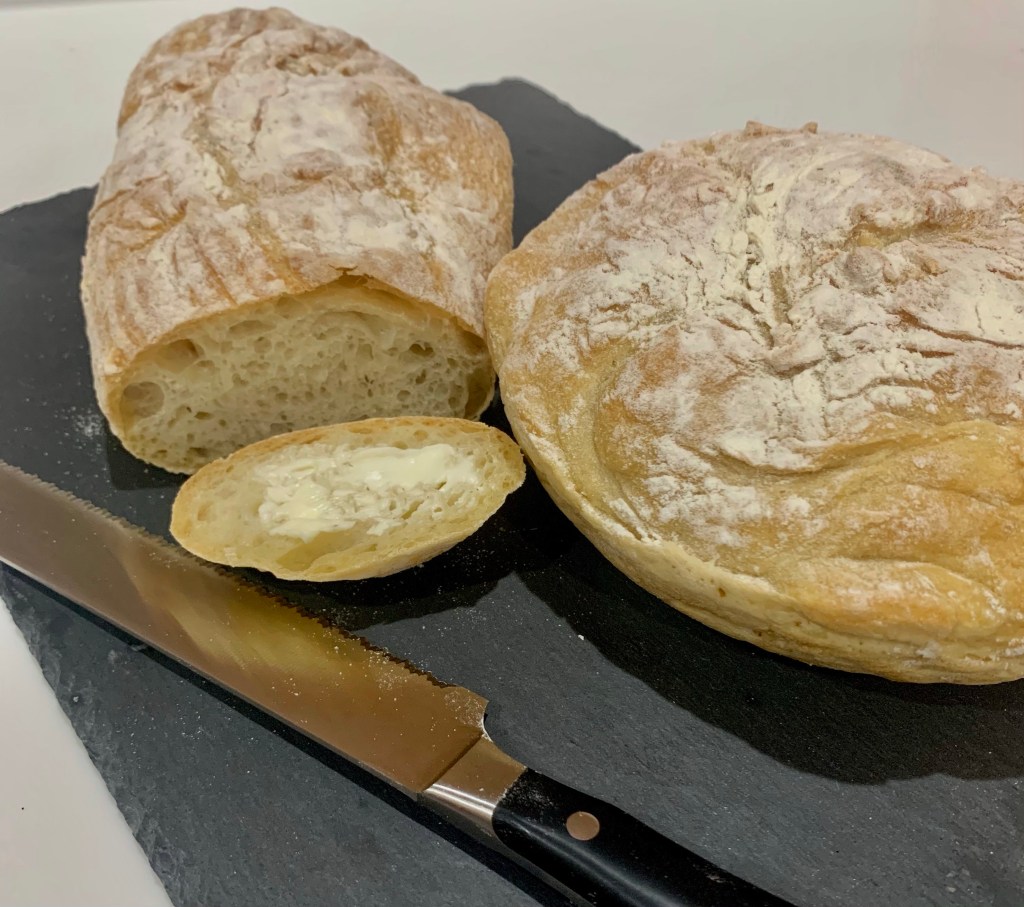
Pugliese is not the easiest of breads to make, but is one of the tastiest with wonderful crumb and crust. The recipe below calls for durum flour, but I substituted what I had on hand, which is Soft Wheat Flour Tipo “00”. This is a high hydration dough which means it is very hard to handle. It is very soft and very sticky and you don’t want to add extra flour to make it easier to handle as you will reduce the hydration.
Typically pugliese is made in round loaves, but I made one round and one batard, as those are the Dutch Ovens I have. Anyway, if you are up to it, and have some time, give this a try. It is one of the best breads I have ever made.
This is approx 82% (the recipe 3 X’s is approx 84%) total hydration dough. The recipe comes from Rose Levy Beranbaum ‘the bread bible’
INGREDIENTS Biga • 225 g – AP flour • 3/16th tsp – 0.6 g instant yeast • 177 g – water, at room temperature (70F to 90F) Dough • 213 g – All Purpose flour • 213 g – Duram Flour – or Soft Wheat Flour Tipo “00” • 1 ½ tsp – 4.8 g Instant Yeast • 15 g – salt • 354 g – water, at room temperature (70F to 90F) about 12 oz
METHOD
6 hours or up to 3 days ahead, make the biga. Use the “Ultimate Flavor” method (let the biga to ferment for 12-24 hours at 55-65 deg, then store in the fridge.)
Combine all the biga ingredients in a large bowl and stir the mixture until smooth and pulls away from the side of the bowl…3 to 5 minutes. It should be sticky enough to cling to your fingers. Cover the bowl, with oiled plastic or lid and set aside until tripled and filled with bubbles ~6 hours. Stir it down and use it, or refrigerate it up to 3 days.
In a large bowl, dissolve the biga in the water… a few little undissolved pieces are ok.
Whisk together flours, yeast. Add salt and whisk again.
Add the flour mixture to the biga and water and mix until wet and combined.
Autolyze for ~50 minutes
Stretch and fold 3 times.
Repeat stretch and fold 3 or 4 times -30 minutes apart,
After dough forms good gluten strands, (I cut the dough in half here as I didn’t have a proofing container big enough to proof this large a recipe,) form a ball, and cover, letting it rise in a (ideally 75F to 80F) until tripled…about 2 hours.
Preheat oven and Dutch ovens to 500F.
1 hour before baking pour the dough out of the bowl onto lightly floured surface and cut it in half. With very few gentle motions pull it over itself into a rough ball. Gently pick it up and drop it seam side up into the floured banneton. Sprinkle top lightly with flour, and cover with oiled plastic wrap. Allow to rise until it has increased by about 1 ½ times, up to 1 ½ hours. It will just start to push up the plastic. Dust with a little flour and score the top with 3 or 4 large slashes.
Bake with steam turning down the oven after the first five minutes and then continue baking with steam for 12 minutes total at 450F or adjusting your ovens temperature to bake the loaves for ~20 minutes, until deep golden brown….leave loaves in off oven with door ajar for 5 to 10 minutes
Actually, it is a lemon knot in my stomach. Dan and Frances gave me some lemons from a neighbor’s tree, permission granted of course. I happen to see a simple recipe for Lemon Knots and decided that would be a great place to use one of the lemons. It was.
It is a very easy recipe, especially since I do not make my own puff pastry. I tried rough puff once, but found the full puff purchased in the market is better than what I could make at home. I may make full puff one day, just for the experience. I’m thinking about it. No promises.
Now, what to do with the other 11 lemons….
I added some sparkling sugar after the egg wash. It provides a little crunch and sweetness balance to the lemon zest.