Pao de Queijo (Brazilian Cheese Bread)

A friend posted a website displaying this “Brazilian cheese bread” indicating they are kosher for Passover. My problem is the website, from Brazil, is in Portuguese. Sleuthlike, I found the recipe for Pao de Queijo (cheese bread) in several of my usual suspect sources.723deb77-6193-4bd9-a5d6-2fd75ffa1f04
The first recipe used a combination of sweet manioc (Polvilho Doce) and sour manioc (Polvilho Azeri) flour, found at your local Brazilian market (Seabra Market, Military Rd and Sample.) This flour is made from tapioca or yucca which is used in place of wheat flour in Northern Brazil where wheat is almost impossible to grow. The sour manioc is made by fermenting the plain manioc. The recipe also called for minas cheese, freshly grated. Minas cheese is sorta a softer Parmesian, maybe mixed with a little 15f394c4-d35b-424a-be73-f4ac51835c9bProvolone. Amazingly, Seabra had this cheese, also amazingly, when baked, these rolls puffed up as if they were a yeast based bread.

The second recipe only used tapioca flour (found at Fresh Market) or Polvilho Doce, and butter instead of vegetable oil. Both versions are good but the second was definitely sweeter, perhaps more “American.”

AMERICANIZED BRAZILIAN CHEESE ROLLS

INGREDIENTS

  • 1/2 cup butter
  • 1/3 cup water
  • 1/3 cup milk
  • 1 teaspoon salt
  • 2 cups tapioca or povilho doce flour
  • 2 teaspoons minced garlic
  • 2/3 cup freshly grated Minas or Parmesan cheese
  • 2 beaten eggs

DIRECTIONS

  1. Preheat oven to 375 degrees F (190 degrees C).
  2. Pour butter, water, milk, and salt into a large saucepan, and place over high heat. When the mixture comes to a boil, remove from heat immediately, and stir in flour and garlic until smooth. Set aside to rest for 10 to 15 minutes.
  3. Stir the cheese and egg into the tapioca mixture until well combined, the mixture will be chunky like cottage cheese. Drop rounded, 1/4 cup-sized (I used an ice cream scoop) balls of the mixture onto a parchment paper lined baking sheet.
  4. Bake in preheated oven until the tops are lightly browned, 15 to 20 minutes.

TRADITIONAL BRAZILIAN CHEESE ROLL RECIPE

INGREDIENTS

  • 2cups finely grated fresh Parmesan (or Pecorino Romano)
  • 2large eggs
  • 2large egg yolks
  • 1 1/4cups sour manioc starch (povilho azedo; see source in headnote)
  • 3/4cup manioc starch or sweet manioc starch (povilho doce; see source in headnote)
  • 2teaspoons kosher salt
  • 1/2cup whole milk
  • 1/2cup water
  • 1/4cup plus 3 tablespoons extra-virgin olive oil
  • Pinch of ground nutmeg
  • Pinch of cayenne pepper
  • Pinch of black pepper

DIRECTIONS

  • Place the Parmesan in the bowl of a food processor. Add the eggs and yolks and blend until you have a smooth paste, about 1 minute.
  • Place the two types of manioc starch and salt in the bowl of a stand mixer fitted with the paddle attachment.
  • Place the milk, water, and oil in a small saucepan, and bring to a boil. Immediately pour the milk mixture into the starch mixture, all at once, and turn the machine on at low speed. Mix until the dough is smooth and the starch is completely incorporated, about 2 minutes.
  • Pause the machine and add the cheese-egg paste, scraping it directly into the manioc starch mixture. Add the nutmeg, cayenne, and black pepper, and mix the dough at low speed until it turns a pale yellow, about 10 minutes. You are trying to develop the structure of the dough by kneading it slowly. The dough should feel a bit sticky and moist.
  • Transfer the dough to a bowl, cover it with plastic wrap, and refrigerate for at least 2 hours, or overnight.
  • Preheat the oven to 350°F (175°C). Line a baking sheet with parchment paper.
  • Lightly coat your hands with olive oil (or flour them with manioc starch), pinch off walnut-size pieces of dough, and roll them between your palms. Alternately, you can use an ice-cream scooper to make 1-inch balls. Place them on the parchment, leaving 1 1/2 to 2 inches between the rolls.
  • Bake the cheese rolls in the oven until they puff up and are lightly golden brown, 12 to 14 minutes. To ensure even cooking, rotate the pan once during baking time.
  • Remove the baking sheet from the oven and place the rolls in a basket lined with a napkin. Serve immediately, while they are still at their warmest and chewiest.

Read more at http://leitesculinaria.com/32757/recipes-brazilian-cheese-rolls.html#2KPPv5drEZfamtKo.99


Meringue Cups, Not Hwy 66 – Revisited

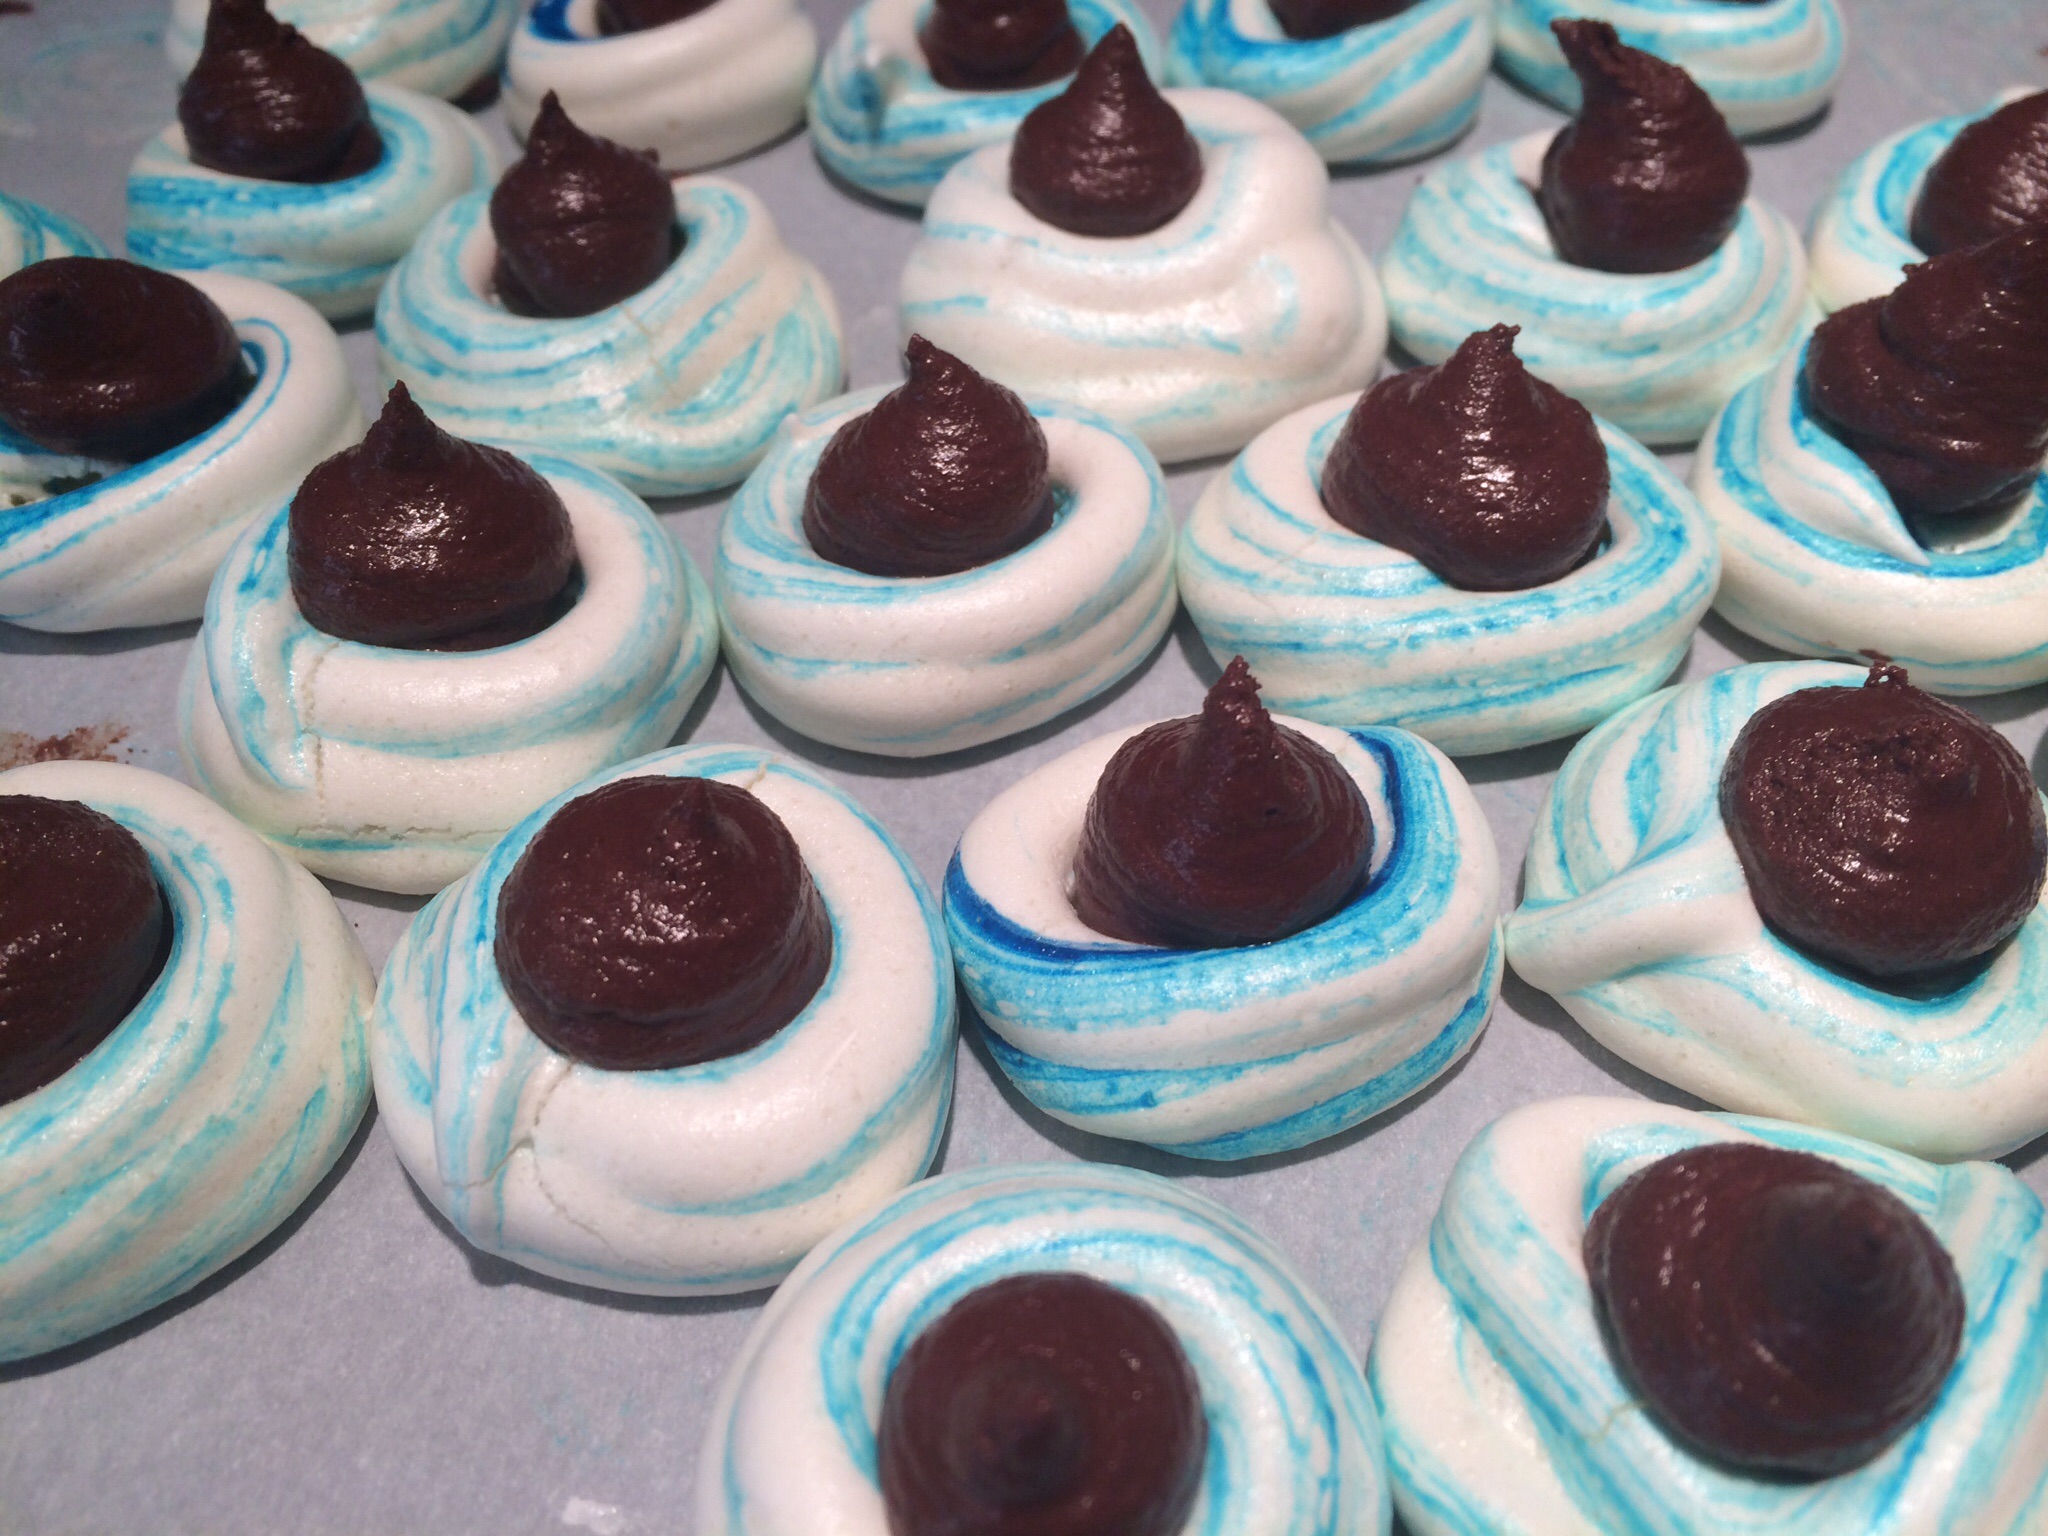
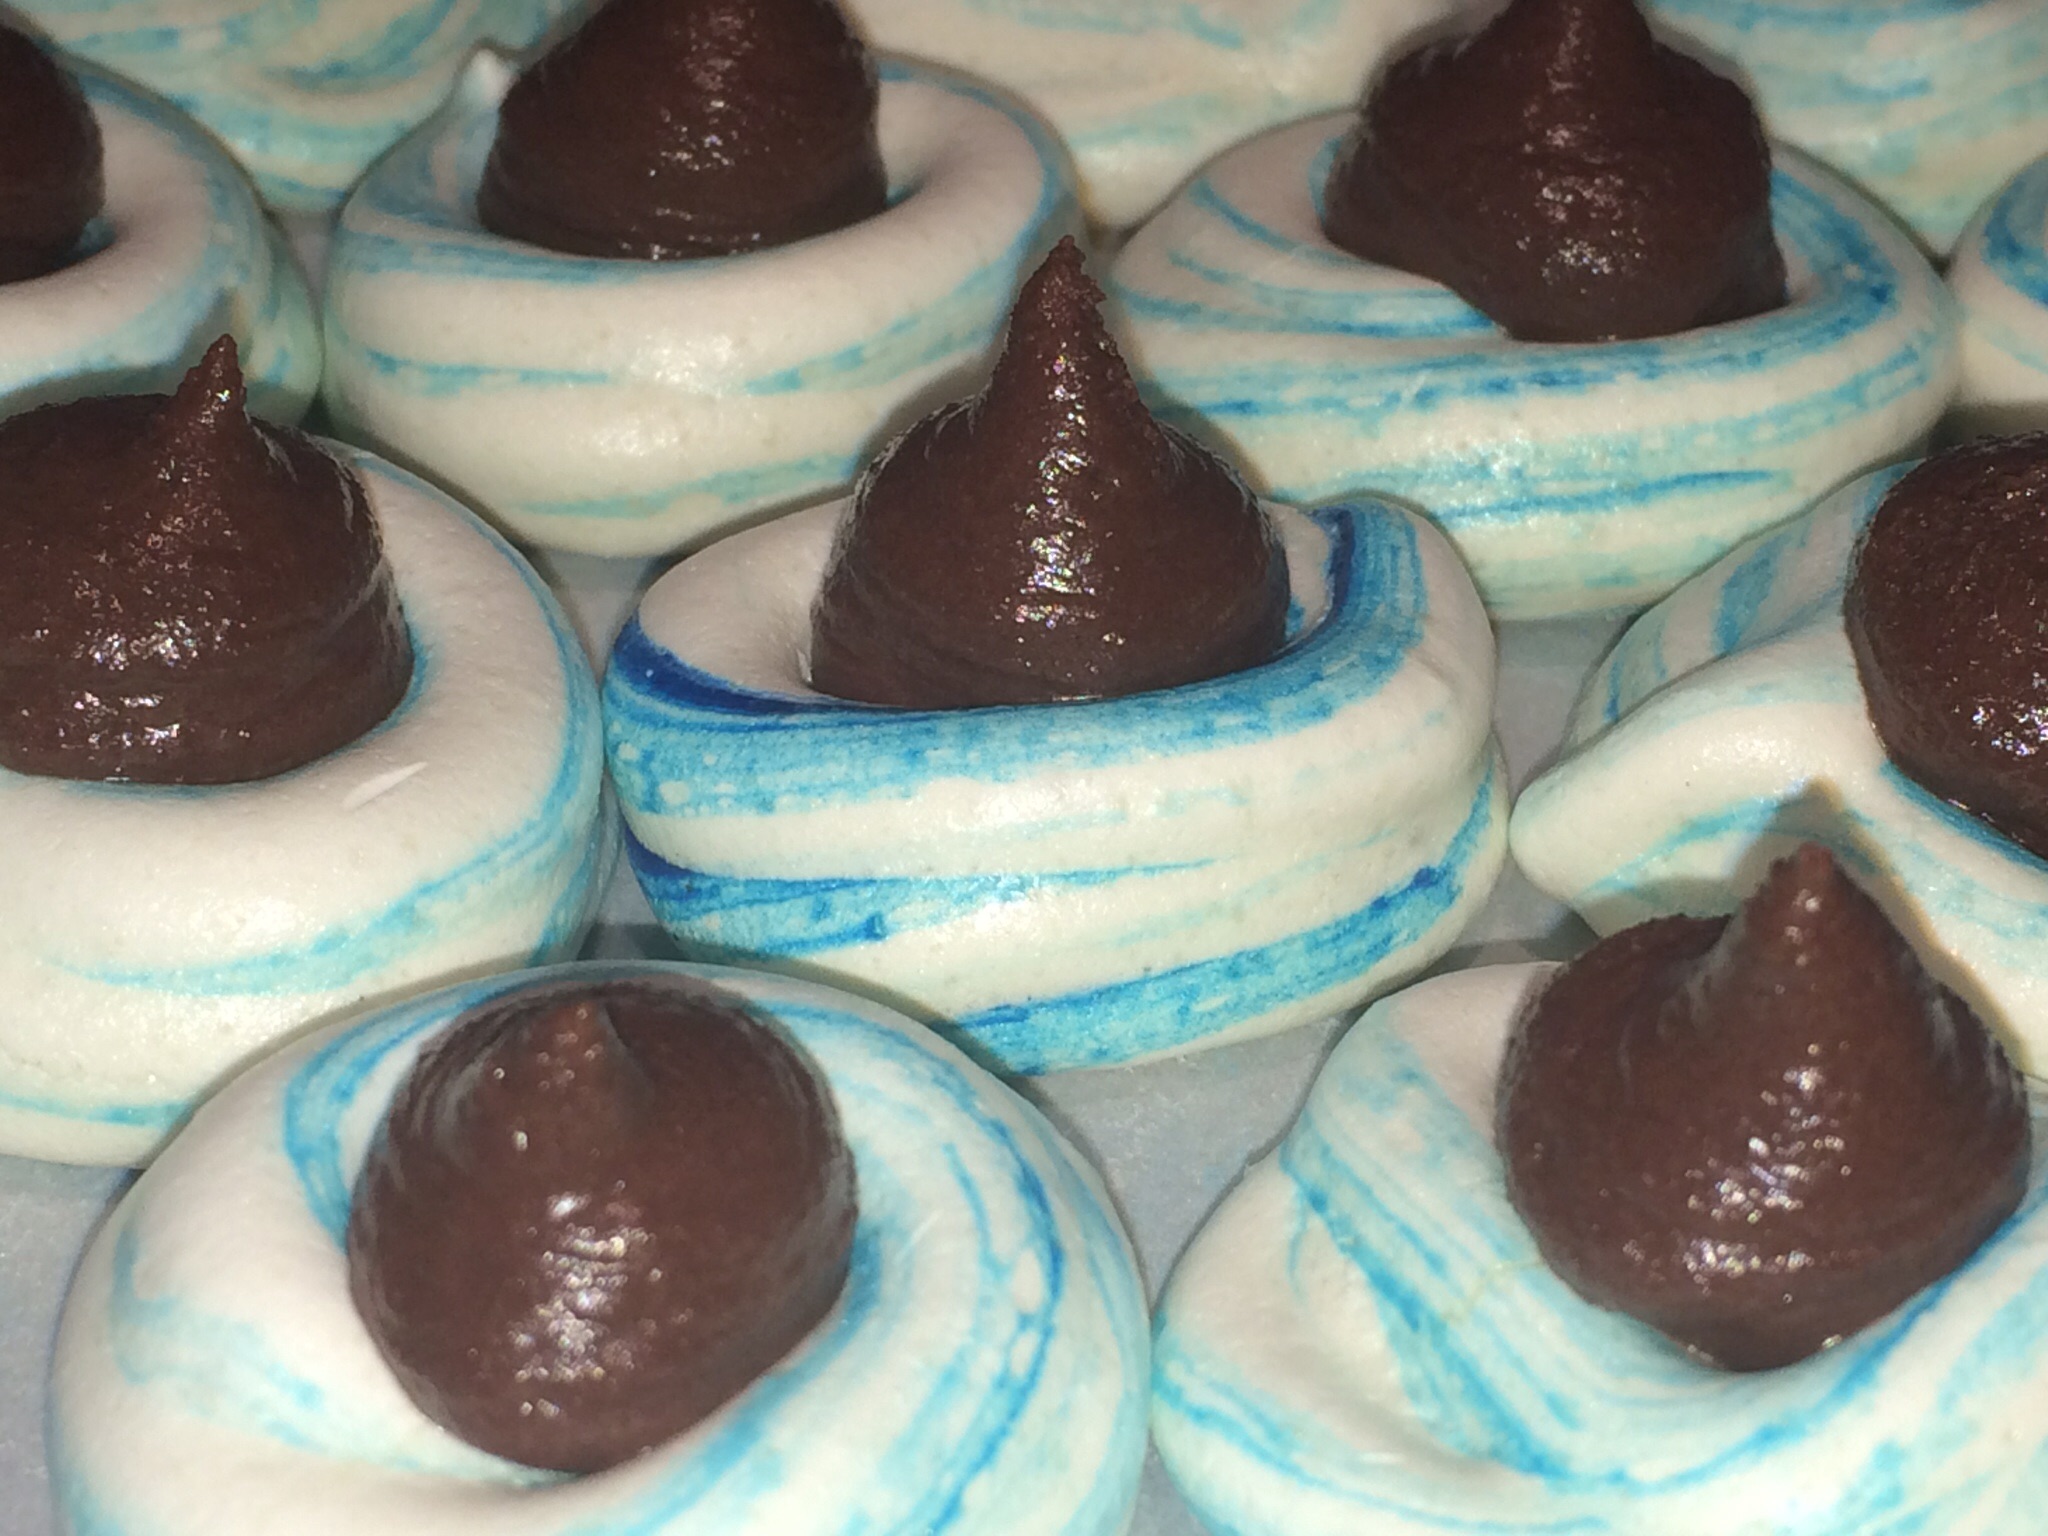
I had the occasion to make a batch of meringue cups today and thought I would try a variation to the ganache filling I typically use. While researching another recipe on Allrecipies I saw that if, after the unsweetened, grated chocolate (4 oz) is melted in the just barely boiling heavy cream (1/2 cup) the mixture is allowed to cool to room temperature, then whipped soundly (about the head and shoulders), it will become a lighter whipped ganache which is easy to pipe into designs, or as in my case bitter kisses. The sweetness of the meringue cup paired with the bitter chocolate results in a well balanced treat.image image

(After taking the picture i decided to add some blue sugar crystals to sweeten the meringue cups up a bit. Obviously, it’s up to you)

Once, I Bared My Soul

Once upon a midnight dreary, while I pondered, weak and weary,
Over many a quaint and curious volume of forgotten lore,
While I nodded, nearly napping, suddenly there came a tapping,
As of some one gently rapping, rapping at my chamber door.

E.A. Poe

Once, though not at midnight, nowhere near midnight,
Perhaps while reading, certainly while napping and
My chamber door is almost never closed…
I bared my soul and to my everlasting surprise
There, hidden deep inside, at the core, was a
Crypt Keeper Stout waiting to be poured.

Stout and Bottle

Cool, not cold and impenetrably midnight dark, smooth and sweet with hints of coffee and roasted barley. Gently carbonated with a velvet texture where a sip will fill your mouth with sweet softness. Curiously, were you to reverse the metaphor and put velvet into your mouth it would unlikely bring memories of Crypt Keeper Stout to mind.

As I pondered late one dreary morning on this delight of nature and chemistry, I wondered what would happen if I replaced some of the Weyermann Carafa II malt with chocolate grain and added 4.5 oz of chocolate nibs which were soaked for 48 hours in vodka to the secondary fermenter.

Time will tell. Time will tell.

Caramelized Pineapple/Mango Salsa Blackened Choose Your Fish

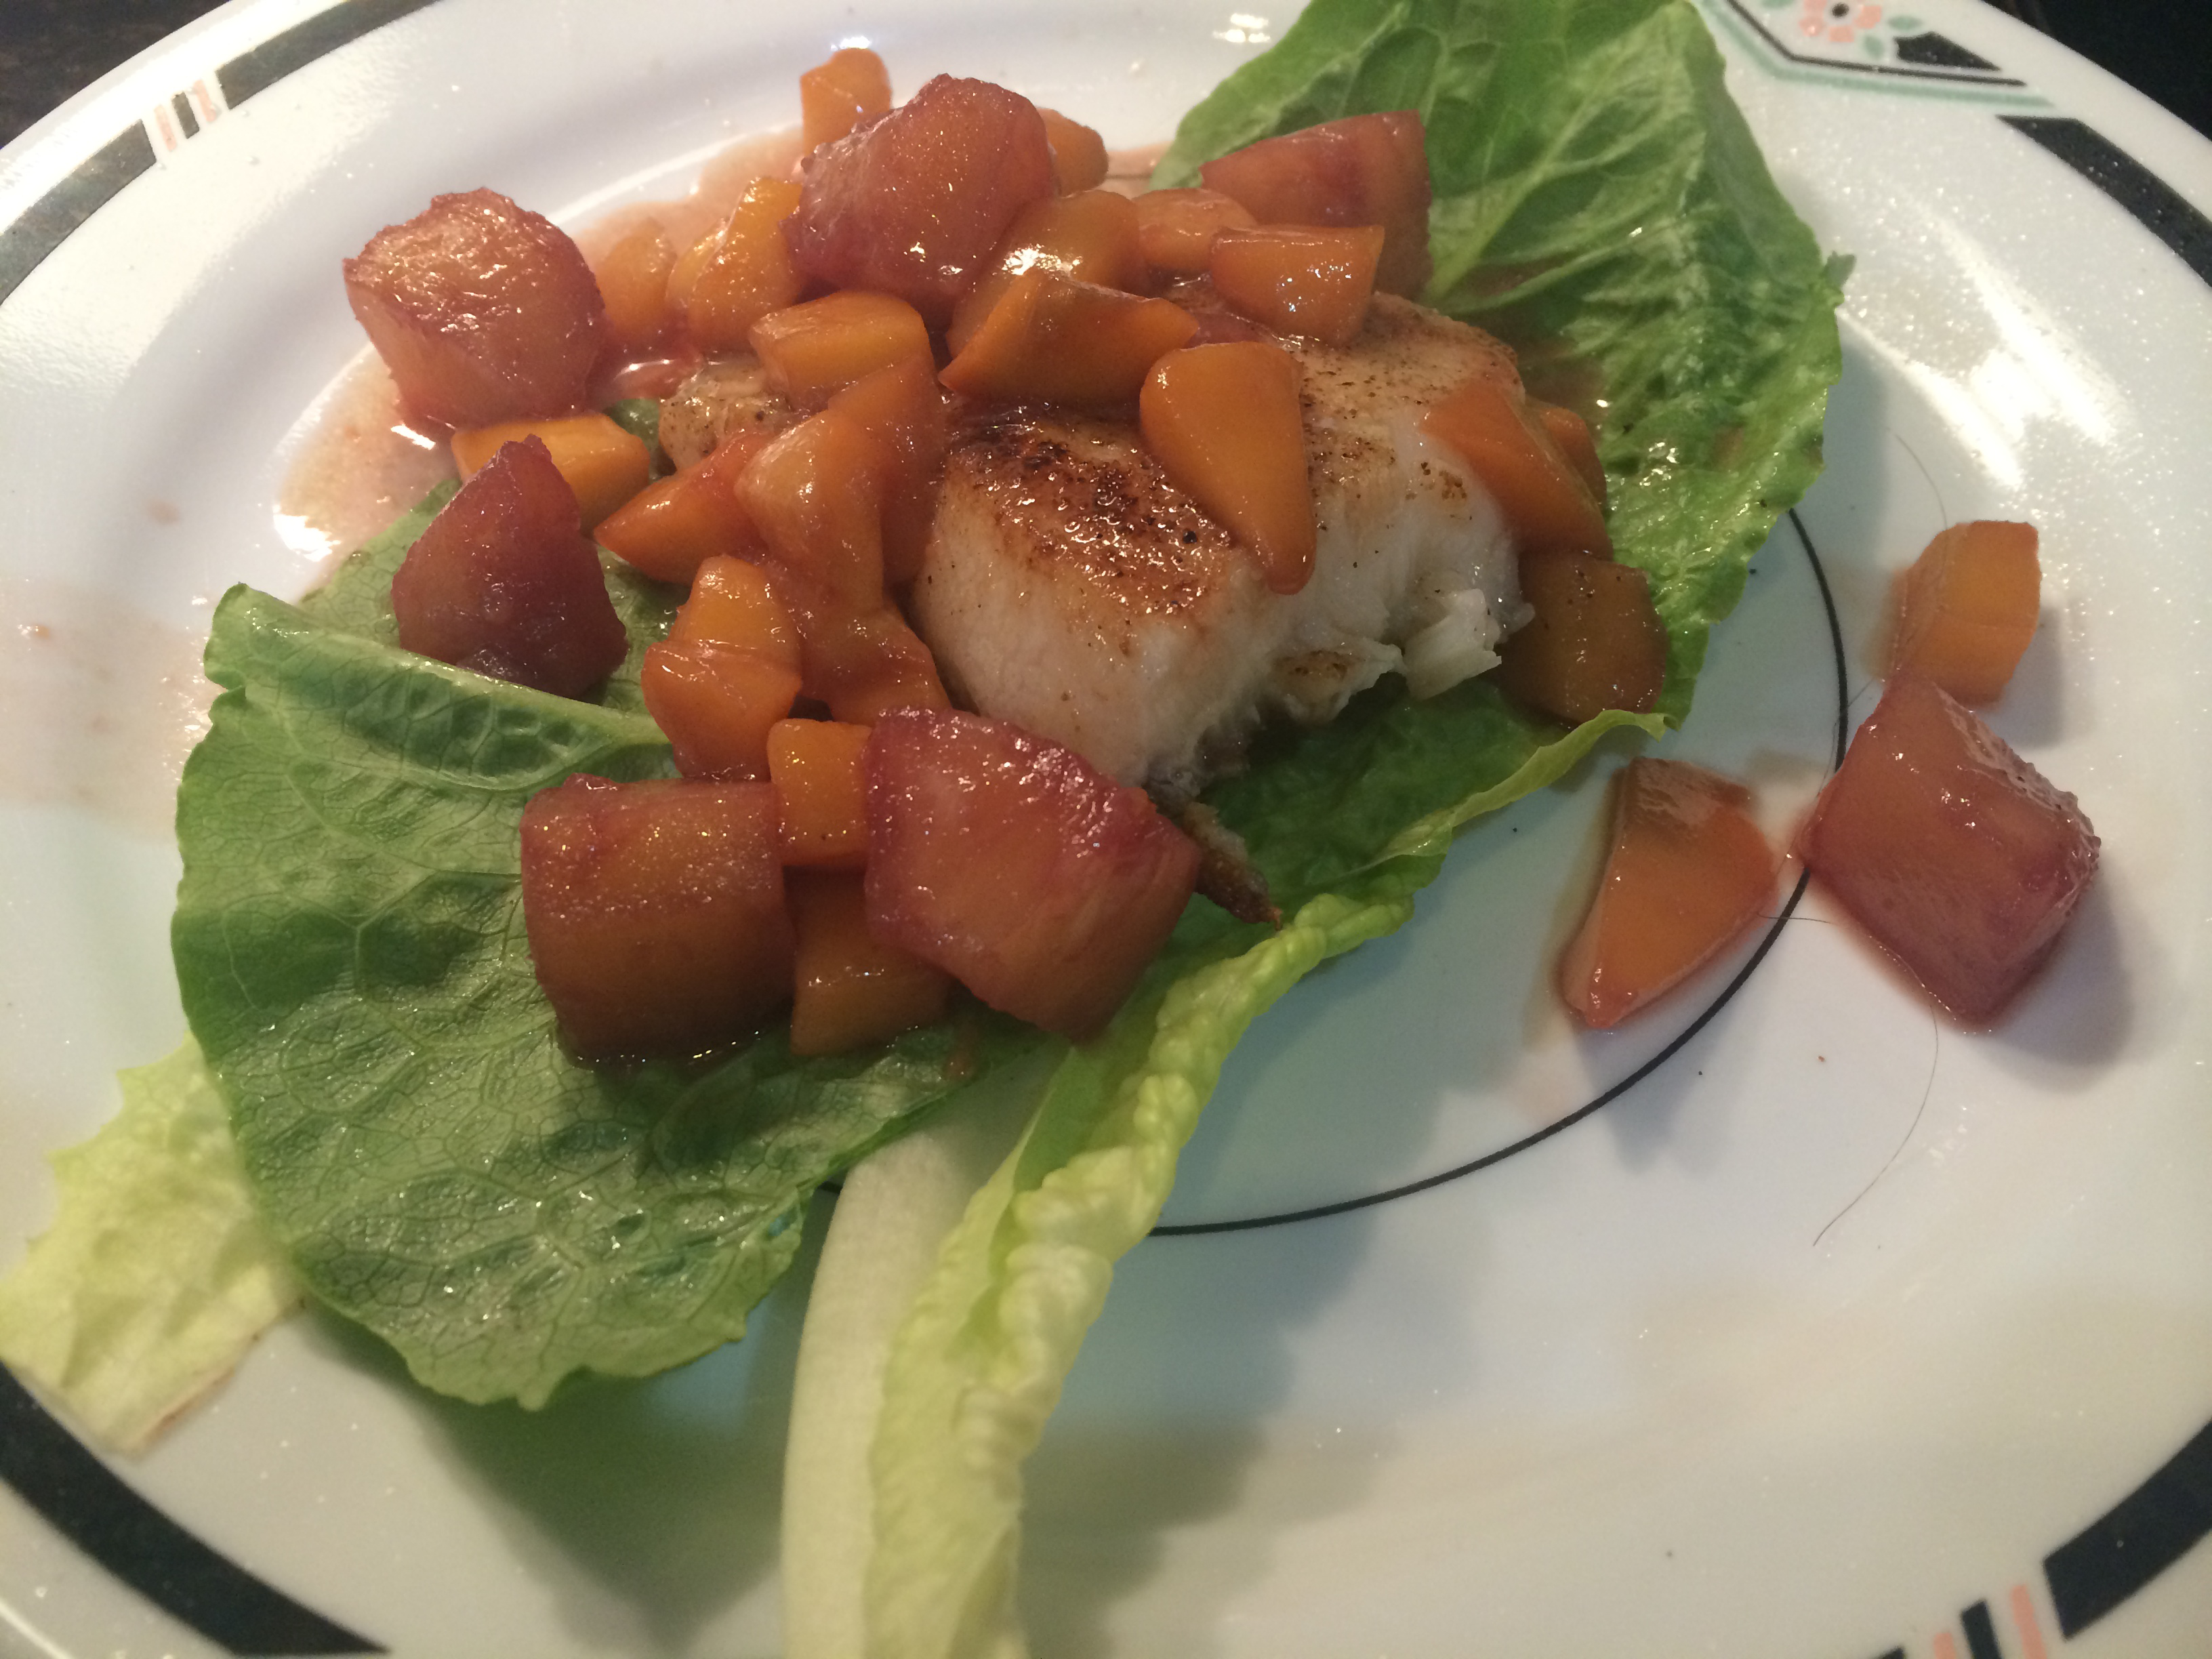
Let’s start with the elephant in the room. Let’s put it right out front. Fran and I are not huge fans of fish. Living in South Florida the occasional fish dinner is inevitable and recently we have weakened to the level where we make a point of having fish for dinner once per week, and, believe it or not, actually order it out when we dine at a restaurant. In an effort to unfishy the fish I like to season it with a blackening spice and often grill it on the BBQ. Tonight, however , was blackened pan seared Chilean Sea Bass on a bed of romaine lettuce covered with a carmelized pineapple and mango salsa.  All gone!

Put a couple tablespoons of EVO in a medium sized frying pan. Add brown sugar and melt together. Once the sugar is almost melted (be very careful, its easy to burn whenCarmelized Mango Salsa Sea Bass
it’s just EVO and sugar and you might have to start over… start over… crap!) add the drained pineapple and stir a lot.  When warm, add diced fresh mango, a glass of red wine, and simmer until just bubbling then transfer to a small saucepan and set on a warm burner. Technically, there should have been onion added to the brown sugar EVO mixture to produce caramelized onion, but a) we didn’t have any onion and b) we don’t like onion much, so I opted for caramelized pineapple.

Liberally coat both sides the fish with your spice of choice, transfer to the now empty, but still medium hot fry pan, adding a little EVO. Tent the fish with some aluminum foil, cook for 4 min on the first side (thank you Daniel for your expert advice) then flip as the flesh turns white. Add a tablespoon, or so, of water with a couple of minutes left and re-tent immediately. When you think it is done, cook for an extra 30-45 seconds. (I do not like rawish fish. It is almost as bad as rawish chicken.)

Here are the ingredients. (Note I didn’t use any measuring devices. Measurements are all approximate)

  • 2 tablespoons olive oil
  • 1/4 cup diced onion (if you have one and like onion)
  • 3 tablespoons brown sugar
  • 1 mango, diced
  • 1/2 (15 ounce) can pineapple chunks, drained
  • 1/4 cup red wine
  • 2 tablespoons olive oil
  • 4 (4 ounce) fish steaks (Mine was Sea Bass, about an inch thick)
  • salt and ground black pepper to taste
  • 1/4 cup blackening seasoning

TBE Logo Cake

Robin asked for anyone planning to attend her and Andi’s Open House last night to let her know in advance so they could plan on what and how many desserts to expect. I immediately told her I would bring a cake. As this open house was in part to celebrate their new home (which was wonderful by the way.) I decided to celebrate the new 5f2349a5-ad83-4fd7-ac6d-47f32f3bbd8abranding of TBE by making a chocolate cake with the new TBE logo on top.  The cake and chocolate fudge frosting use the standard recipe found elsewhere in this blog.

The new TBE logo was designed with careful attention to both geometric design and color. I am not good with colors and only approximated the CMYK color of the actual image. The logo is made with cut out, rolled sugar cookies. I made a 3709785b-9975-4bc7-ae2d-fb2e189b5ce3template by printing the logo scaled to size. In this case the overall height was about 10″.  I then cut out the colored parts of the logo and placed the template on the rolled out cookie dough and trace the outline with a knife. Next, remove the template and carefully cut out the dough along the tracings and transfer it to a 4bc8d4aa-341f-4088-8d3a-edd0d5227ef9parchment covered cookie sheet., being careful not to distort the shapes. Check them against the template and correct any distortions. Bake the cookies as per the directions below and allow to cool. I actually made the cookies 2 weeks ago and froze them between layers of waxed paper.


The color was added by “float frosting” the shapes with colored royal icing. I made small recipes of royal icing (3 tbl meringue power, 1 cup powered sugar and 4–6 tablespoons warm water or enough to make the icing just barely pipeable. I am not sure pipeable is a word, but it is now.) Pipe the thick icing around the edges of the appropriate shape. In my case the star and the long curvy thing were blue (I used Wiltons Royal Blue gel icing.) The base and ASL sideways “L”, or if you are left handed its a backwards ASL sideways “L”,  was mostly yellow with a little orange. Once the edges are coated (don’t worry if it runs a little you can trim it later) pipe a bead around the top edge of the piece letting it just run into the sides to make a seamless seam (hmmmm.)  Once that is completed, dilute the royal icing with a couple more tbls of warm water to the point is just barely drips out of the piping bag. Flood the top of the cookie letting the icing run together into a solid smooth coating. Let it dry, or refrigerate if you are the annoying, impatient, Type A person. After refrigerating, I trimmed runny frosting from the edges of the cookies.

Arrange the cookie shapes on the chocolate cake. A bit of advice – make sure the top of the cake carrier will not squish the cookies into the cake and stick to the top of the carrier causing them to rip out of the cake when setting out for display. Just sayin.

Basic Sugar Cookie Recipe for Cut out Cookies

Incredients

  1. 3 cups all-purpose flour
  2. 1 teaspoon baking powder
  3. 1/4 tsp kosher salt
  4. 2 sticks (1cup) butter, unsalted, softened to room temperature
  5. 1 cup granulated sugar
  6. 1 large egg, room temperature
  7. 1 tbl vanilla extract, vanilla bean past or almond extract
  • Sift together flour, baking powder, add salt, set aside.
  • In a small dish whisk together egg and vanilla extract, set aside.
  • In a mixing bowl cream together room temperature butter and sugar, about 5 minutes, scrape the bowl twice. Butter and should be light and fluffy.
  • Gradually add vanilla egg mixture, beating anywhere from 30 seconds to minute until well mixed in.
  • Now gradually in 3 additions add flour. Lower the speed of your mixer to low. Scrape the bowl well after the last addition and beat just until flour is combined.
  • Scrape the cookie dough into a large bowl, and using your hand knead it for about 30 to 60 seconds, until dough comes together.
  • Wrap the dough in a plastic wrap and refrigerate overnight (8 hours) or minimum 4 hours.
  • Preheat oven to 375F
  • Divide cookie dough in half. Roll one half of the cookie dough into about 1/4 inch thick, between 2 pieces of parchment paper using rolling guides. (2 painter’s sticks glued together on each side, or 2 pieces of 1/4 inch molding.
  • Cut out the shapes. Place the cookies on a light colored baking sheet lined with parchment paper. (I use a double walled insulated baking sheet.)  You can re-knead and re-roll the dough to cut additional shapes. Chill the cut outs in the fridge for about 15 minutes or in the freezer 8 minutes. This will help them hold their shape during baking.
  • Bake for 9 min, depending on the oven, turn the sheet once half way through the baking.
  • Let the cooking cool on the baking sheet for 5-7 minutes, transfer to cooling rack.
  • Store in the airtight container for up to 2 weeks or freeze un-decorated cookies between pieces of wax paper in a large freeze safe container, for up to 2 months.

A Berry Good Tip

A few weeks ago Fran found a tip on how to keep berries fresh in the refrigerator. If you are like me and am annoyed when the berries you buy on Saturday are all white and fuzzy by Monday try this. I know everyone else in the world new and uses this tip but it worked so well I had to post it.Blackberries

Wash the berries in a 1:1 solution of white vinegar and water. Swish them around for a couple of minutes to wash all the dirt and bugs (just kidding) and unseen mold spores out. Then wash well, at least a couple of minutes. The berries will be clean with no odor of vinegar and the ones I did this way lasted 2 weeks and are still good.

Here is another suggestion: mash some berries and layer with vanilla ice cream in a tall thin glass. This will create a parfait and as Donkey in Shrek said: “Parfait’s gotta be the most delicious thing on the whole damn planet! “

Baked Almost Donuts

About mid-morning yesterday I realized the banana I had for breakfast several hours earlier was not going to sustain me until lunch. Suddenly I had a donut craving. IMG_1145Remembering that I had a mini-donut baking pan I searched AllRecipes for a baked donut recipe, assuming it would be healthier (and easier) than frying. I chose a recipe for “Donut Muffins” and planned on baking them in my donut baking pan. I started assembling all the pans and ingredients but couldn’t find the ^#&%#* donut baking pan.
Finally I realized the recipe directions were inaccurate. I should have planned 15 minutes for preparation and 15 minutes for baking and 20 minutes to find the ^#&%#* donut baking pan. Ultimately I had to settle and use mini-cupcake pans. Also, the recipe says it makes 24 servings. In my humble opinion this recipe makes 24 delicious mini-muffins which are one serving, unless there are two people home, when it could then, under duress, be 2 servings. I strongly suggest not making these if there are more than 2 people home, there won’t be enough. You could always double up the recipe, if you really wanted to.

 Donut Muffins

24 Servings, Prep Time: 15 Minutes, Cook Time: 15 Minutes, Time to find the ^#&%#* donut baking pan: 20 min

Ingredients

  • 1/2 cup white sugar
  • 1/4 cup margarine, melted
  • 3/4 teaspoon ground nutmeg
  • 1/2 cup milk
  • 1 teaspoon baking powder
  • 1 cup all-purpose flour
  • 1/4 cup margarine, melted
  • 1/2 cup white sugar
  • 1 teaspoon ground cinnamon

Directions

  1. Preheat convection oven to 350 degrees F.
  2. Search every cupboard, drawer and cabinet for the ^#&%#* donut baking pan.
  3. Failing to find it, grease and flour 24 mini-muffin cups.
  4. Mix 1/2 cup sugar, 1/4 cup margarine, and nutmeg in a large bowl. Stir in the milk, then mix in the baking powder and flour until just combined. Fill the prepared mini muffin cups about half full.
  5. Bake in the preheated oven until the tops are lightly golden, 15 to 20 minutes.
  6. While muffins are baking, place 1/4 cup of melted margarine in a bowl. In a separate bowl, mix together 1/2 cup of sugar with the cinnamon. Remove muffins from their cups, dip each muffin in the melted margarine, and roll in the sugar-cinnamon mixture. Let cool slightly and serve.

Take Me Out to the Ball… Park

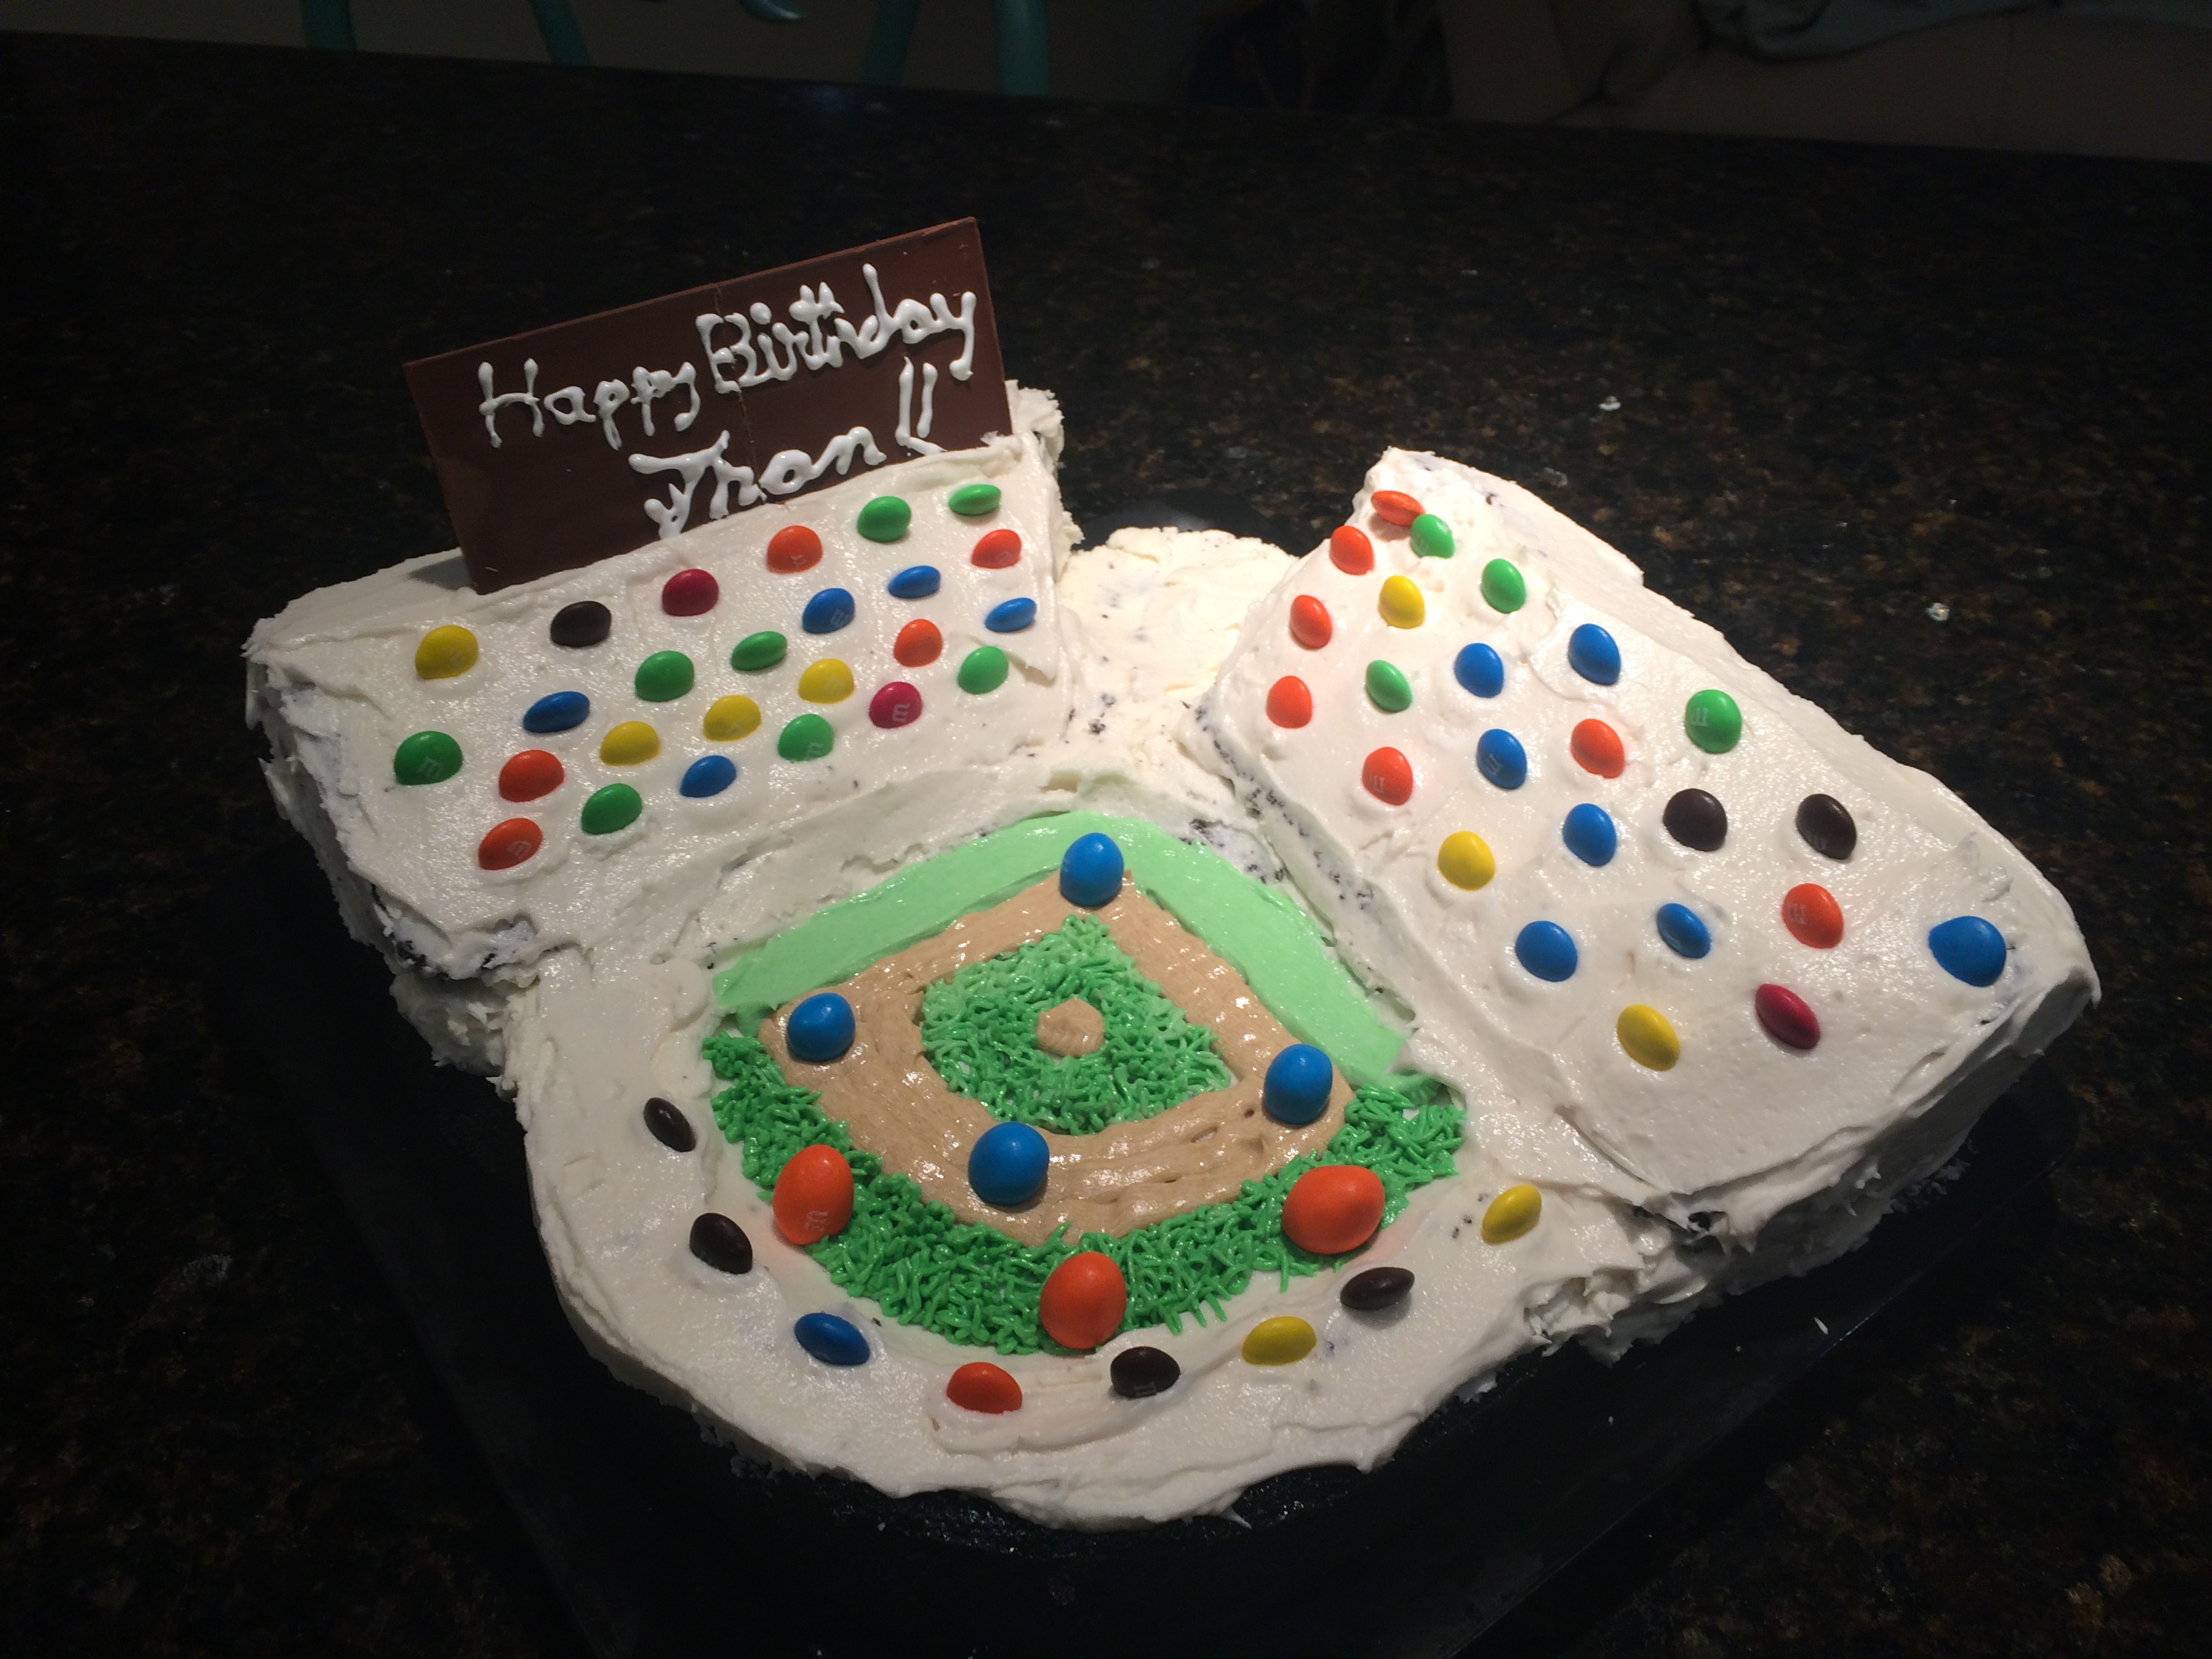
For her birthday all Fran wanted was one of my cakes. For the woman who starts counting the days until pitchers and catchers report from the last out of the World Series (114 days) I thought a baseball themed cake would be perfect. I mulled it over for a while, discarding baseballs, gloves and bats before deciding on a baseball park.BB Stadium 3

As I often do, I searched Google images for ideas of a design for a baseball park cake. Not finding any that caught my eye or attention, I designed my own. The first thing I discovered is it is very difficult to make a small cake with any detail. I compromised and used M&M’s for fans and Peanut M&M’s for players. The scoreboard is a Hershey bar (one of Fran’s favs) with a Happy Birthday message piped with royal icing. You can tell I did that, the piping is mediocre and the penmanship is atrocious. The BB Stadium 4playing field is chocolate cake with the outfield carved into a curved radius and grand stands are white velvet cake baked in a bread loaf pan then cut at an angle to make parallel triangular wedges for the grand stands. Everything was crumb coated with white butter cream frosting, chilled overnight and a finish frosting coat added the next day.

The infield was made from green dyed butter cream and piped onto the cake with a grass tip (Wilton #233.) M&M’s were placed strategically around the ball park and the scoreboard on top of the right field grand stand.

Recipes for all cakes, frostings and icings can be found in other posts in my blog.

M&Mmmmmmmm Cake

M&M 3

If it works, don’t fix it. My chocolate cake is probably the best cake I make (In My Not So HO). The Heavenly White is a very close second, but I really think the chocolate is #1.

Anyway, when invited to Robin’s open house, and knowing Robin has some sort of M&M obsession (in the nicest sense of the word), and being asked to inform them if I was bringing a

MM 1 Small

dessert, I had some initial anxiety deciding on a “theme” for the cake (between a Robin’s Egg Blue cake, which could have been Heavenly White, or an M&M cake, which HAD to be chocolate) I ultimately chose the M&M cake. (Please see my Facebook “Chicken and Egg” post for a further discussion of life’s anxieties.)

I used a Wilton’s 3D Egg Pan which I found on eBay for $6. This is a very versatile pan if you want to make egg (bird, chicken, bunny, Fabrege, etc) or football, or even Peanut M&M shaped cakes. It is very important to allow the cake to cool completely. I untied the two pans and left them in place overnight, otherwise they are hard to remove from the pans and will break apart. Crumb coat the ovoid cake with a relatively thin version of the butter cream frosting. Add a little milk if it is too thick. Let the butter cream set for a couple of hours in the refrigerator. After it is set, put on some latex gloves and smooth the entire cake.eggpan 1 small eggpan 3 small

Roll out some red fondant and lay it over the cake, tucking it in and under the sides and smoothing as best you can. I am not good with rounded ends and can never get them smooth enough to satisfy me. If anyone has some tips here I would love to hear them. I do the typical stretch, smooth etc etc etc but it still wrinkles.

To make the “M” use the Rockwell font which is similar to what is found on the candy and print it about 2″ high. Cut the “M” our and use as a stencil. Roll out some gum-paste, lay the stencil over it and cut out the “M” using an Exacto knife. Wet the area backside of the the “M” and stick it in place on the cake.

Chocolate Cake

Ingredients

  • 2 cups white sugar
  • 1 3/4 cups all-purpose flour
  • 3/4 cup dark unsweetened cocoa powder
  • 1 1/2 teaspoons baking soda
  • 1 1/2 teaspoons baking powder
  • 1 teaspoon salt
  • 2 eggs
  • 1 cup milk
  • 1/2 cup vegetable oil
  • 2 teaspoons vanilla extract
  • 1 cup boiling water

Preheat oven to 350 degrees F (175 degrees C). Grease and flour the two Wilton 3D Egg cake pans. Use the first set of ingredients to make the cake. In a medium bowl, stir together the sugar, flour, cocoa, baking soda, baking powder and salt. Add the eggs, milk, oil and vanilla, mix for 3 minutes with an electric mixer. Stir in the boiling water by hand. Pour evenly into the one half of the egg pan. It should almost overflow. Place the empty half over the filled half, tie both halves together tightly with string and place in the oven balanced on one of the stabilizing ovals.

Basic Butter Cream

Ingredients:

  • 1/2 cup solid high ratio shortening
  • 1/2 cup butter softened
  • 1 teaspoon Clear Vanilla Extract (or extract of choice)
  • 4 cups sifted confectioners’ sugar (approx. 1 lb.)
  • 2 tablespoons milk

In large bowl, cream shortening and butter with electric mixer. Add vanilla and milk. Gradually add sugar, one cup at a time, beating on a slow speed. Scrape sides and bottom of bowl often. Keep bowl or covered with a damp cloth until ready to use. Refrigerated in an airtight container, this icing can be stored 2 weeks. Don’t overwhip or it will bring air to the icing and is impossible to smooth. If you have a kitchen Aid use white attachment, not whip attachment.

Chicken Scallopini with Whatever You Find in Your Pantry

While grocery shopping this weekend I “impulse bought” a pound of  boneless, skinless, thin-sliced chicken breast cutlets, knowing for the two of us this would be enough for dinner for both of us and one lunch. (If they ended up good, my lunch, if not…)

I found this recipe on AllRecipes.Com but made just a few changes. At the same time I started cooking the onions I added some sliced green peppers, skipped the wine (didn’t have any) and added a teaspoon of capers. I also didn’t measure anything, just added some of this and some of that until it looked about right.

I was going to serve it over a bed or rice, but I forgot to impulse buy any. I had some egg noodles that worked well.

I have lunch today!!

Ingredients (All approximate)

  • 3 tablespoons canola oil (I used vegetable oil)
  • 4 skinless, boneless chicken breast halves, pounded 1/2-inch thick
  • salt and pepper to taste
  • 2 cloves garlic, minced
  • 2 onions, sliced
  • 1/2 cup white wine (skipped this)
  • 1/2 cup chicken stock
  • 3/4 cup heavy cream
  • 1 1/2 teaspoons all-purpose flour
  • 1/4 green pepper, sliced thin
  • 1 tsp, or so of capers

Directions

  1. Heat the canola oil in a large skillet over medium-high heat. Season the chicken breasts with salt and black pepper. Arrange the chicken in the skillet and pan fry until golden brown, no longer pink in the center, and the juices run clear, about 10 minutes on each side. An instant-read thermometer inserted into the center should read at least 165 degrees F (74 degrees C). Transfer the chicken to a large platter, and cover with aluminum foil.
  2. Return the skillet to the stove and reduce heat to medium. Stir in the garlic and onion; cook and stir until the onion has softened and turned translucent, about 5 minutes. Stir in the white wine and scrape up any brown bits from the skillet with a spatula. Add the chicken stock, and continue to cook and stir until the liquid has reduced, about 5 minutes. Stir in the heavy cream and flour; cook and stir until thickened. Top the chicken with the sauce before serving.